This article explains how to import remark test results.
Importing remark test results
To import results, the following conditions must be fulfilled:
- The test must be manually created.
- The test can only contain single choice, multiple-choice, or true/false question types.
- The test must have an external ID.
- Each user must have an external ID.
- The users must be assigned to the test and have a “Not attempted” status.
Note: If the file contains different test results from a single user in the same test, only the first results will be imported, and the others will be skipped.
It’s necessary to define the following information in the file that will be uploaded.
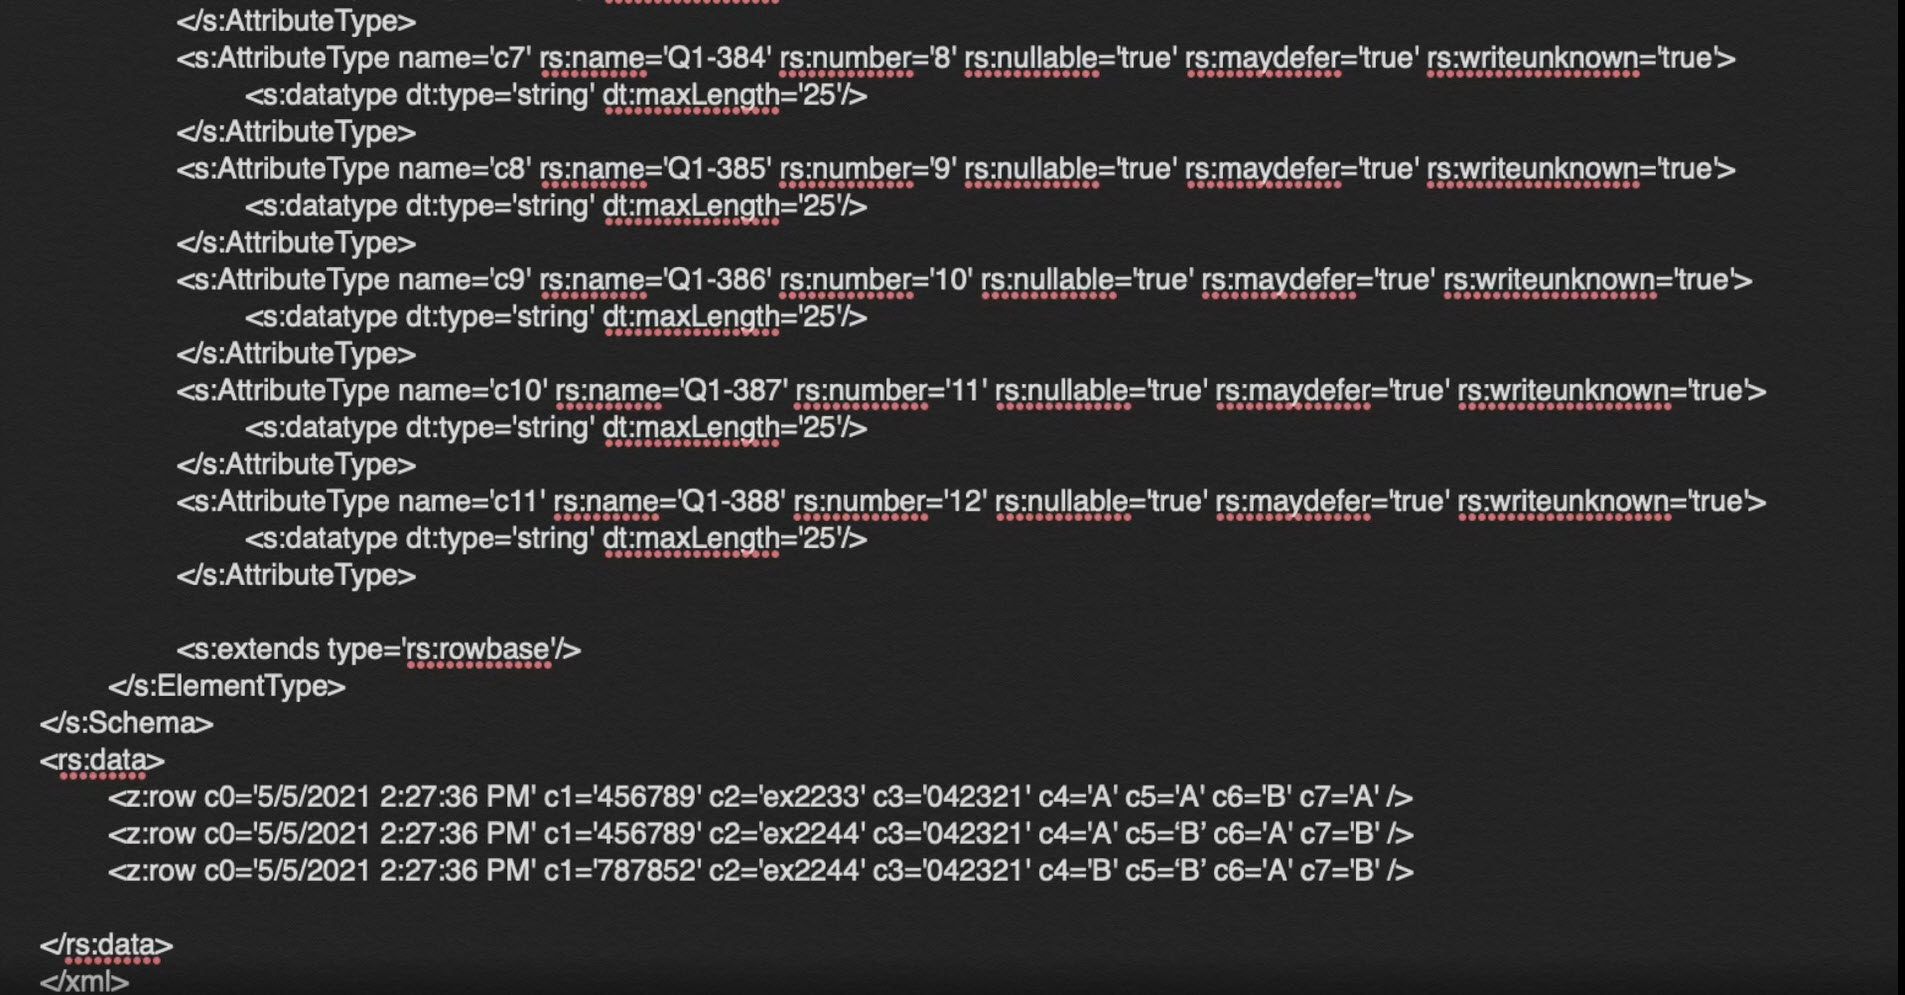
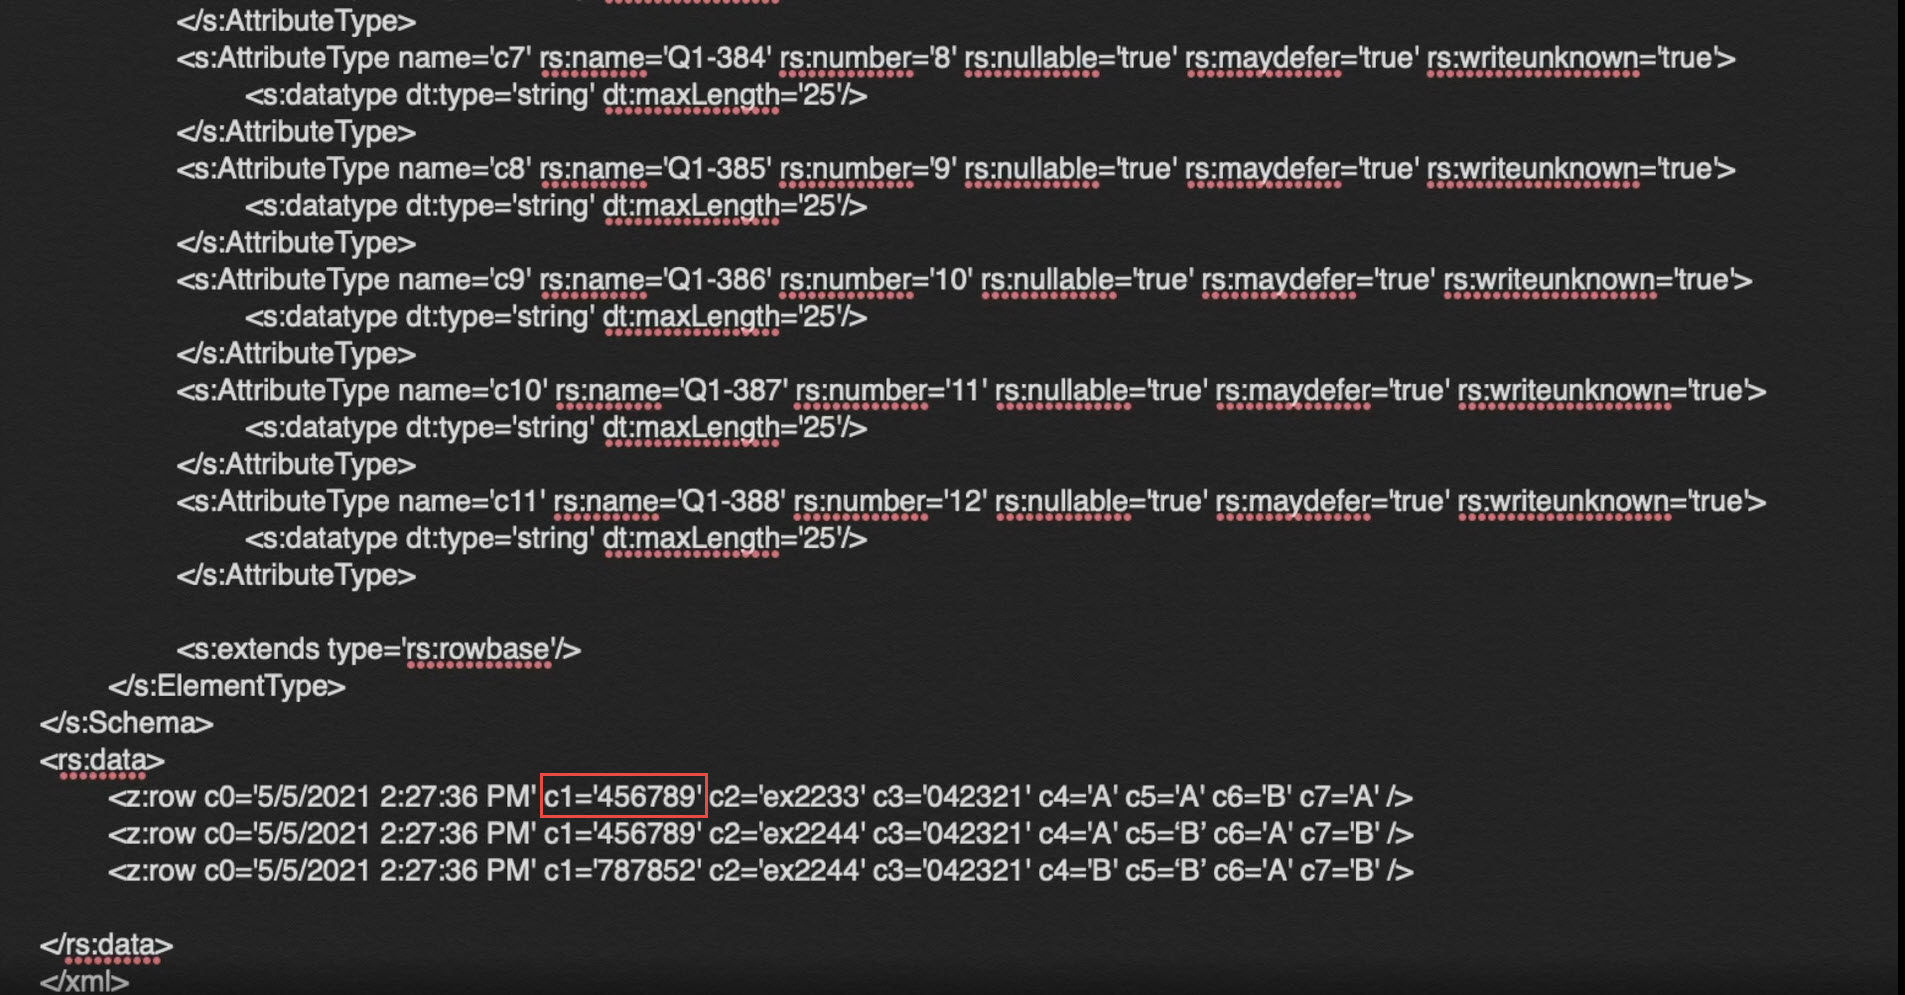
User ID
User ID represents the external ID of a candidate. If the external ID can’t find the candidate, the system will find the candidate by the systems ID. If the system can’t find the candidate by the systems ID, the candidate will be skipped to import.
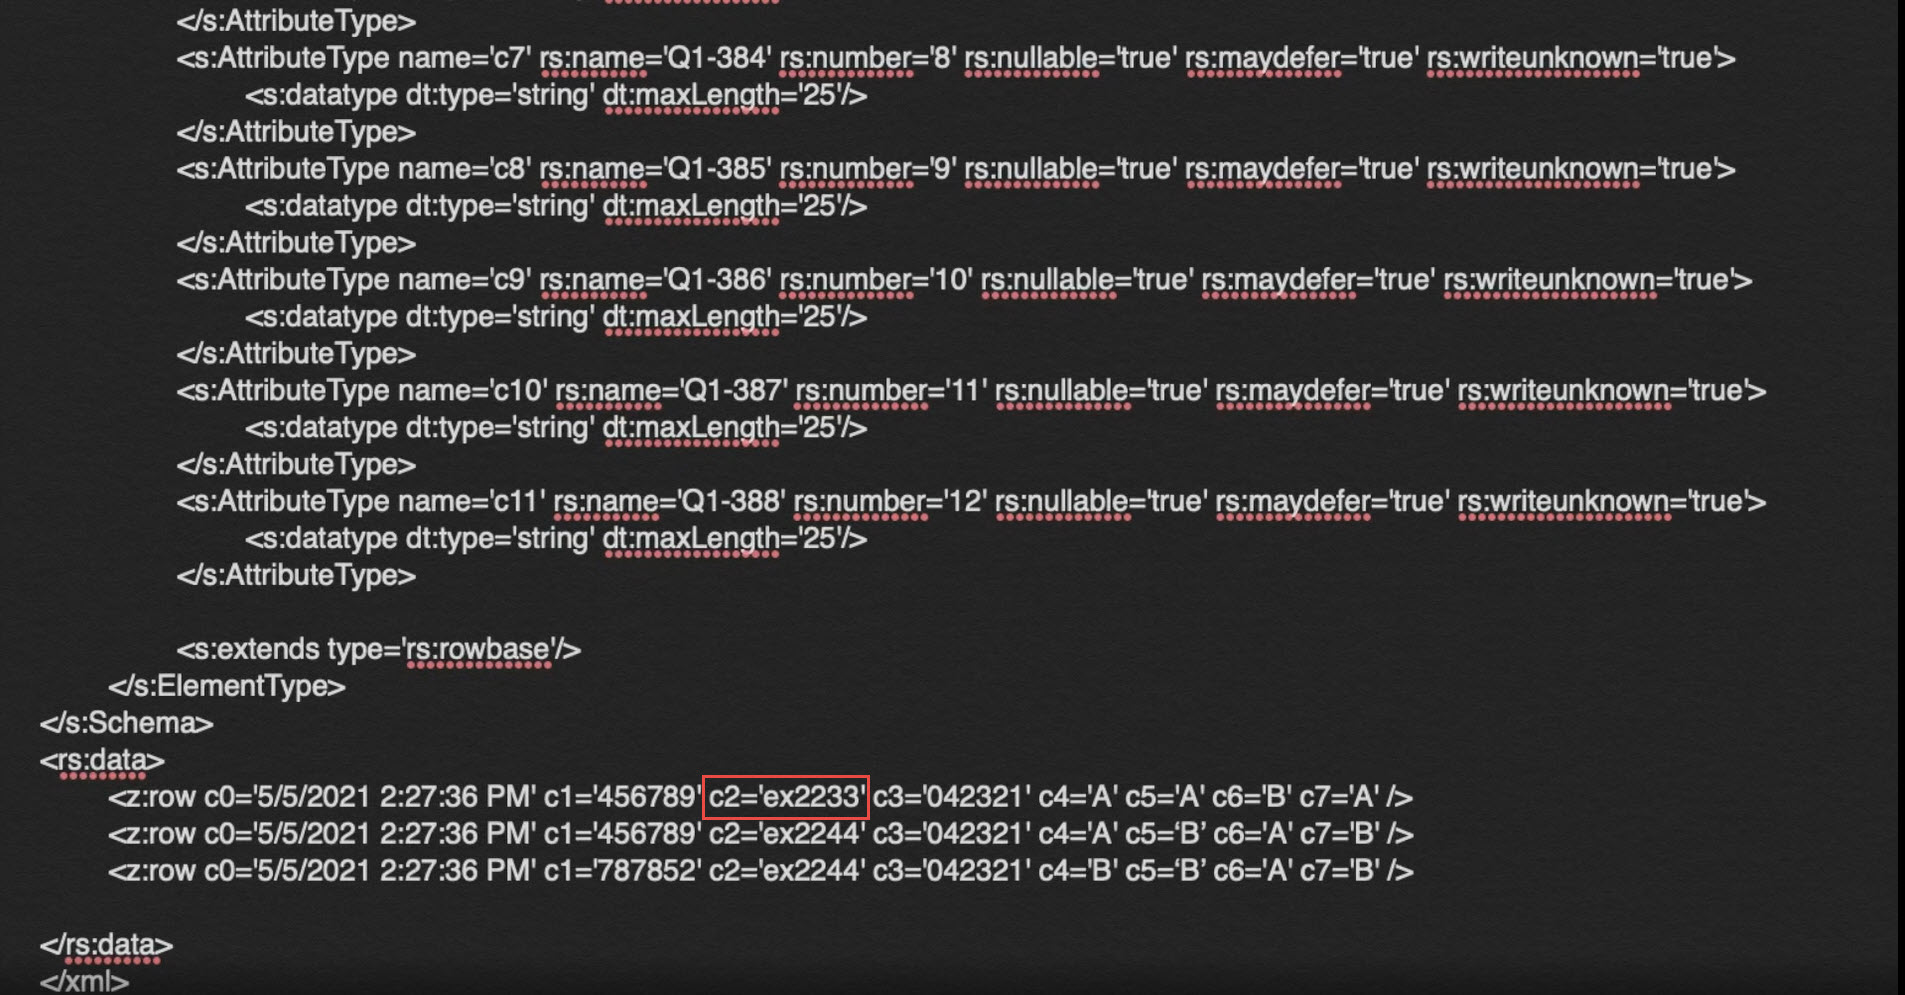
Test external ID
If the system can’t find the test by the external ID, the candidate will be skipped to import.
Responses to all questions
Responses to all questions in the test started from c4.
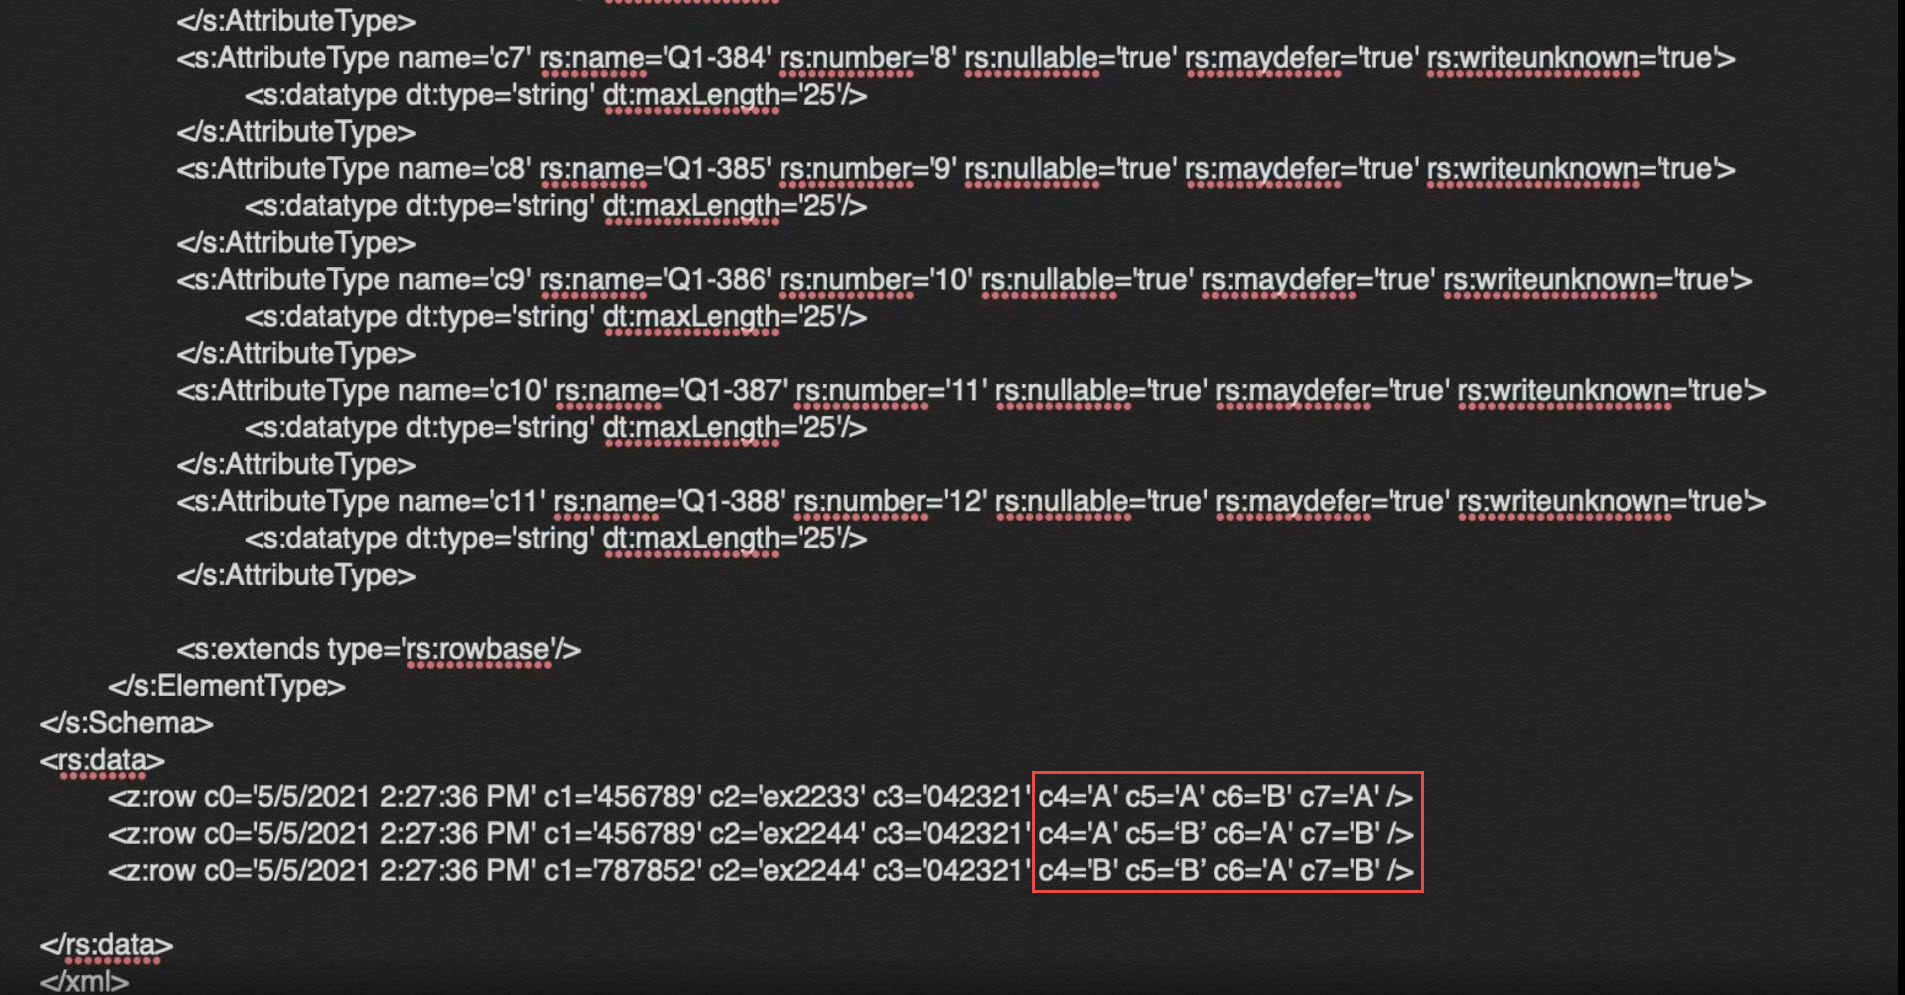
The test results won’t be imported if the user’s external ID or test doesn’t exist in the system. If the answer is, for example, AB, the student chooses the first and the second answer for the question.
The prepared file can be imported into the application in two ways.
The first way is importing the file manually.
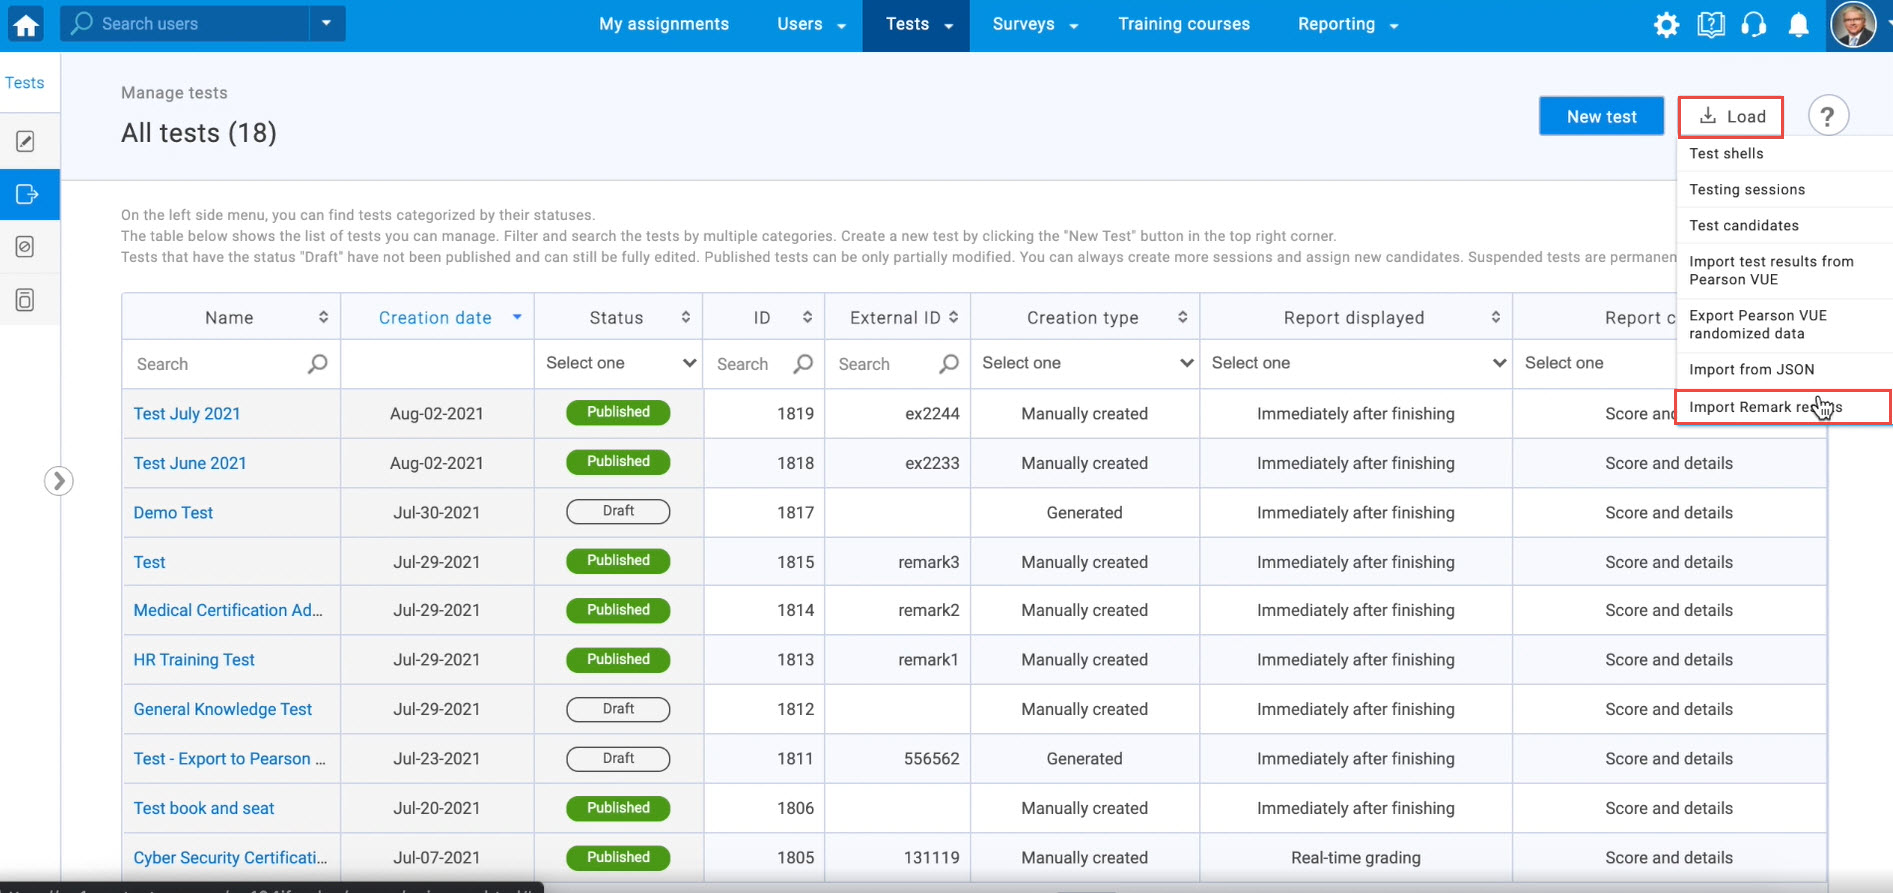
Hower to the “Tests” tab in the main menu and select the “Manage Tests” tab. Click on the “Load” button and select “Import Remark results” to import test results.
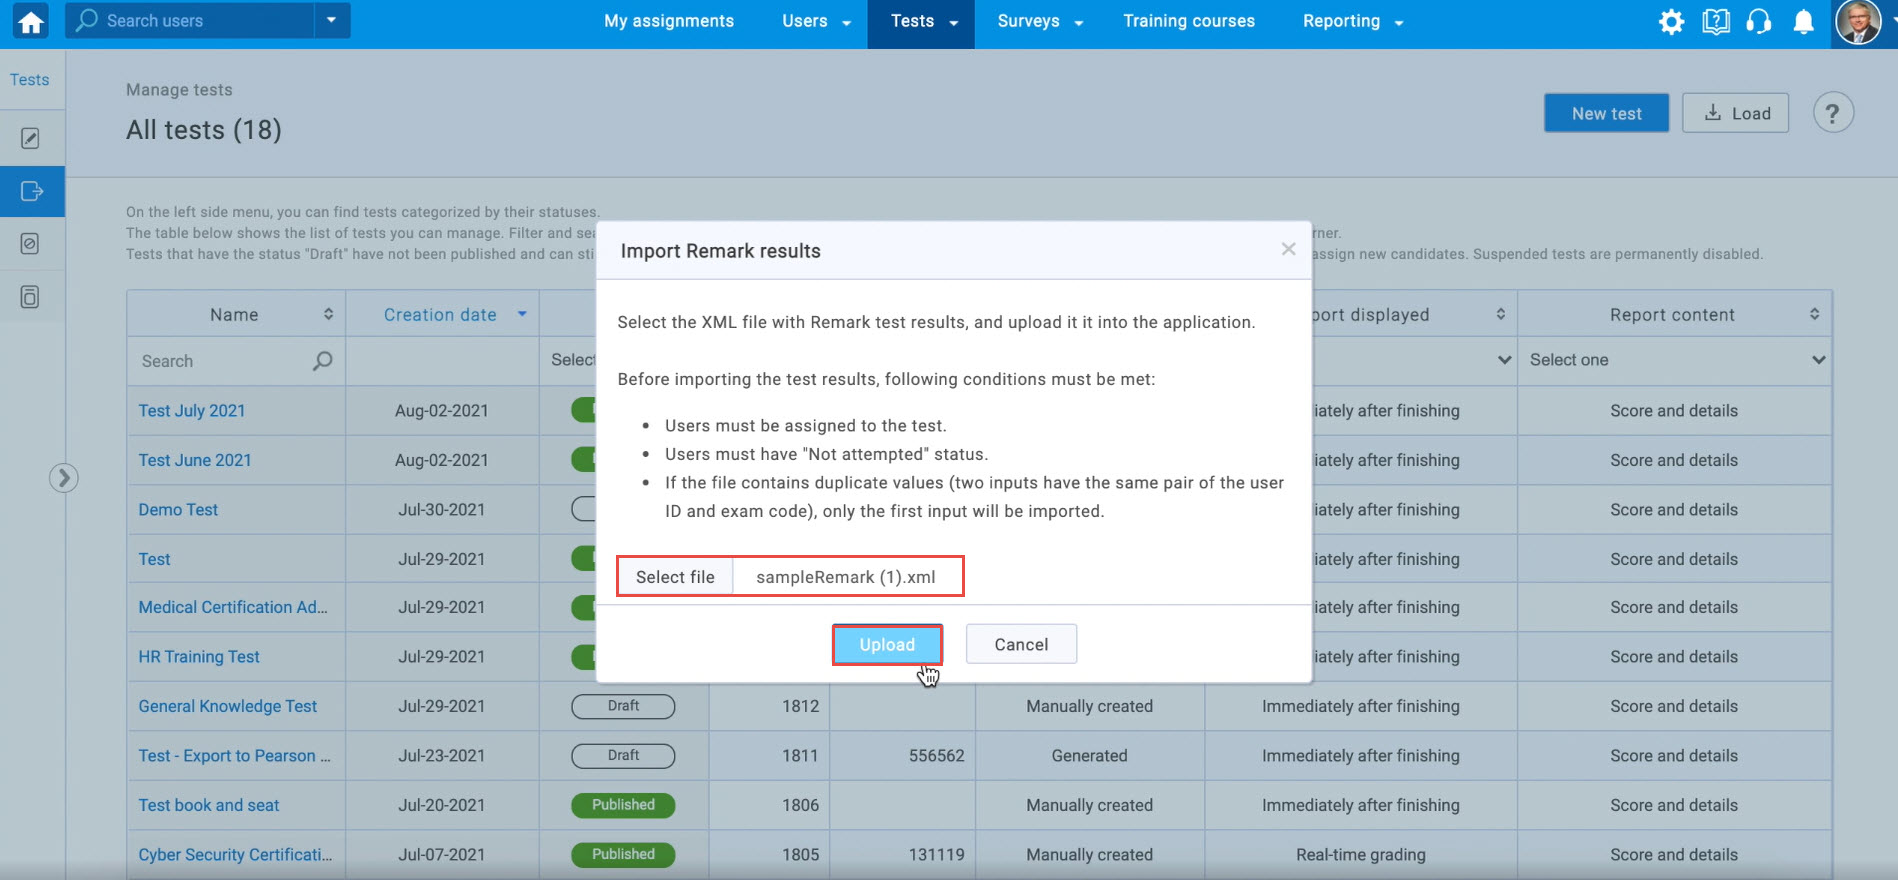
The pop-up window will appear. Click on the “Select file” button and choose the file. Finally, click on the “Upload” button,
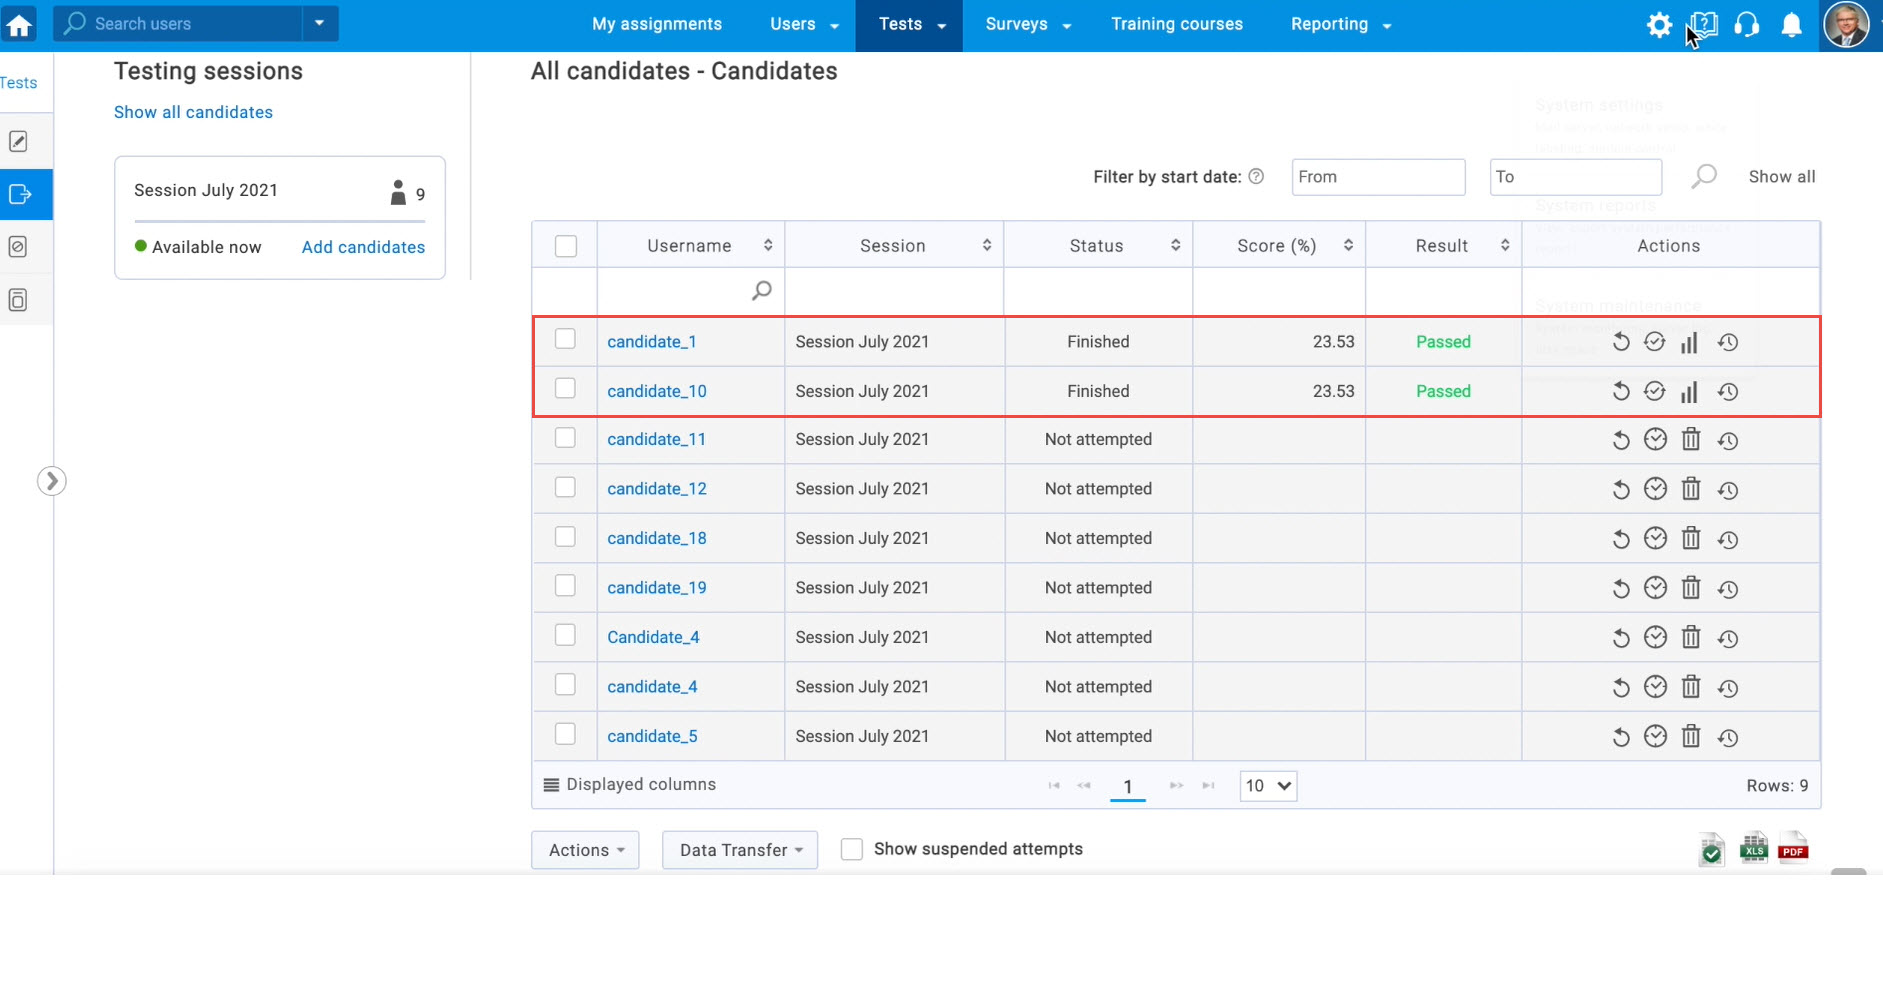
The test result is imported for tests “Test June 2021” and “Test July 2021”. When clicking on one of them and navigating to the “Candidates” tab. The status has changed to “Finished,” Their score and results appeared for the first two candidates.
The other way to import results is to use “Jobs scheduler“.
To import the test results through the “Jobs scheduler“, do the following:
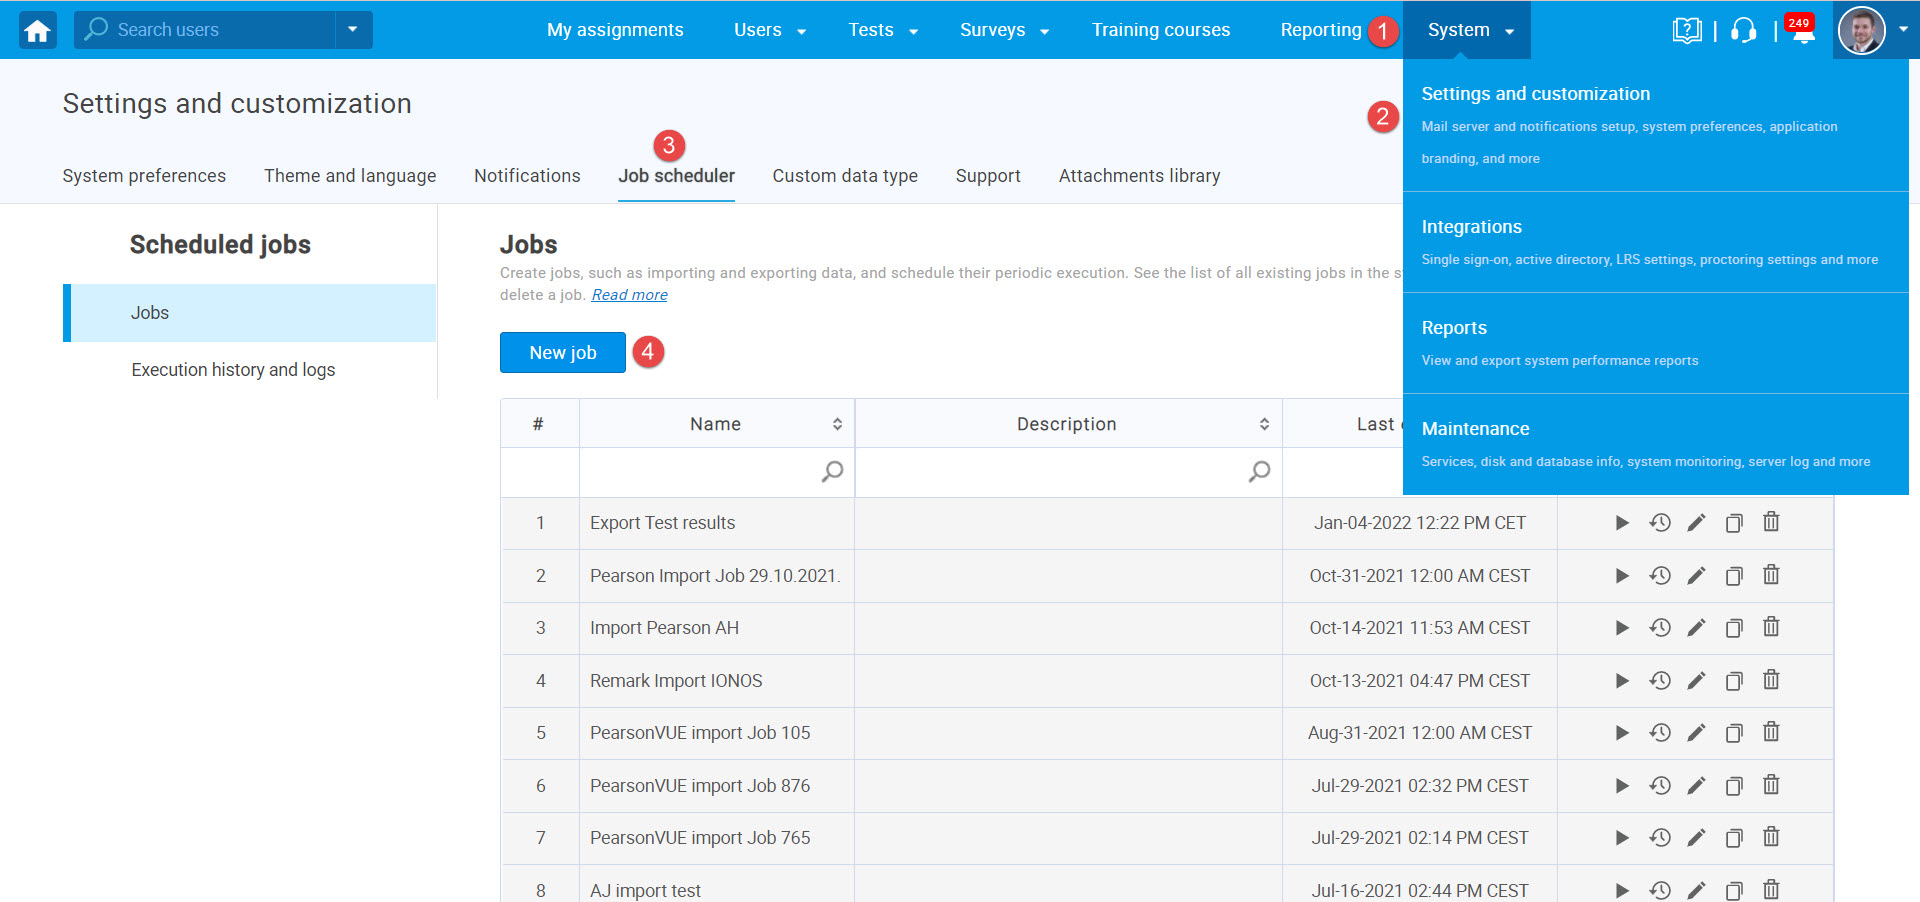
- Navigate to the “Systems” tab.
- Select the “System and customization” tab.
- Navigate to the “Job scheduler” tab.
- Click on the “New job” button.
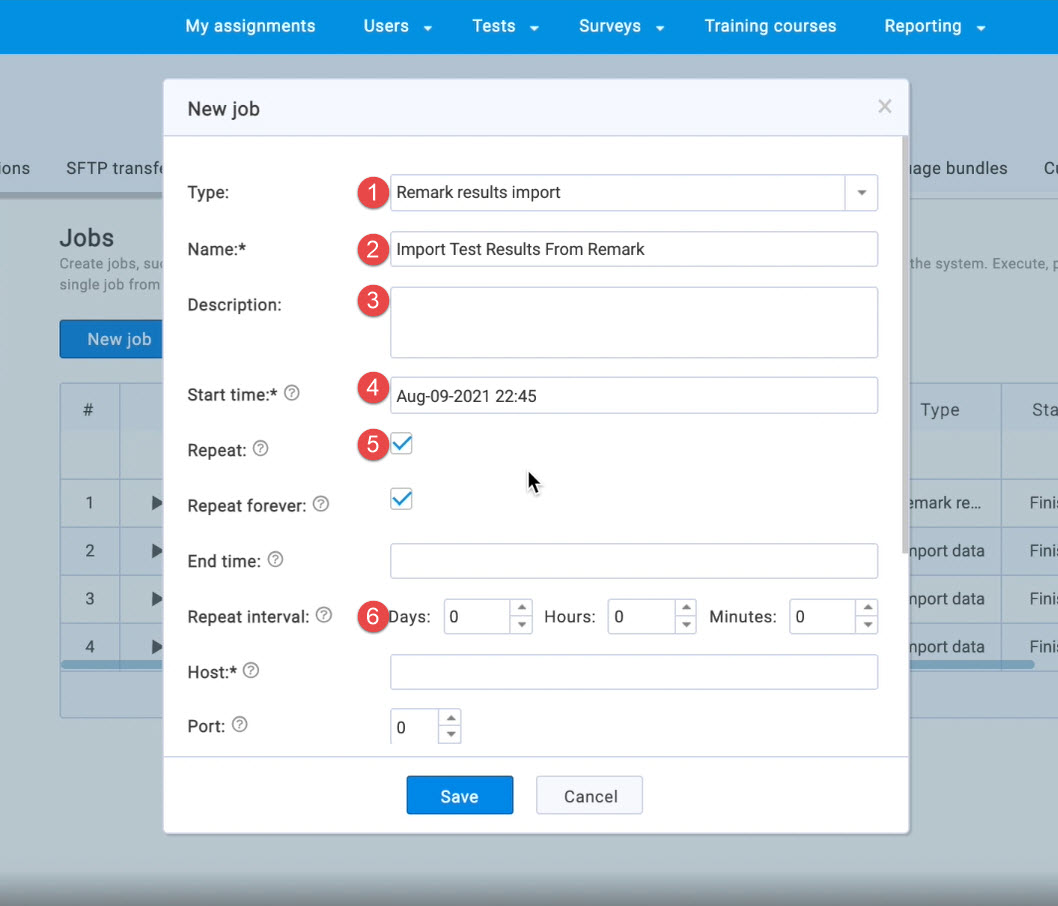
To create a new job, do the following:
- In the pop-up window, choose the job type and choose “Remark result import“.
- Enter the name.
- Optionally add a job description.
- Set the start the – the time the first execution should happen.
- If the “Repeat” option is checked, the job will repeat at the same time in intervals.
- Define the repeat interval.
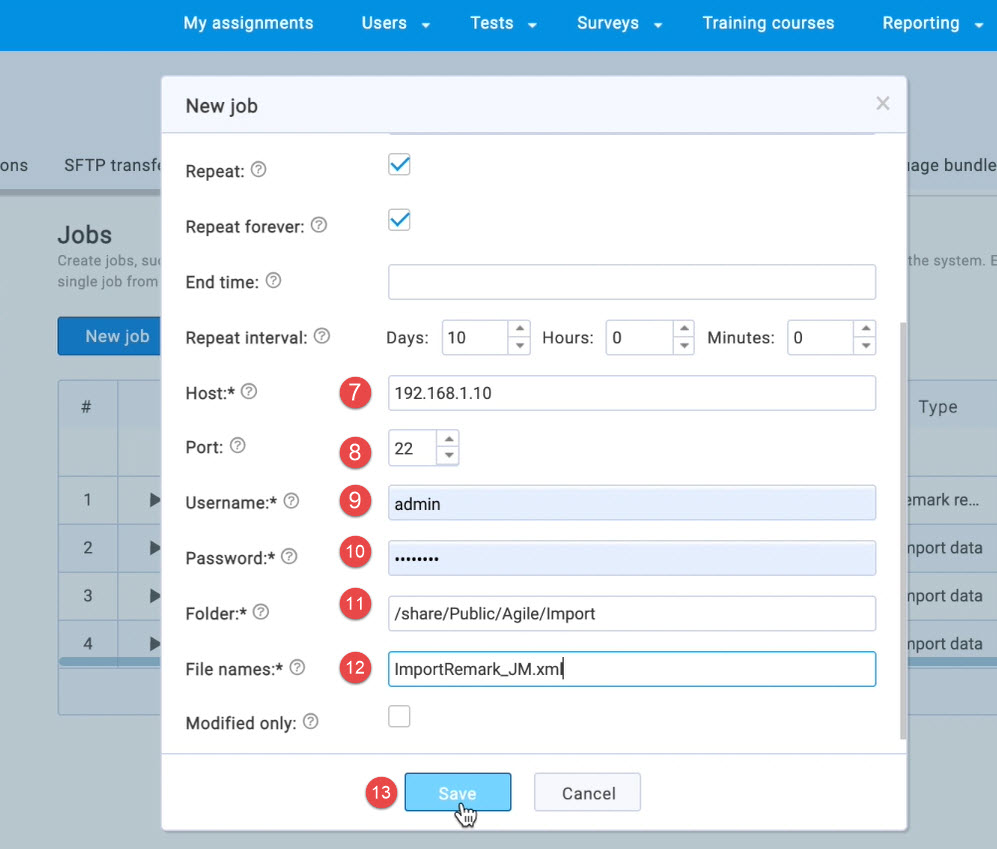
- Enter the hostname of the SFT protocol server.
- Enter the port of the SFT protocol.
- Enter the username of the SFTP server user.
- Add password.
- Import the absolute path to the folder to import data from.
- Enter the file names.
- Click the save button to create a job.
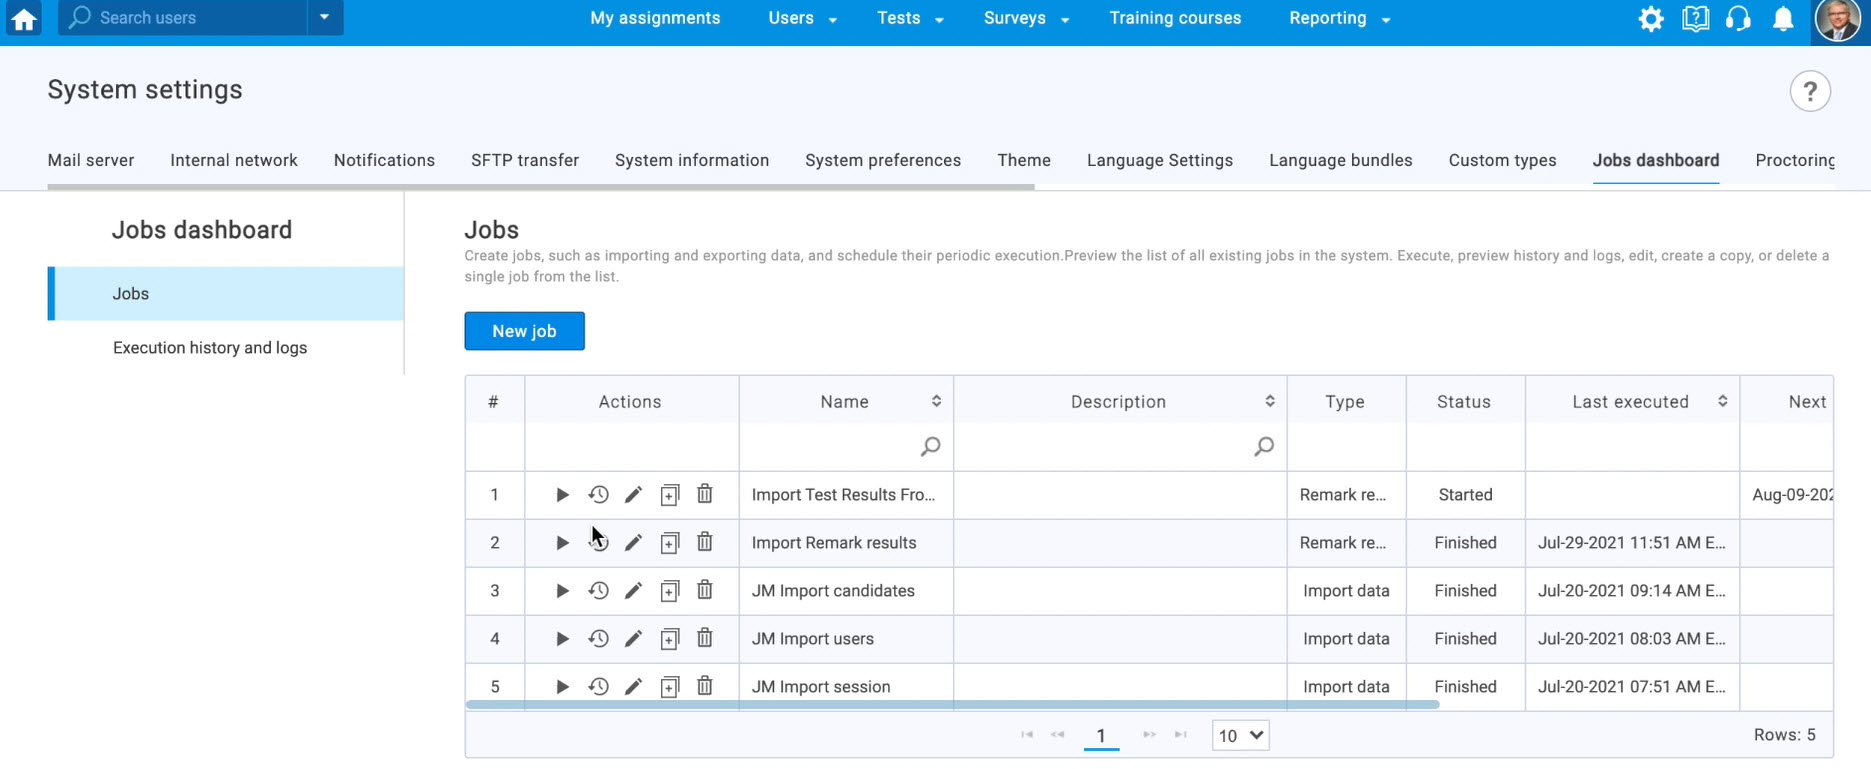
When the job is created, it will be inserted at the top of the table.
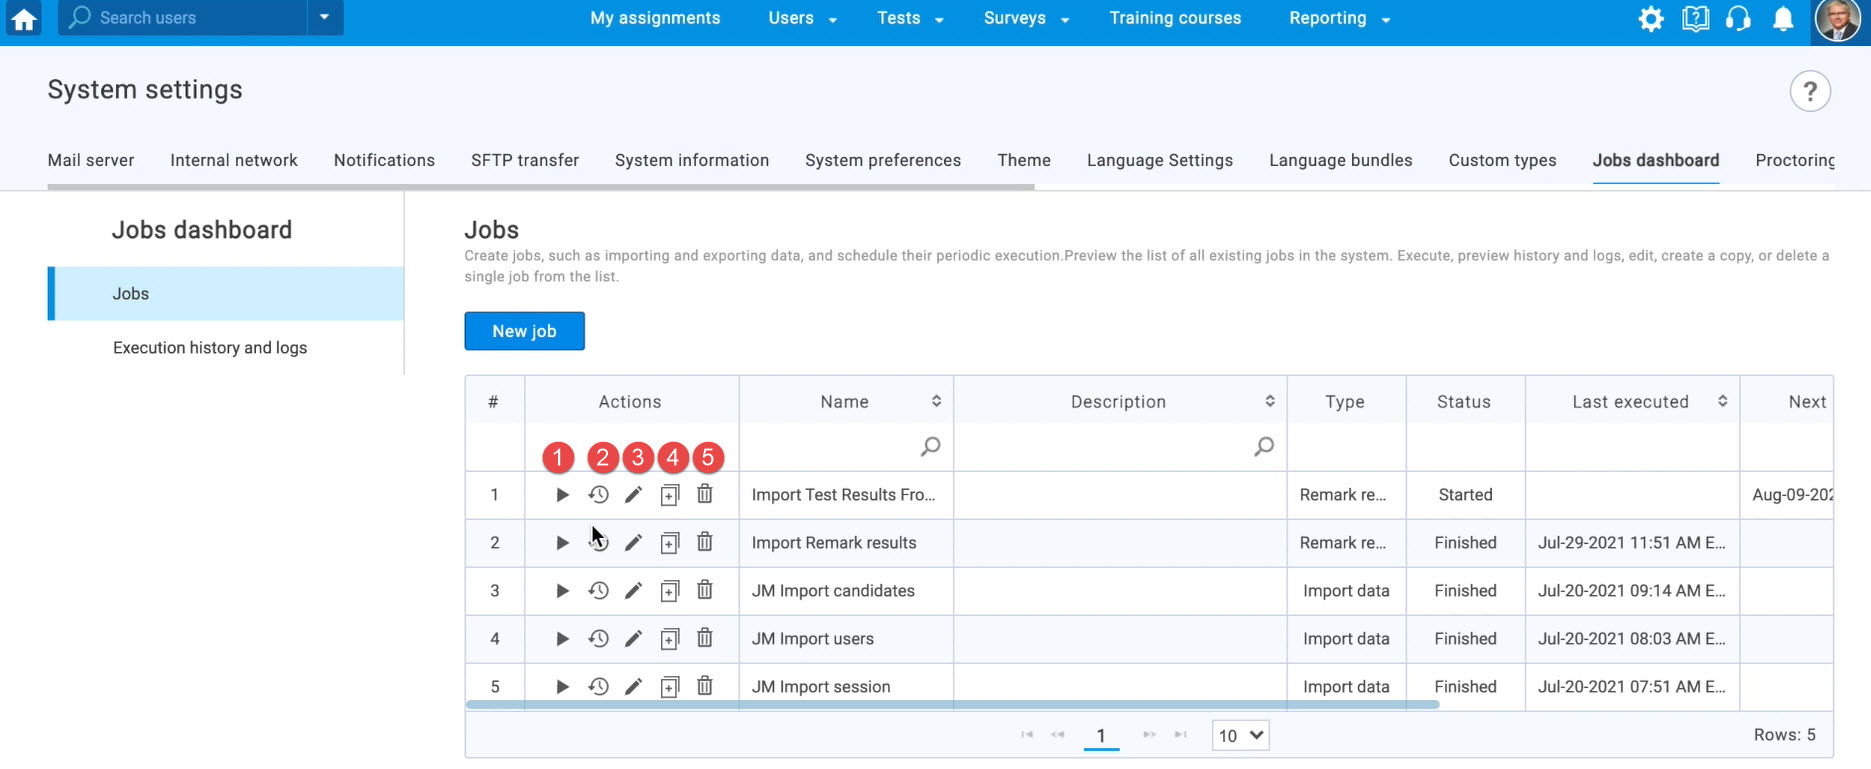
For each job in the table, the following actions can be performed:
- The job can be executed mediately.
- History and logs of the job.
- Edit job.
- Copy job.
- Delete job.
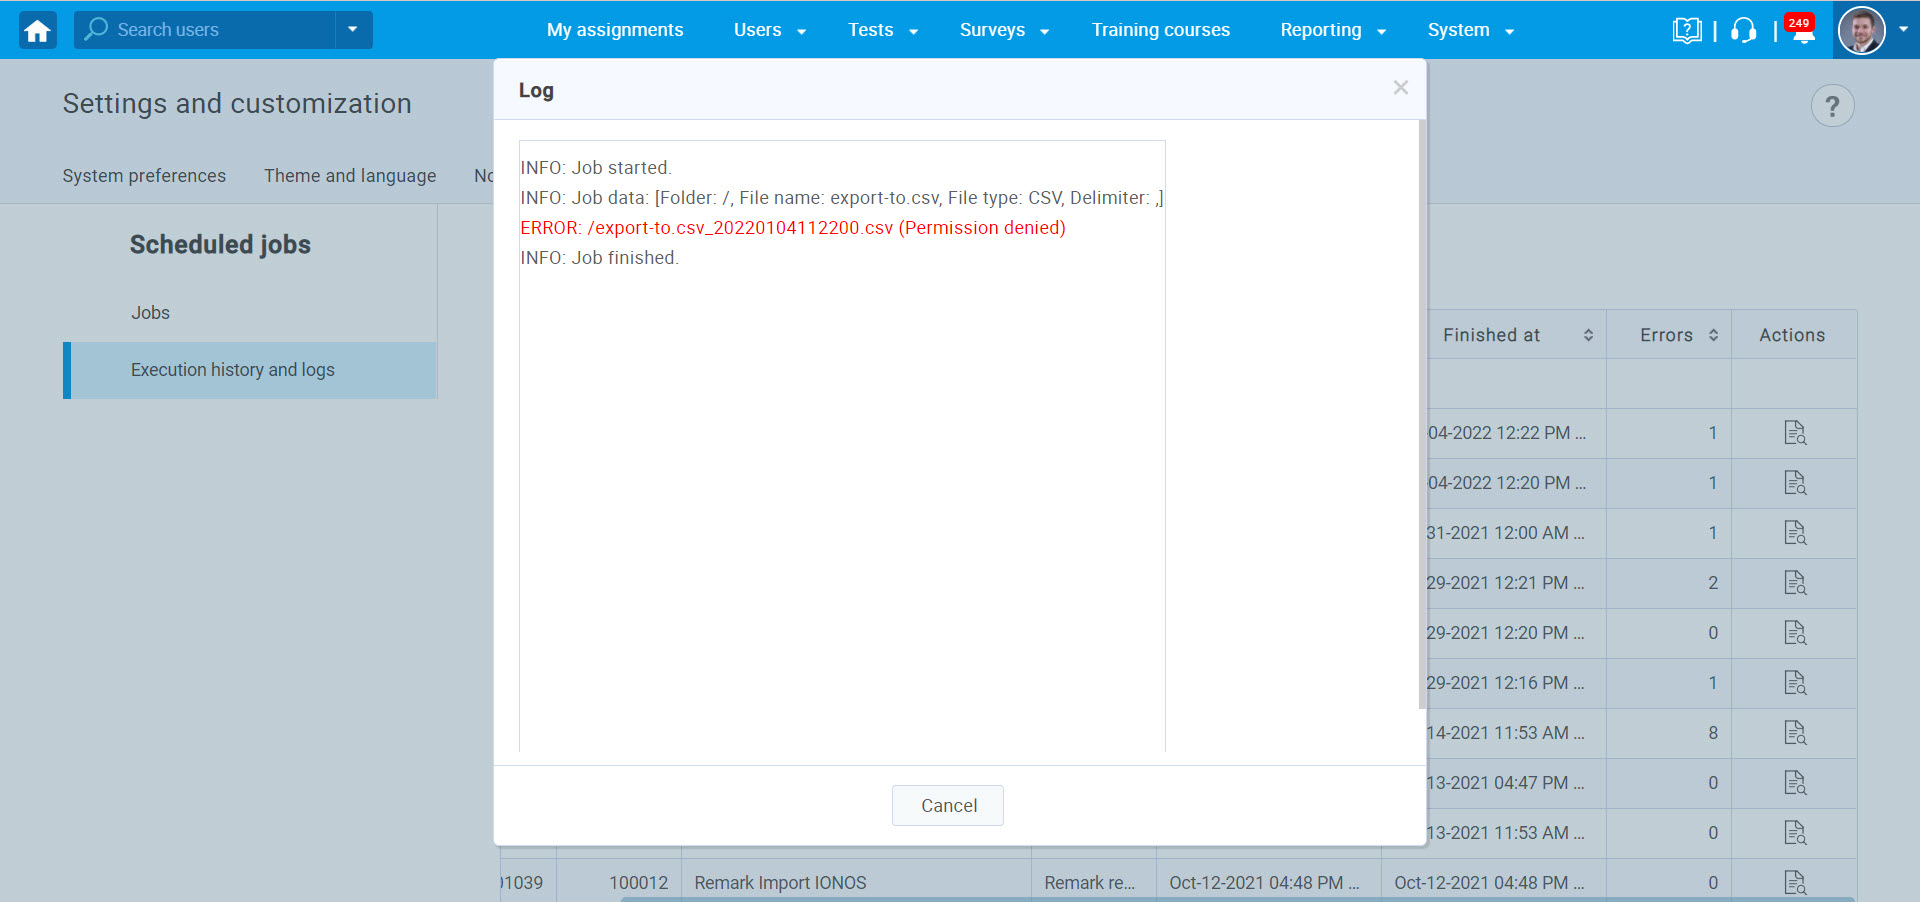
To preview the complete execution history and logs for all jobs in the system, navigate to the “Execution history and logs” tab to see details of the executed jobs. There can be seen job type, when the job was executed, the number of errors during the execution, and preview a log. Here can be seen if some issues were found when importing the files:
For more similar information, please visit this site:


