This article explains how to define a certificate expiry date, after which recertification, i.e. taking the same or another test again will be required.
Adding a certificate to the test
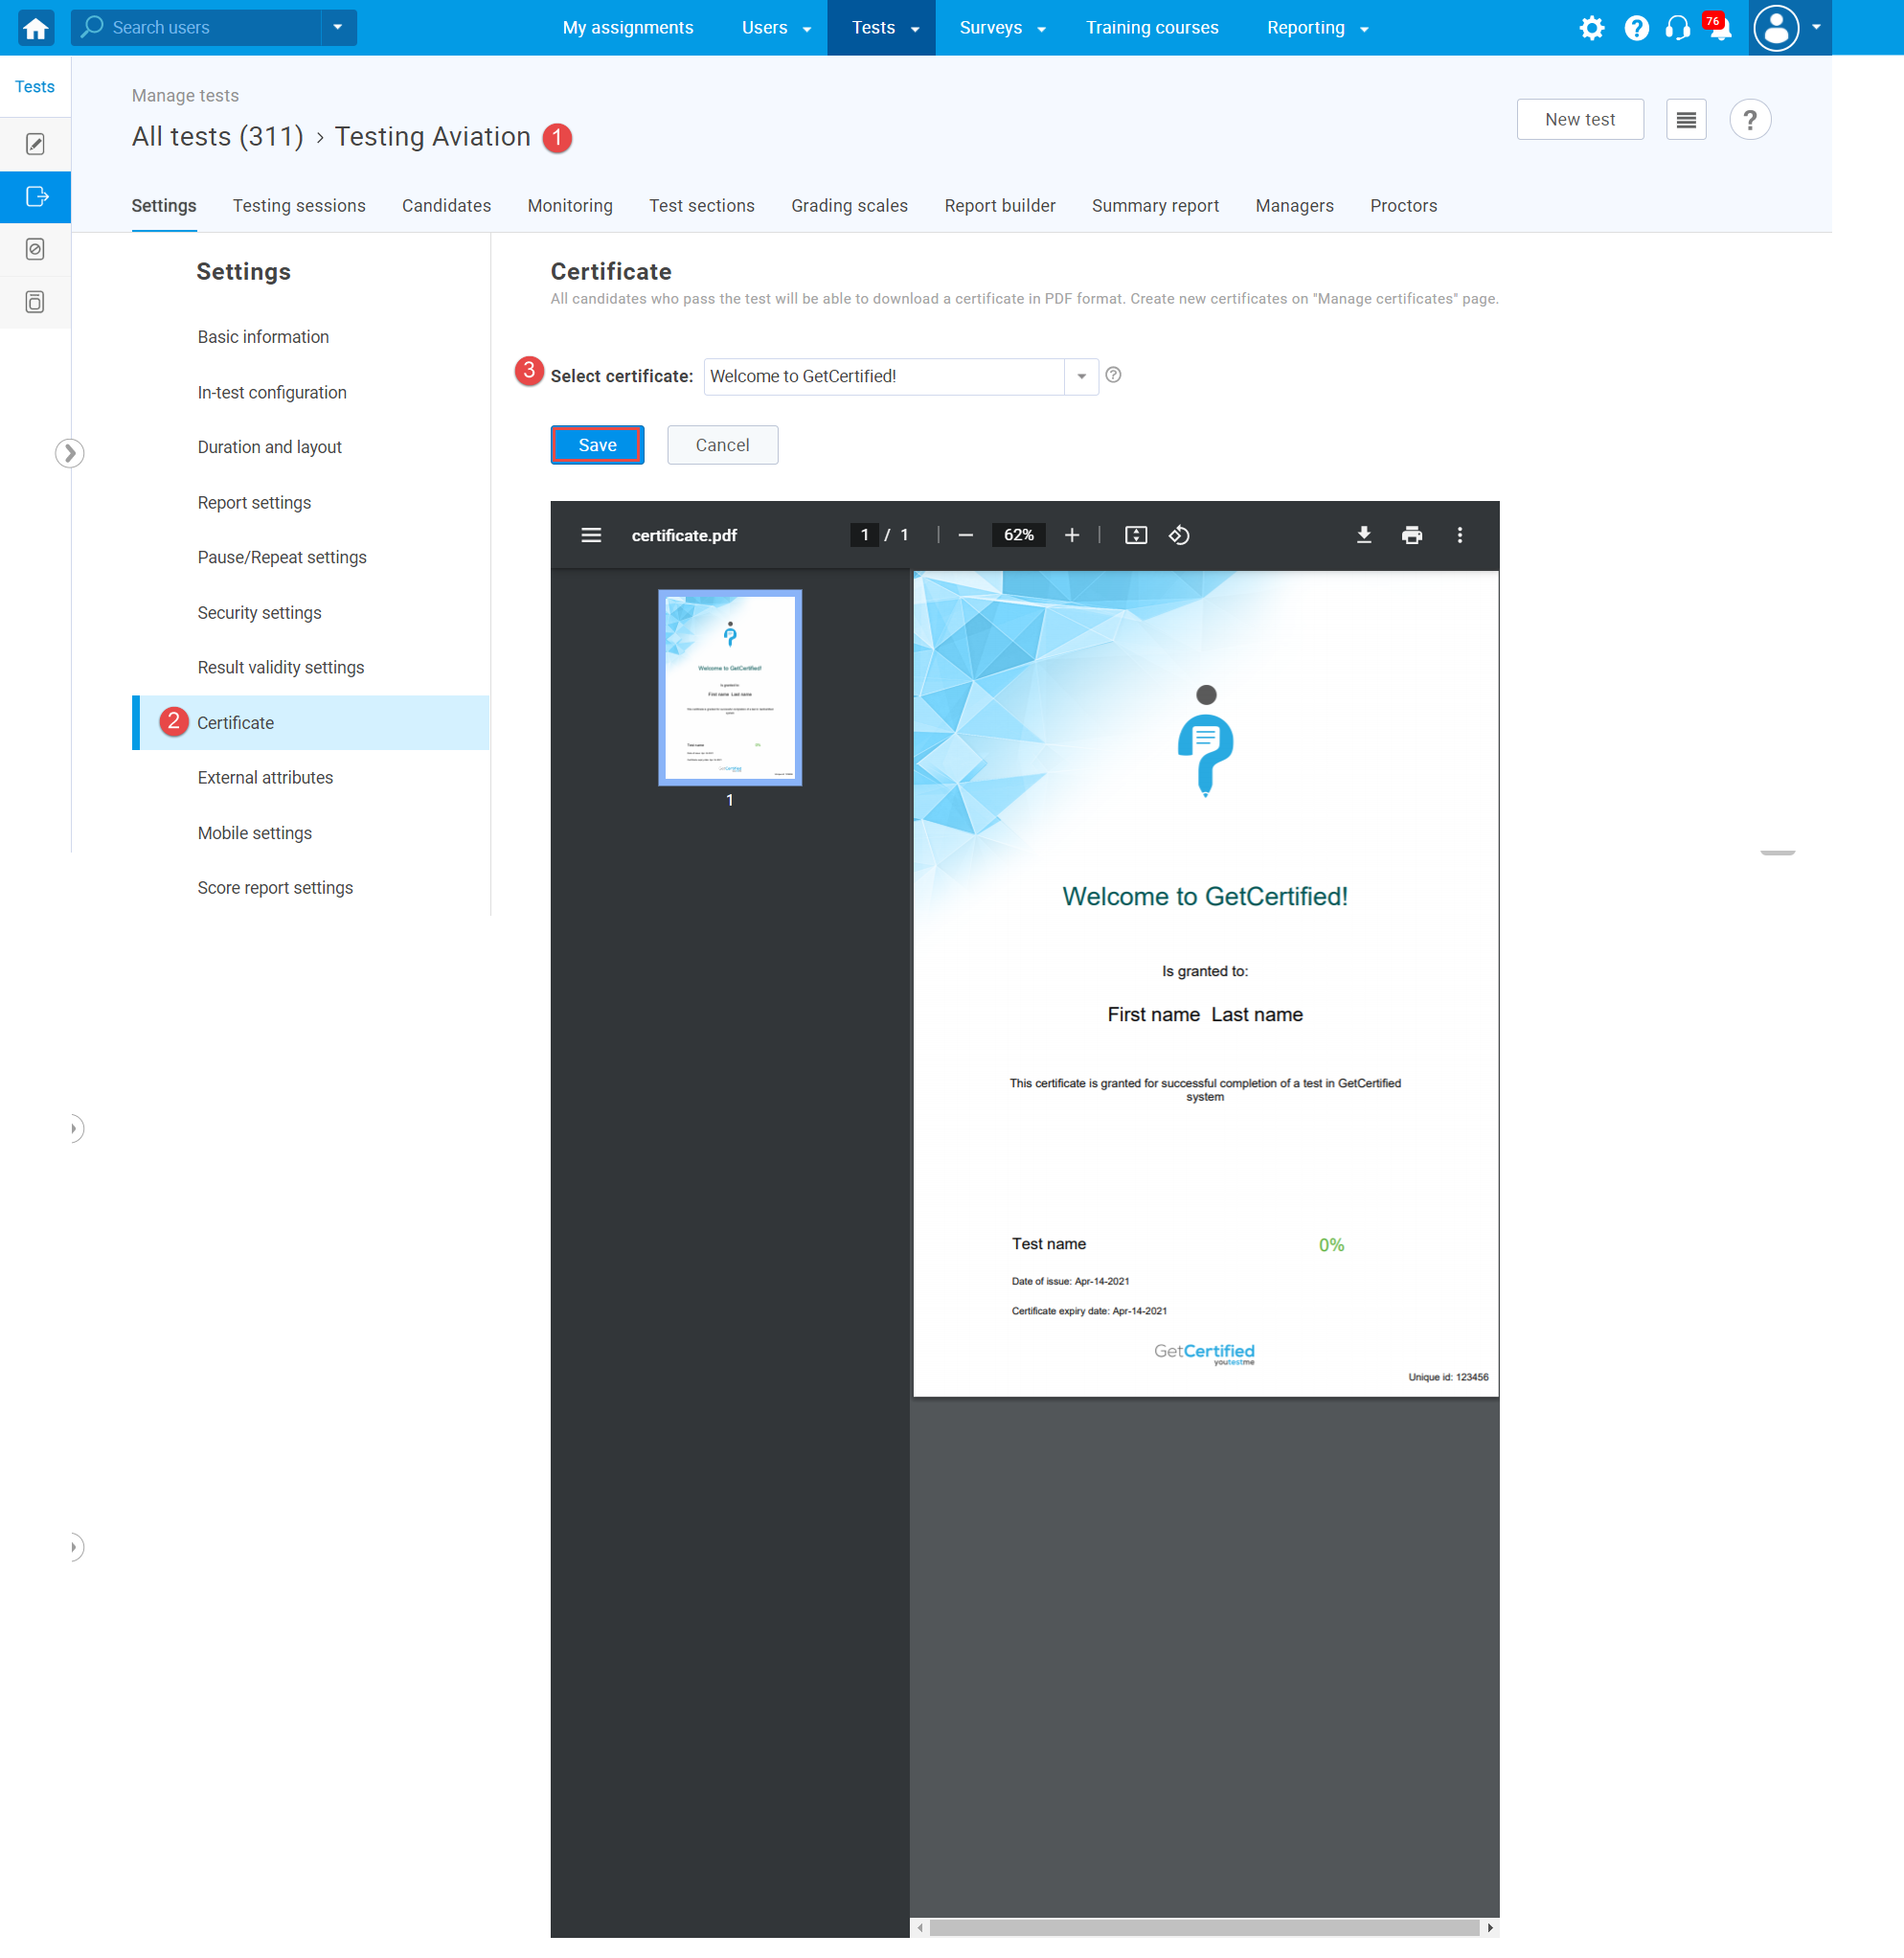
Once you have created the test (for more information on how to create a test, please visit the How to create a simple test without sections), you can configure the certificate as follows:
1. Open the desired test – hover over the “Tests” and select “Manage tests“.
Follow steps 2 and 3 if you did not attach a certificate during the test creation. If you added the certificate, go to step 4.
2. Navigate to the “Certificate” tab.
3. Choose the desired certificate from the drop-down menu and add it to the test by clicking the “Save” button.
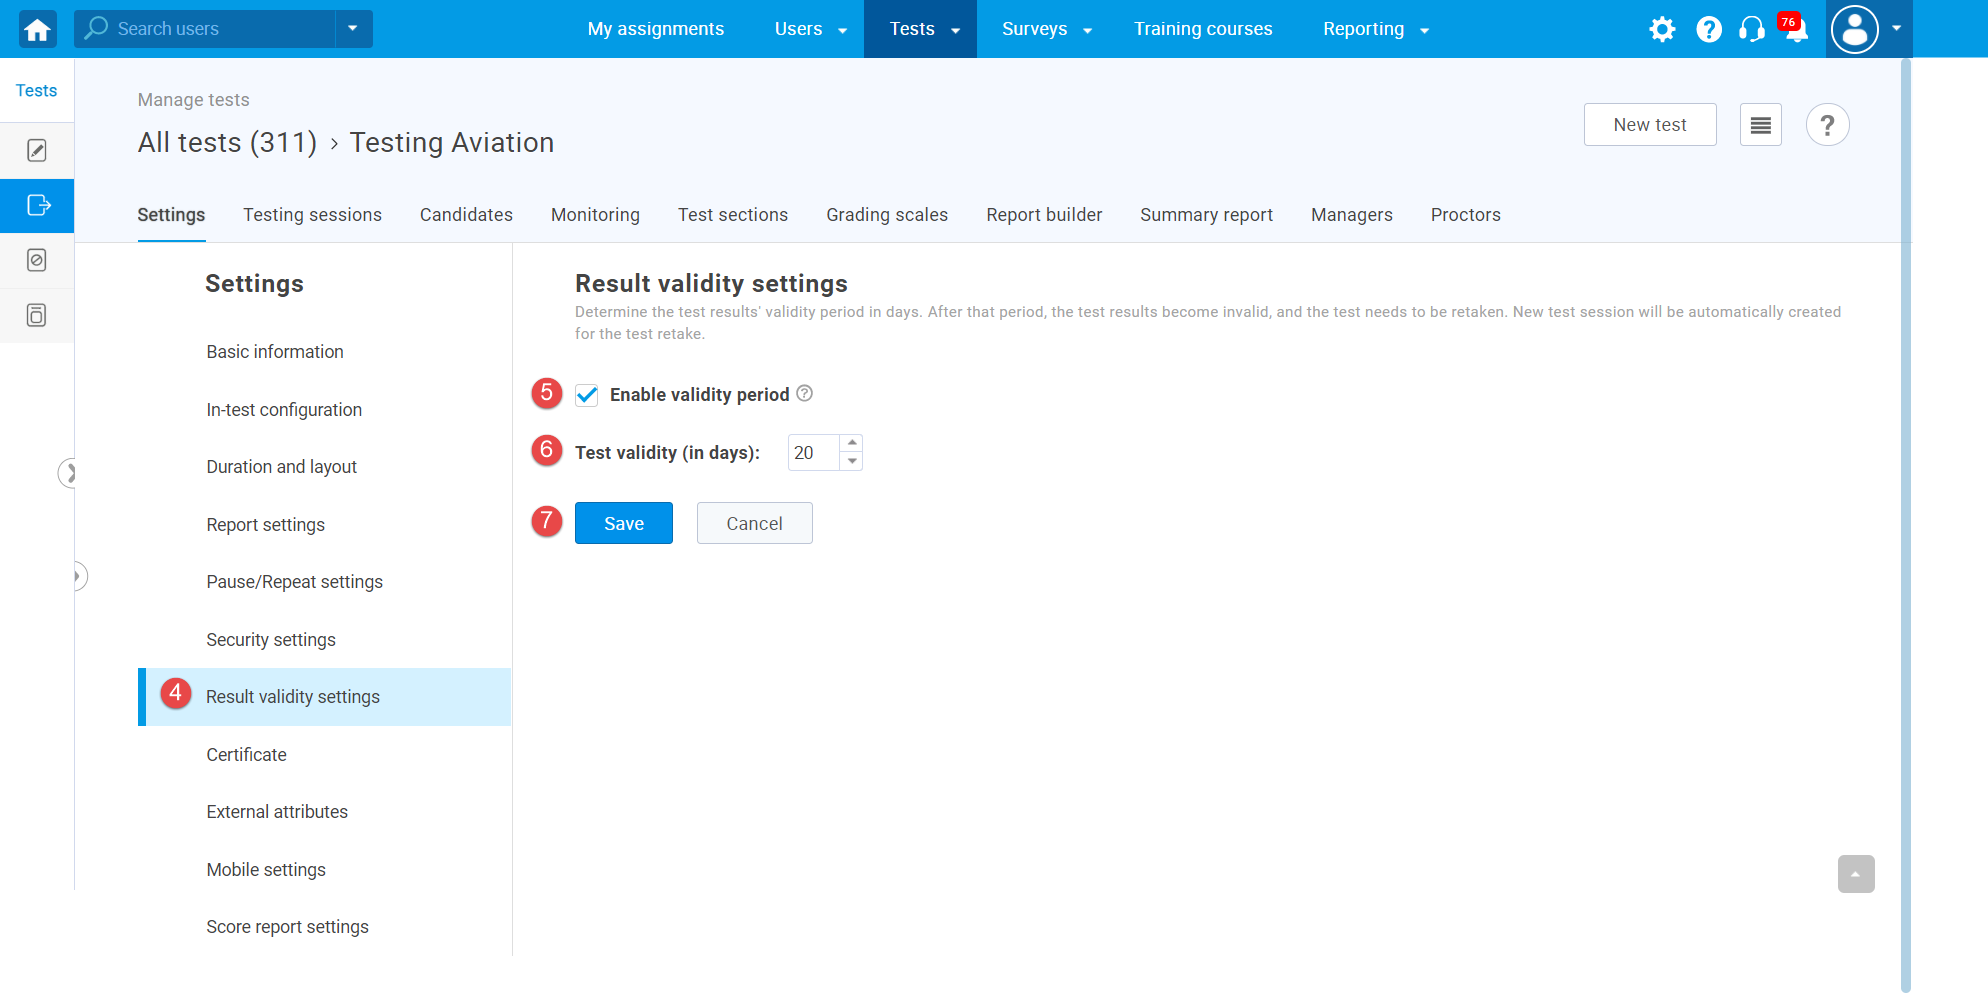
4. Navigate to the “Result validity settings” tab.
5. Tick the box next to the “Enable validity period“.
6. Set the validity period in days. After the defined period, the results, as well as the certificate, will become invalid. All previous test attempts will be suspended, and users will need to retake the test. Completed sessions will be displayed as “Finished,” and new sessions will be created automatically.
Note: Once you set the validity period, the certificate expiry date will be automatically displayed on the certificate.
7. Click the “Save” button to confirm changes.
Once you have added the certificate expiration date, complete the test creation process.
The certificate from the candidate’s perspective

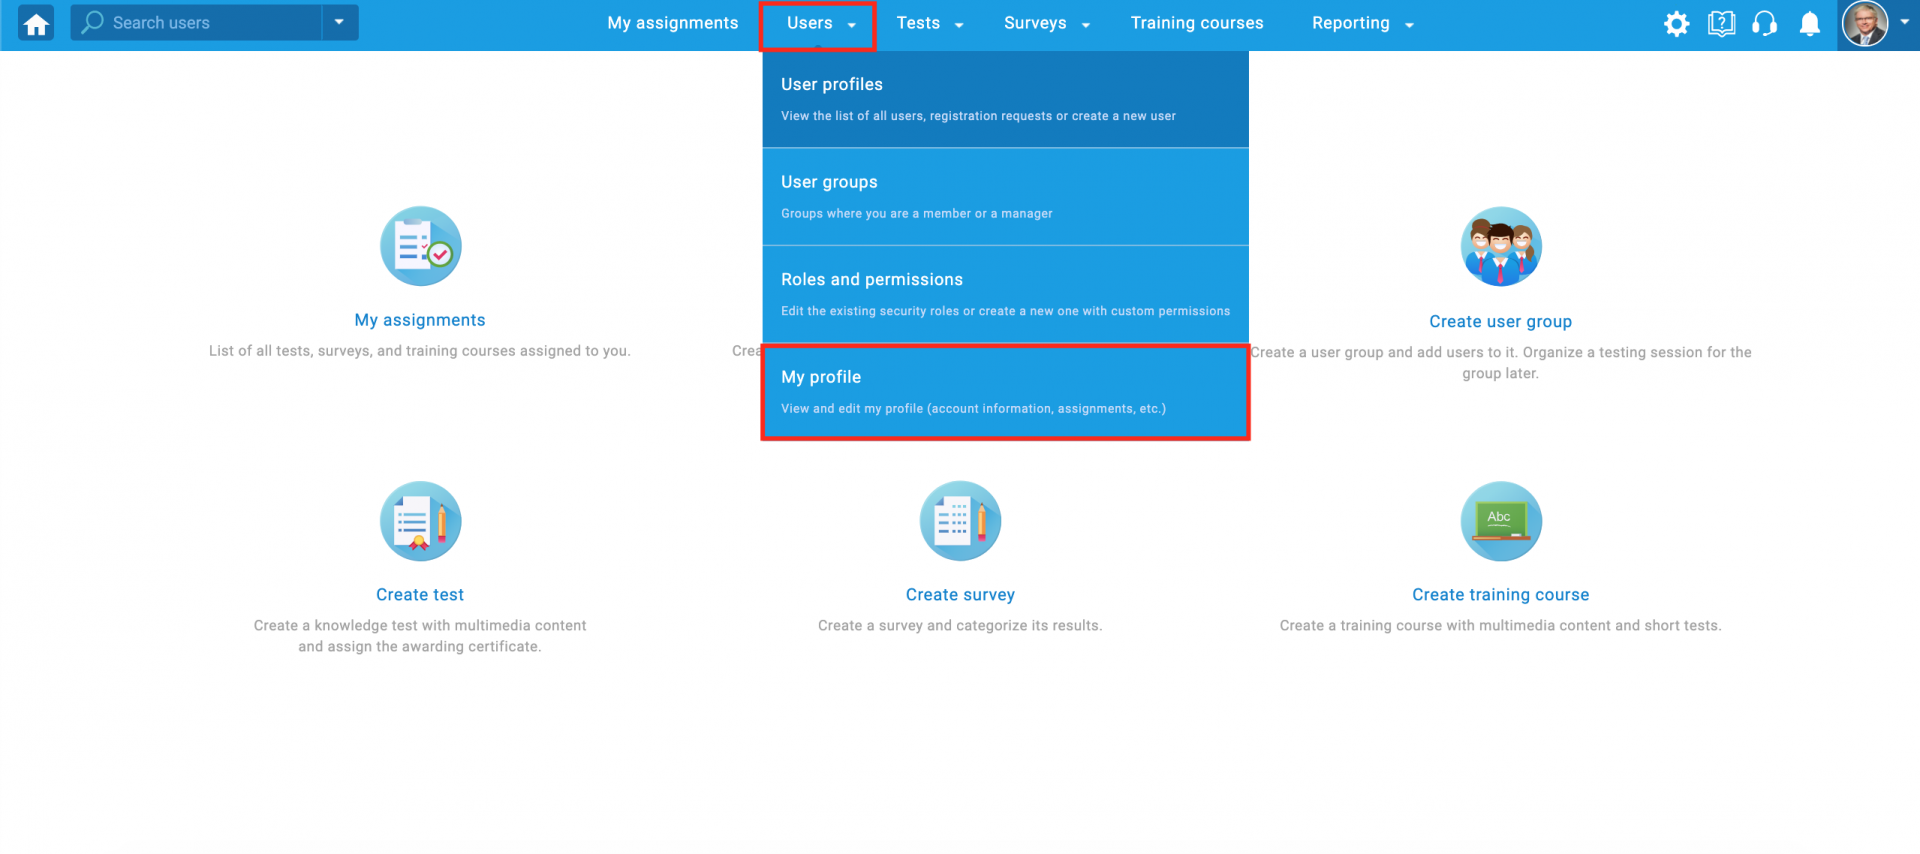
Accessing the My certificates tab
Hover over the “Users” in the main menu, and select the “My profile“.
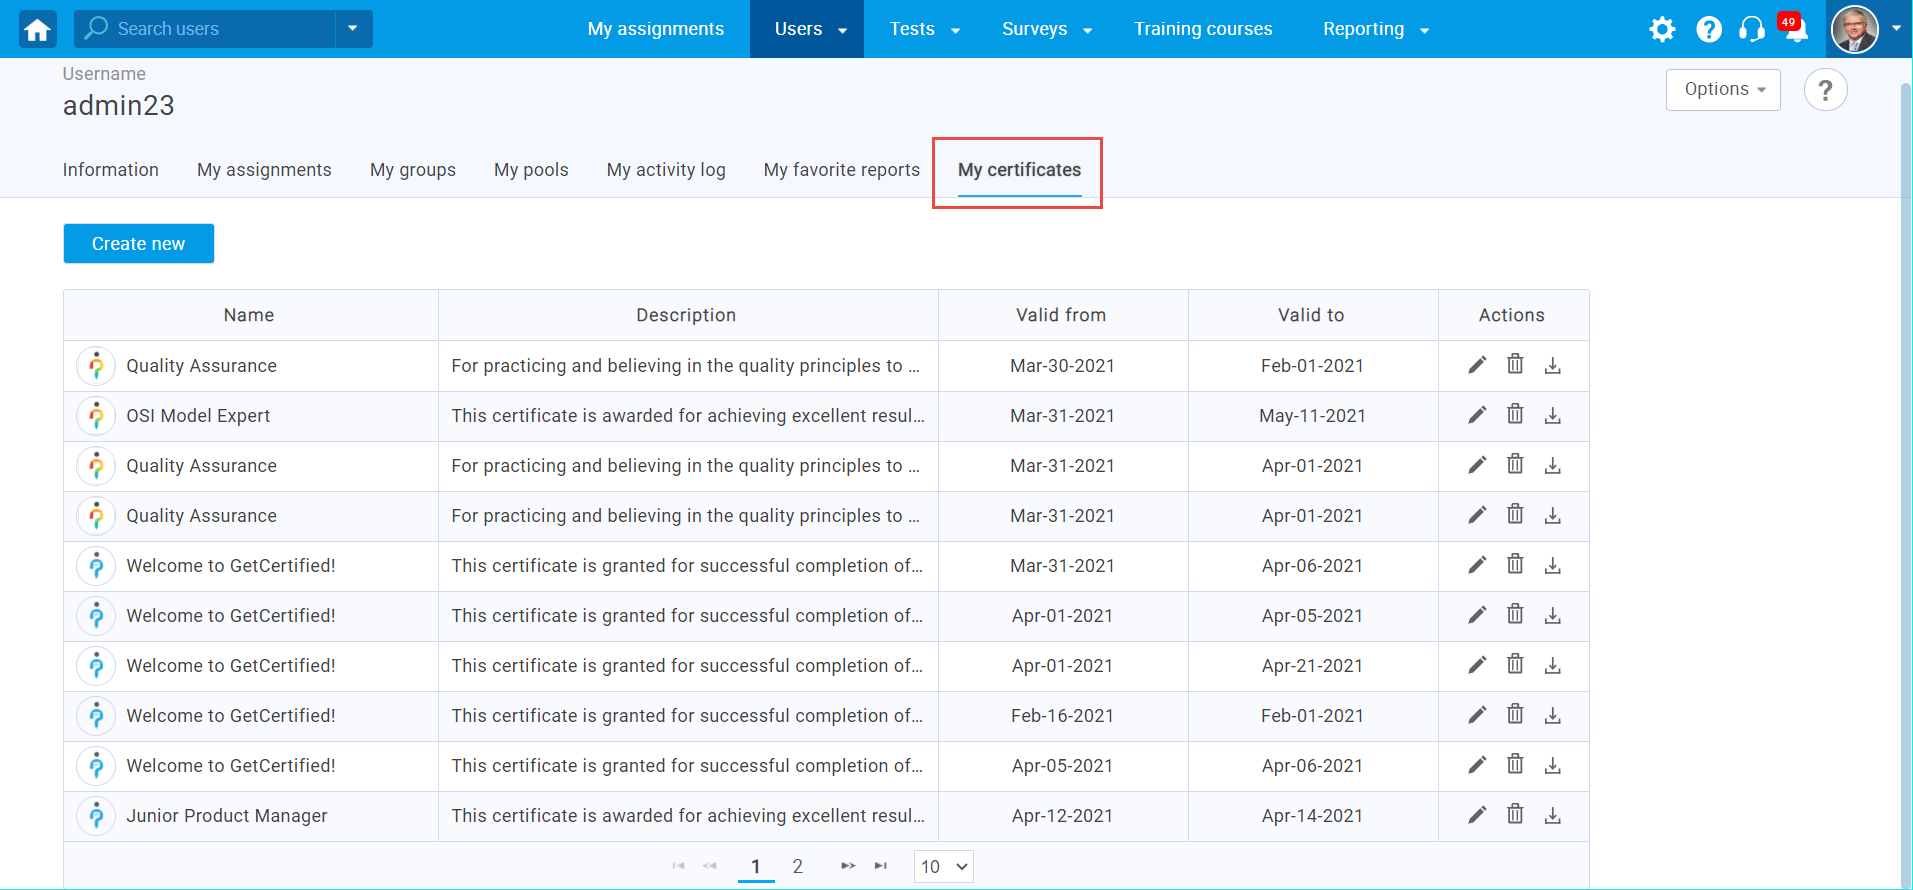
Then, go to the “My certificates” tab.
Managing My certificates tab
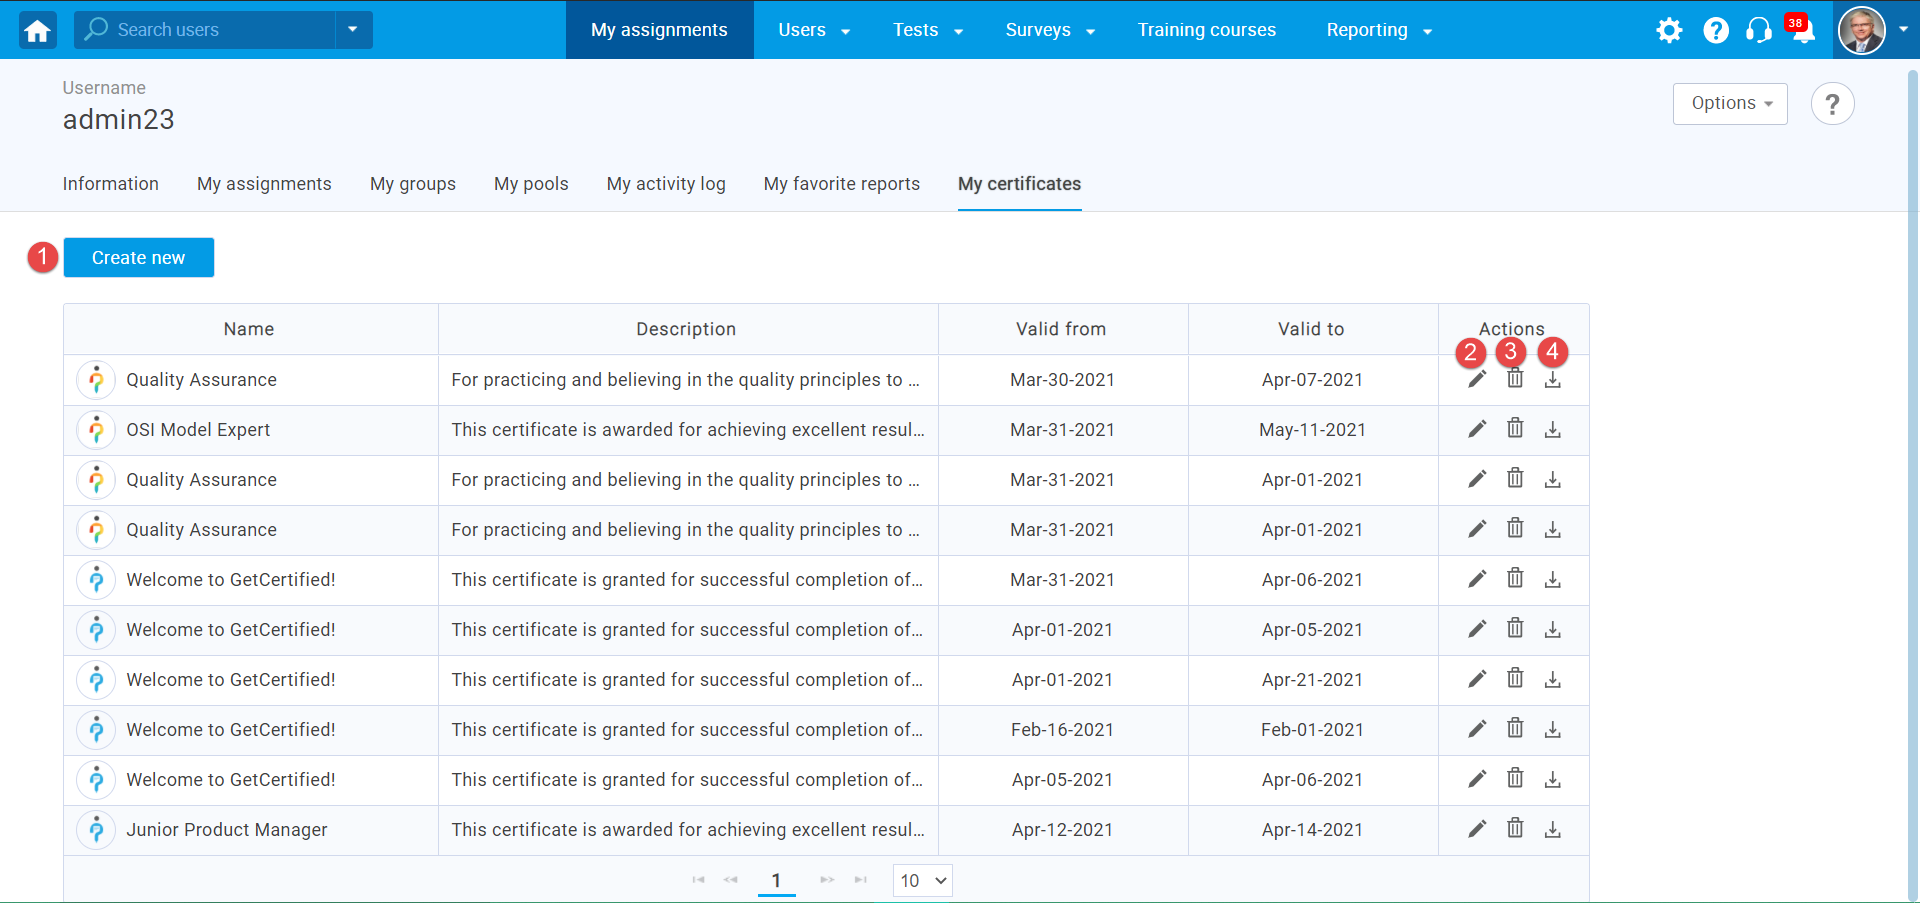
The tab “My certificates” displays the list of achieved certificates. When you complete an assignment that grants you the certificate, it will appear here.
Here, you can perform the following actions:
- Create a new certificate.
- Edit certificate information.
- Delete the certificate.
- Export the certificate as a PDF file, download it, and save it.
Creating a new certificate
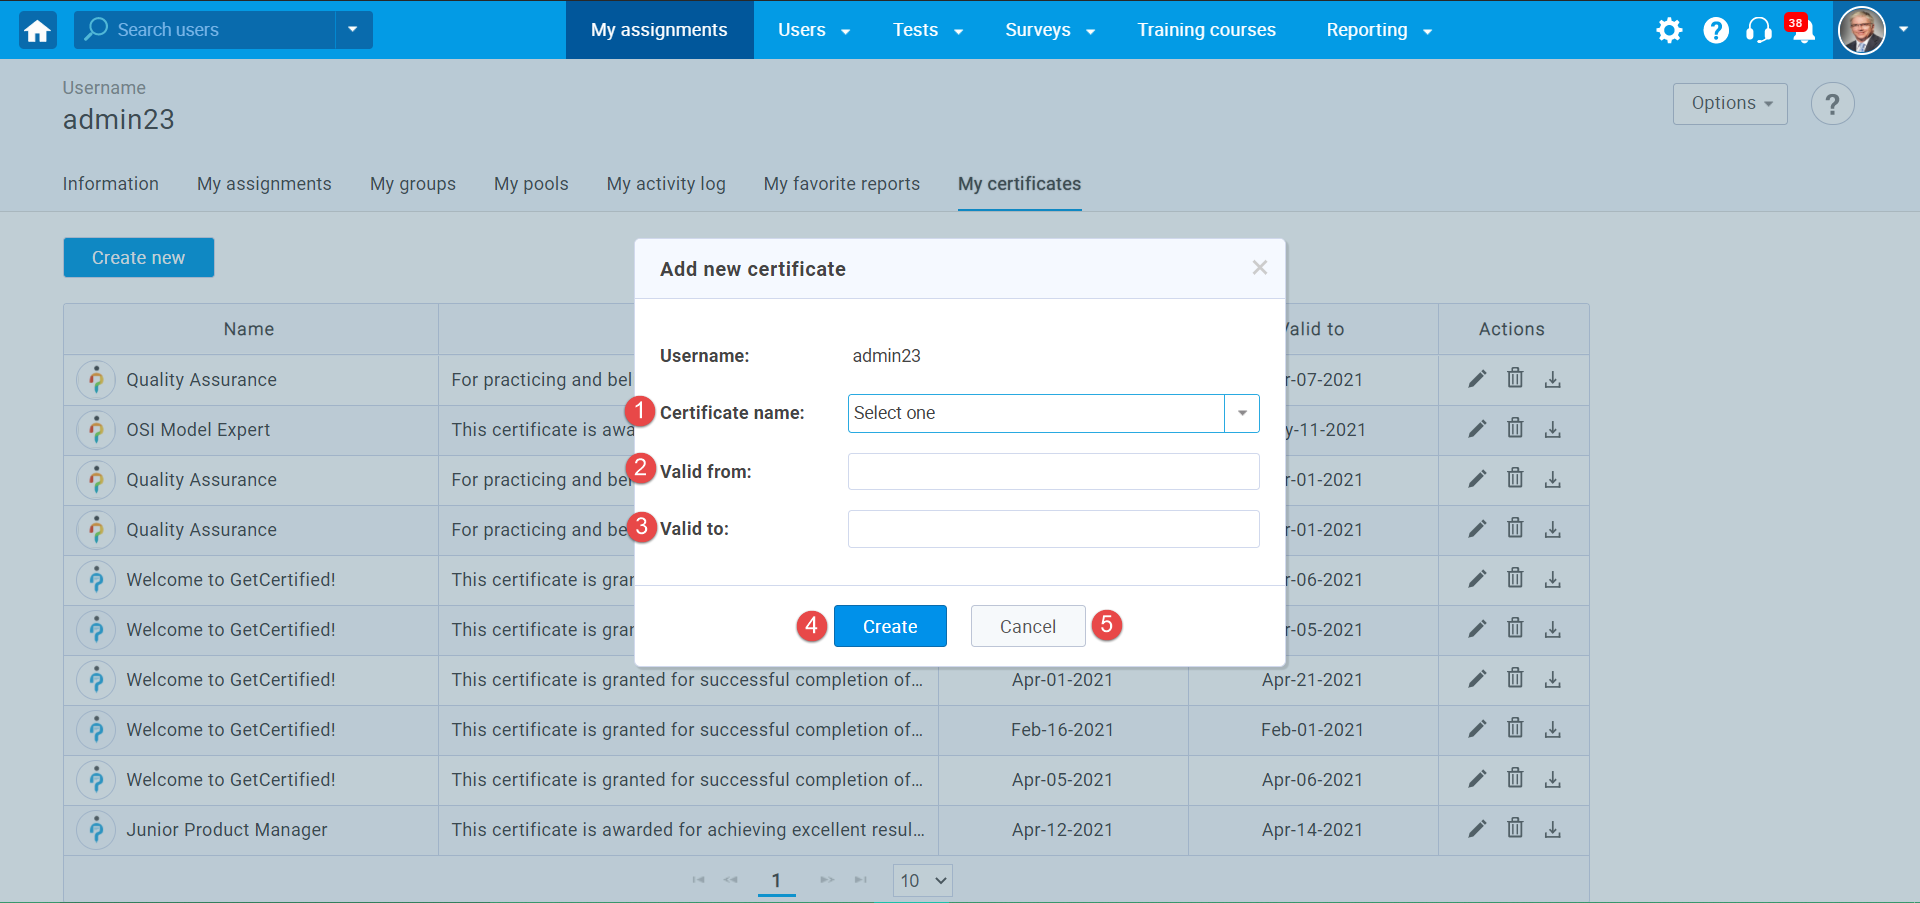
By clicking on the “Create new” button user can create a new certificate.
- Enter the certificate name.
- Set the valid from date – a date from which a certificate will be valid.
- Set the valid to date – the last date when a certificate is valid.
- Click the “Save” button to confirm.
- Click the “Cancel” button to discard.
Editing certificate’s expiry information
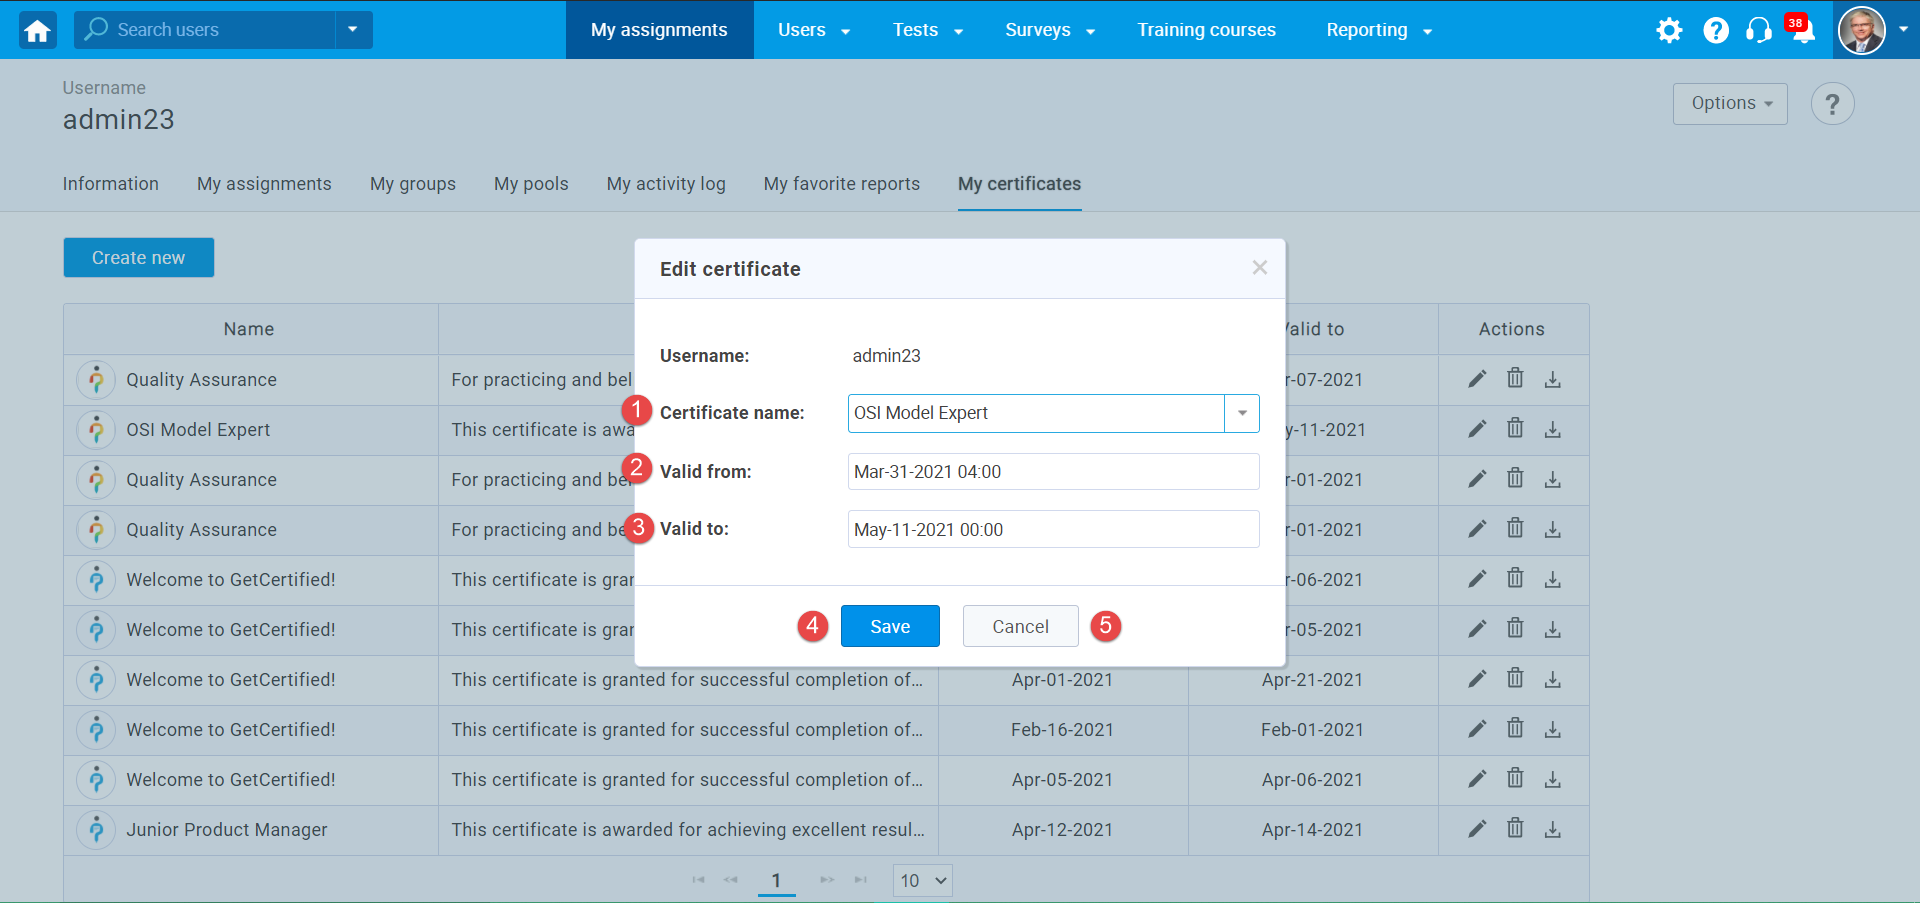
By clicking on the pencil icon user can edit the certificate’s information.
- Enter the certificate name.
- Enter the valid date.
- Enter the valid to date.
- Click the “Save” button to confirm the changes.
- Click the “Cancel” button to discard your changes.
Note: Certificates have a validity period that is independent from the validity period of the test. If the test is suspended or deleted, the certificate will still exist.
For more related instructional materials, please visit:
- How to create and add certificates to a test.
- How to manually adjust certificate dates.
- How to manually assign the certificate to the candidate.
- How to assign a certificate manager.
- How to enable test results validity period.
For a video tutorial on how to set certificate expiry date please watch the video.


