This article will explain how to set up Webex integration, and how proctoring using Webex works from the instructor’s and the candidate’s perspective.
Setting up the Webex integration
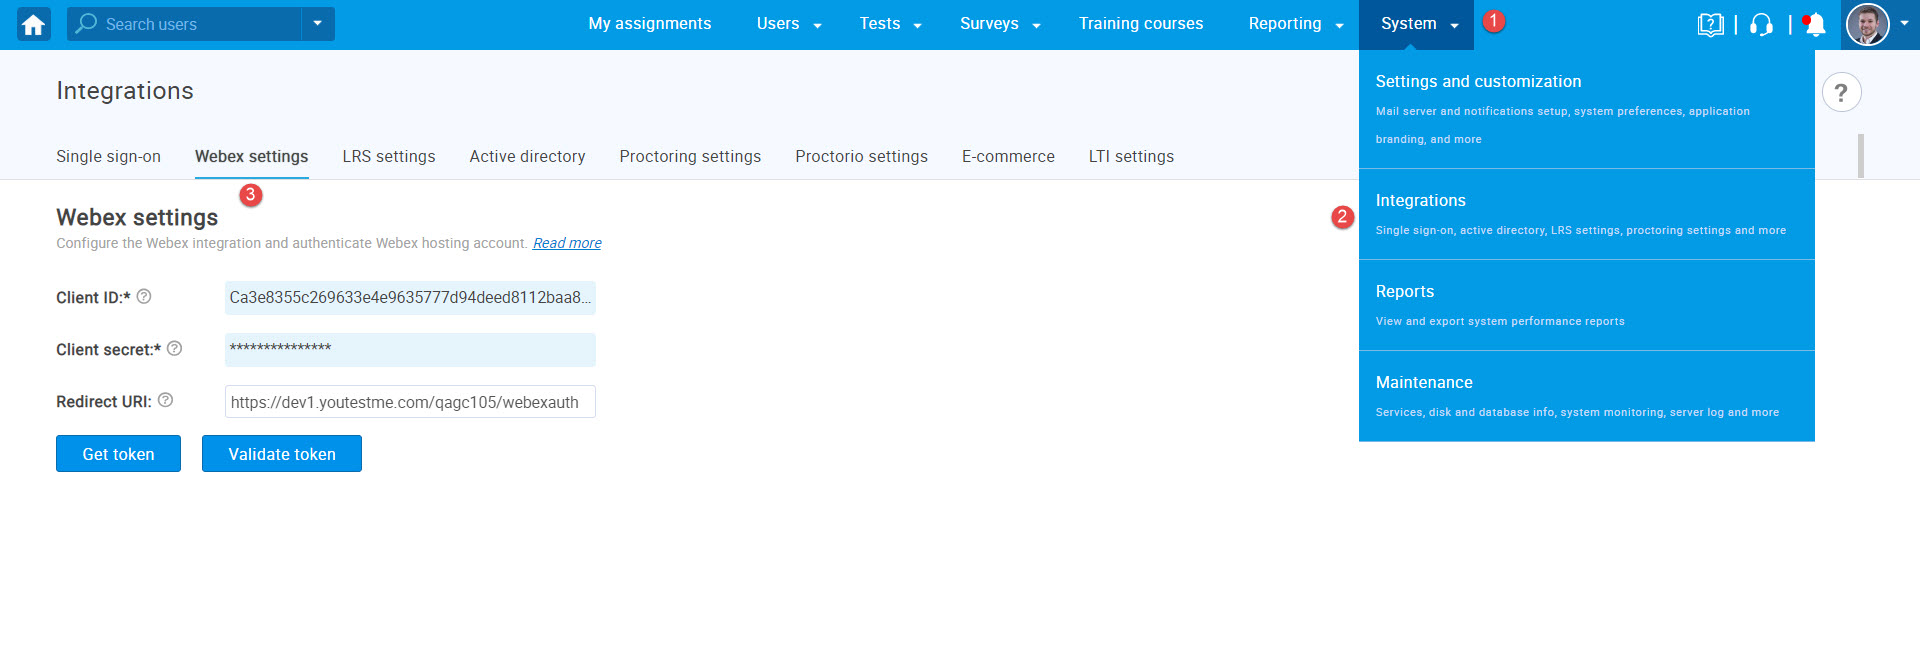
To access the tab to set up Webex integration:
- Click on the “System” tab in the main menu.
- Select the “Integrations” tab.
- Select the “Webex settings” tab.
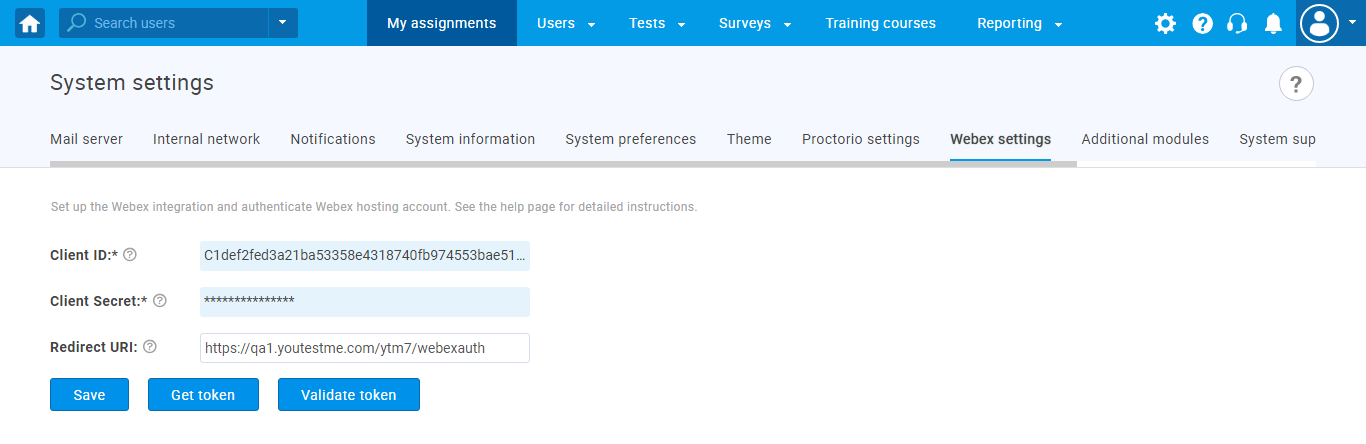
“Client ID“ and “Client Secret“ need to be configured. You can find this information after you register the integration on the hosting Webex account. Use the “Redirect URI” parameter later to configure the Redirect URI of the app at https://developer.webex.com/.
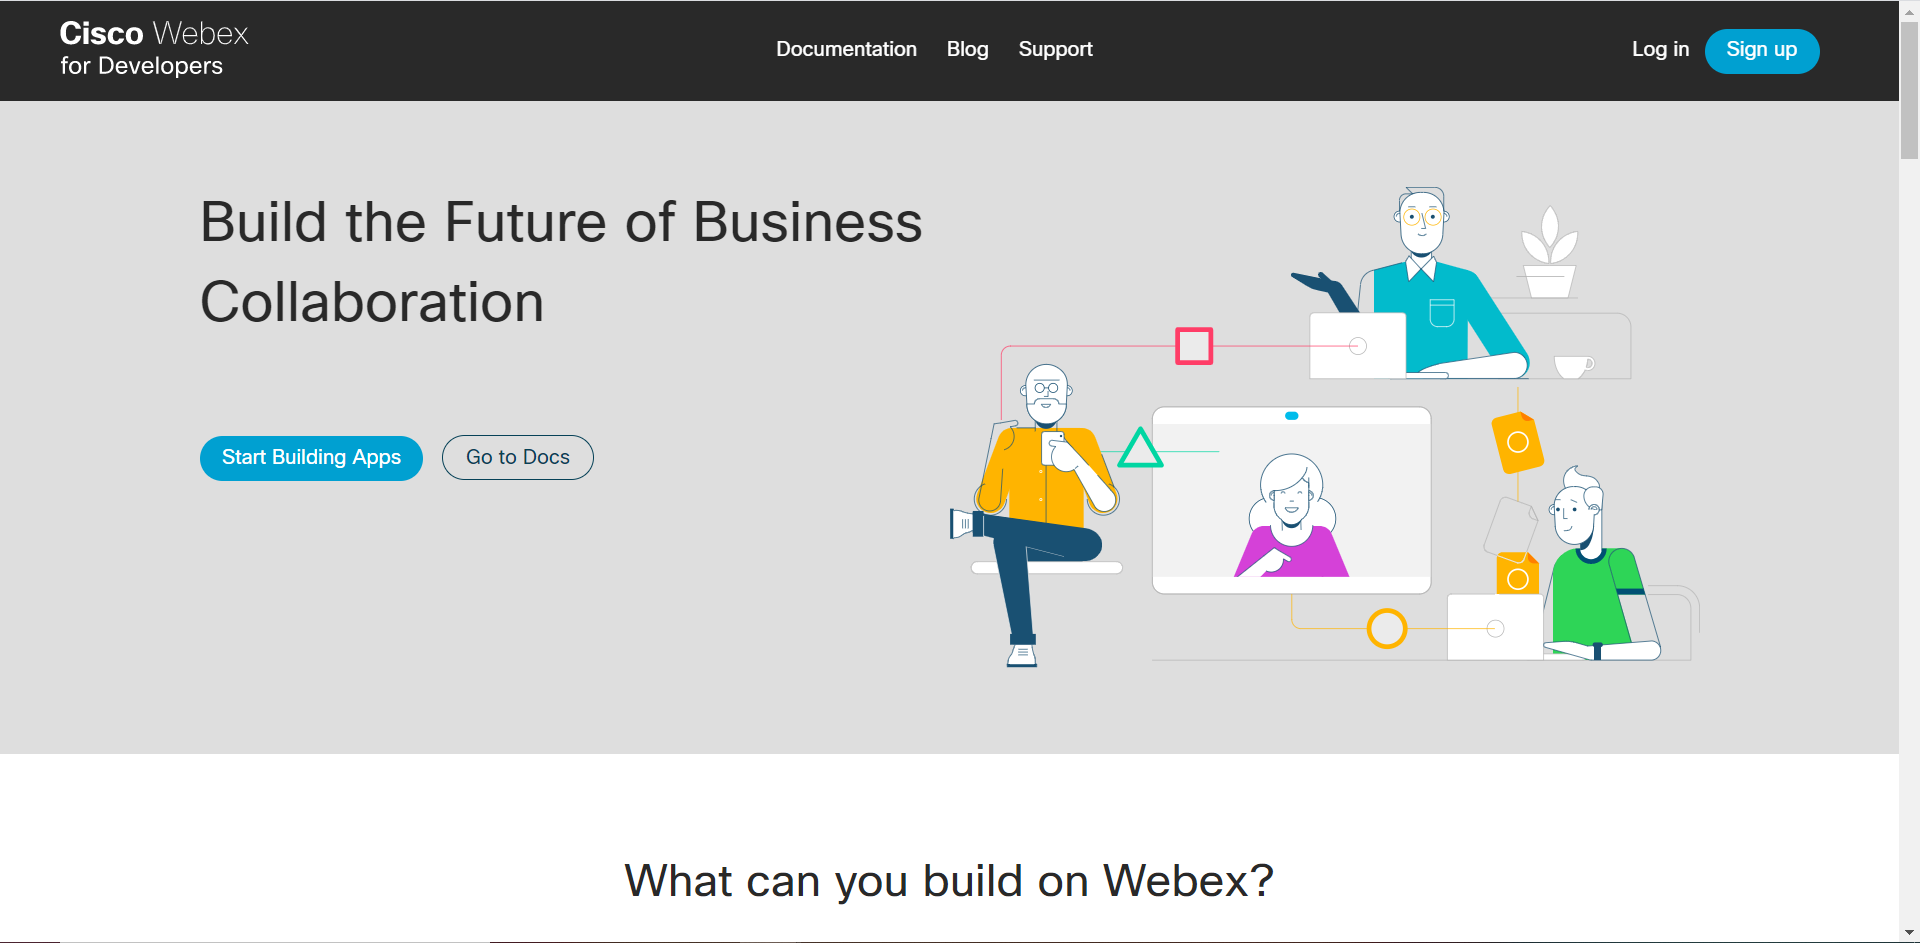
You should log in with the Webex hosting account on https://developer.webex.com/.
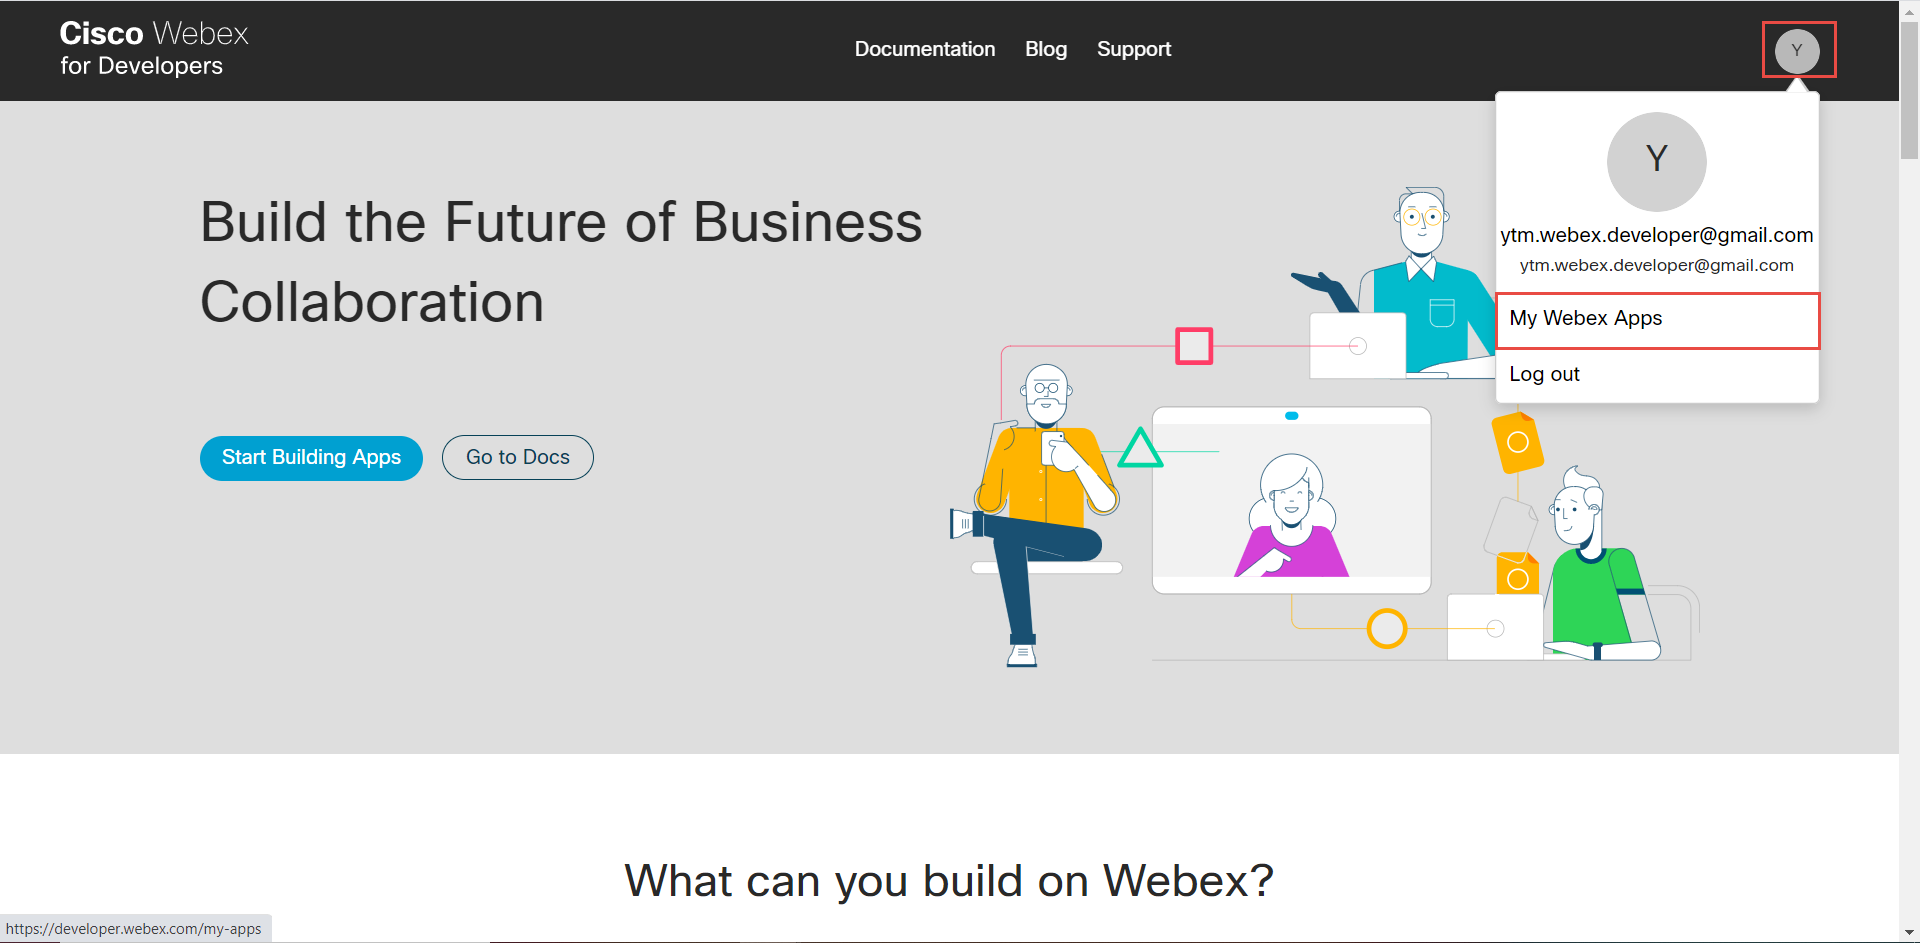
Click on the profile icon and choose “My Webex Apps.”
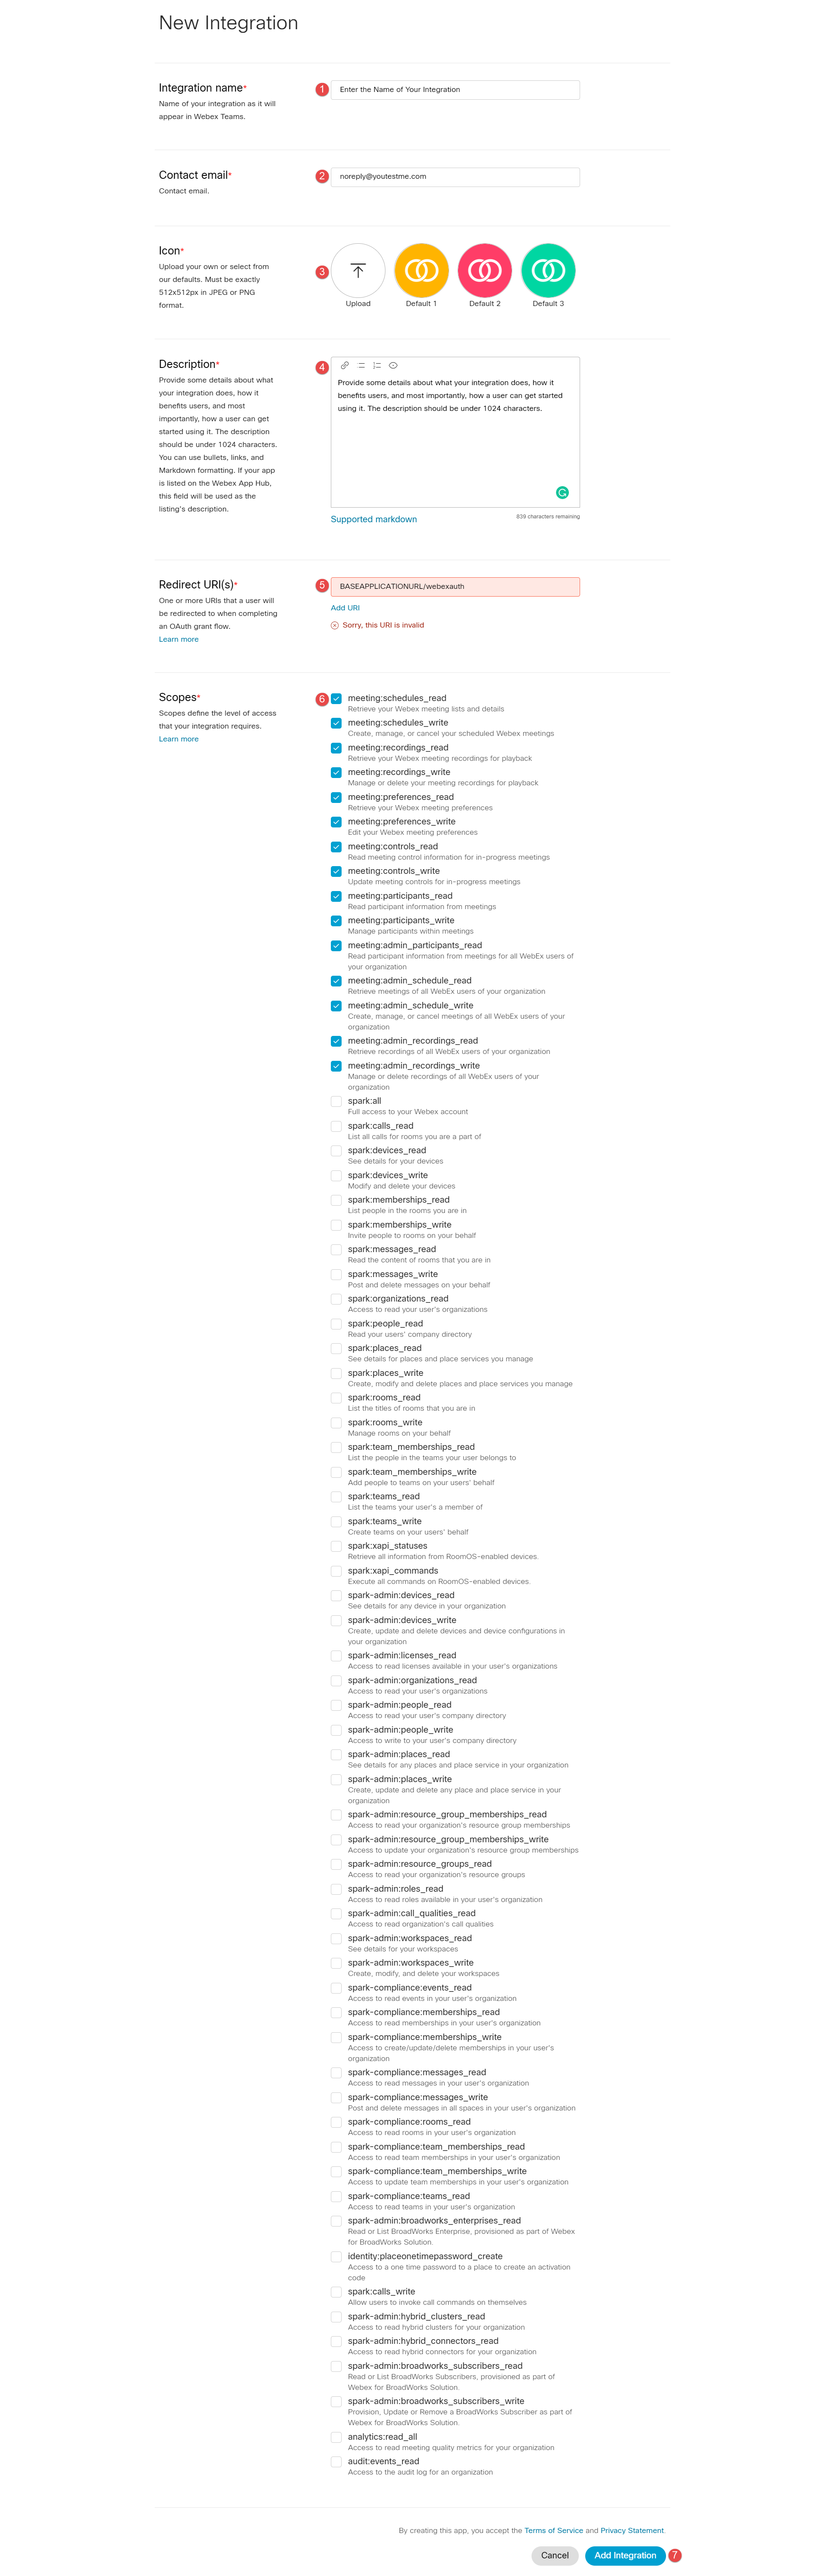
Click on “Create a New App”

- Enter integration name
- Enter Contact email
- Choose icon
- Enter Description
- Enter Redirect URI, use the Redirect URI parameter from Webex Settings
- Select all “Meetings” Scopes
- Click “Add integration.”
Once you create an integration, you will get the “Client ID” and “Client Secret.”
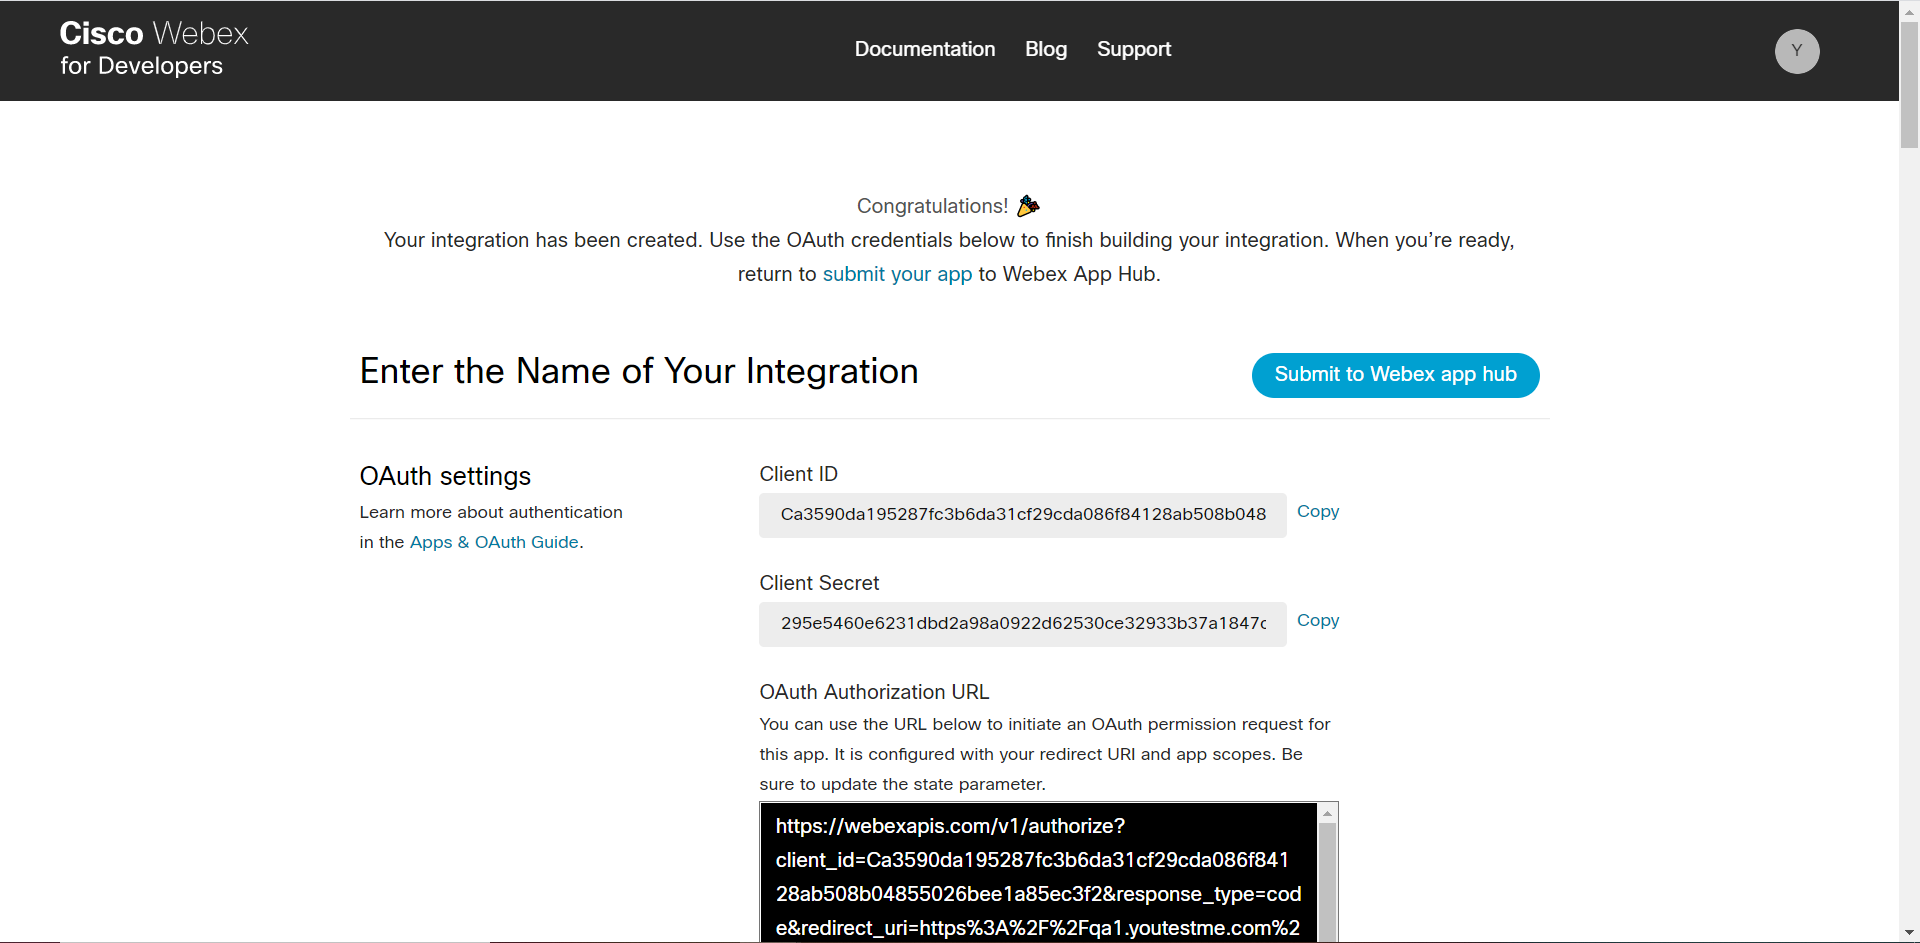
- Copy “Client ID” in the GetCertified Application under the “Webex settings” tab.
- Copy “Client Secret in the GetCertified Application under the “Webex settings” tab.
- Click the “Save” button.
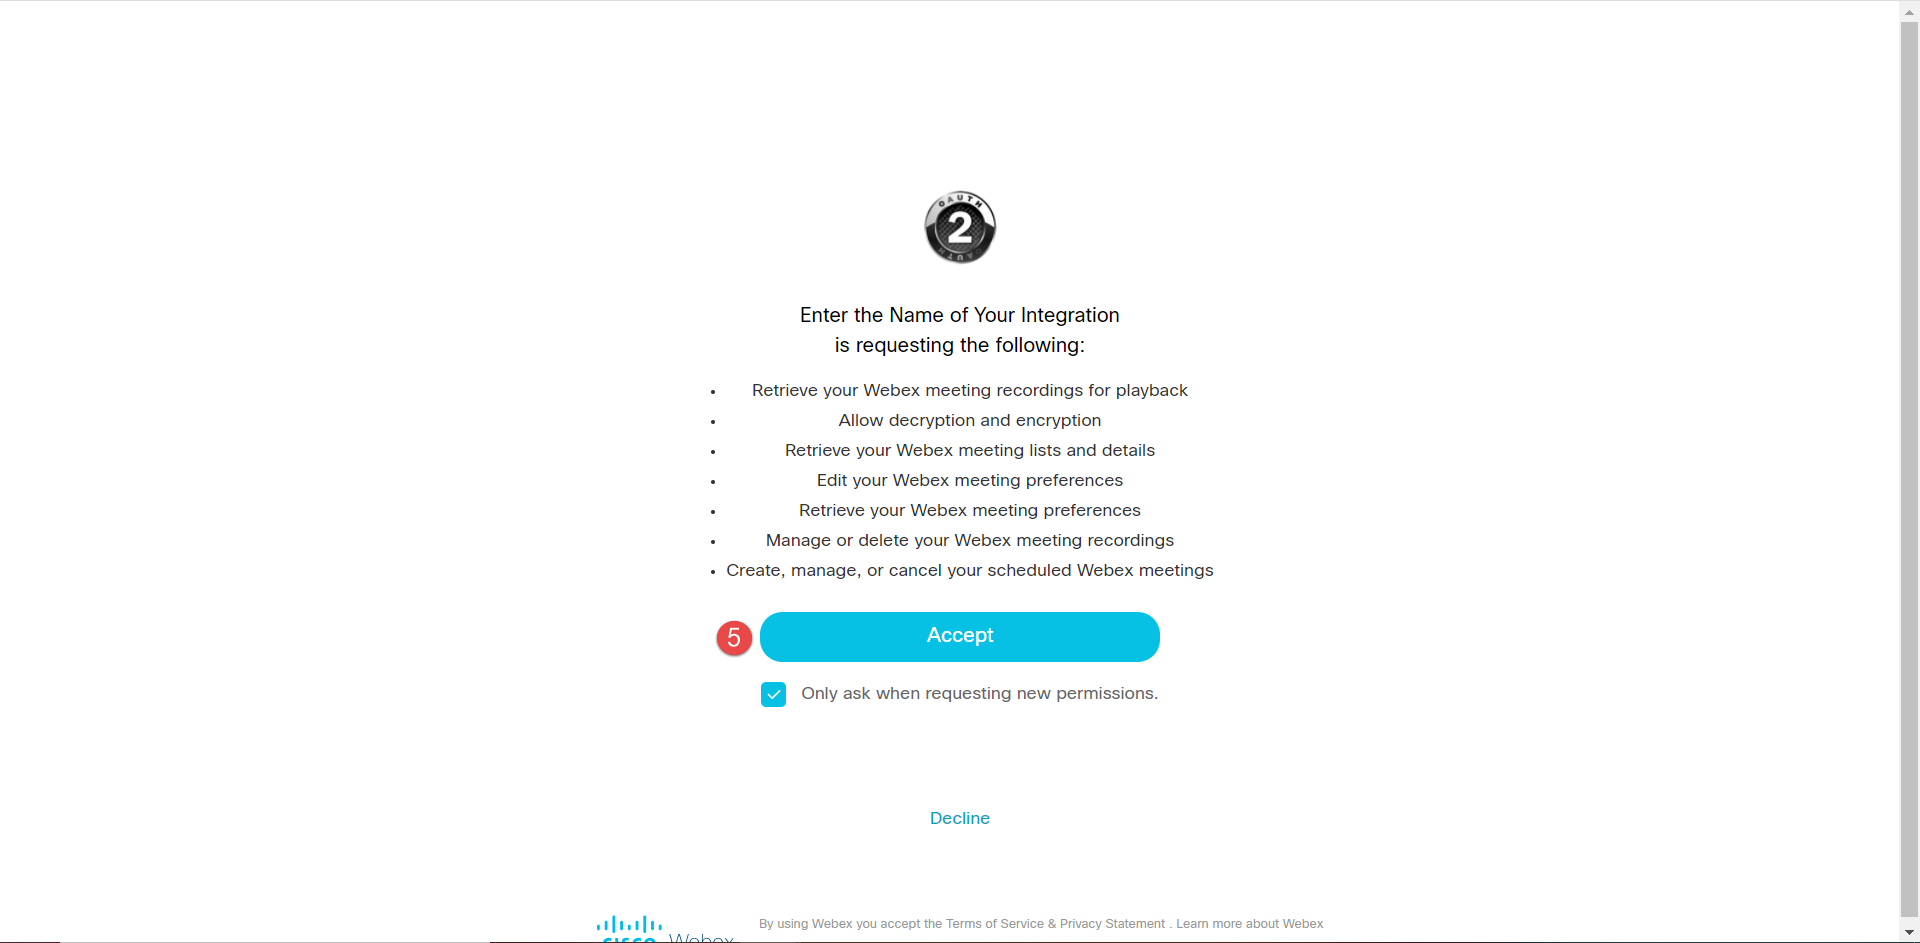
- Click on the “Get token” button, and you will be redirected to the Webex page, where you should log in again with the hosting Webex account.
- Once you are logged in, click the “Accept” button.
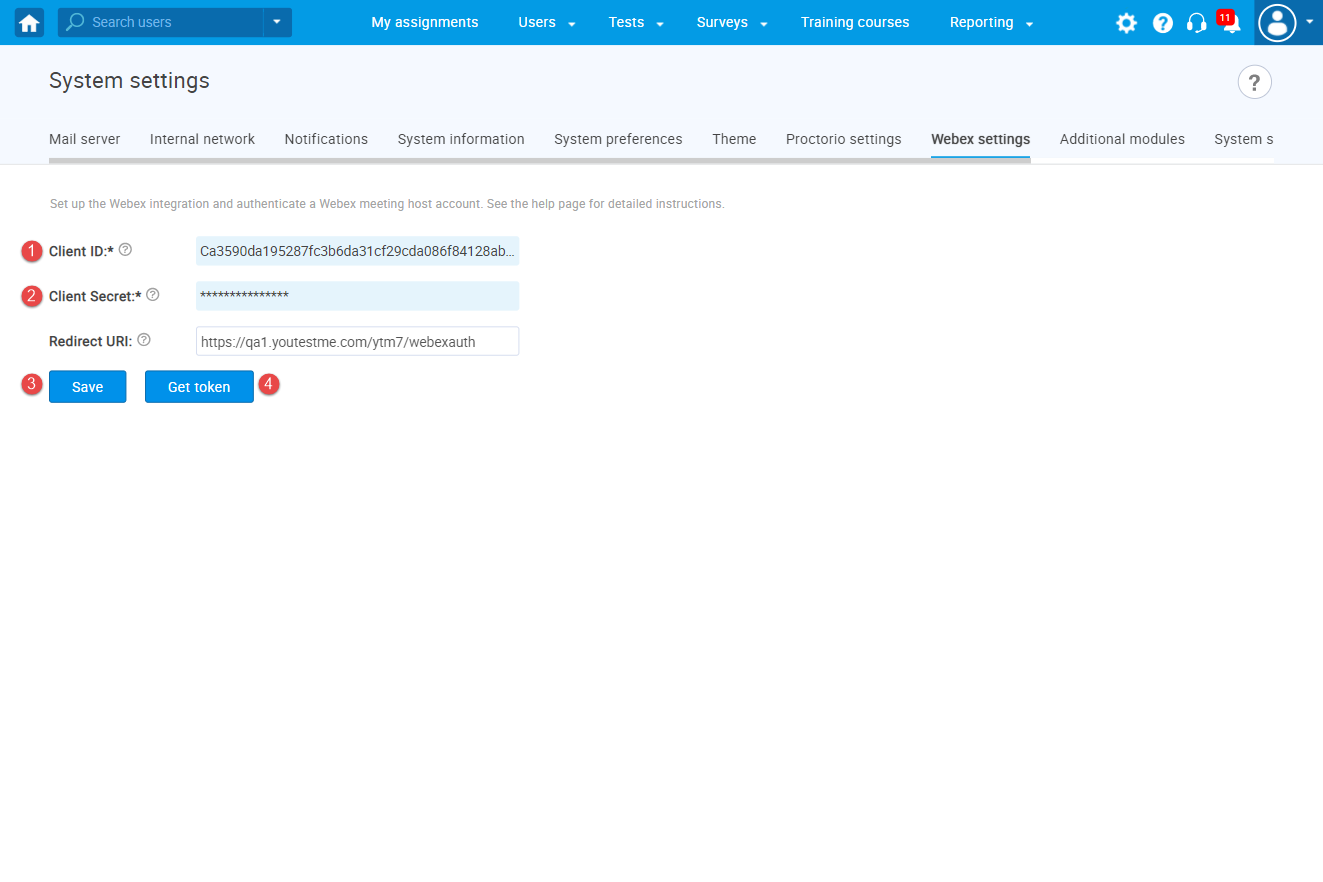
Once you accept, the button “Validate token” will appear in the GetCertified application, which is an indication that you have access to this token.
Proctoring using Webex
For more information on how the proctoring using Webex works, please see the links below.
Test from proctor’s perspective
Test from a candidate’s perspective


