This article will explain how to customize the application interface text according to your needs – change labels’ names, create new hints, and modify notifications’ content.
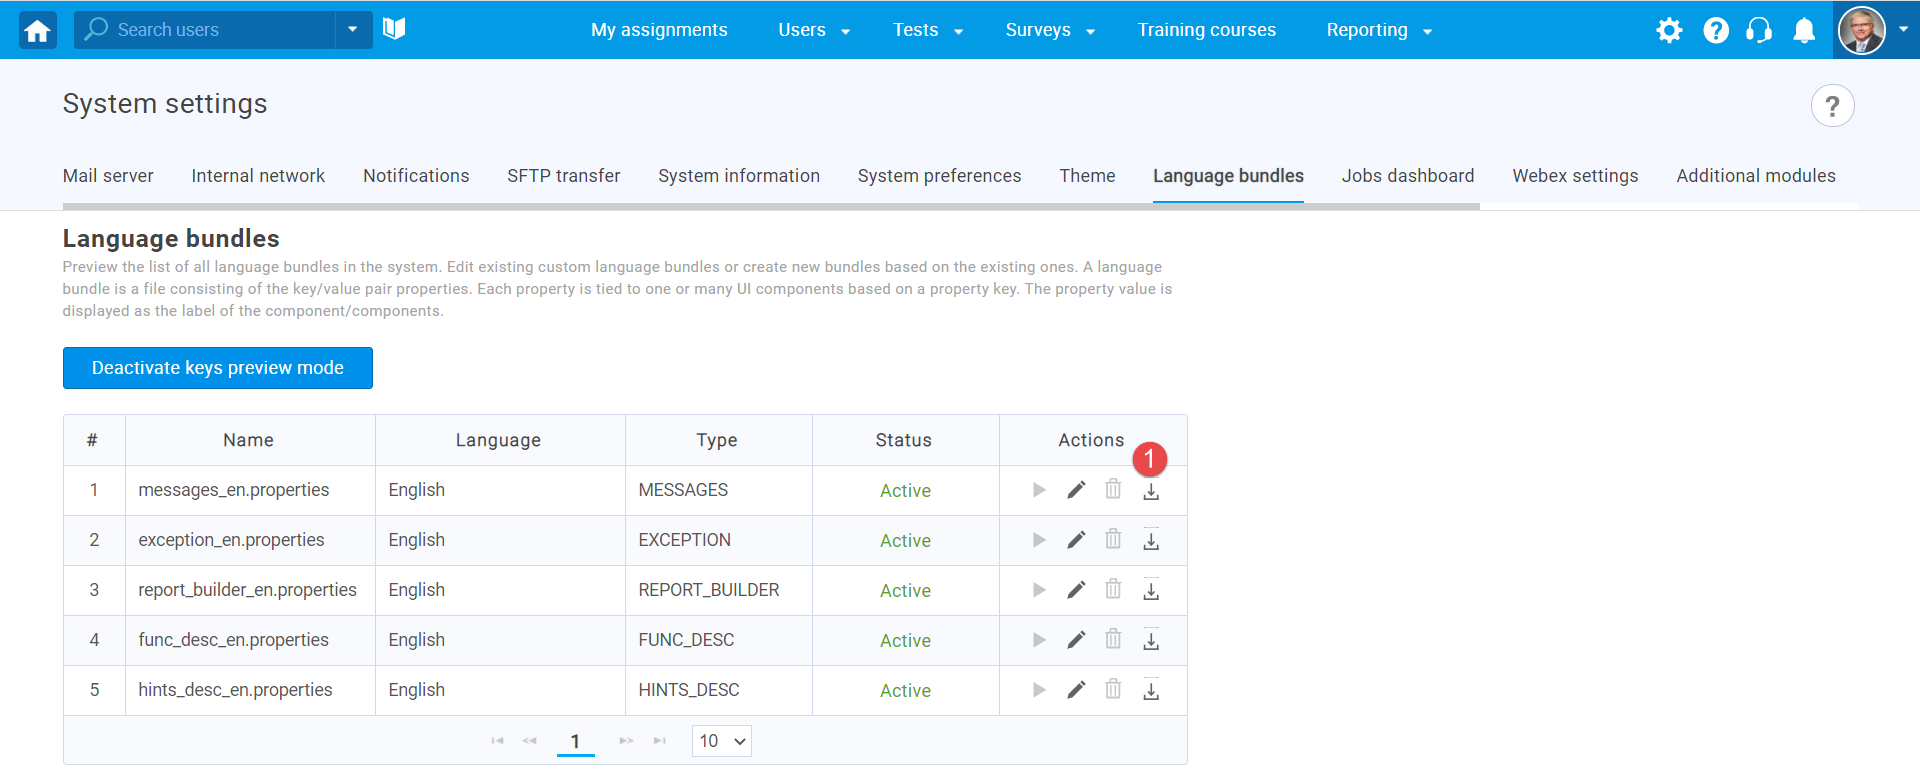
Accessing language bundles page
To access the “Language bundles” page, you should hover over the “Settings” tab in the main menu and select the “System settings” option.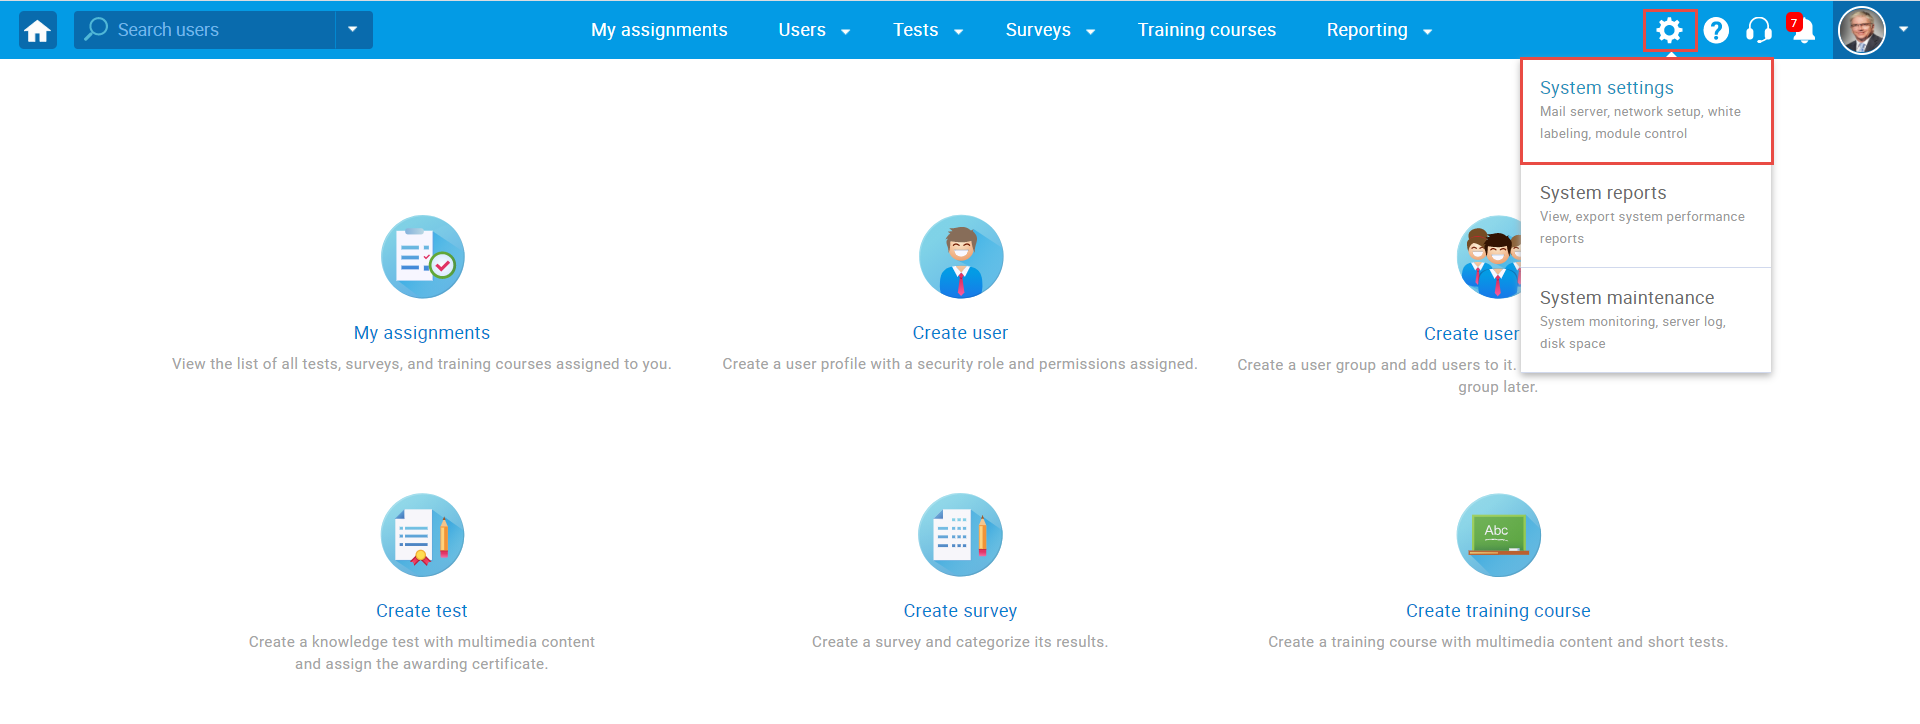
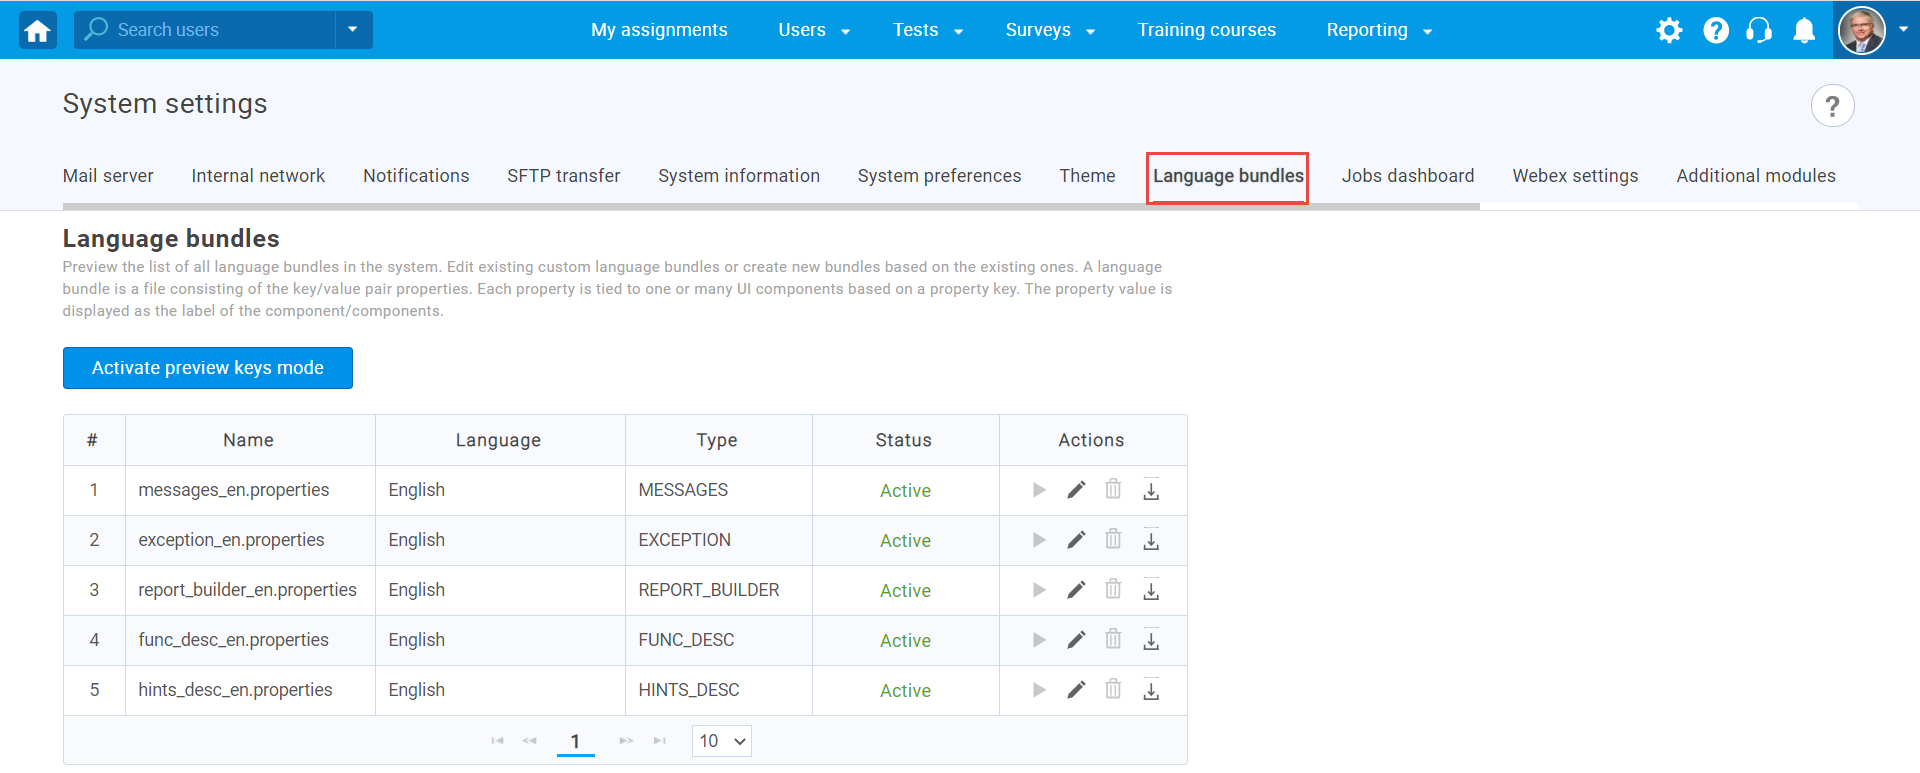
Then, click the “Language bundles” tab.
Customizing application’s interface text
There are 5 default language bundles in the system. A language bundle is a file consisting of the key/value pair properties. Each property is tied to one or many UI components based on a property key.
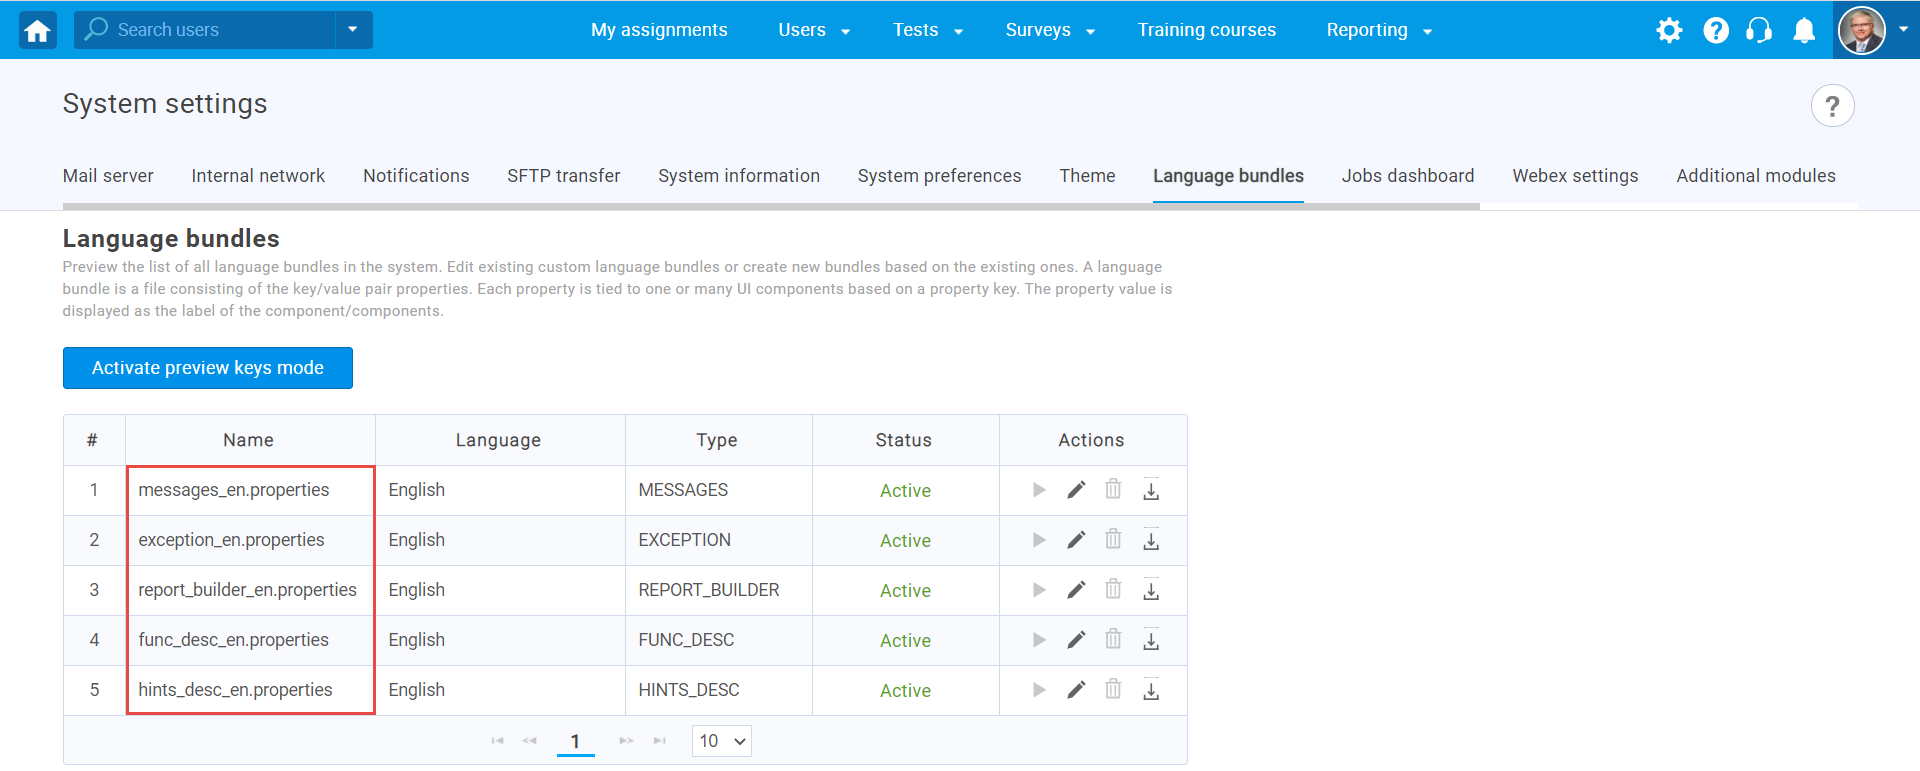
Note that it is impossible to delete default language bundles, but you can create new ones based on them. Also, it is not possible to have two active bundles of the same type simultaneously.
There are two ways to create a custom language bundle:
- Changing the language bundle by editing one-by-one property value.
- Downloading the language bundle, editing the file offline using the desired text editor, and importing it into the application.
Note: The keys must not be changed. Otherwise, the changes will not be visible.
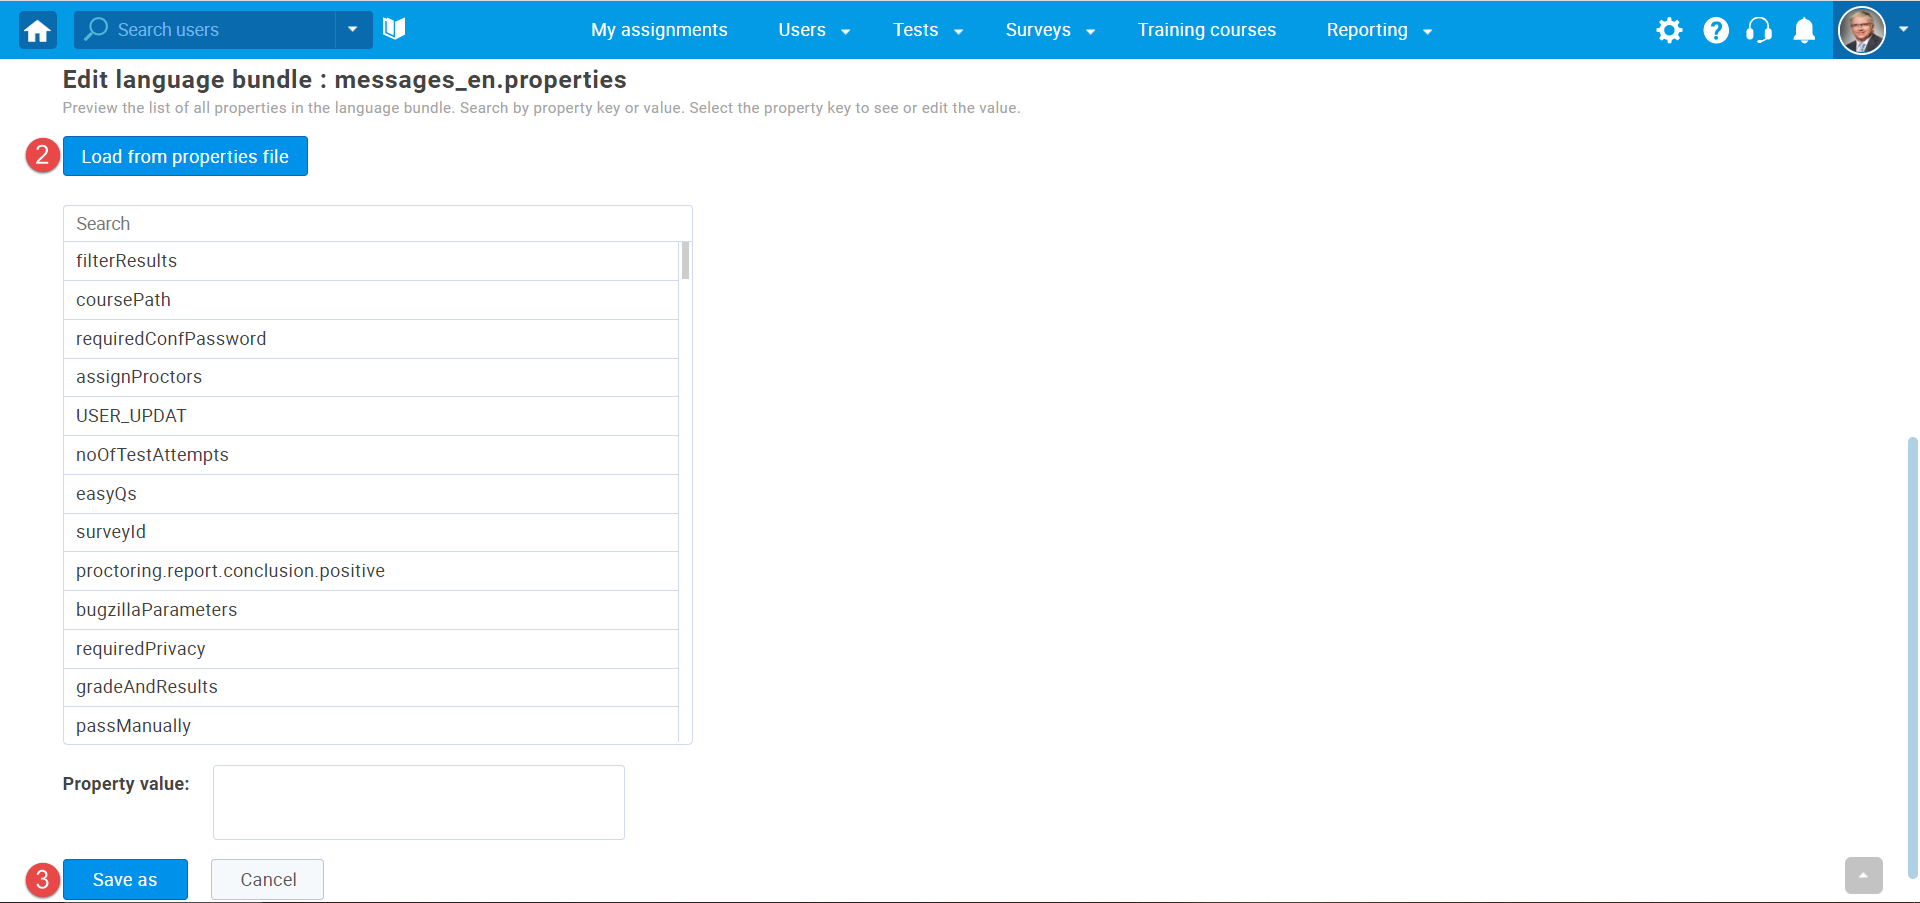
To create a new language bundle by editing one-by-one property value:
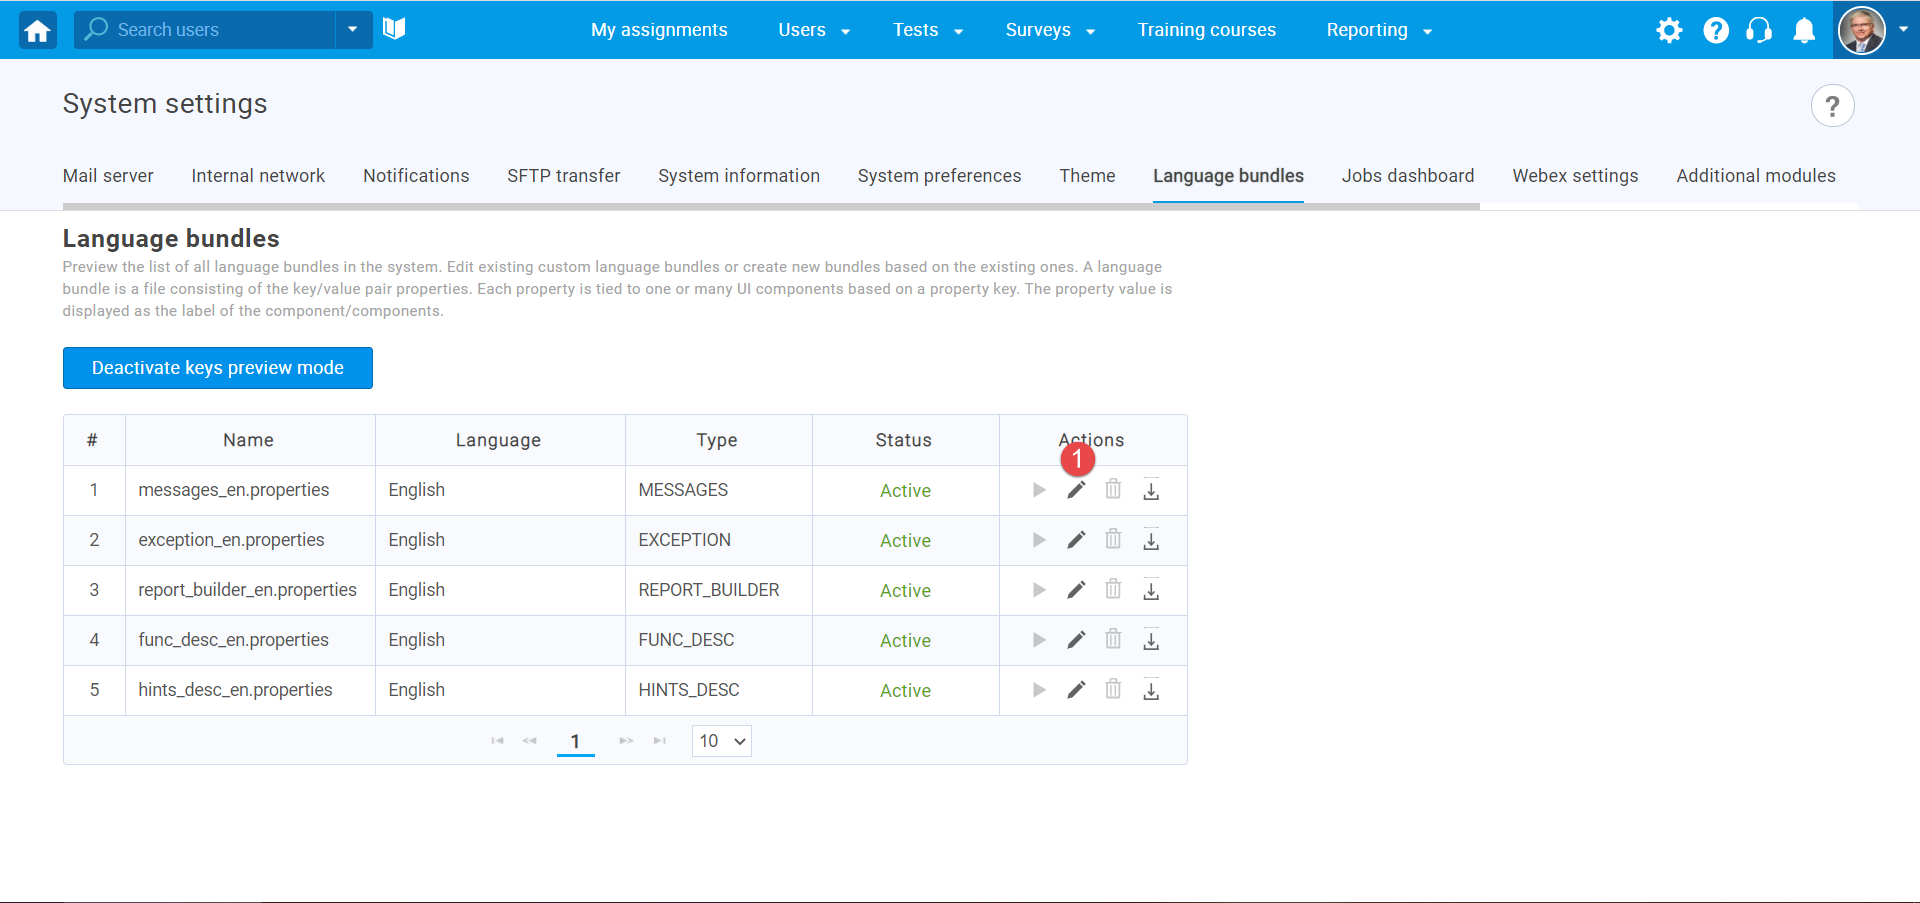
- Click the “Pencil” icon for the language bundle based on which you want to create a new one.
- Search the property value or key you want to change.
- Choose the desired key from the list. If you cannot find the key for the desired property value, you can use preview key mode to easily find it. For more information on how to use it, please visit the Preview keys mode.
- Edit the text.
- Confirm or discard the changes you made in the property value field.
Note: In one language bundle, you can edit as many property values as you want. All of them will be displayed when you activate the language bundle. - Click the “Save as” button to save a new language bundle.

To create a new language bundle by uploading a file:
- Download the language bundle and edit the file by changing the property values.
Note: The downloaded file will be saved in .properties format.
- Load the file by clicking the “Load from properties file” button. The “Choose file” dialog will appear. Choose a modified .properties file and confirm your choice.
- Click the “Save as” button to create a new language bundle or the “Save” button to update the existing one.
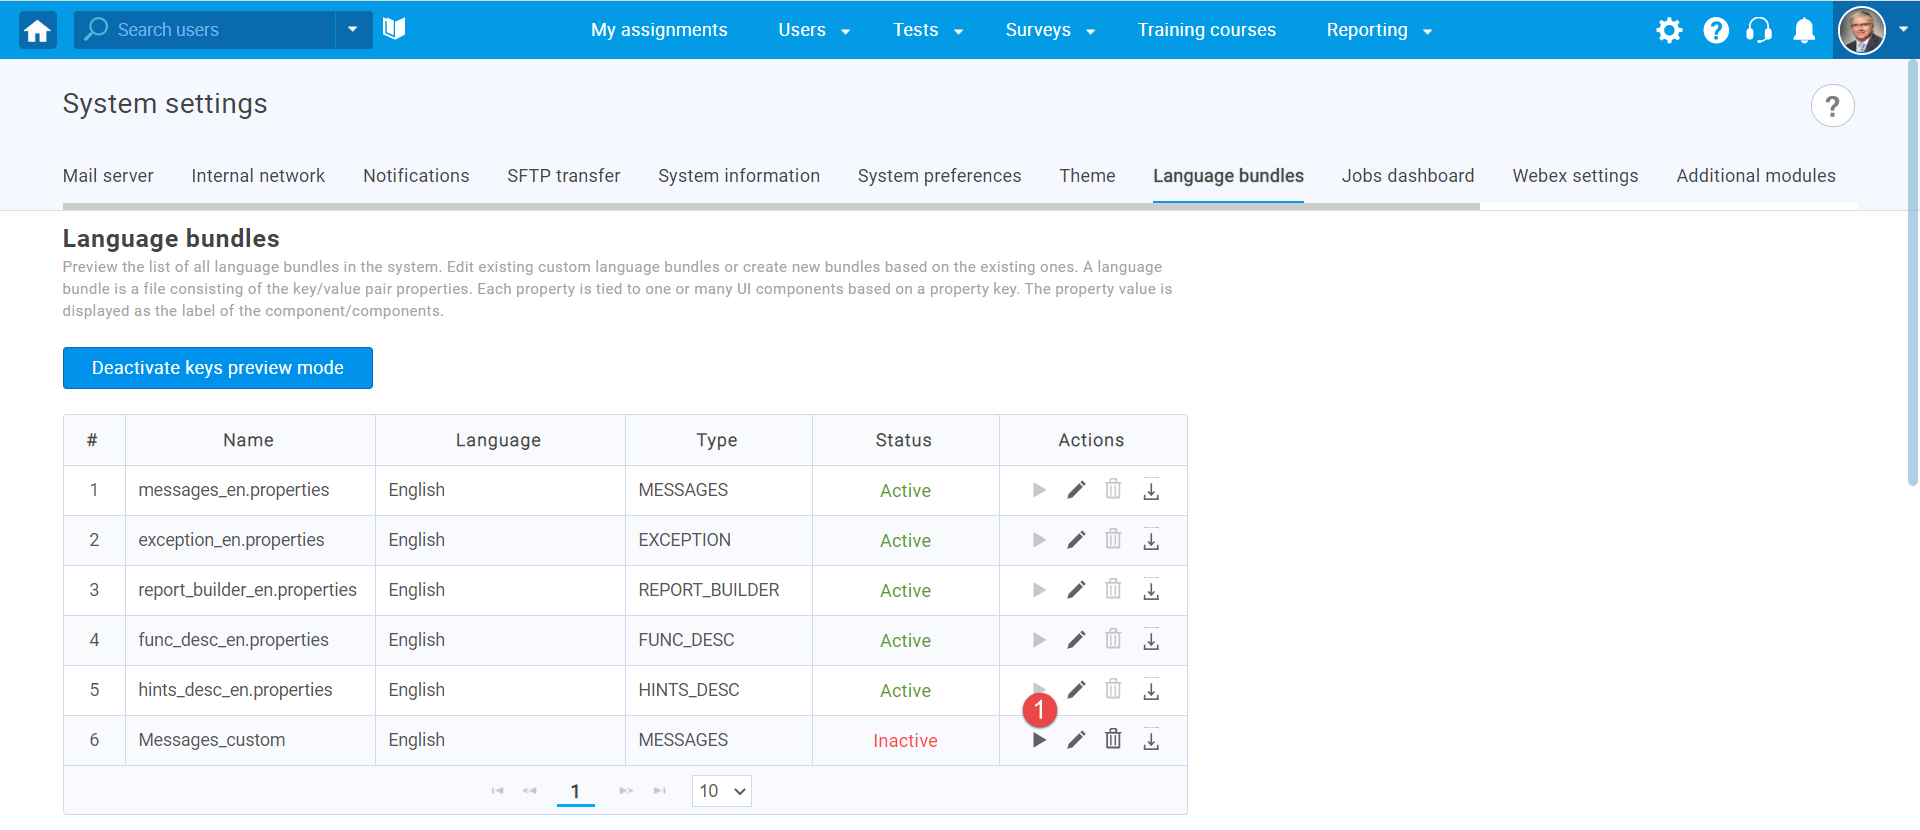
Once you create a new language bundle, it will have an inactive status.
To activate a new language bundle:
- Click the “Activate language” button.
- Click the “Yes” button in the pop-up window.
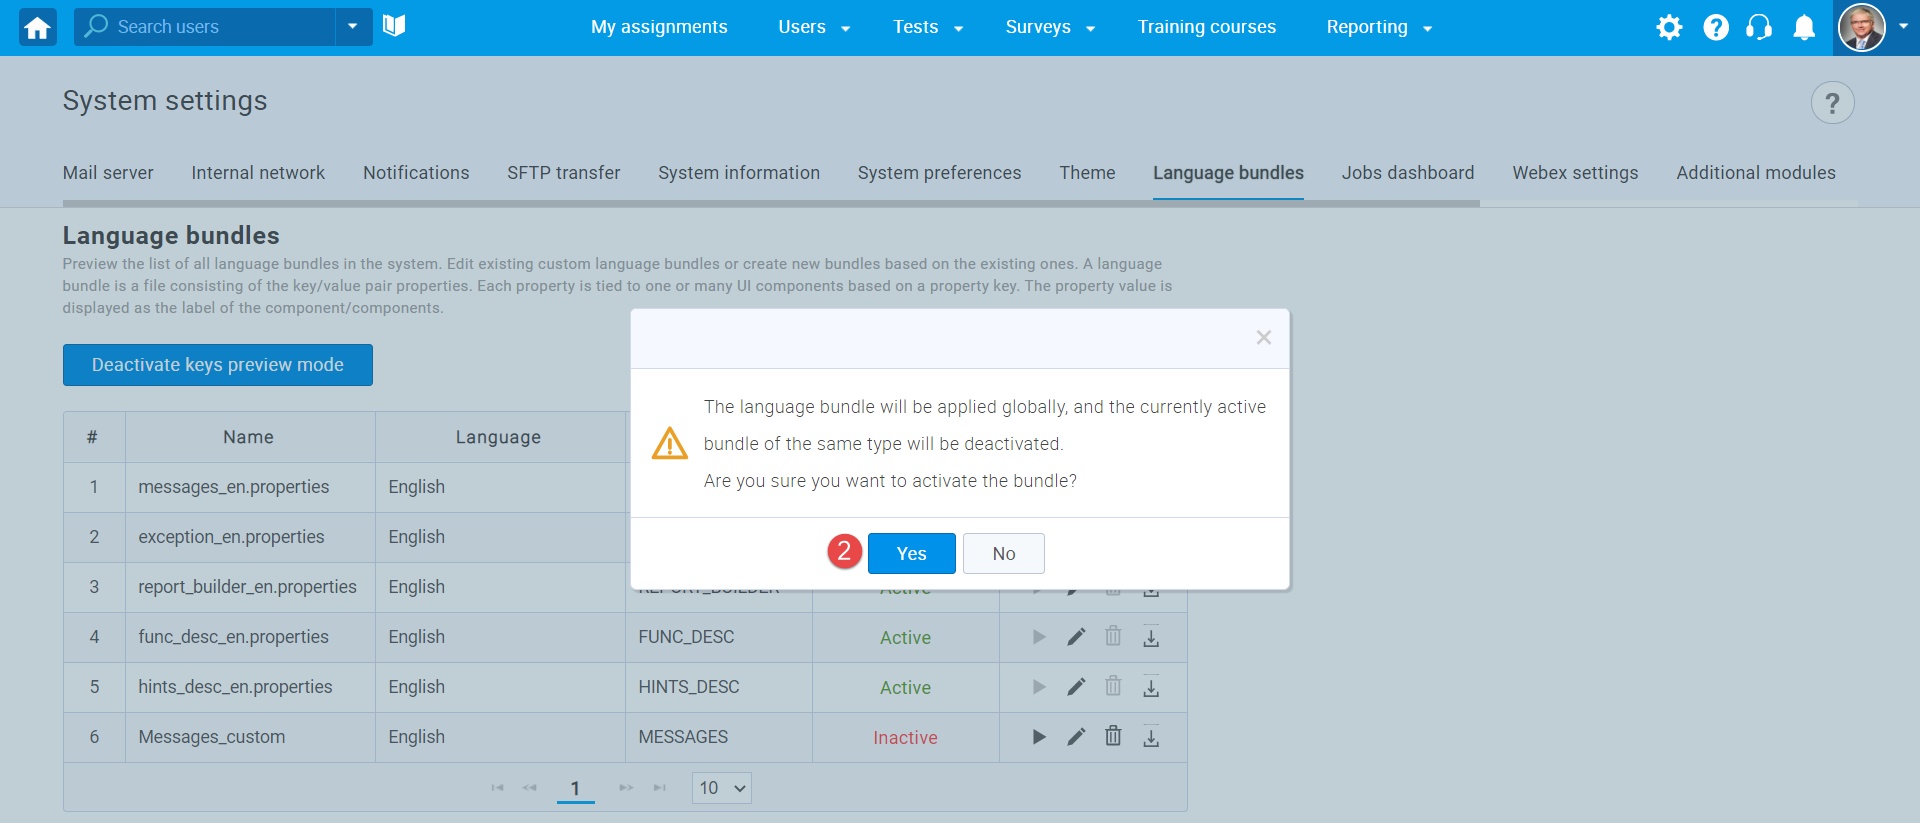
Note: Once you activate the language bundle, it will be applied globally, and the currently active bundle of the same type will be deactivated.
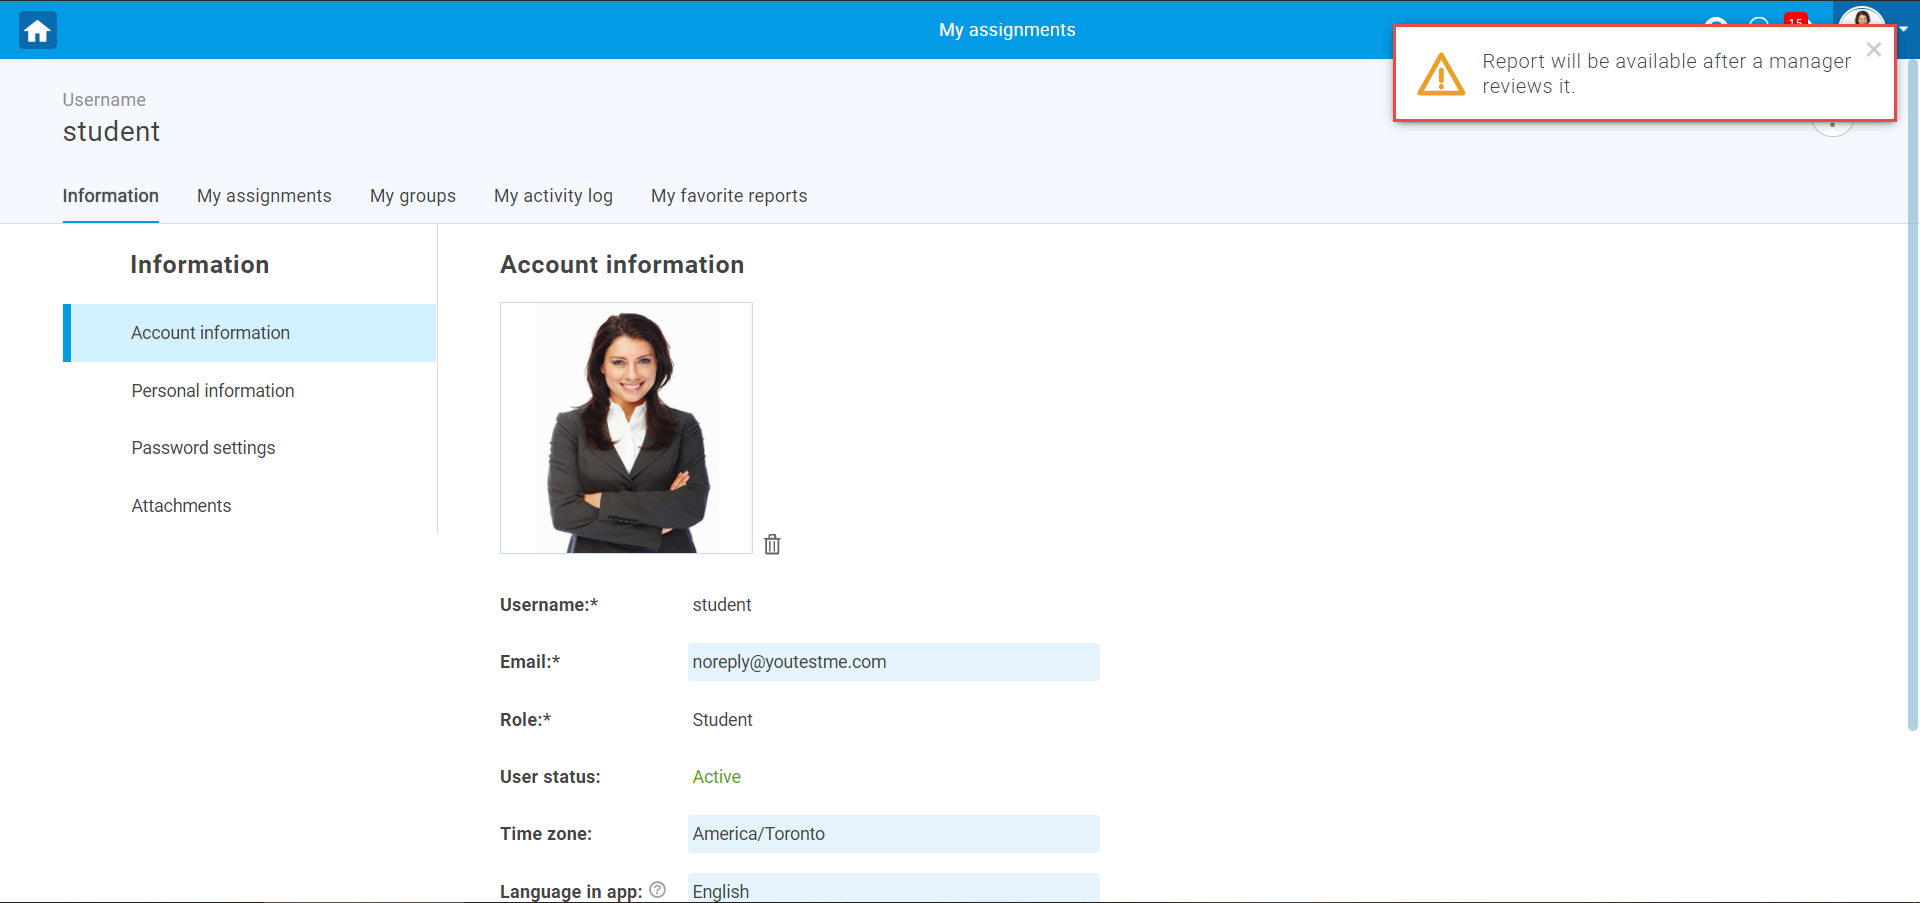
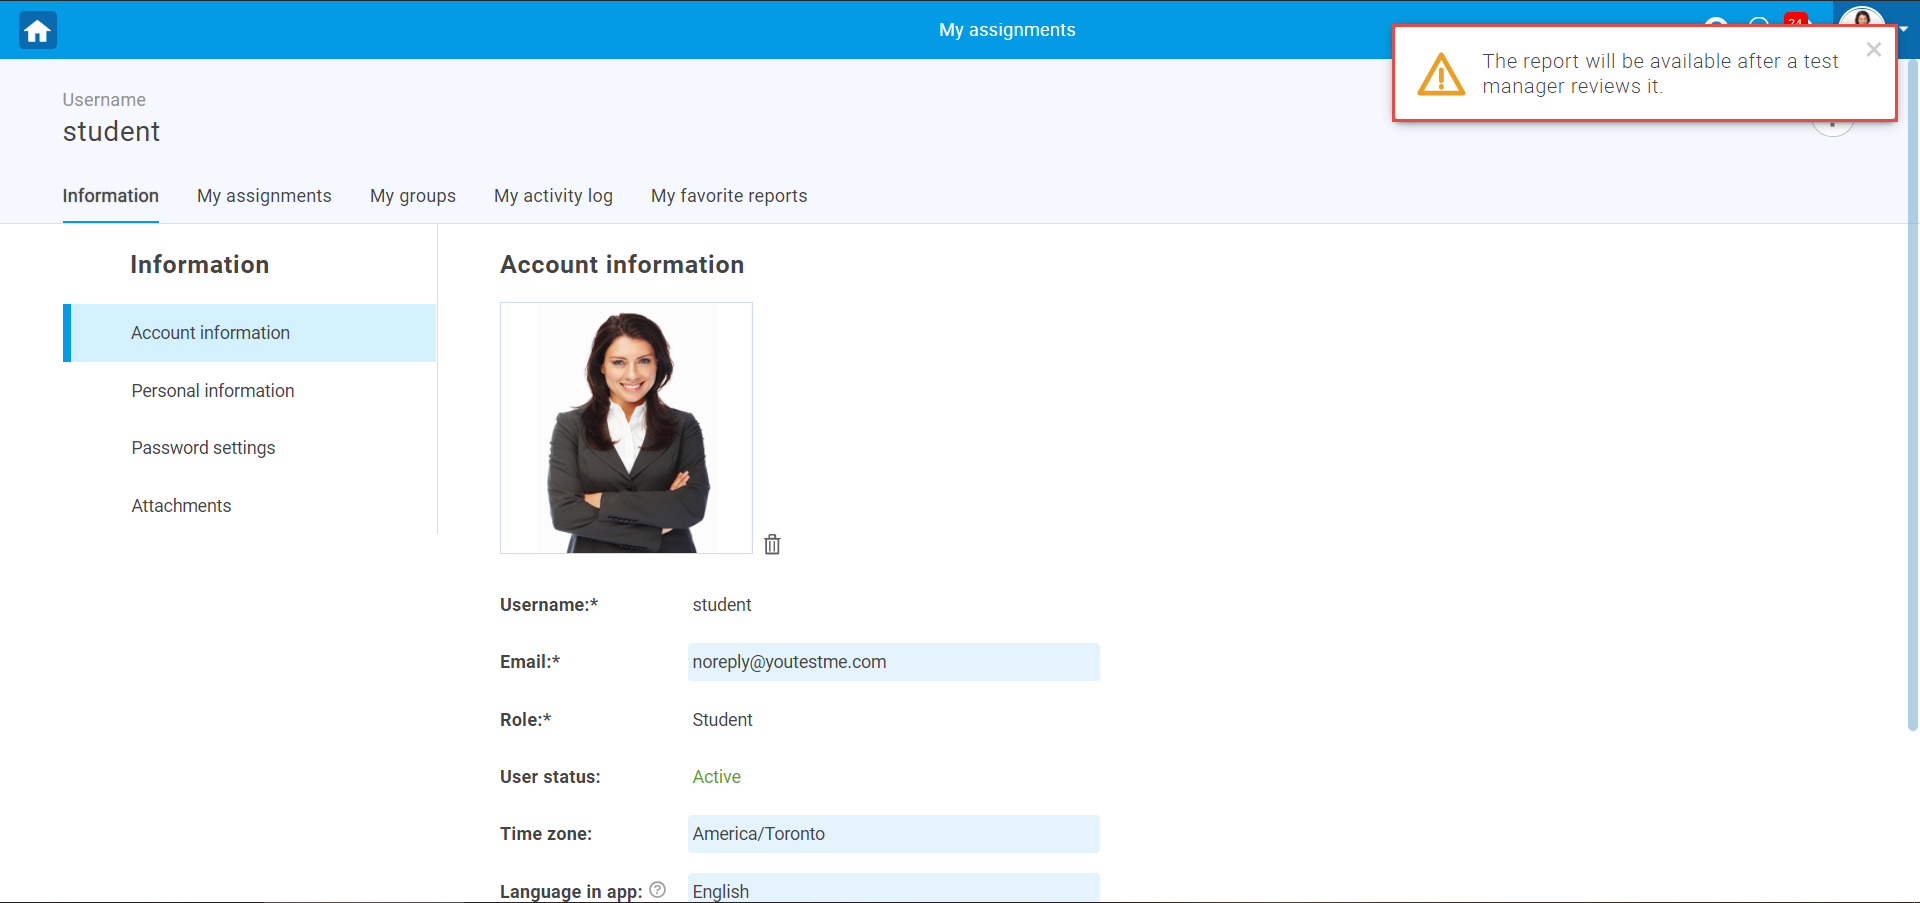
Example of how the message looks before and after changes.
Before
After
You can reactivate the default language bundle at any time. If you want to delete a custom language bundle:
- Click the “Trash can” icon.

- Click the “Yes” button in the pop-up window.
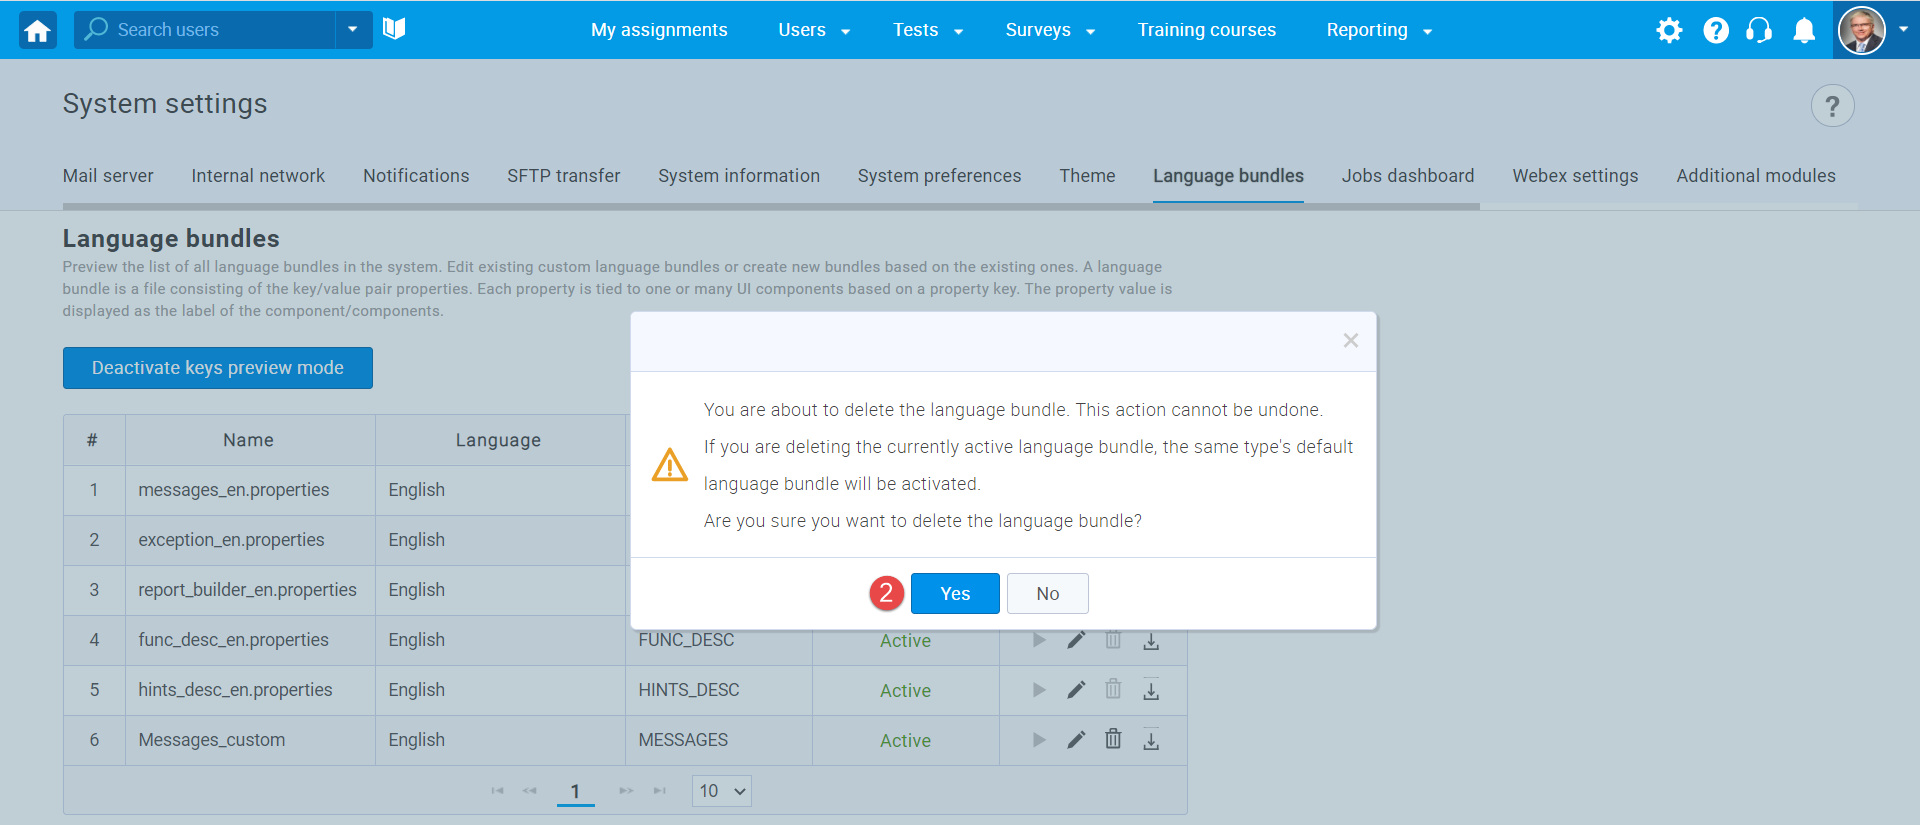
After deleting a custom language bundle that was active, the default bundle will be activated automatically.


