This article explains how to configure mail server in the System settings on the “Mail server” tab.
The “Mail server” tab serves to set parameters for a mail server that will be used for sending various notifications to administrators and users via email. There is no limit regarding the number of mail servers that can be set.
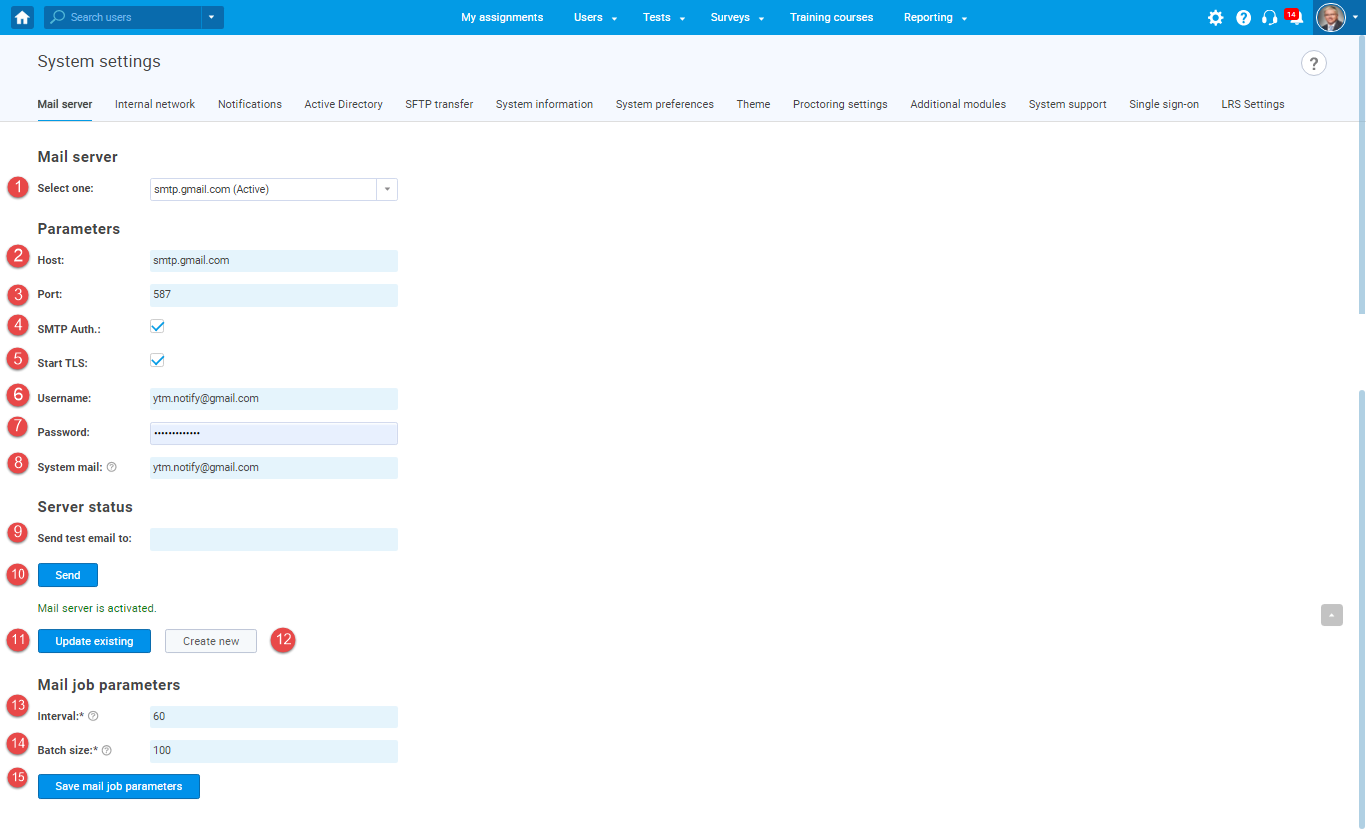 To configure the mail server, you need to set up the following:
- The drop-down list determines the mail server from which the parameters are displayed.
- Enter the SMTP hostname of the mail server.
- Enter the SMTP port number of the mail server.
- Enable SMTP authentication.
- Enable starting TLS protocol.
- Enter the username of the mail server.
- Enter the password for the mail server.
- Enter the email address a recipient will see as the sender’s address.
- You can test if the mail server works by sending an email to the address you specify in the “Send test email to” field.
- Click the “Send” button to send the test email.
- By clicking the “Update existing” button, the entered parameters will be applied to the selected mail server.
- By clicking on the “Create new” button, you will create a new mail server with the entered parameters.
- Interval – enter the number of seconds between two successive executions of the mail job.
- Batch size – enter the maximal number of emails sent during one execution of the mail job.
- Click the “Save mail job parameters” button to save the changes.
-
-
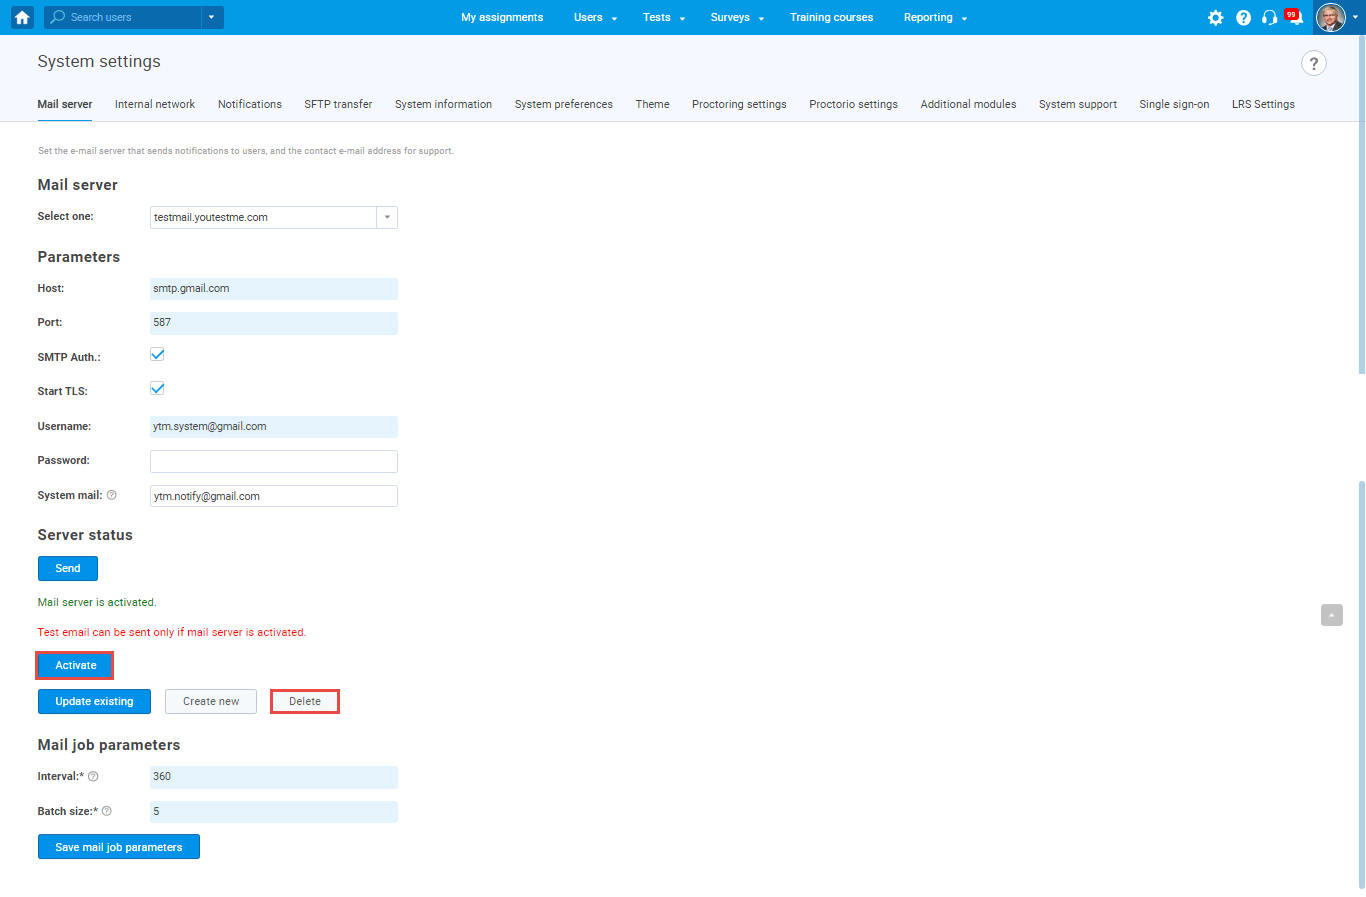 Note: Only one mail server can be active at a time. You can set a mail server to be active by clicking on the “Activate” button in the form of an inactive mail server. Only inactive mail servers can be deleted by clicking on the “Delete” button in the form of the inactive mail server.


