This article explains how to assign managers to the test and what is their role. To manage tests, you need to have at least an instructor role, or some custom role with specific permissions.
Make a user with permissions to manage a test:
There are two ways to create a new user in the application:
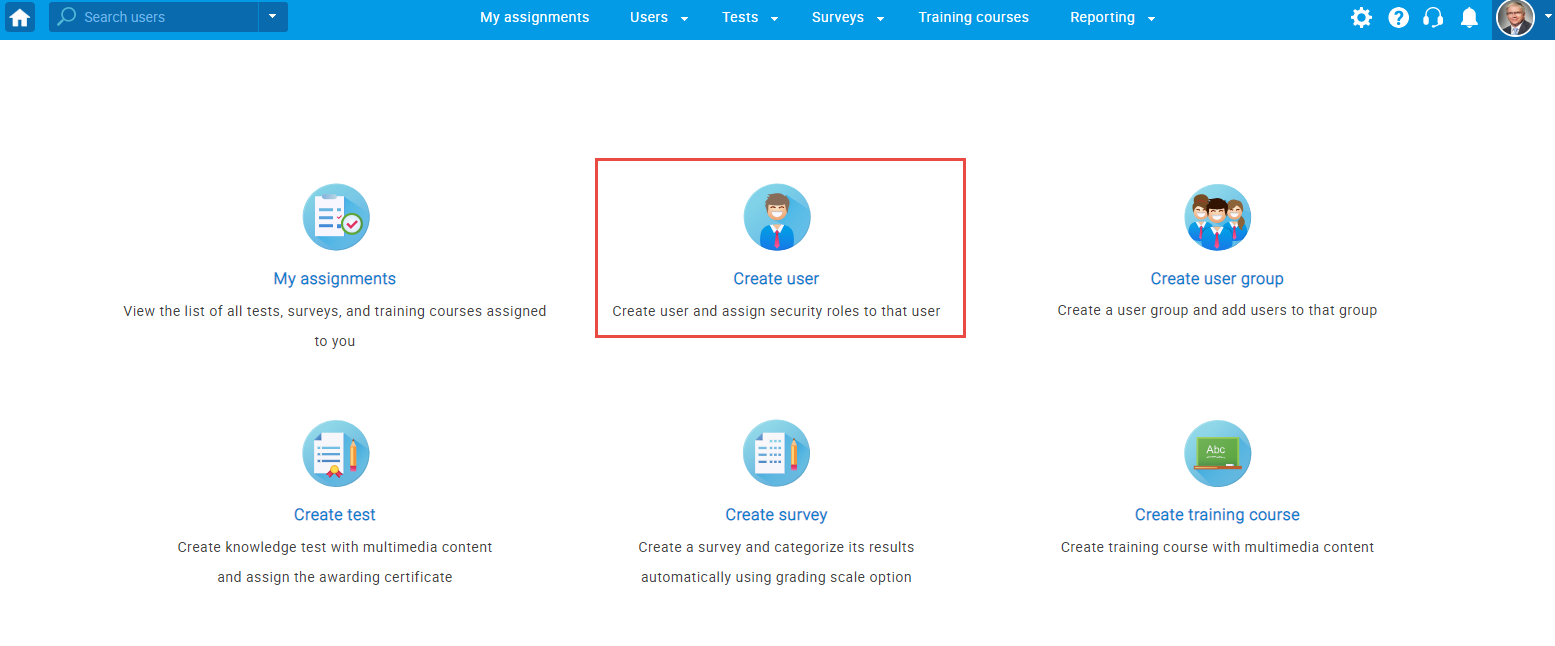
- Select the “Create user” quick action option from the home screen
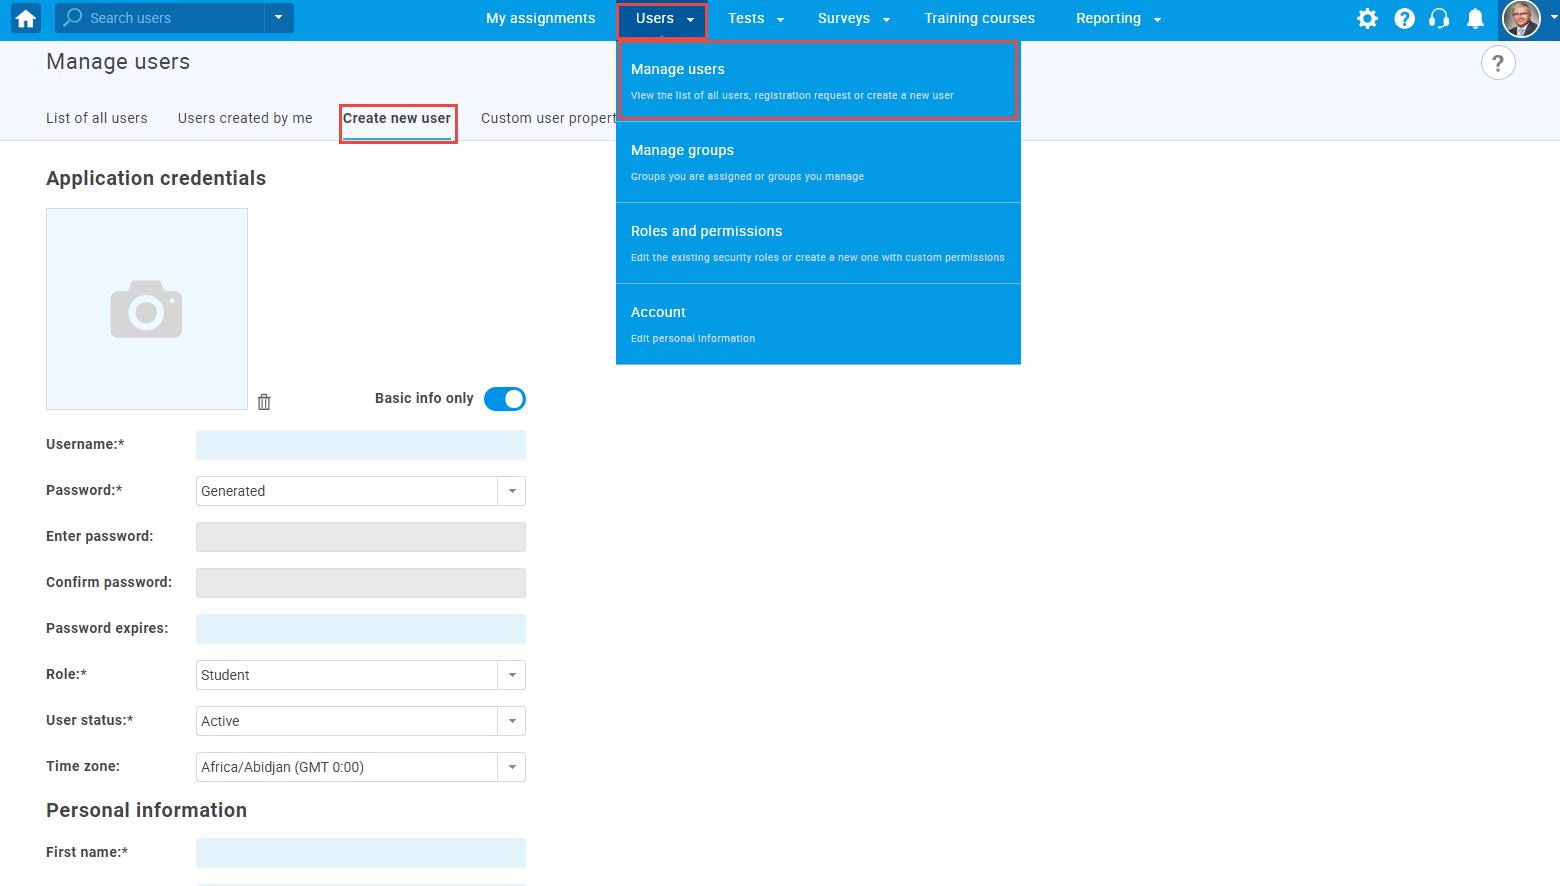
- Navigate to the “Users” option from the main menu and select “Manage users.” On the “Manage users” page, select the “Create new user” tab.
In the “Create new user” tab, you can manually add a new user by entering personal information and setting a role. If you want to choose a predefined role that can manage a test, the best option is to select the “Instructor” role because it has all the permissions that you need for managing a test enabled.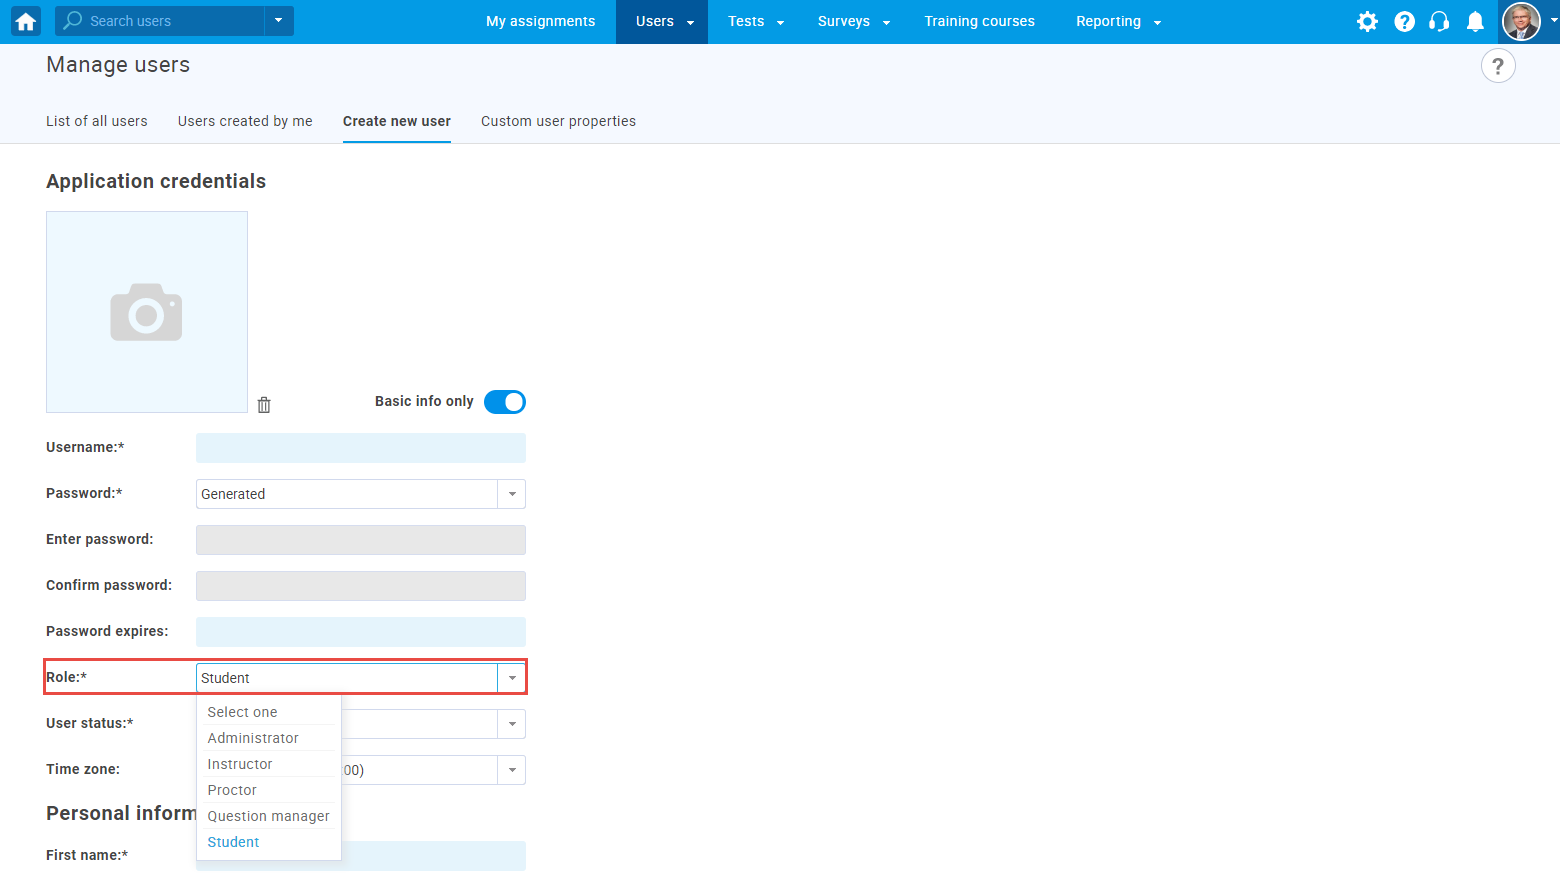
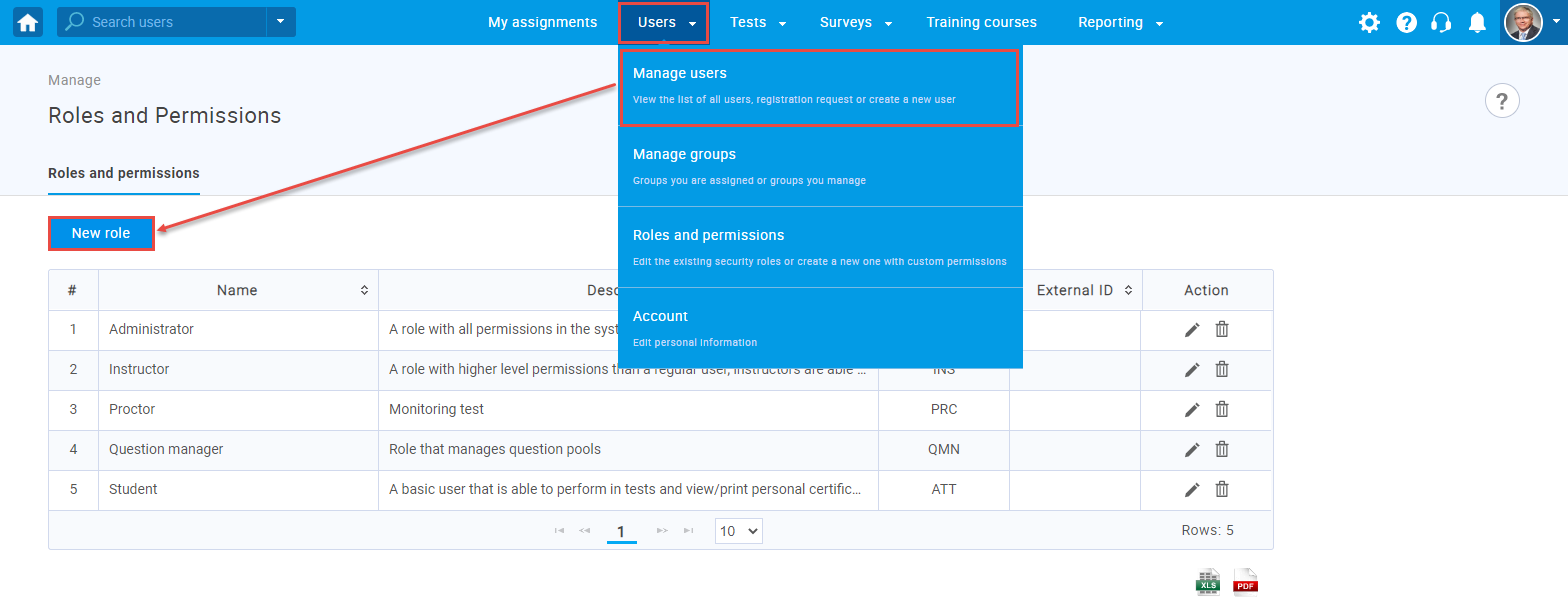
If you don’t want to use a predefined role, you can make a custom role and select specific permissions for it so the user with that role can manage a test. You can do so if you:
- Click on the “Users” option in the main menu
- Go over to the “Roles and Permissions” and then create a new role by clicking on the “New role” button
For a user to manage a test, he/she must have a role with at least these three permissions enabled: Page Access, Assign group members, and Fully manage personal tests and surveys.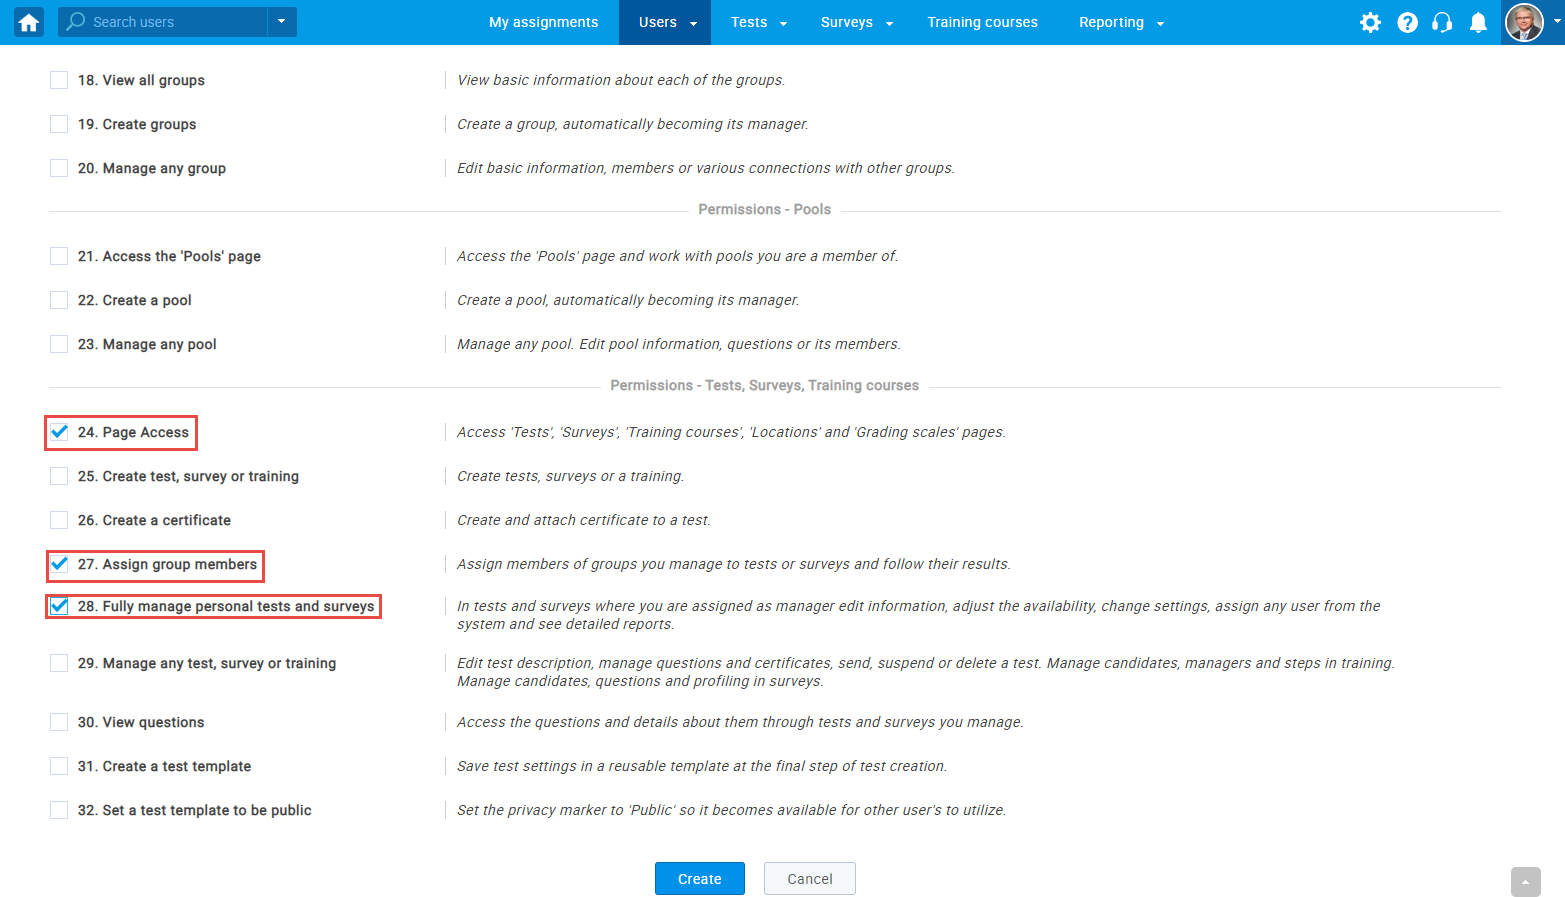
Assigning Test manager
To assign test managers, navigate to the “Tests” option in the main menu, and select “Manage tests.” Enter the name of the test in the search bar and select it.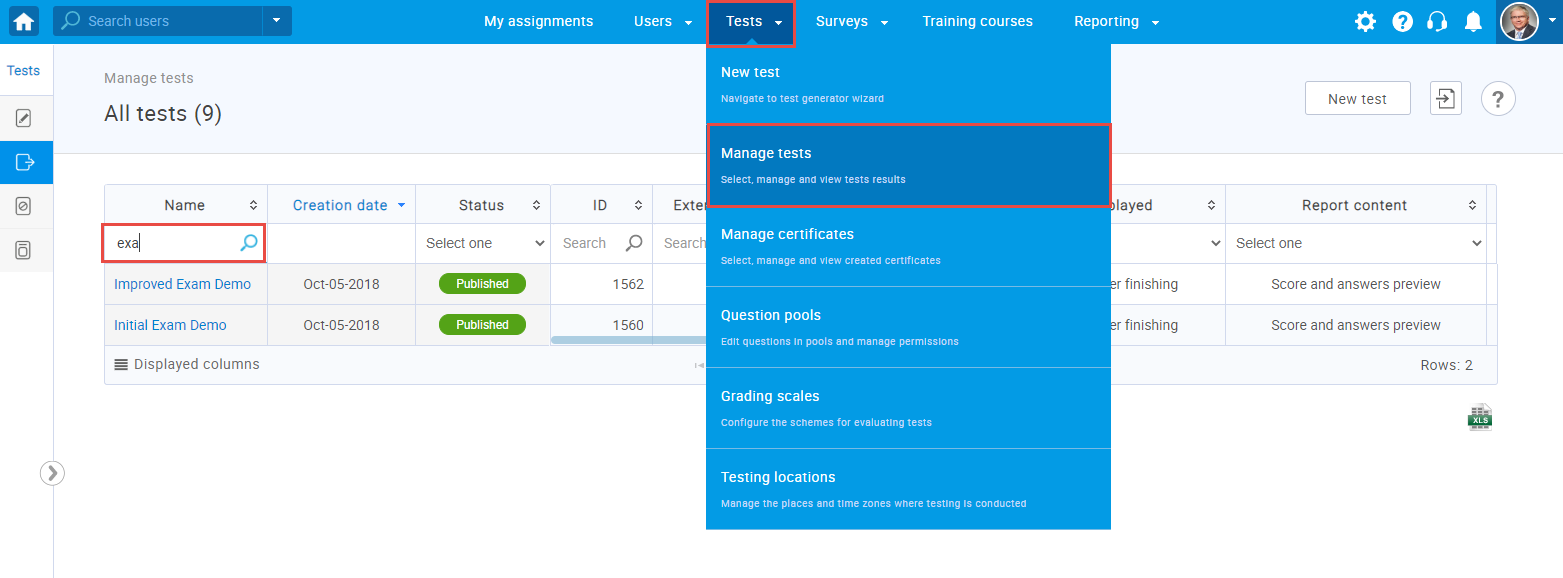
Select the drop-down menu option and choose the “Managers” tab.
When you select the “Assign managers” option, the pop-up window will show up. In the search bar, enter the username of the user that you want to assign as a manager, check the box for the user, and select the “Confirm” option.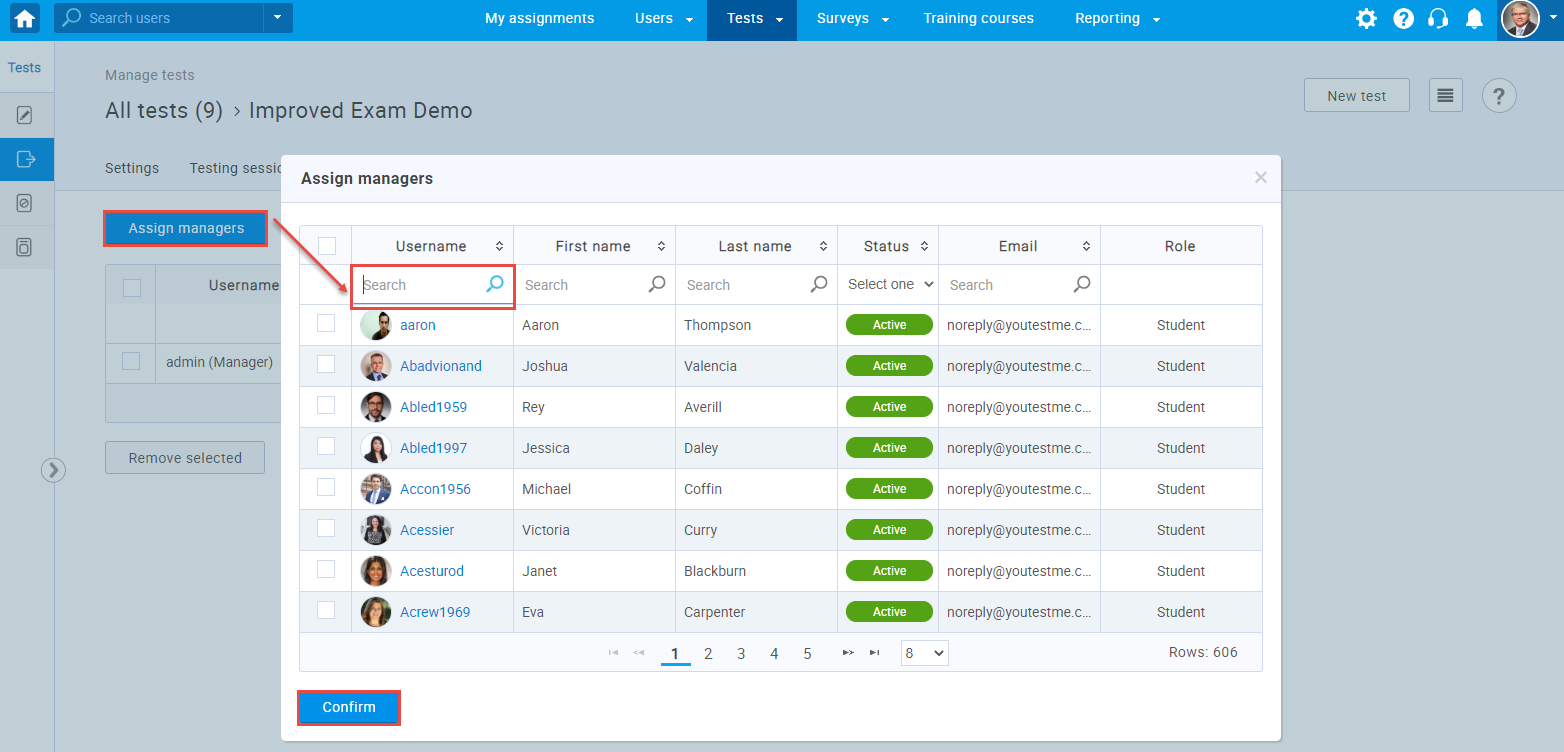
Now that you appointed a user as a manager of the specific test, he can edit tests, create new sessions, assign users to that session, and monitor those users while taking the test.


