YouTestMe GetCertified supports complete white-labeling.
This article explains how to change the application theme (interface colors), the appearance of the login page, set your logo and favicon, customize both in-app and email notifications, and configure your own link.
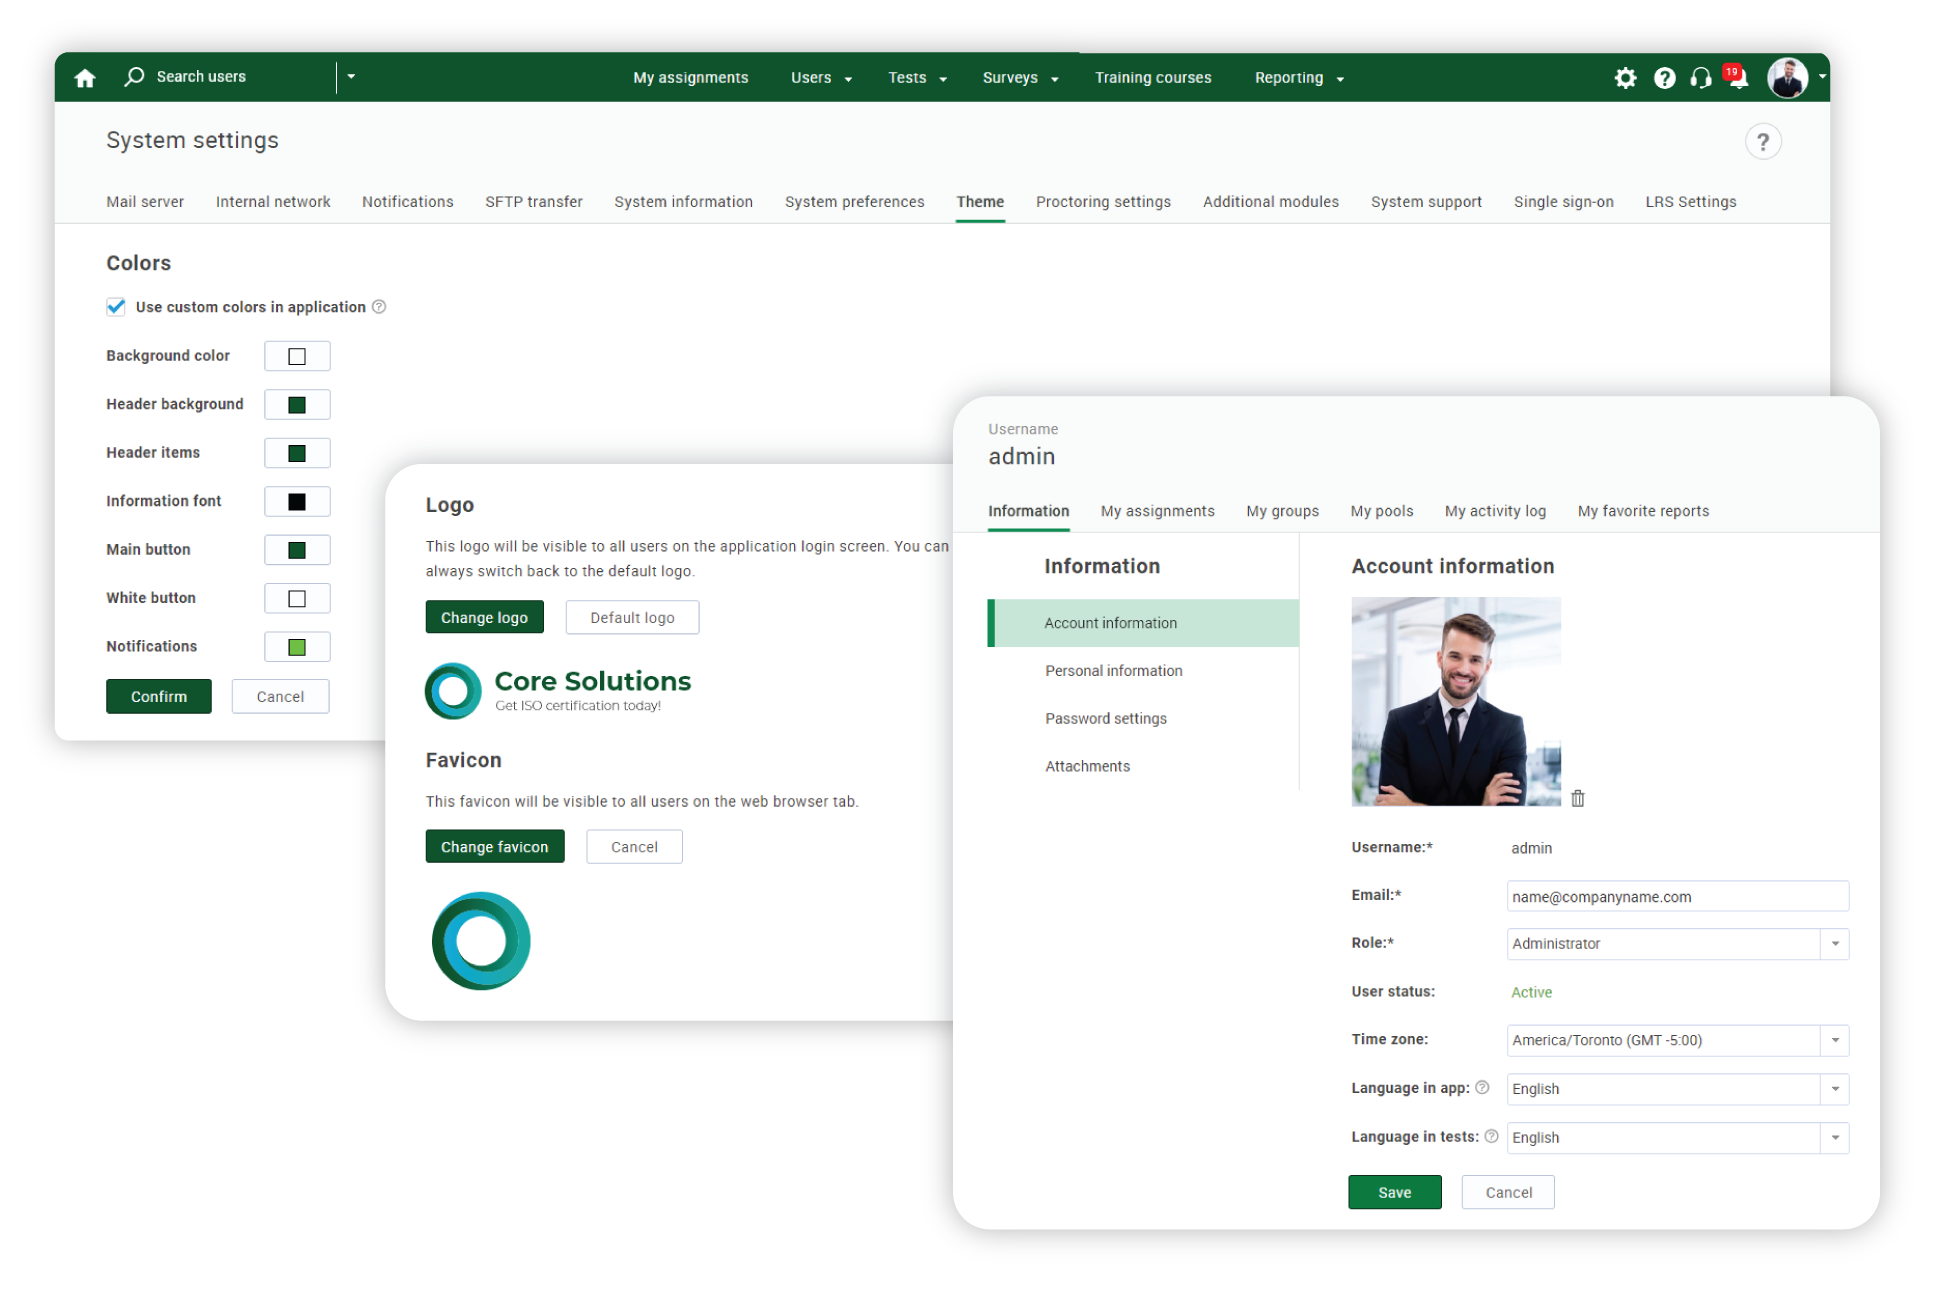
Change logo, theme and add instructions to login page
To fully customize the following things in the application, do the following:
- Select the System tab in the main menu.
- Select the System and customization tab.
- Select the Theme and language tab.
- Select the Logo and favicon tab.
- Set up your company logo.
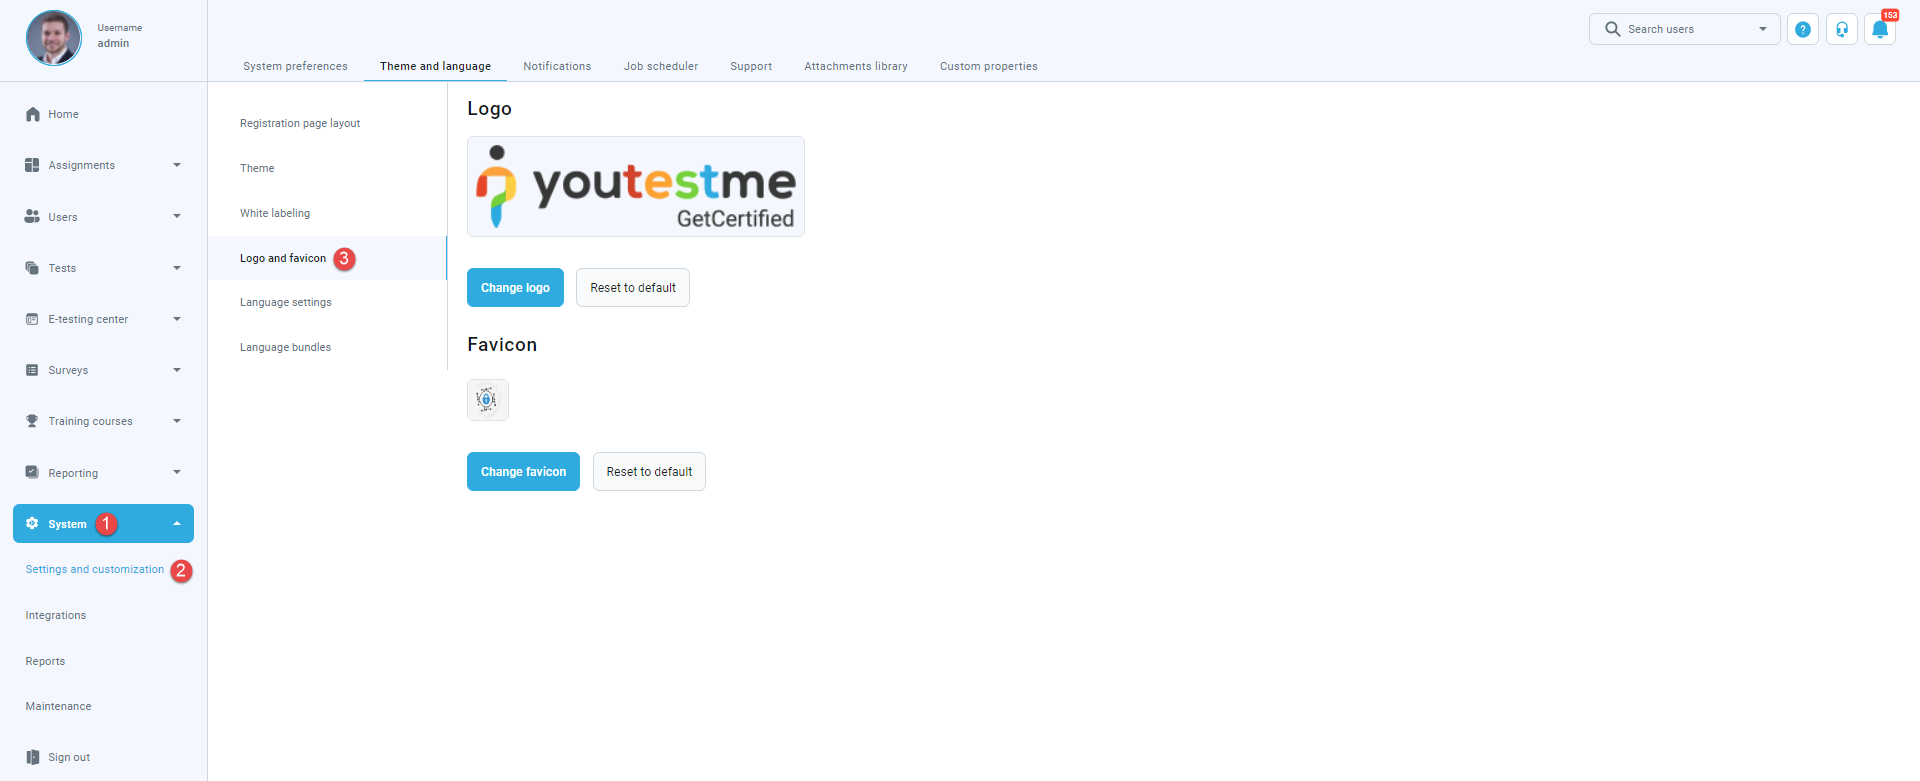
- Navigate to the Theme to customize the application colors.
- To customize the registration page, open the Registration page layout tab, where you may:
a) Require the first and the last name fields to be filled in upon registration
b) Require the external ID to be filled in upon registration
For more information, please watch this video.
Set Up Your Support Contacts
You can set up different contact settings that will be used for application support. You can set multiple email addresses of all people involved in the testing process, allowing users to get adequate help. For example, you can create one form for the instructor, one for the proctor, etc.
To set up support contacts, do the following:
- Select the System tab in the main menu.
- Select the System and customization tab.
- Select the Support tab.
- Insert the Purpose of the mail.
- Insert the Email.
- Insert optionally a phone number.
- Click on the Confirm button to save the changes.
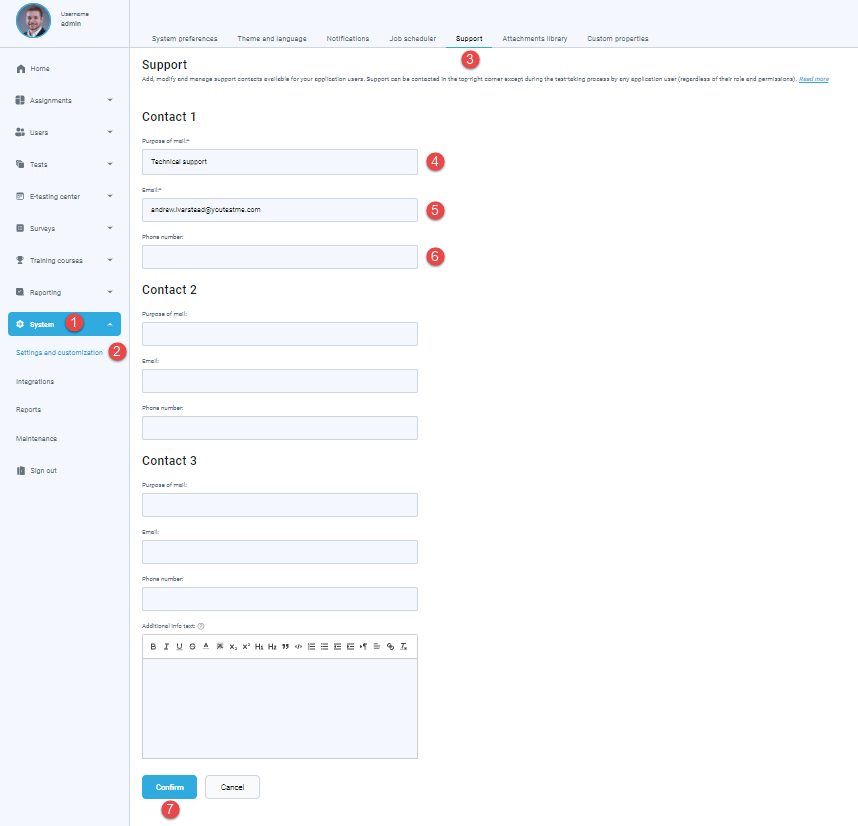
There can be created multiple contacts for support. The fields that have the “*” are mandatory.
To see how to create different contact forms, please watch this video.
Customizing In-App and Email Notifications
Both email and in-application notification templates are used if you want to notify users of some changes in the system. For example, send users usernames and passwords, notify them about new training courses, assigned new roles, and permissions, allowed test continuation, etc. Users can be informed either by email or in-application notifications. These event notifications are predefined, but content can be edited by changing email/application notification templates.
To edit the notification templates, do the following:
- Select the System tab in the main menu.
- Select the System and customization tab.
- Select the Notifications tab.
- Click on the Edit button for editing the in-application messages.
- Click on the Edit button for editing the email messages.

For more detailed instructions on how to modify the predefined notification, please check out this article.
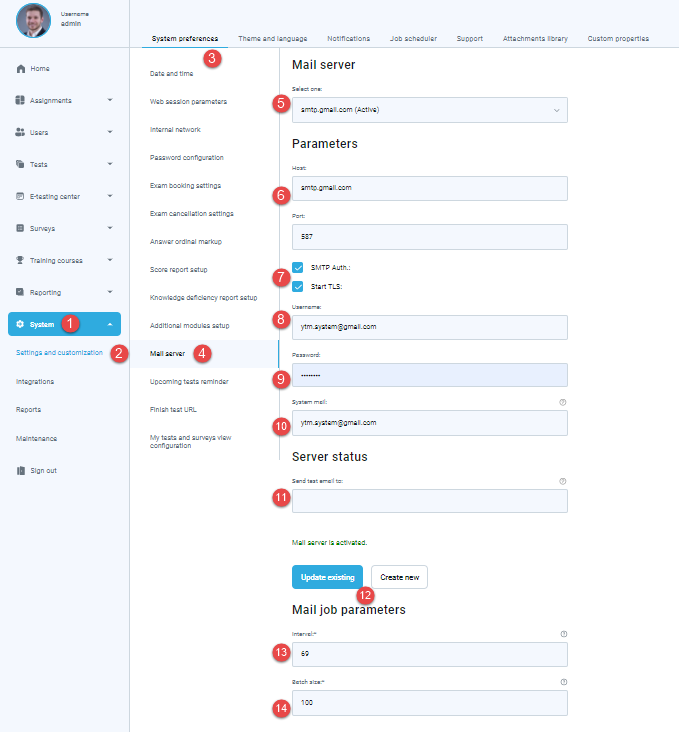
Configuring Mail Server
You have the ability to set up parameters for a mail server that will be used for sending various notifications to users via email. By setting up your mail server, candidates will receive all notifications via email address with your domain.
To set up the mail server, do the following:
- Select the System tab in the main menu.
- Select the System and customization tab.
- Select the Mail server tab.
- Select the mail server,
- Insert the host.
- Insert the port.
- Think the checkboxes for SMTP authorization and Start TLS.
- Insert the username.
- Insert the password.
- Insert the system mail.
- Insert the email for the “Test mail”.
- Update the existing mail server or create a new one.
- Insert interval for the mail job.
- Insert the batch size.
For more detailed instructions on how to configure your own mail server, please check out this article.
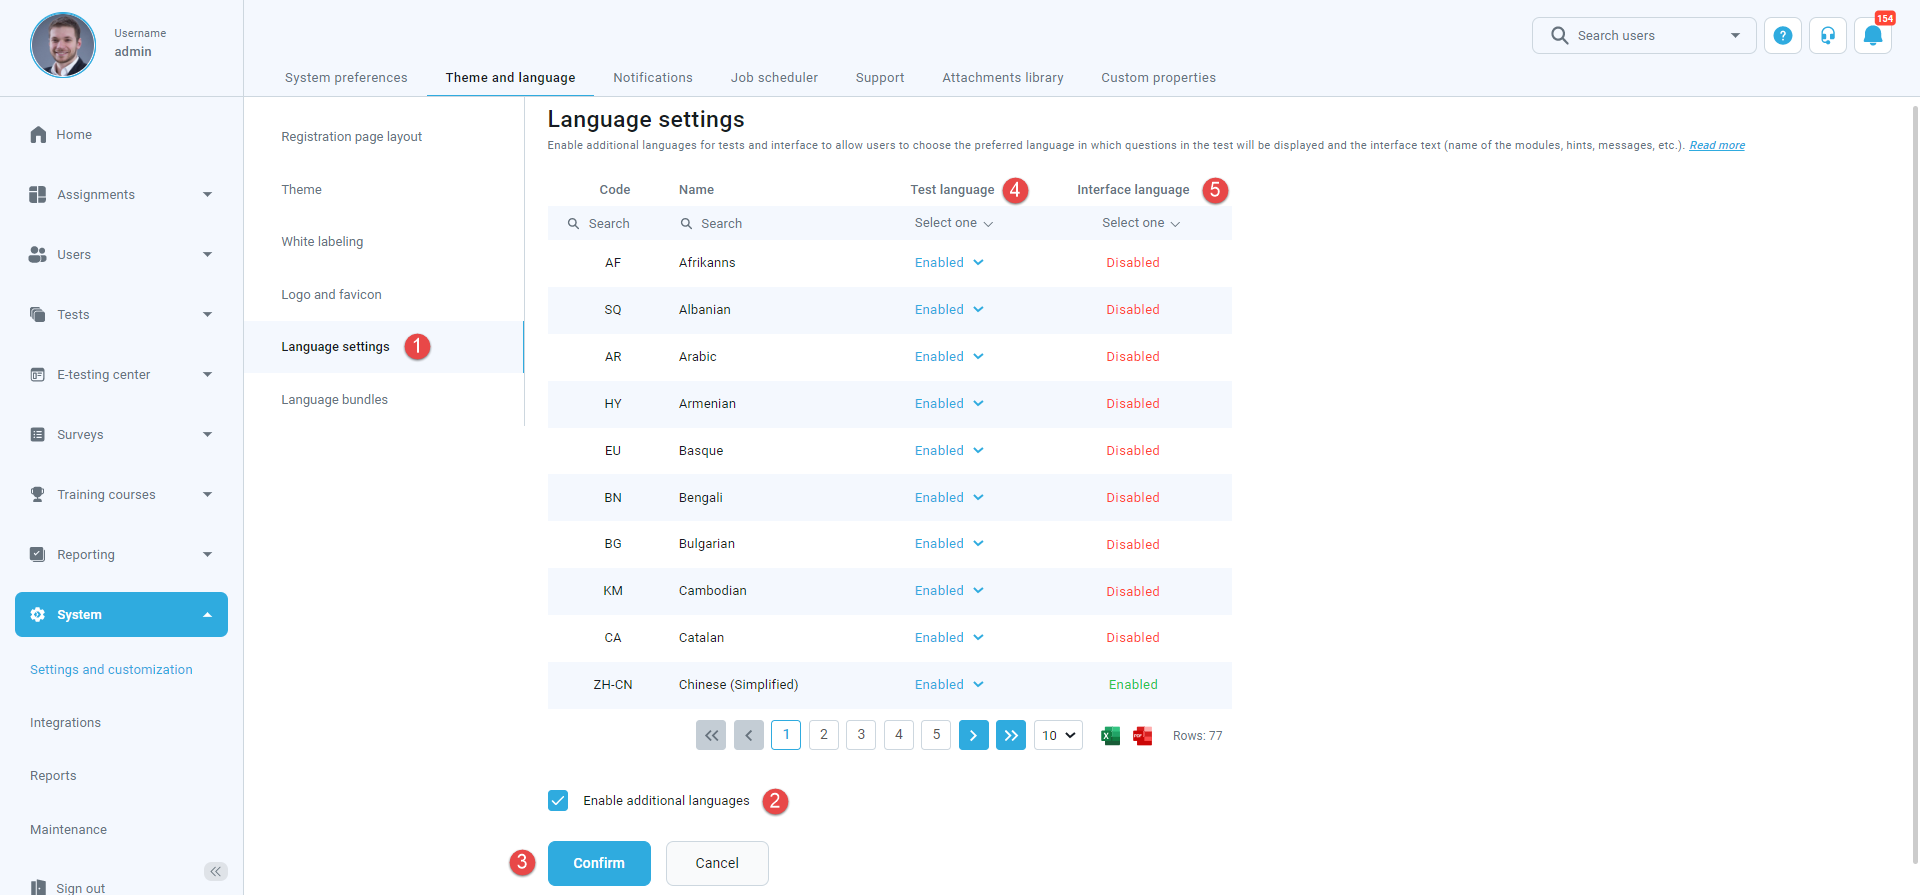
Language settings
To set up the desired language, do the following:
- Go to the Language settings.
- Thick the checkbox Enable additional languages.
- Click on the Confirm button.
- Enable/disable test language.
- Enable/disable interface language.
Language bundles settings
In the “Language bundles” tab, users can customize the application interface text according to their needs – change labels’ names, create new hints, modify notifications’ content.
A language bundle is a file consisting of the key/value pair properties. Each property is connected to one or multiple UI components based on a property key.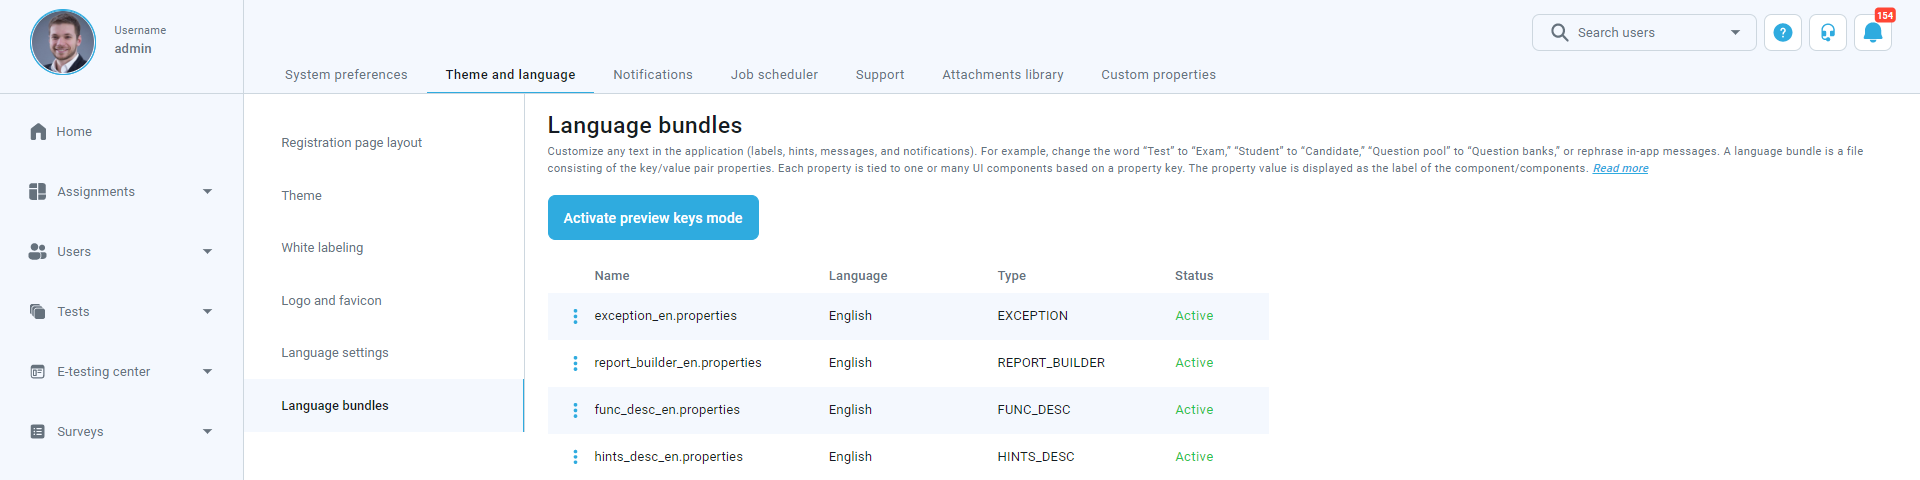
Note that it is not possible to delete default language bundles, but you can create new ones based on them. Also, it is not possible to have two active bundles of the same type simultaneously.
-
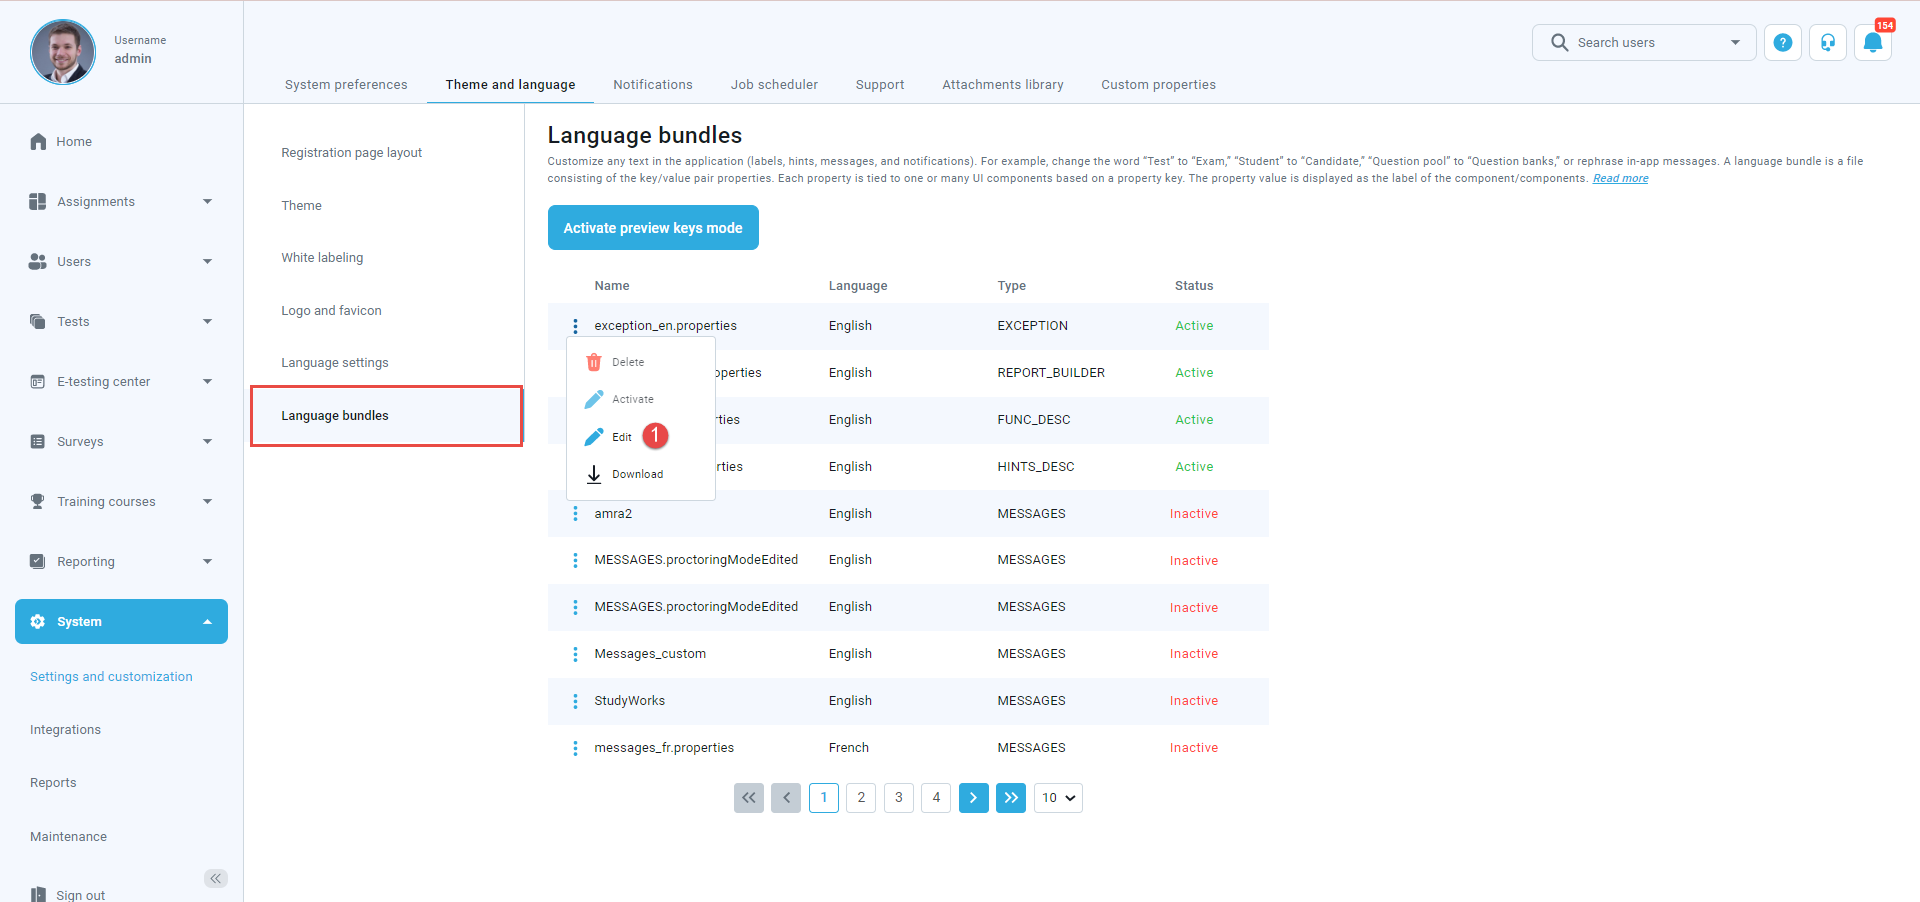
- There are two ways to create a custom language bundle:
- Changing the language bundle by editing one-by-one property value.
- Downloading the language bundle, editing the file offline using the desired text editor, and importing it into the application.
Note: The keys must not be changed. Otherwise, the changes will not be visible.
-
-
- To create a new language bundle by editing one-by-one property values:
- Click the Actions option and select the Pencil icon for the language bundle based on which you want to create a new one.
-
-
- Search the property value or key you want to change.
- Choose the desired key from the list. If you cannot find the key for the desired property value, you can use preview key mode to easily find it. For more information on how to use it, please visit the Preview keys mode.
- Edit the text.
- Confirm or discard the changes you made in the property value field.


