This article explains how a test manager can add instructions to the test that candidates need to acknowledge before starting the test.
Adding test instructions
Test instructions are added during the test creation.
To create a test, hover over the “Tests” in the main menu, and select the “New test” (for a video tutorial on how to create a test, please watch this video).
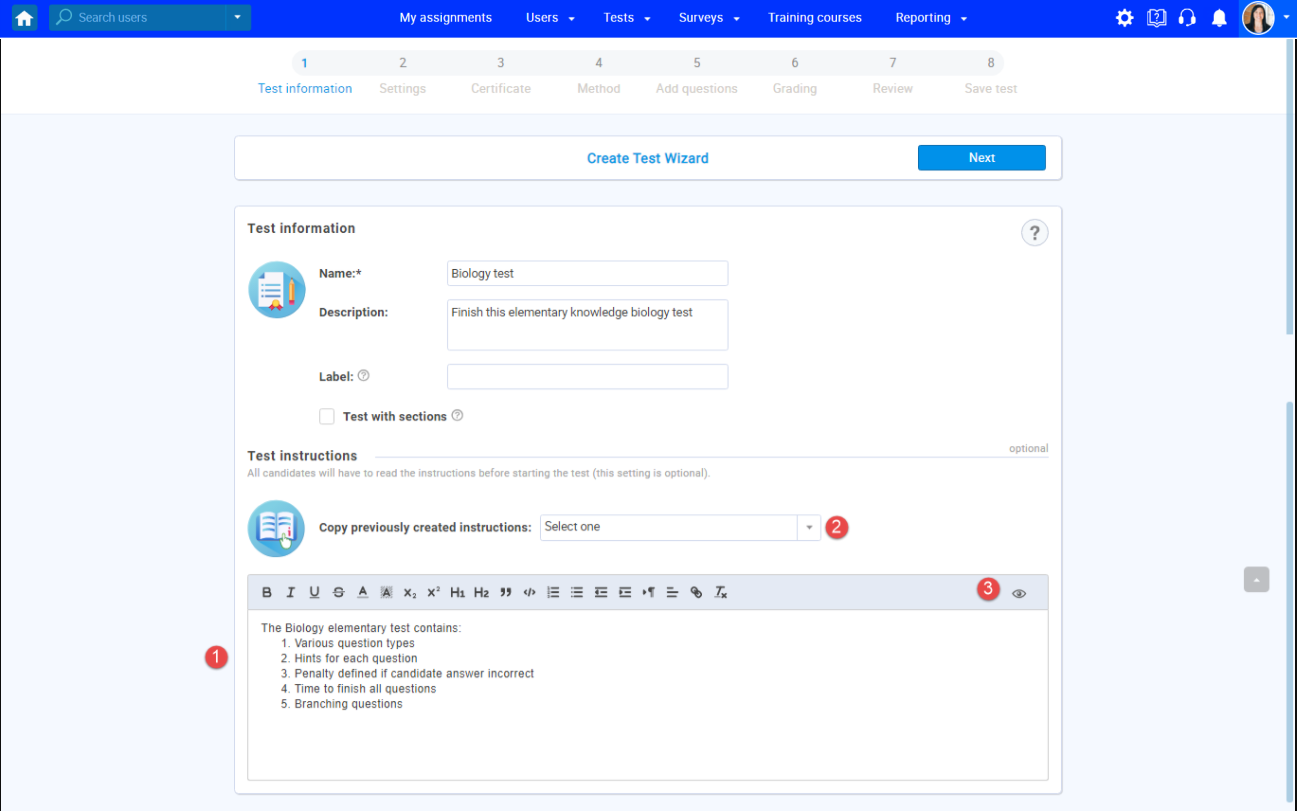
The Test Creation Wizard will open, where you should:
- Write the instruction in the field.
- Or load previously created instructions by selecting the saved instruction from the drop-down list. All the instructions written for the published test will appear in this list.
- Preview the instructions – click the eye icon to see the instructions from the candidate’s perspective.
Preview of test instructions
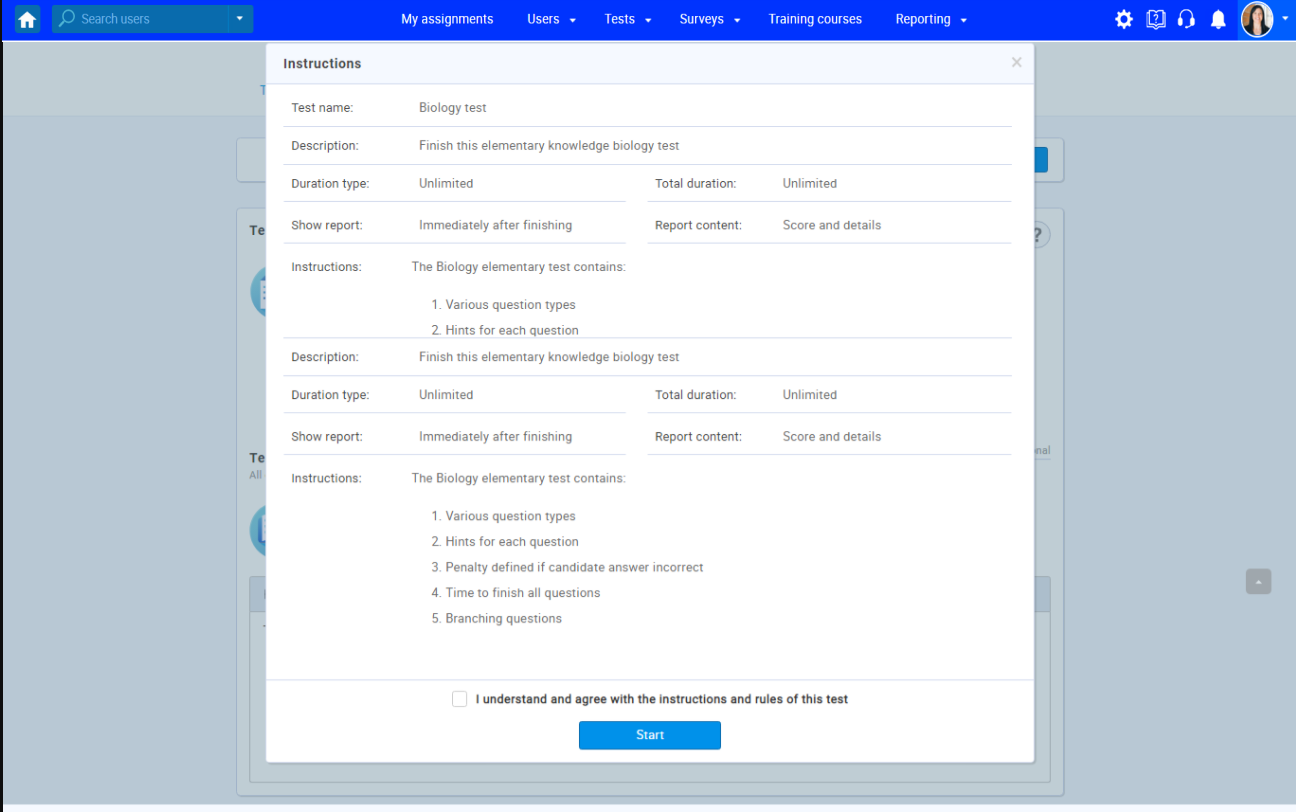
You can see the candidate’s perspective of the instructions in the picture below. To start the test, candidates need to agree with the rules (by ticking the box) in order to be able to start the test.
Verify if the test instructions are visible in the notification email sent to the candidates
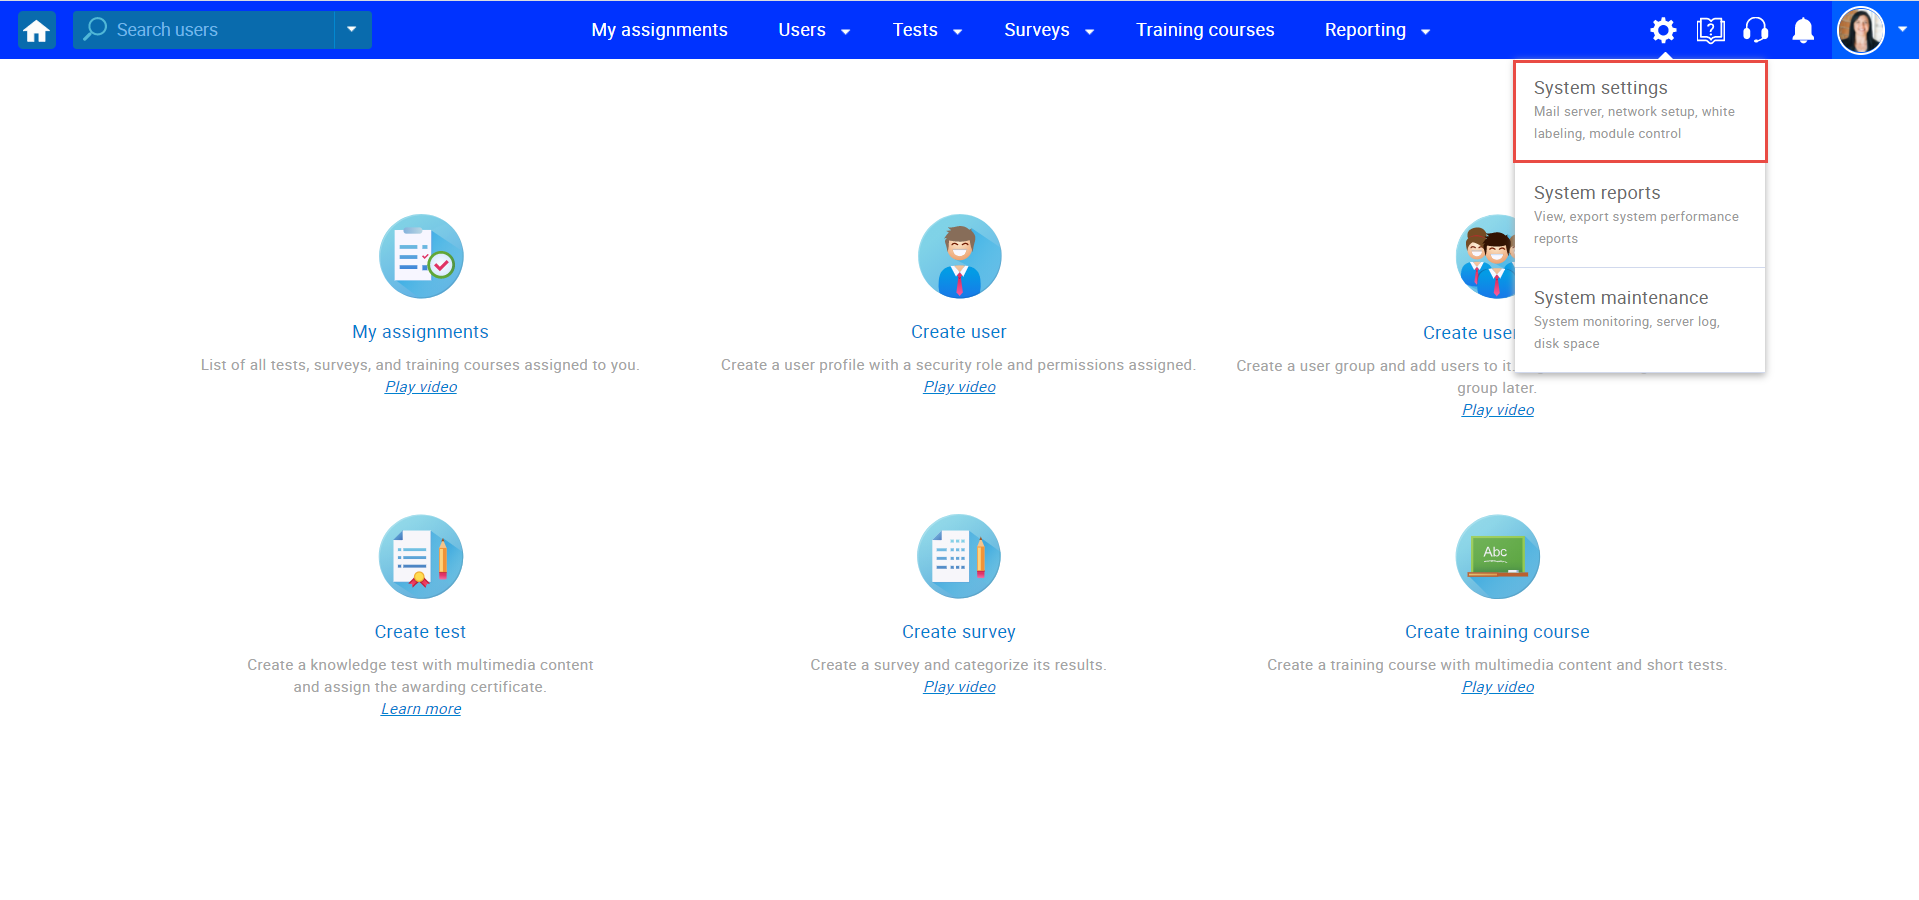
Navigate to the “System Settings” in the main menu.
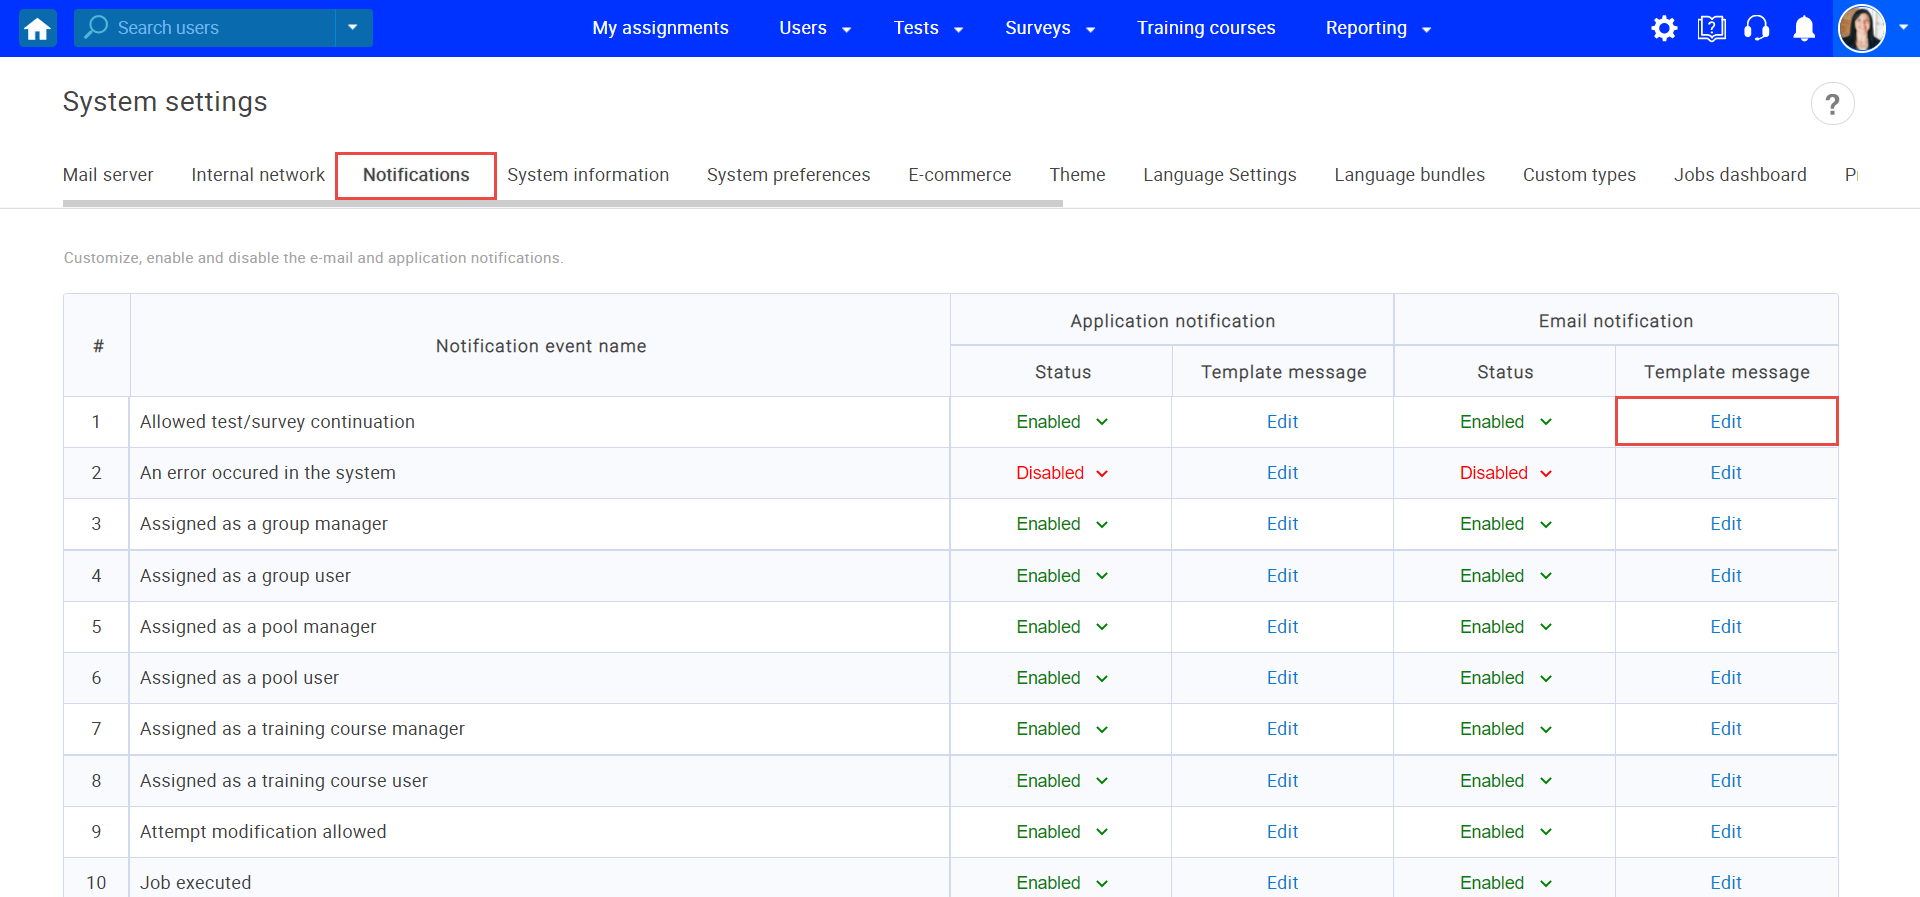
Navigate to the “Notifications” tab. In this tab, you can customize, enable and disable the e-mail and application notifications. Find the “Test published” event in the “Notification event name” column, and click the edit the “Template message” for “Email notification“.
The pop-up window will appear, and you will be able to edit and preview the email template. The “List of variables” should contain the “Instructions“, which will be sent to test takers by email.
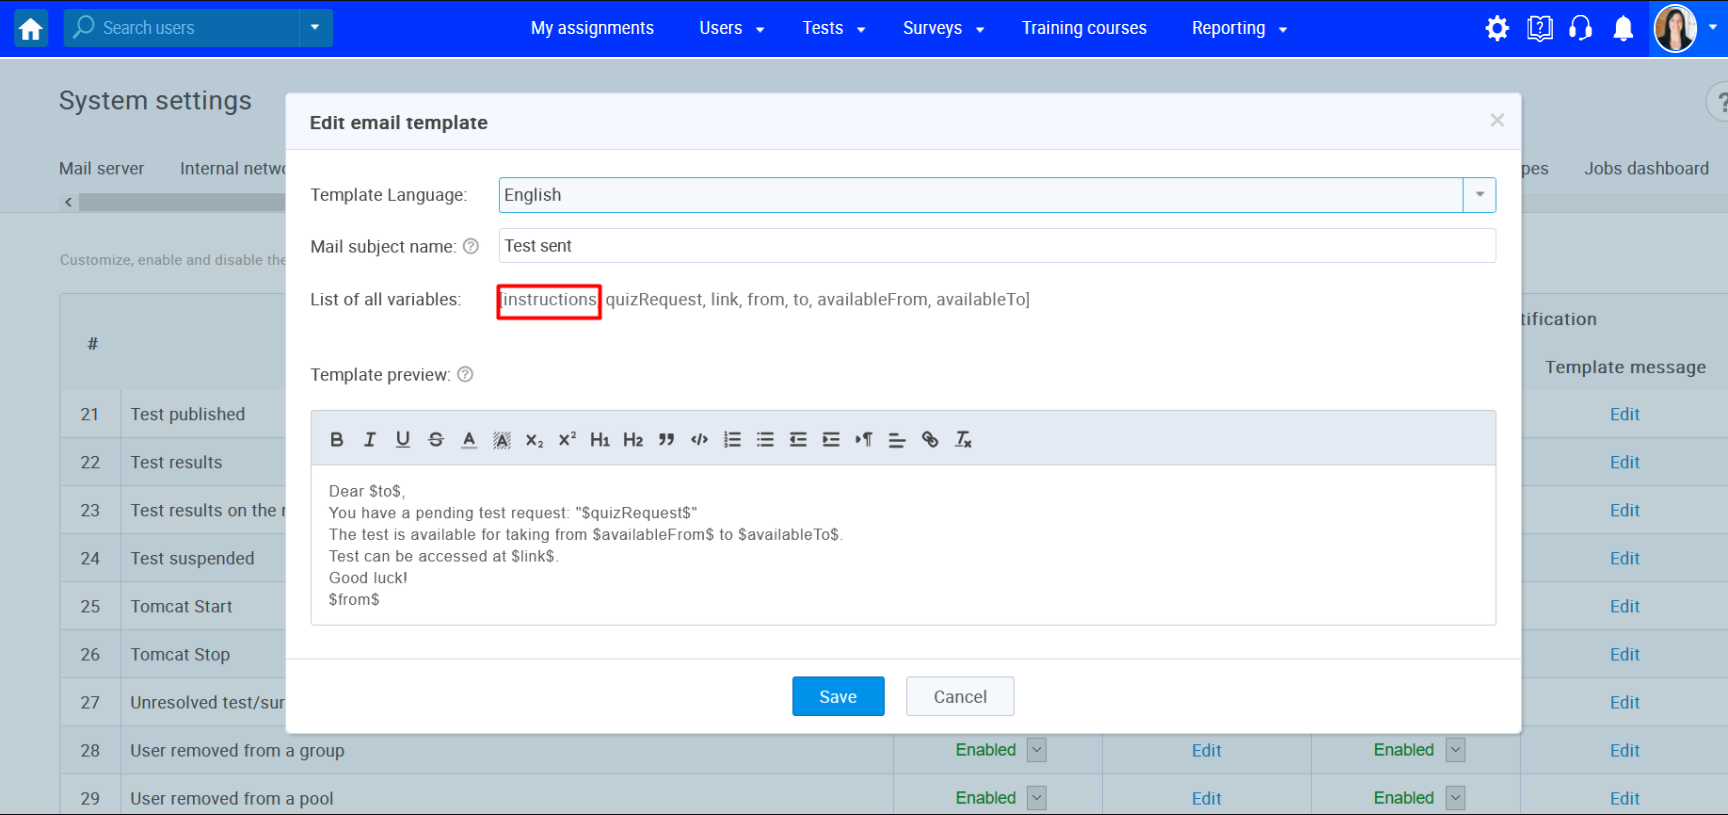
After verifying the template preview and confirming it contains instructions, click the “Save” button.
Note: Before you close the Notification window, make sure the “Email notification” status is enabled.

For more related instructional materials, please visit:


