This article’s purpose is to explain how to create a new user in GetCertified via Zapier integration with the system. Zapier integration with GetCertified offers an easy way to set up an action that creates a new user.
Using Zapier actions, you can easily create a new user in the system. All you need to do is to fill in the Google Sheet with the user data. The Zap you create will read the spreadsheet data to create a new user in GetCertified. Click the “Make a Zap” button, and the Zap creation process will start.
Then:
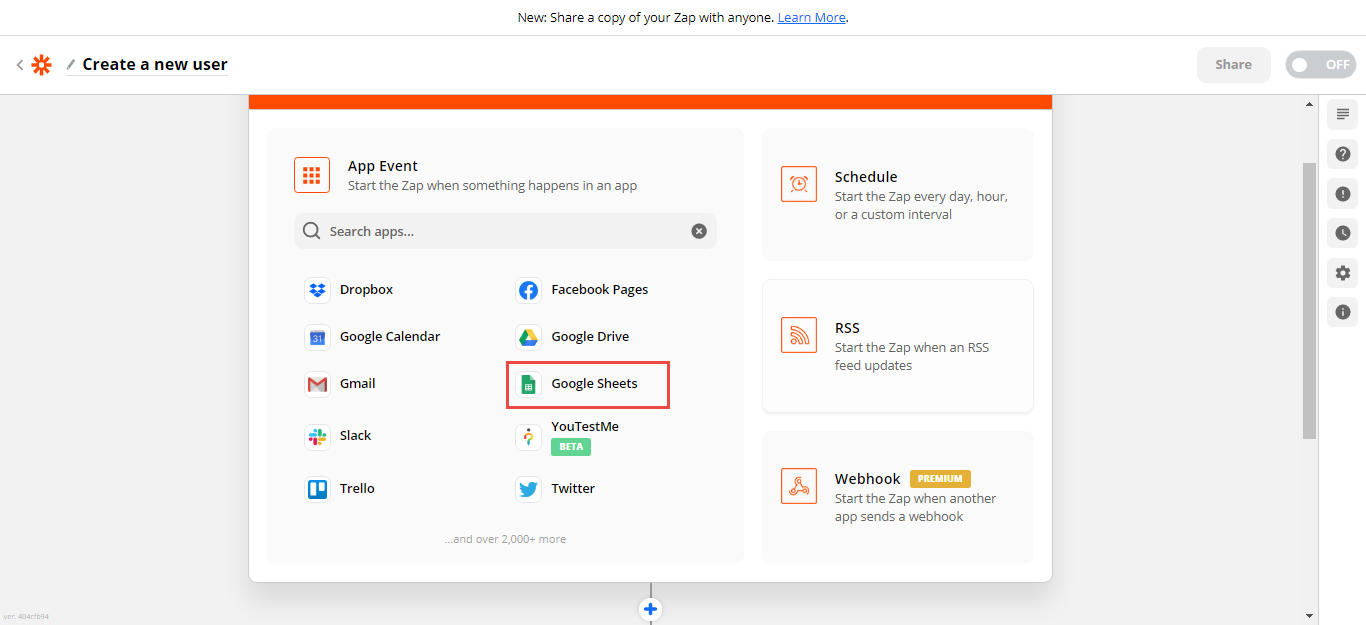
- Choose the App Event – Select Google Sheets.
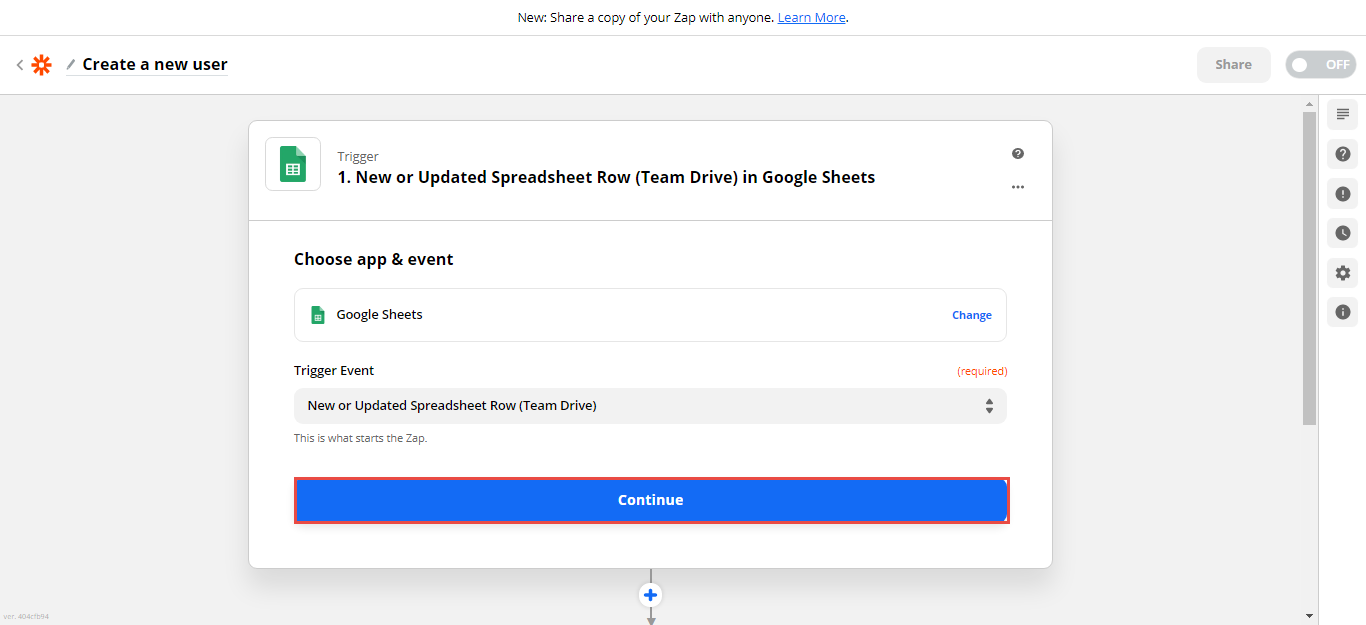
2. Choose the Trigger event – Select New or updated spreadsheet row. The new user will be created when you add a new row to the bottom of a spreadsheet.
3. Click the “Continue” button to move on to the next step.
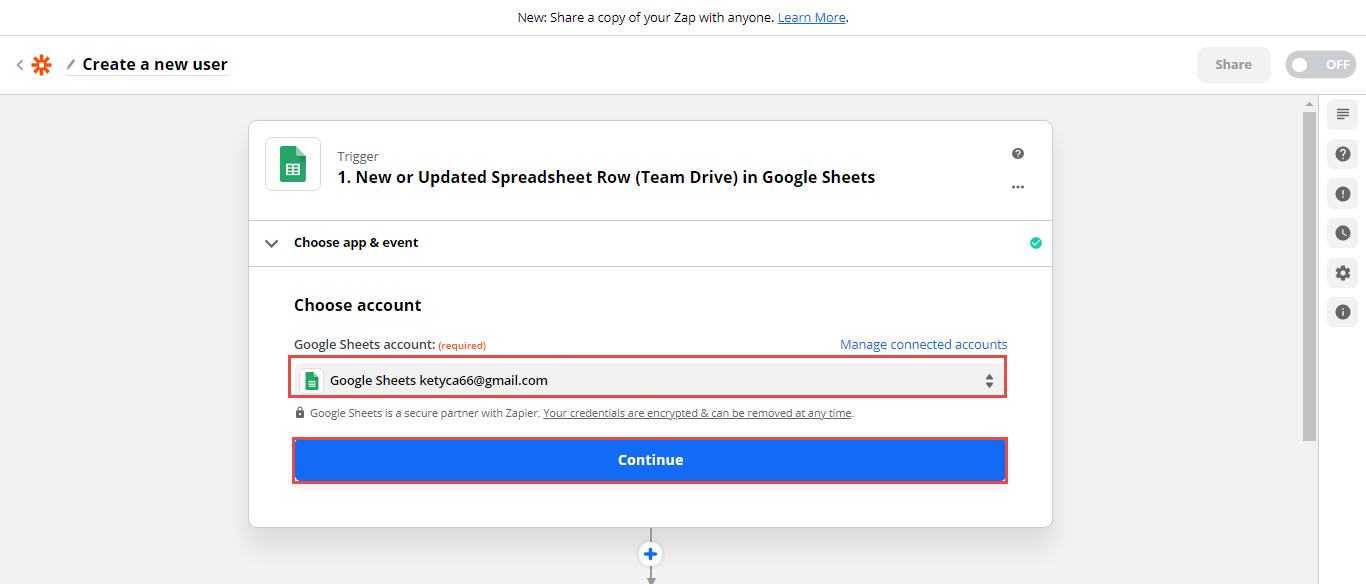
4. Choose the Gmail account.
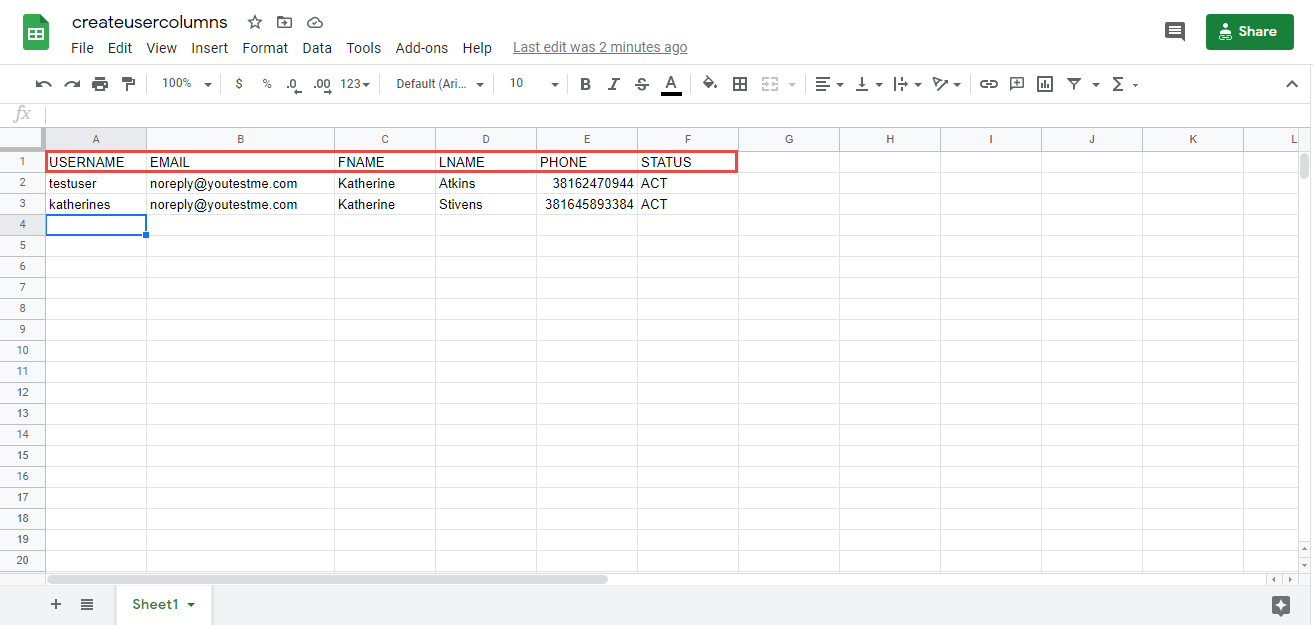
Fill in the Spreadsheet with the user data
Insert the following user data:
- Username.
- Email.
- First name (FNAME).
- Last name (LNAME).
- Phone.
- Status- Active or Inactive.
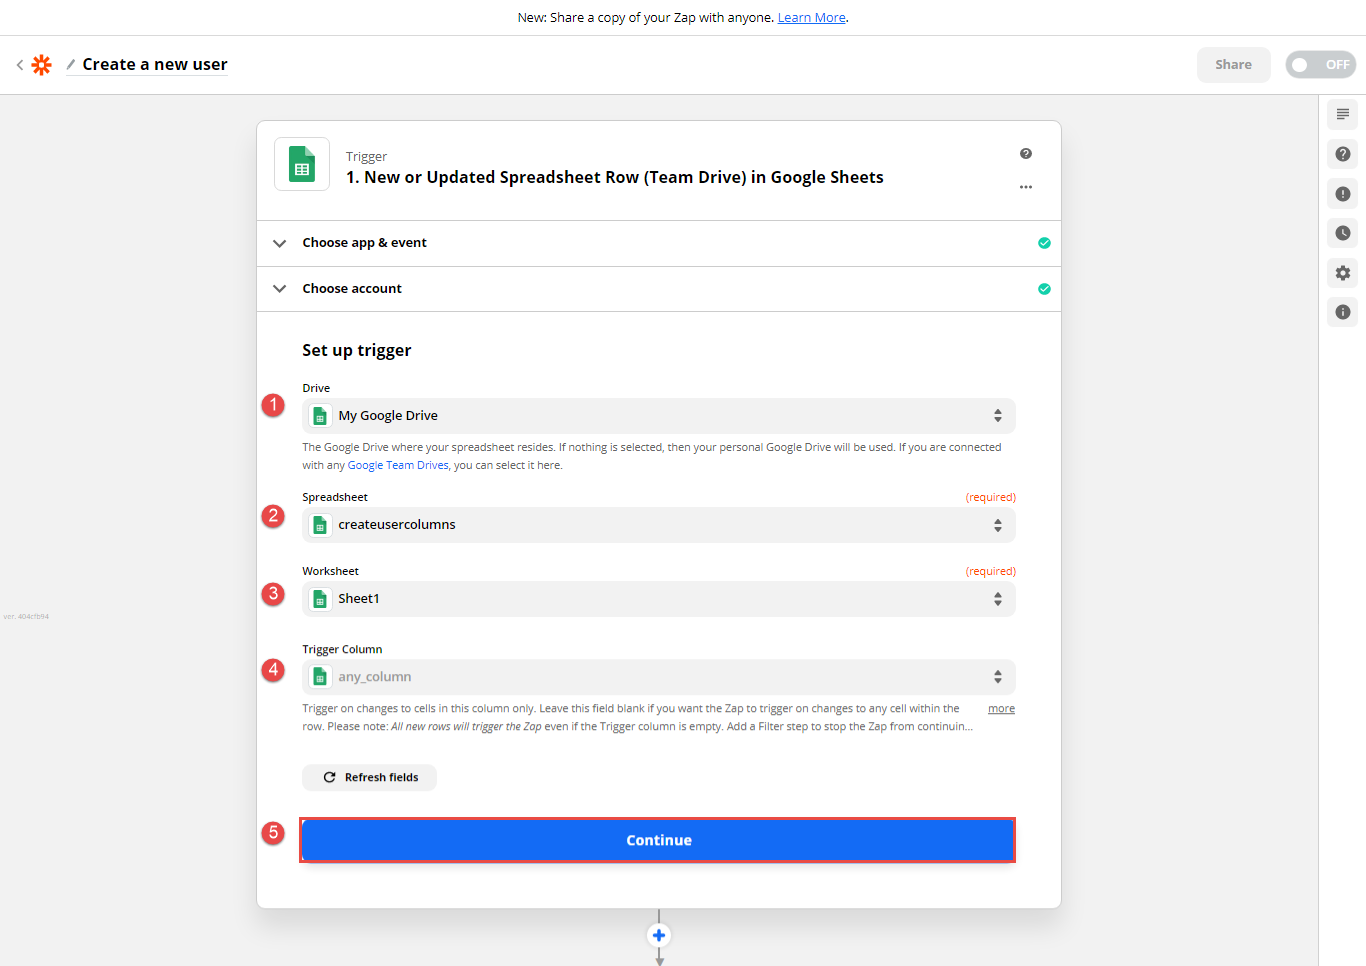
Set up a trigger
The next step is to set up a trigger. There is the following information you need to setup:
- Choose Drive – My Google Drive.
- Spreadsheet – Choose value.
- Select Worksheet.
- Choose the trigger column – for example, USERNAME or select the Any column option. Depending on the option you select, the trigger will start only on the changes in one of the columns or All the Spreadsheet columns.
- Click the “Continue” button.
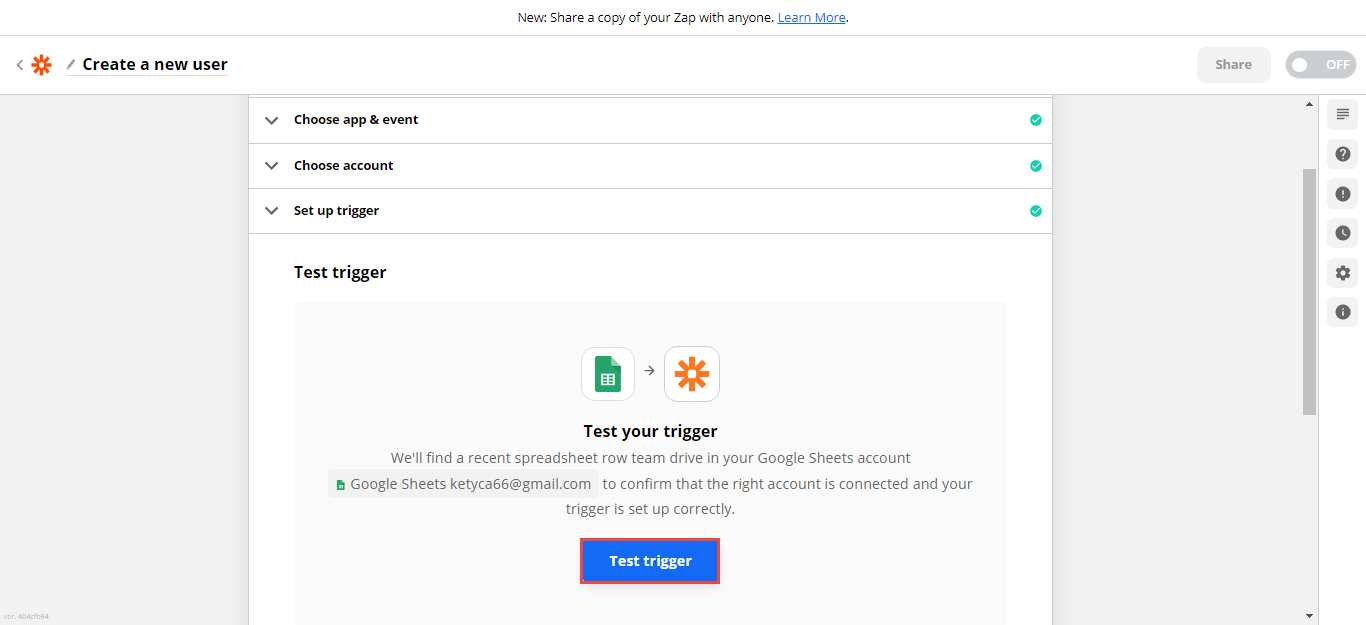
Note: It is necessary to Test the trigger to check if Zapier will find a recent spreadsheet row that contains user data. Click the “Test trigger” button.
If the trigger test is successful, the user data will be read from a spreadsheet row and show user data.
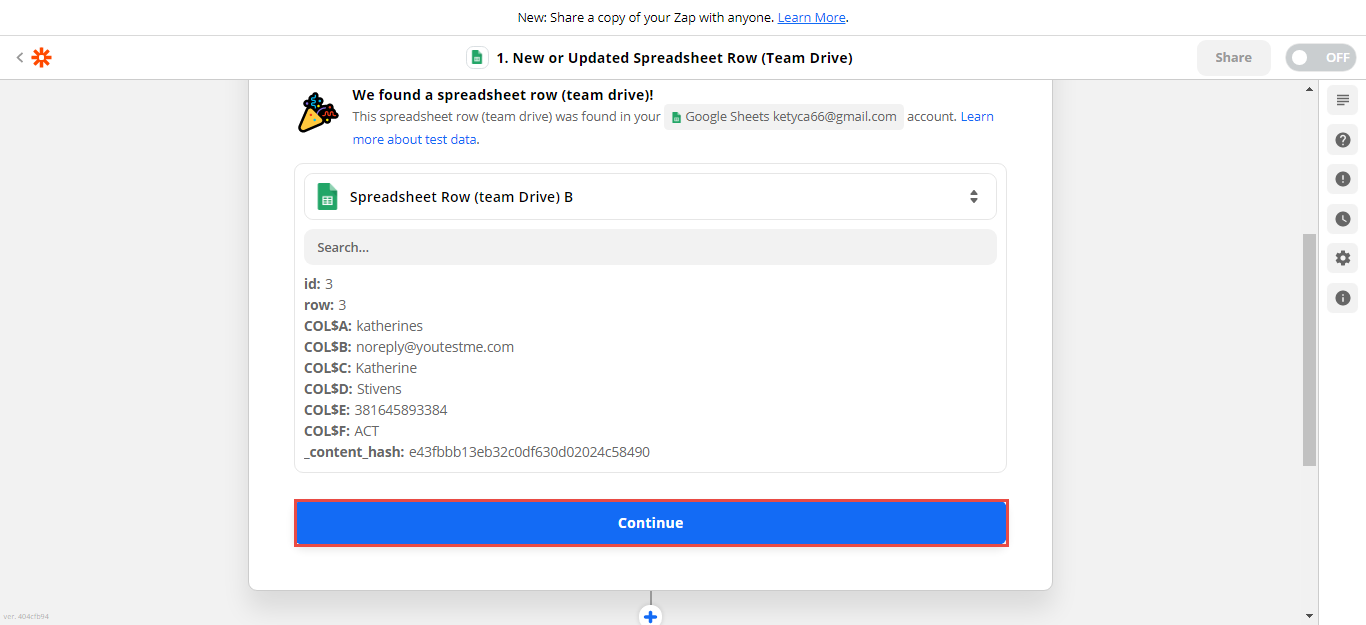
Now, click the “Continue” button.
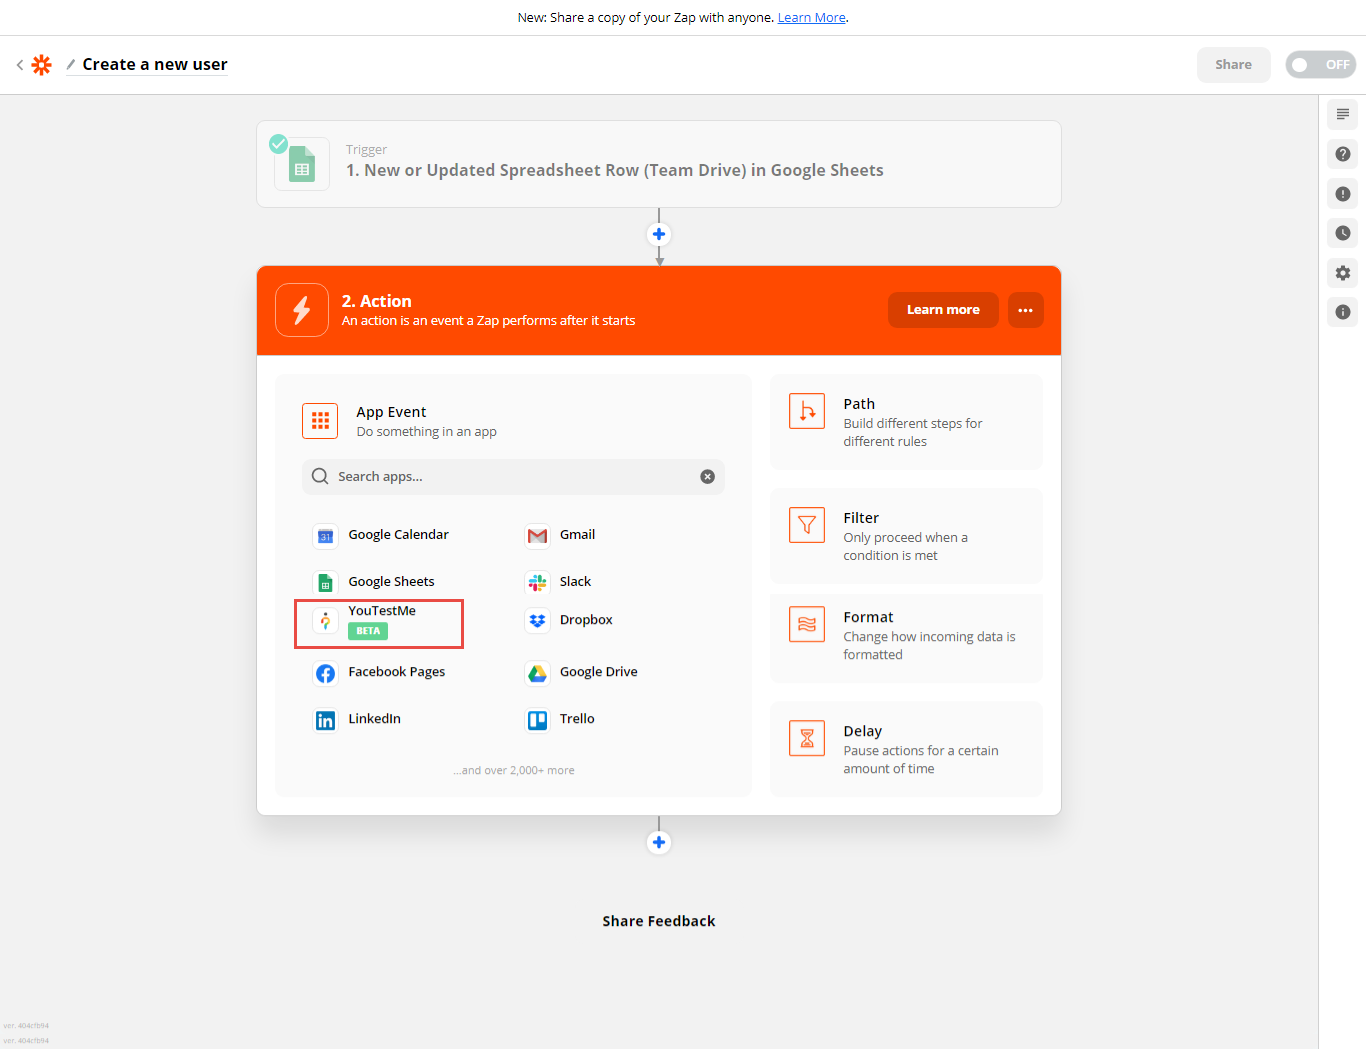
Set up an Action
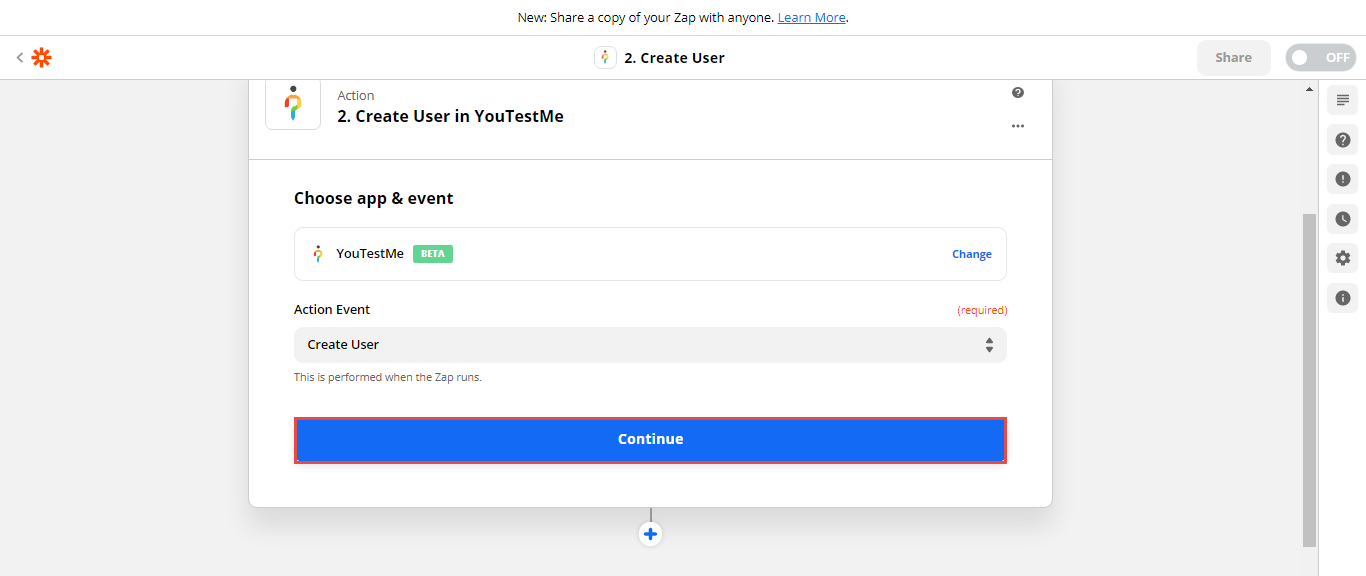
The next step is to set up an action. An action is an event a Zap performs when triggered. First, you need to choose YouTestMe for the app.
Then, choose the action event (Create User), and click the “Continue” button.
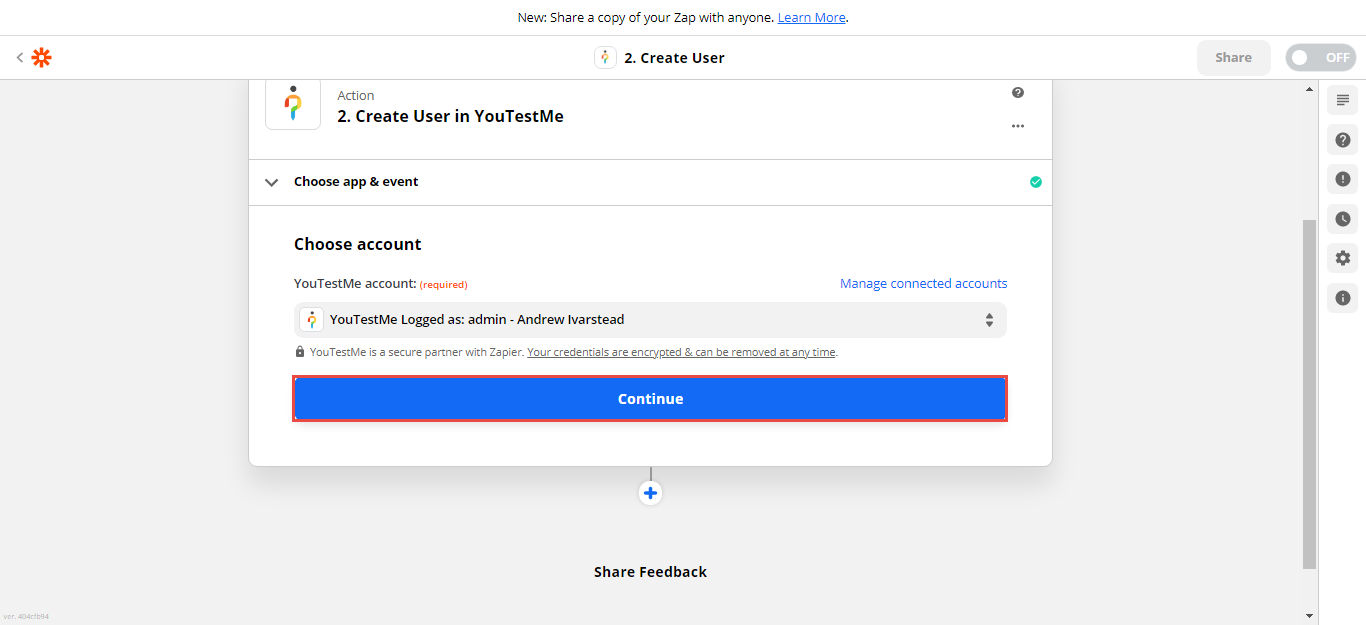
Choose the YouTestMe account to login and connect with the application.
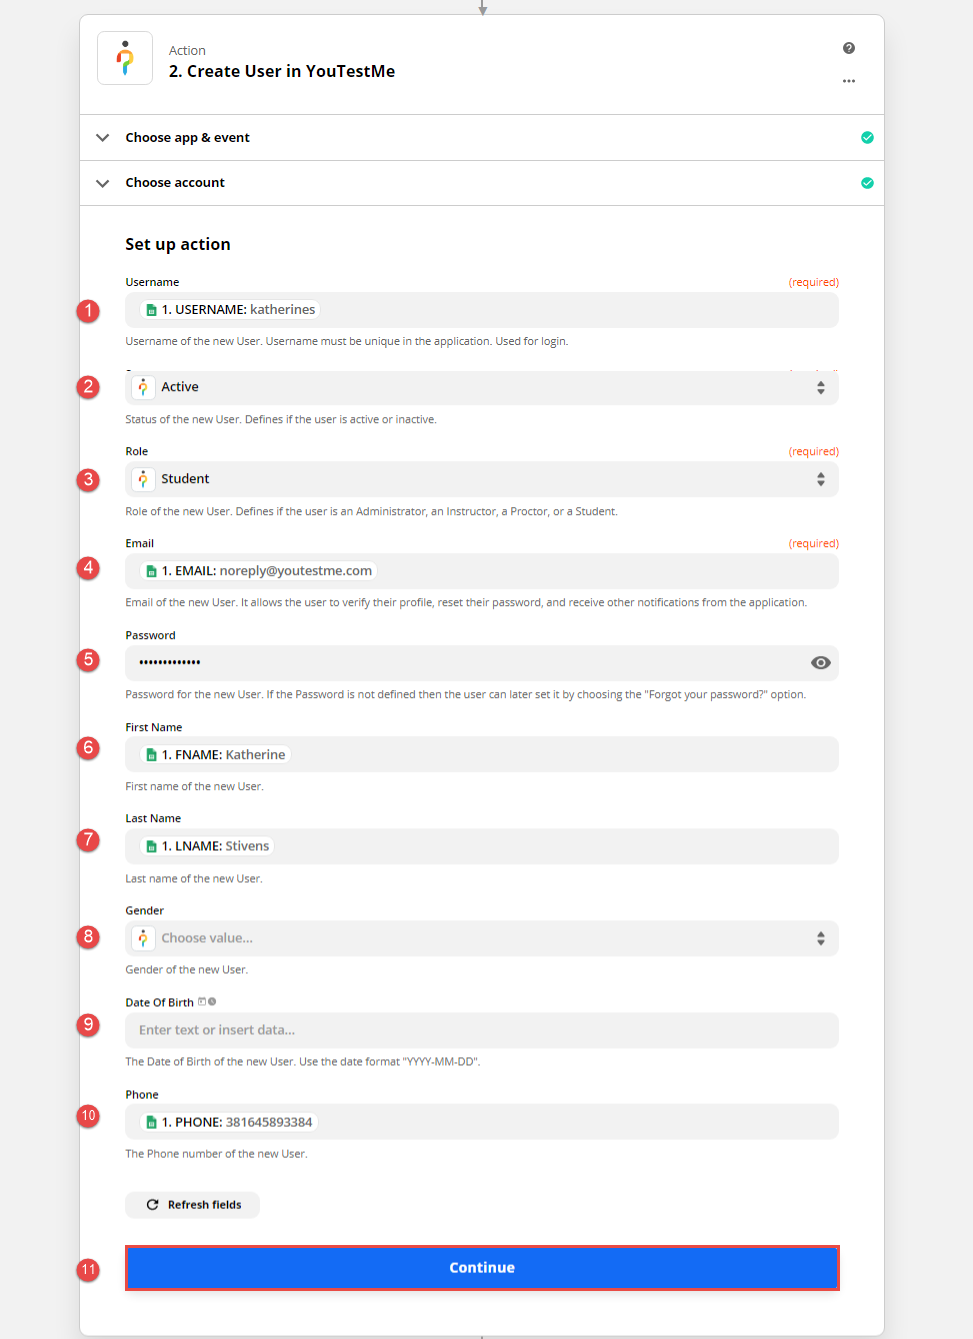
To set up Action insert :
- Username – choose the desired column from a spreadsheet.
- Status- choose the Status- Active, Inactive, Suspended, Locked, or Pending.
- Role – choose the new user role.
- Email – choose the desired column.
- Password (optional, the user will receive a mail to set up their password)
- First name – choose the desired column (FNAME).
- Last name – choose the desired column (LNAME).
- Gender – (optional).
- Date of birth (optional).
- Phone number – (optional).
- Click the “Continue” button.
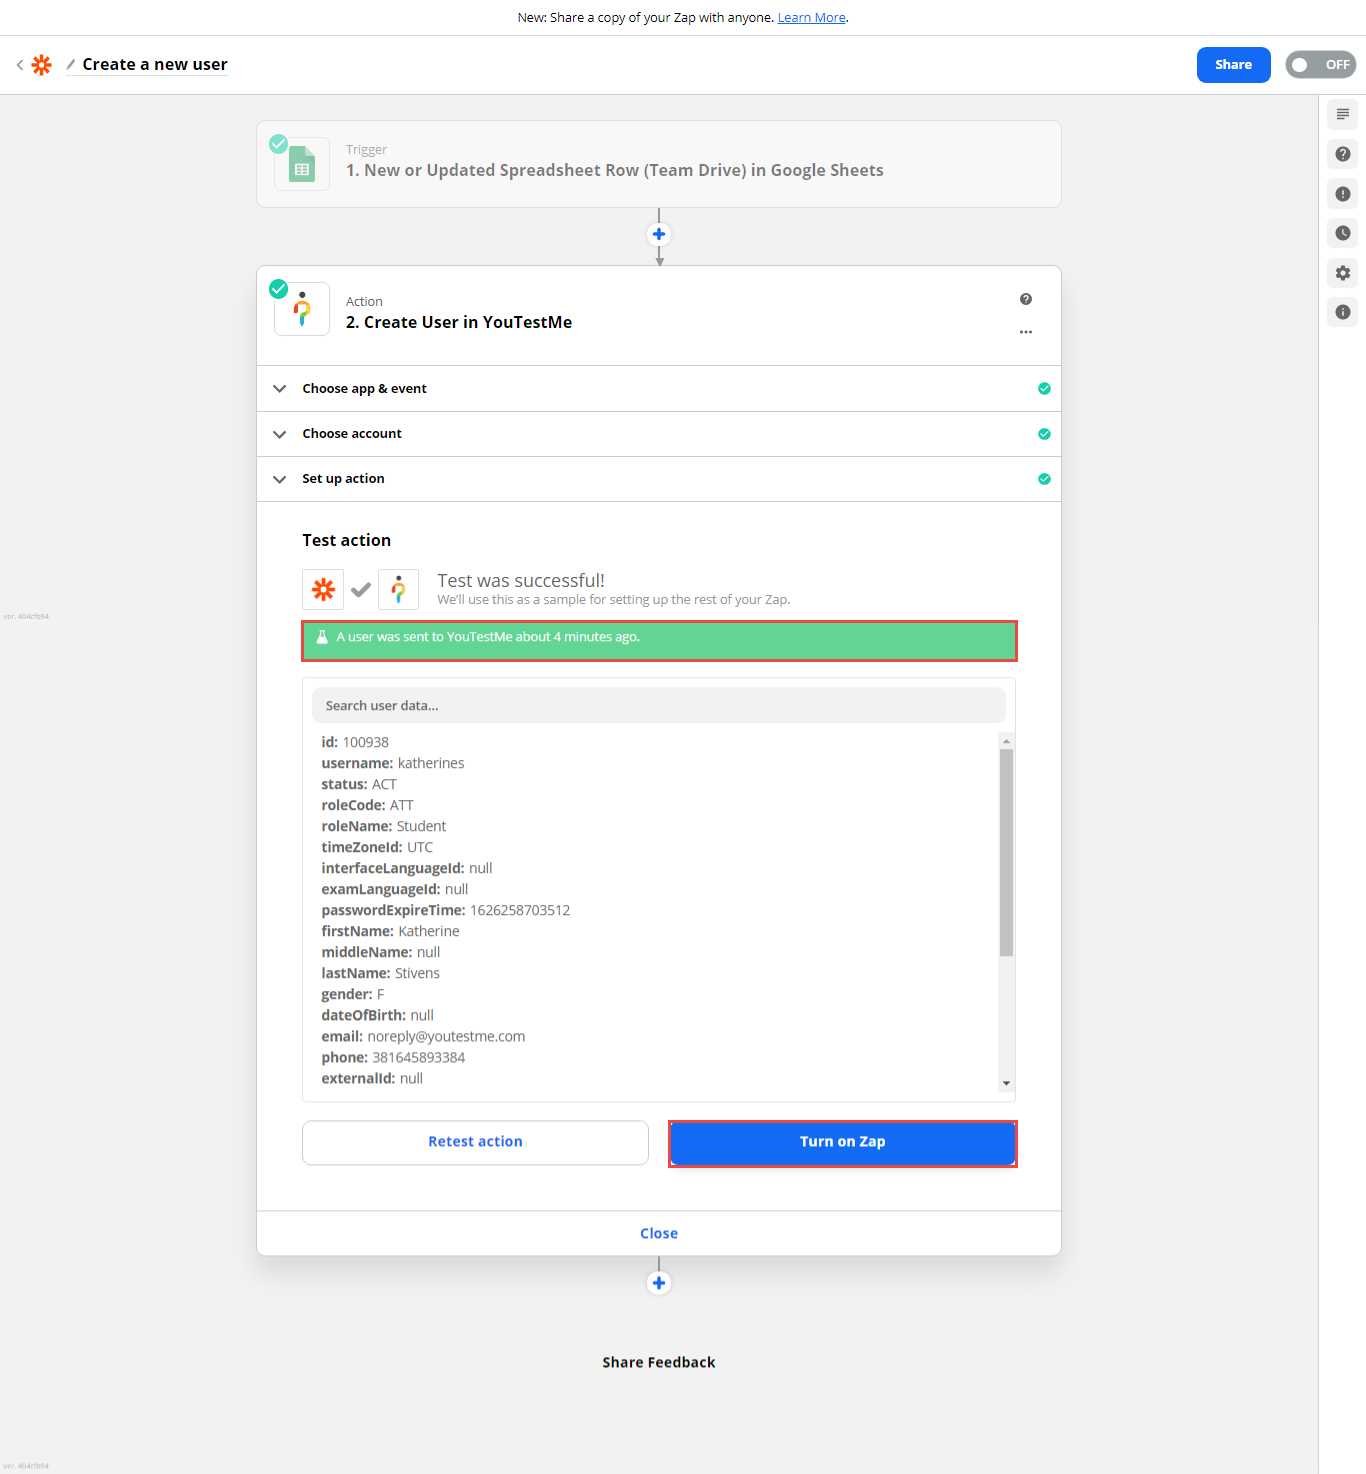
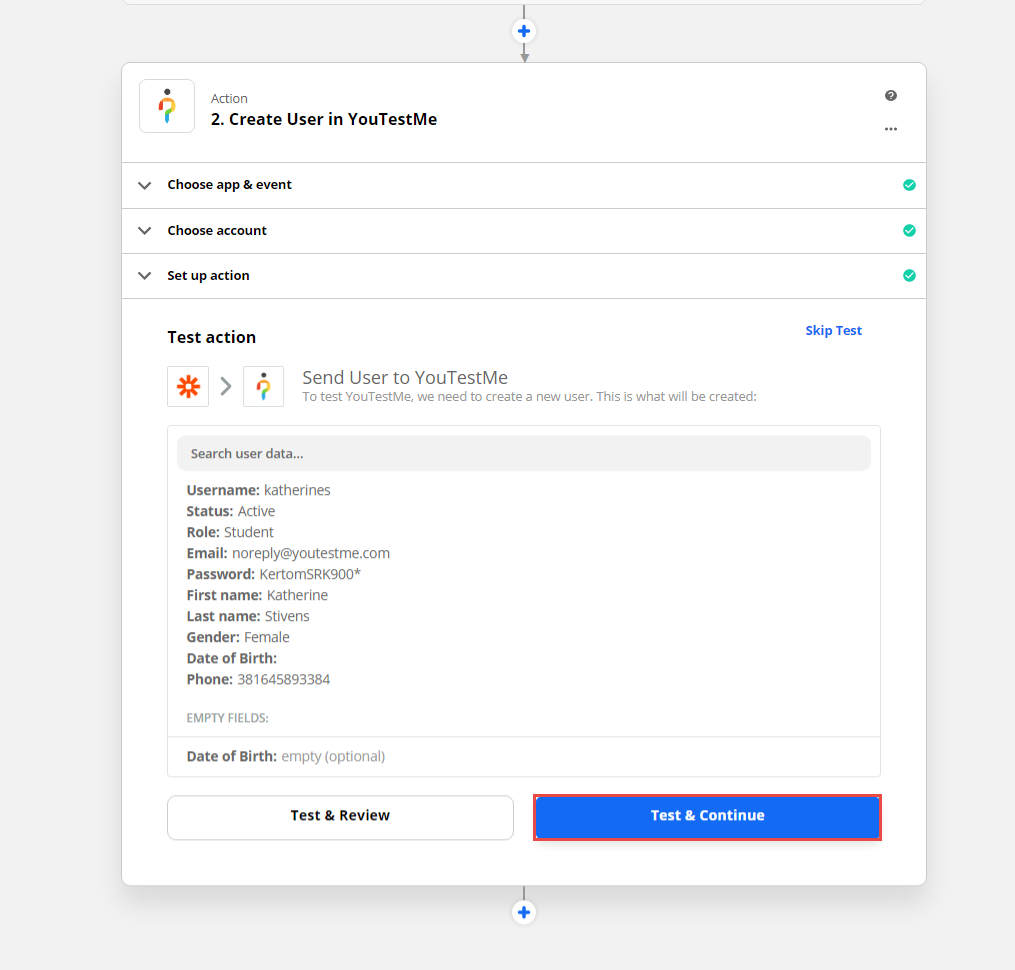
After the Zap setup is finished, you can test the user creation action. To do so, click the “Test & Continue” button. You will receive the message that the user is sent to YouTestMe GetCerfitied and successfully created. To avoid the creating of a user with the test data click “Skip test”.
Now you can turn on this Zap so that each time you insert a new row into the spreadsheet, a new user will automatically be created. Click the “Turn on Zap” button, and the Action will trigger each time you add a new row containing the user data.