This article describes the best practices of assigning candidates or groups of candidates to the testing session. Testing sessions specify who and when can take the test.
There are several ways to assign the candidate or the group of candidates to the test:
- Assign the candidate to the testing session.
- Assign the candidate to the self-enrollment testing session.
- Assign the group of candidates to the testing session.
- Assign the group of candidates to the self-enrollment testing session.
Note: To assign candidates to test or survey, you need to create the testing or survey session.
Creating a testing session
To create a testing session:
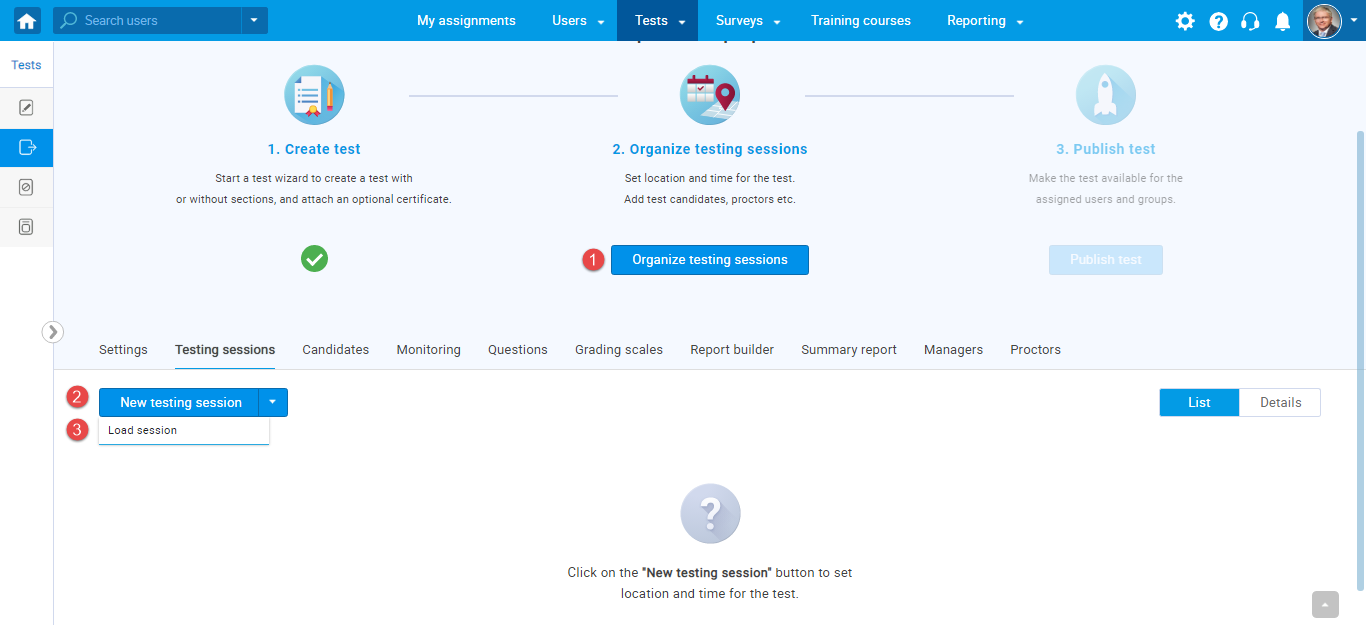
- Click the “Organize testing session” button.
- Click the “New testing session” button.
- Click the “Load session” if you wish to load the session from an Excel file.
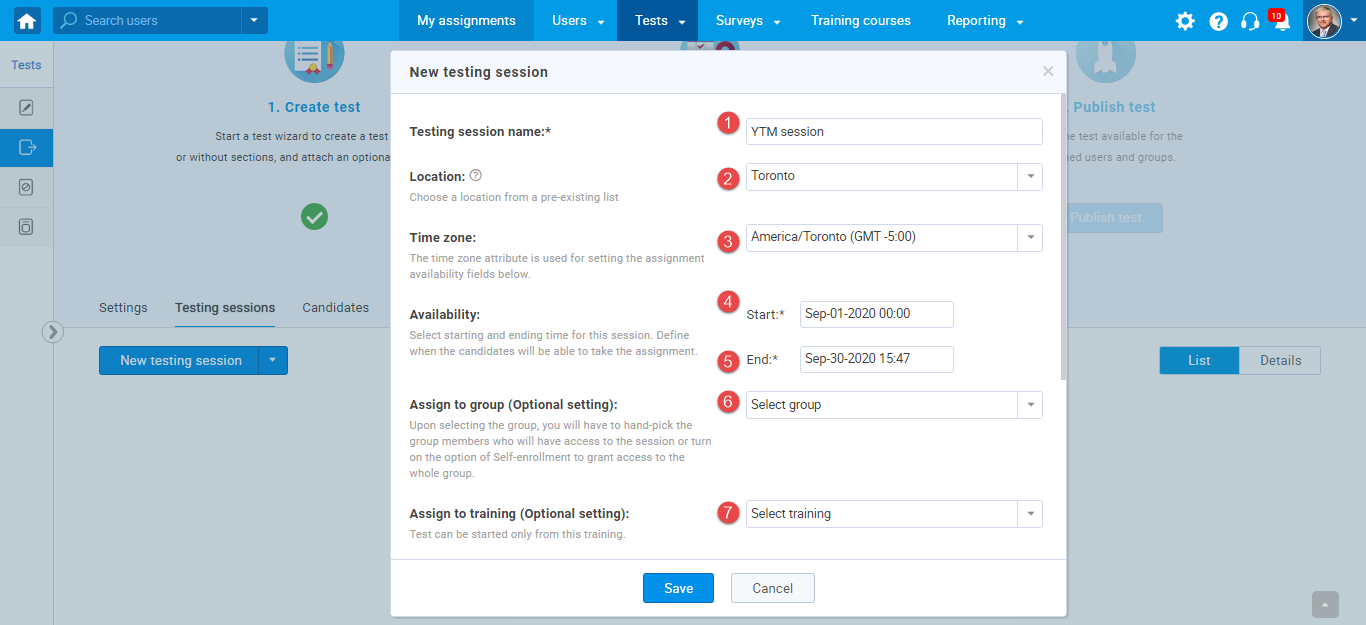
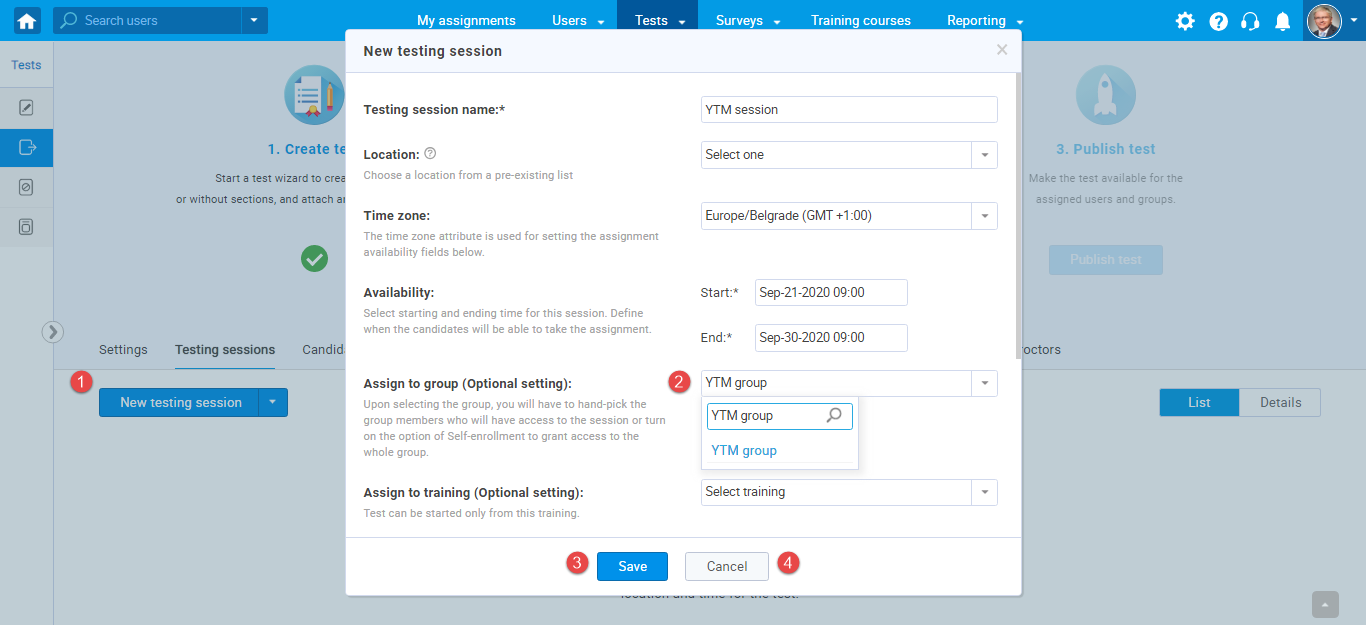
When you click the “New testing session” button, the window will open, and you need to fill the following fields:
- Enter the testing session name.
- Enter the location where the session is conducted.
- Select the time zone of the session.
- Enter the availability start date.
- Enter the availability end date.
- Select the group whose members you will assign to the testing session.
- Assign the test to the training course.
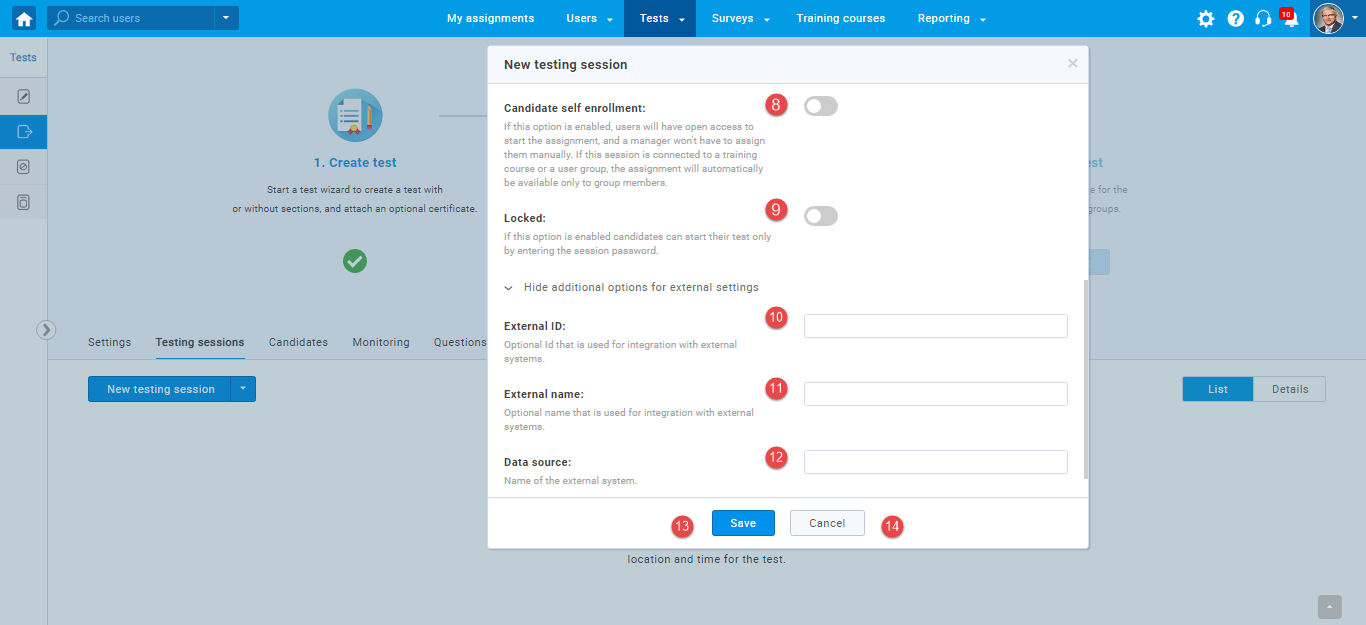
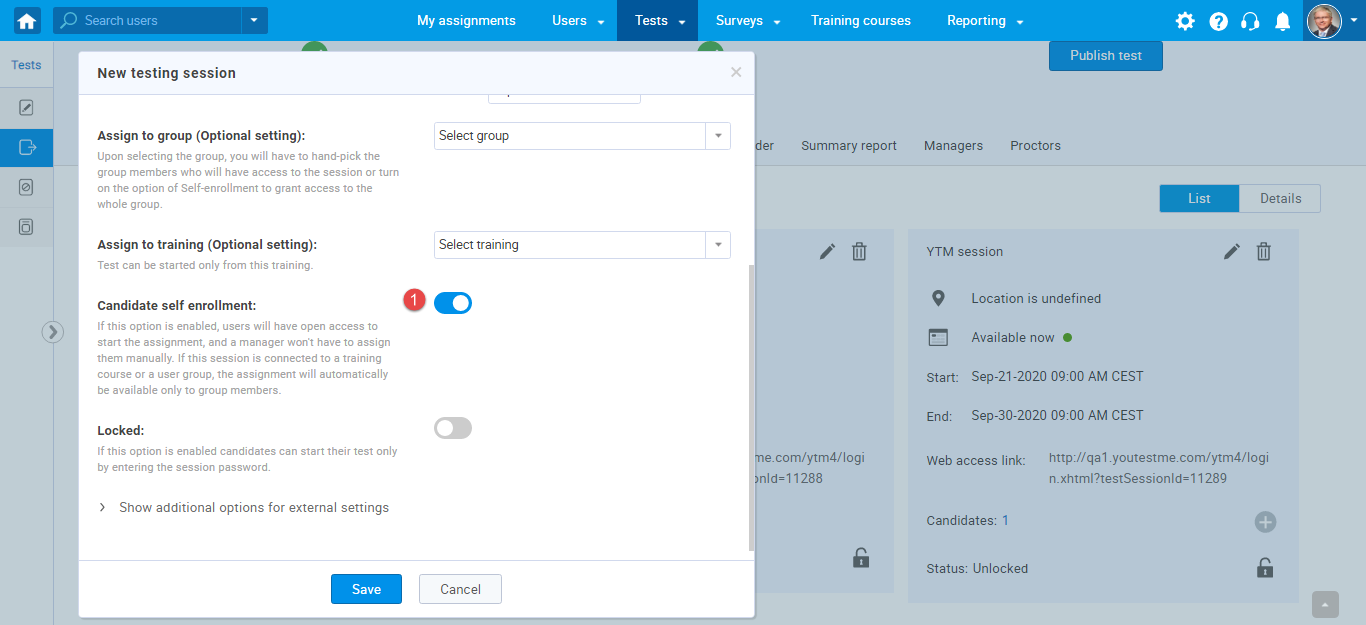
- Enable the “Candidate self-enrollment” option.
- Enable the “Locked” option to specify the password that candidates will be required to enter to start the test.
- Enter the External ID.
- Enter the External name.
- Enter the data source.
- Click the “Save” button to save the testing session.
- Click the “Cancel” button to discard the testing session.
Assigning the candidate to the testing session
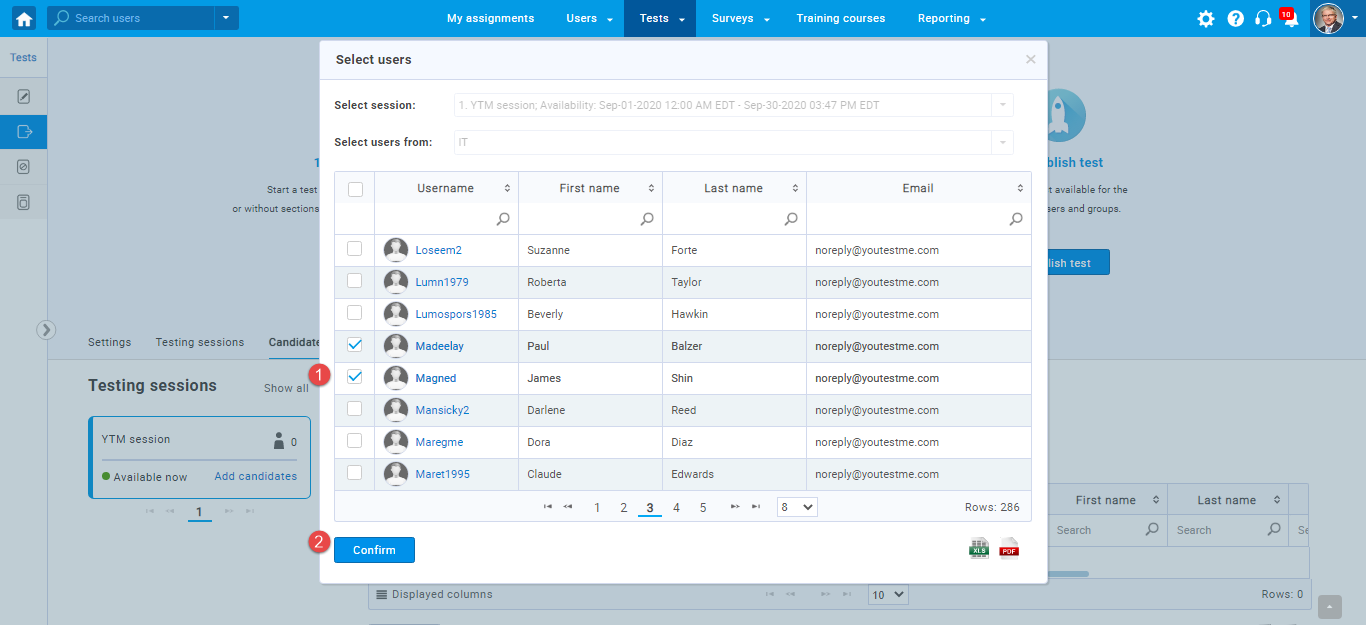
When you create the testing session, you can assign candidates to it by clicking the “Add candidates” button.
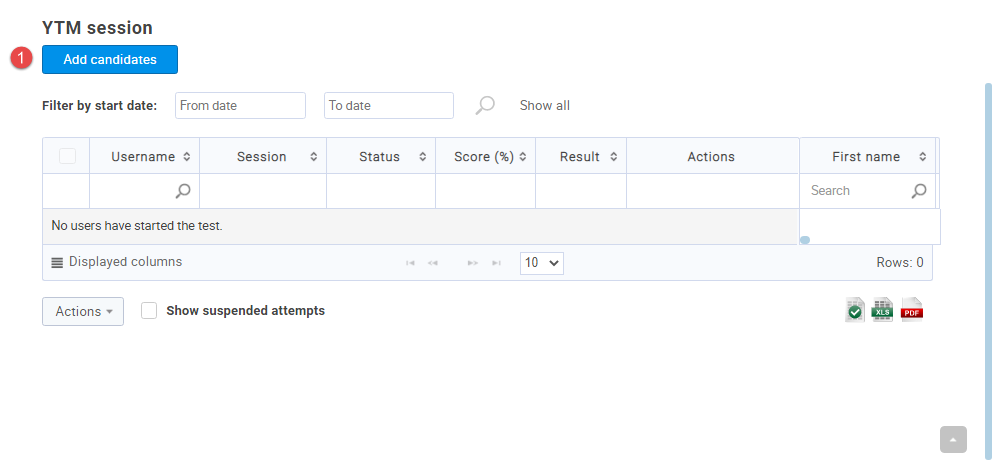

A window with the list of application users will appear, where you should:
- Select one or more candidates from the list. Use a search box to find users by their usernames, first or last name, etc. To select candidates, tick the box next to their usernames.
- Click the “Confirm” button.
After you have assigned the candidates to the testing session (and when the test is published), they will see the test in their “My assignments” panel.
Note: Only the candidates assigned to the testing session can start the test-taking process.
Assigning candidates to the self-enrollment testing session
To add the candidate to the self-enrollment testing session, you should enable the “Candidate self-enrollment” option.
Note: When the testing session is self-enrolling, the test will be automatically visible to all candidates in their “My assignments” panel.
Assigning the group of candidates to the testing session
To assign the test to the user group, you need to create a user group and add user members. To create a new group testing session:
- Click the “New testing session” button.
- Select the group name from the drop-down list.
- Click the “Save” button to create a session.
- Click the “Cancel” button to discard session creating.
When you select the group name and create the testing session, you can assign group members to the testing session in the “Candidates” tab.
On the “Candidates” tab, click on “Add candidates” and select the group members you will assign to the testing session.
To assign group members to the testing session:
- Select one or more group members from the list.
- Click the “Confirm” button.
Note: You can assign only the candidates that are members of the selected group. The test will be available on the “My assignments” page only to the selected group members, not every group member.
Assigning the group of candidates to the self-enrollment testing session
To ensure that the group member can assign to the session by self-enrollment, you have to enable the self-enrollment option after selecting the user group name from the drop-down list.

To enable the group member self-enrollment to the testing session:
- Enable “Candidate self-enrollment.”
- Click the “Save” button.
- Click the “Cancel” button to discard the changes.
Note: Every group user can access the test after he assigns the self-enrollment test session. When you become a user group member, you will automatically enter the test.
To learn more about scheduling tests in YouTestMe GetCertified, please watch this video.


