This article explains how to add different attachment types to the training course step. Attachments represent the learning material of the training course that candidates need to examine and learn in order to finish the course.
Accessing the training course step
Follow the steps:
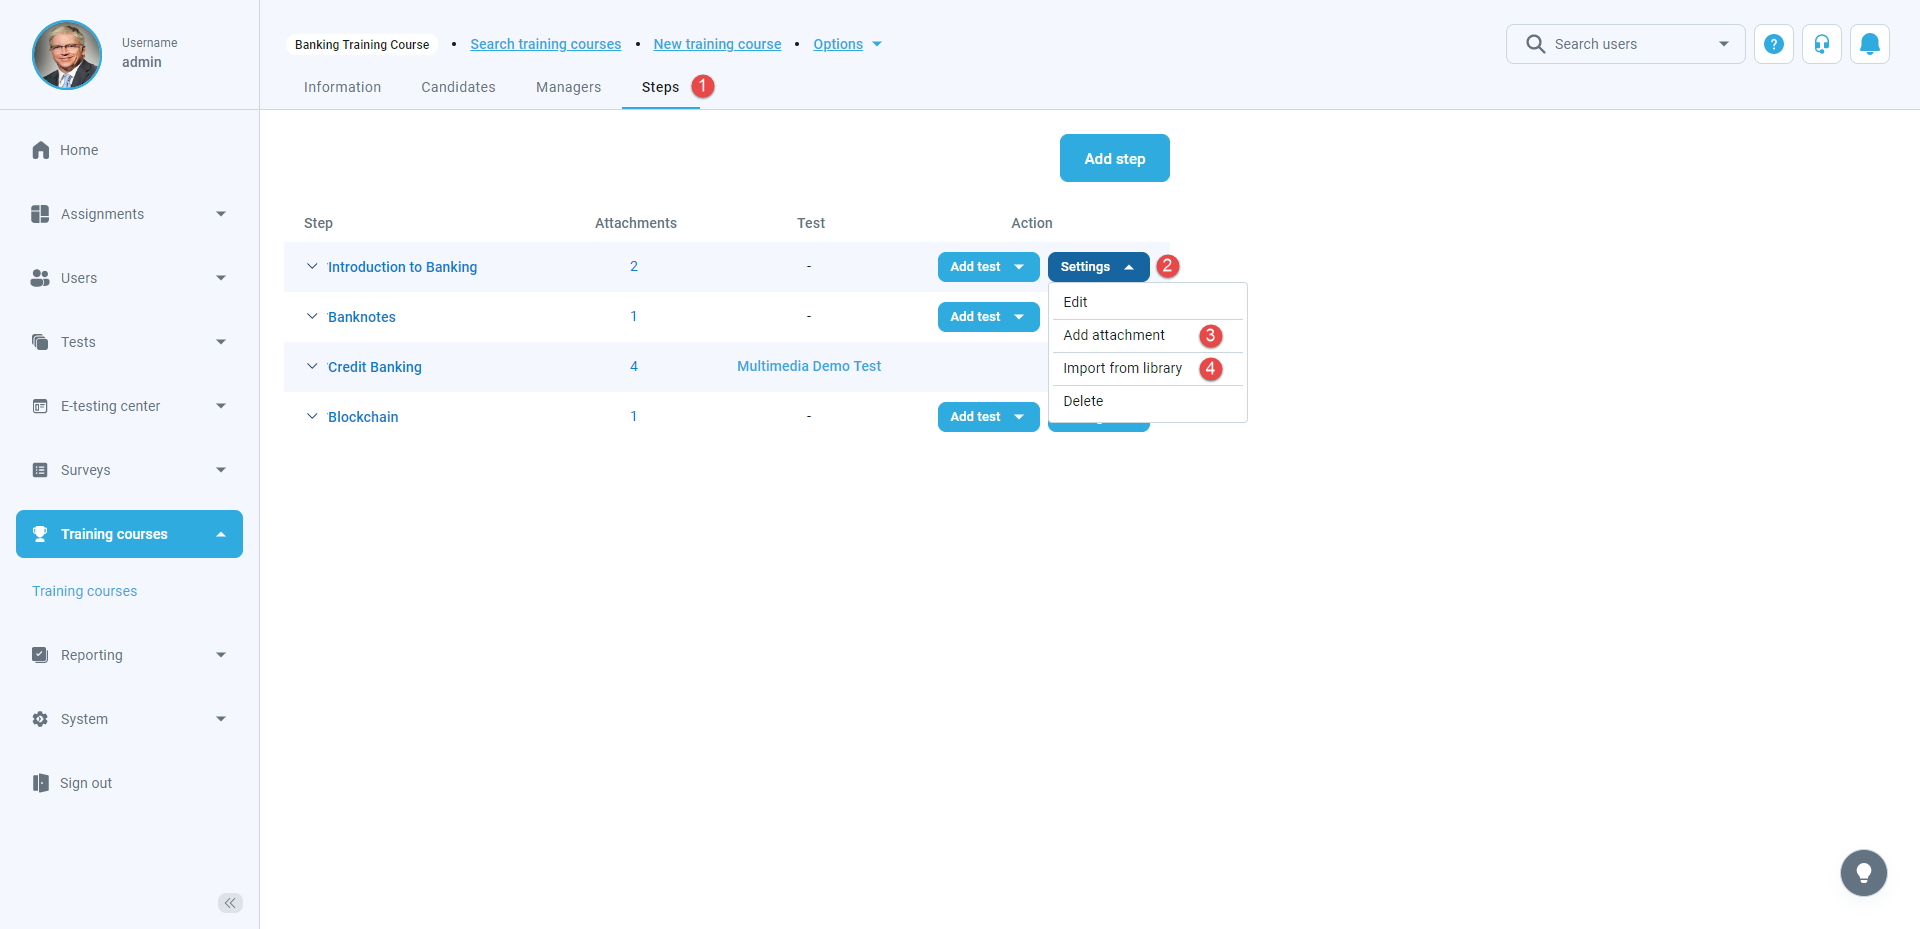
- Navigate to the “Steps” tab.
- Click the “Settings” button.
- From the dropdown menu, choose the “Add attachment” option to create a new attachment.
- From the dropdown menu, choose the “Import from library” option to import an existing attachment from the library.
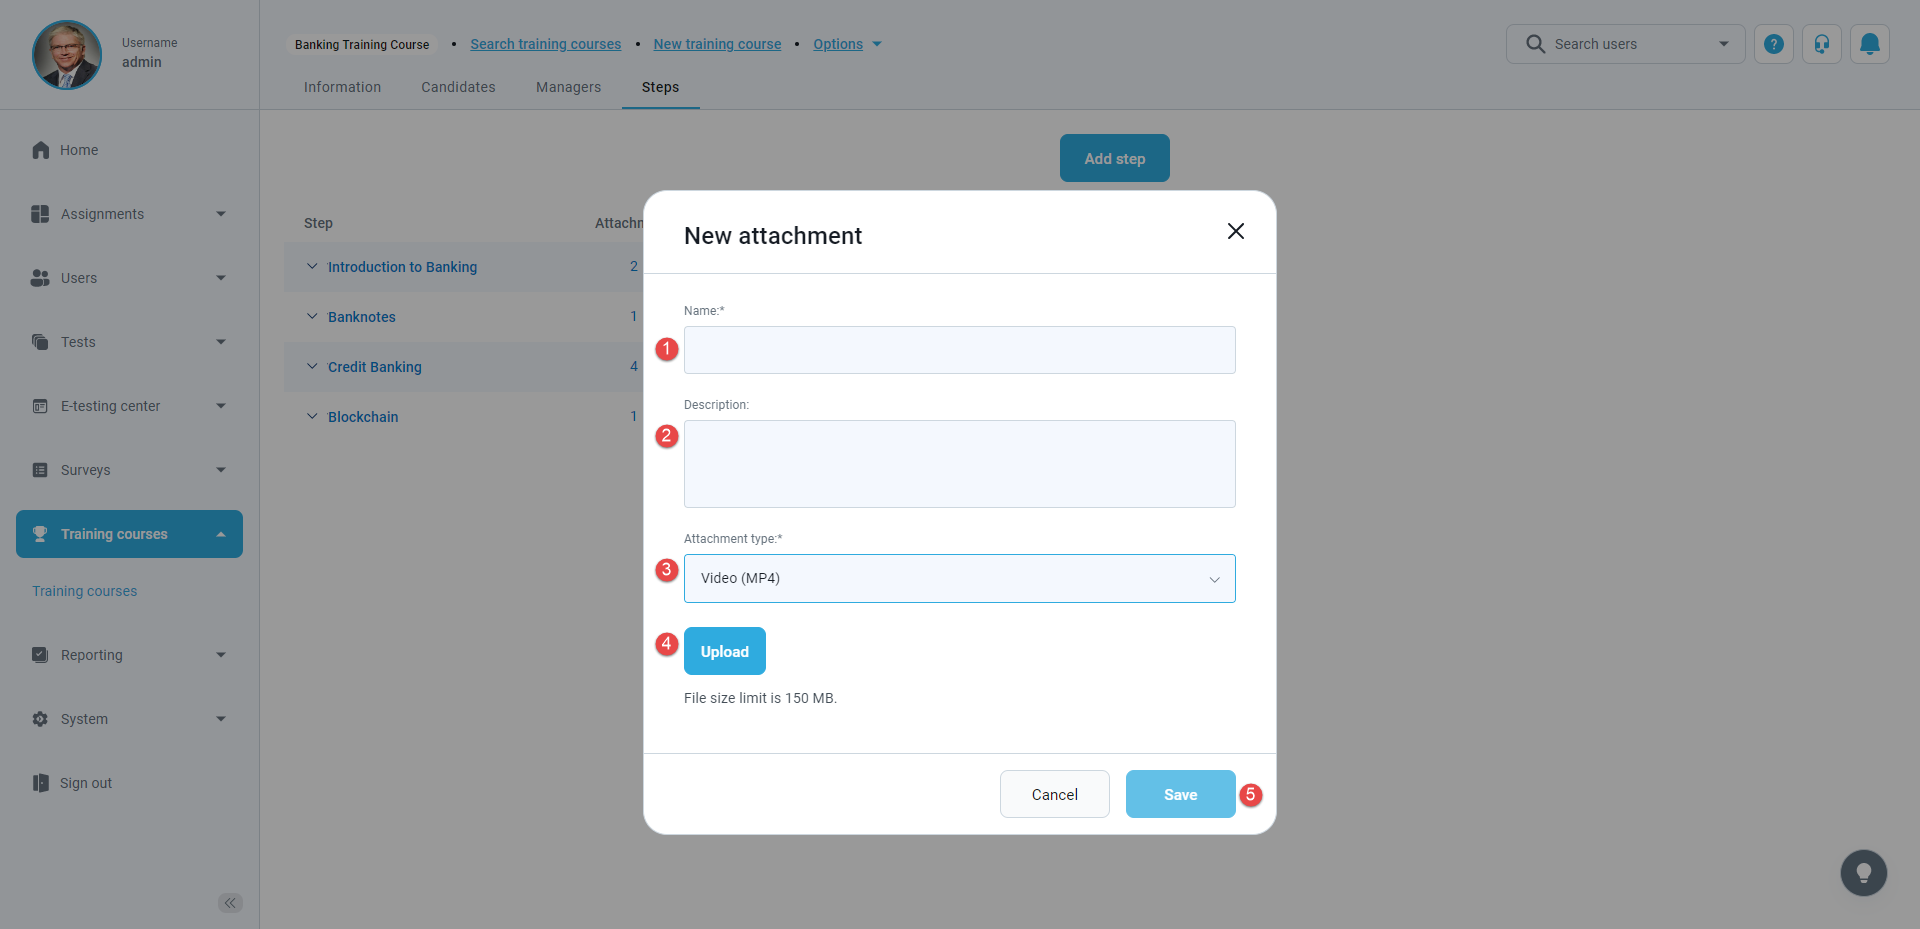
Adding a video file (MP4)
To add a video file:
- Enter the attachment name.
- Optionally, enter the description.
- Choose the attachment type – select Video (MP4) from the dropdown list.
- Upload the file by clicking the “Upload” button.
- Click the “Save” button to add the video file.
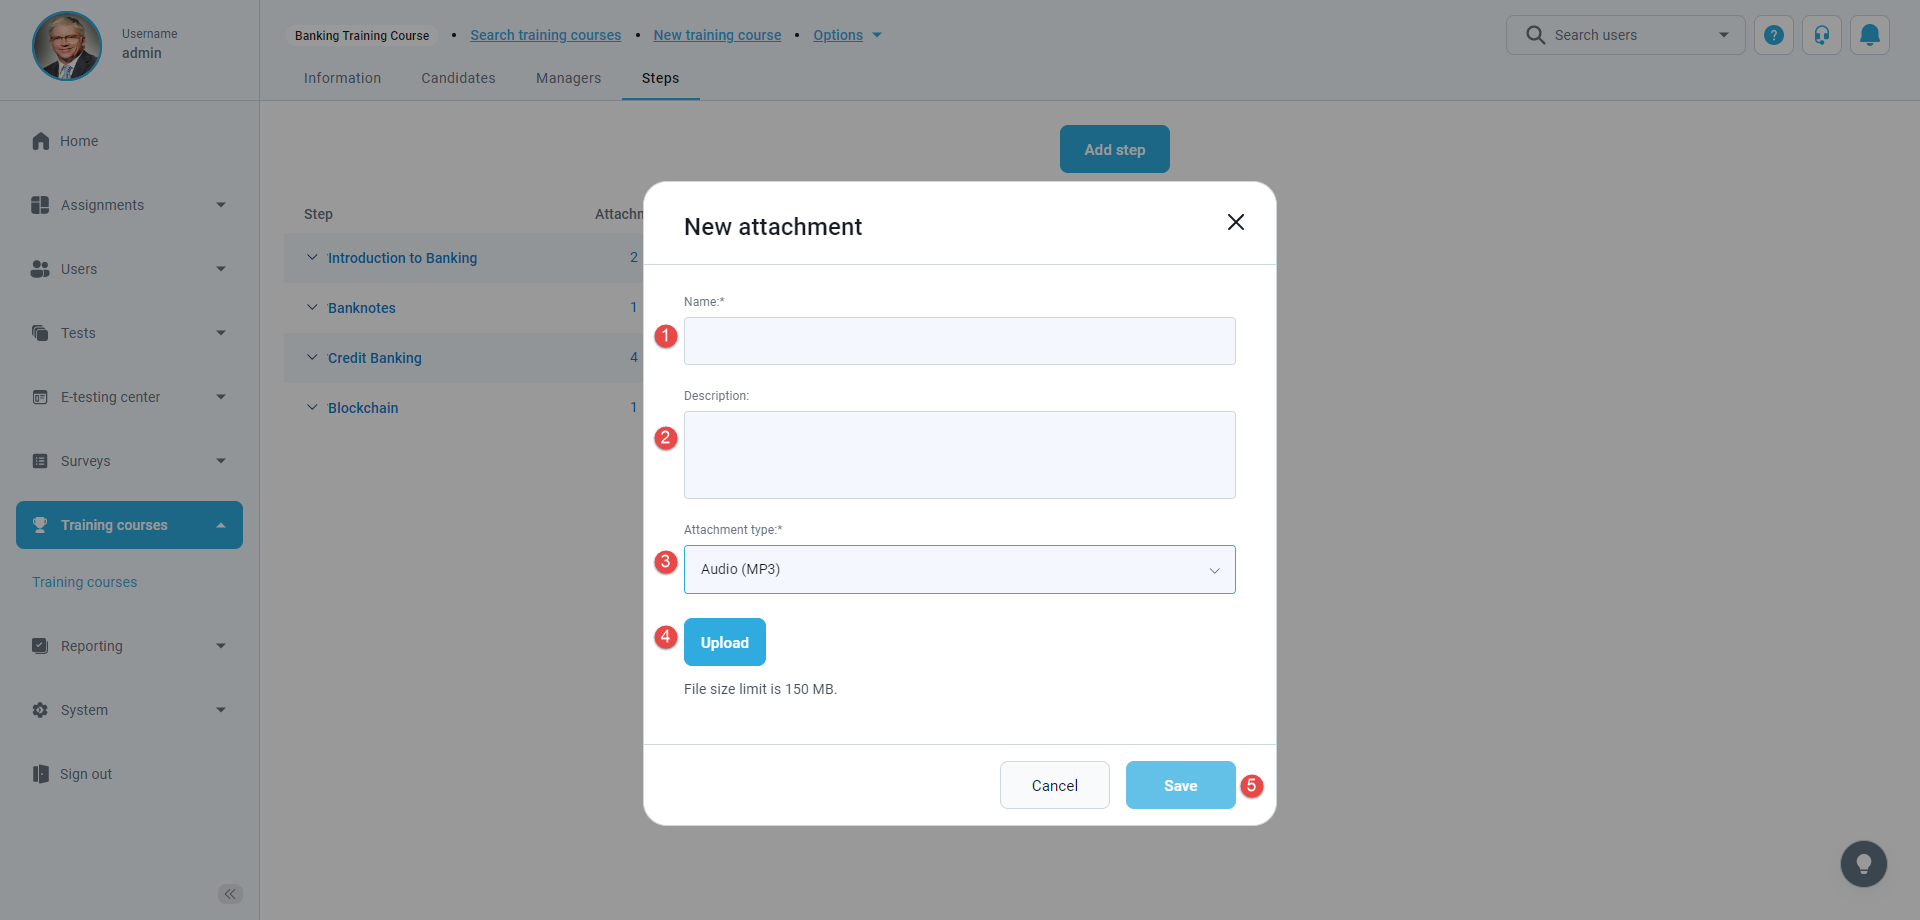
Adding an audio file (MP3)
To add an audio file:
- Enter the attachment name.
- Optionally, enter the description.
- Choose the attachment type – select Audio (MP3) from the dropdown list.
- Upload the file by clicking the “Upload” button.
- Click the “Save” button to add the audio file.
Adding a PDF file
To add a PDF file:
- Enter the attachment name.
- Optionally, enter the description.
- Choose the attachment type – select PDF from the dropdown list.
- Upload the file by clicking the “Upload” button.
- Click the “Save” button to add the PDF file.

Adding Google docs
To add Google doc:
- Enter the attachment name.
- Optionally, enter the description.
- Choose the attachment type – select Google Docs from the dropdown list.
- Insert the link to the document.
- Click the “Save” button.

Adding Archive (.ZIP)
To add .ZIP file:
- Enter the attachment name.
- Optionally, enter the description.
- Choose the attachment type – select Archive (.ZIP) from the dropdown list.
- Upload the file by clicking the “Upload” button.
- Click the “Save” button.

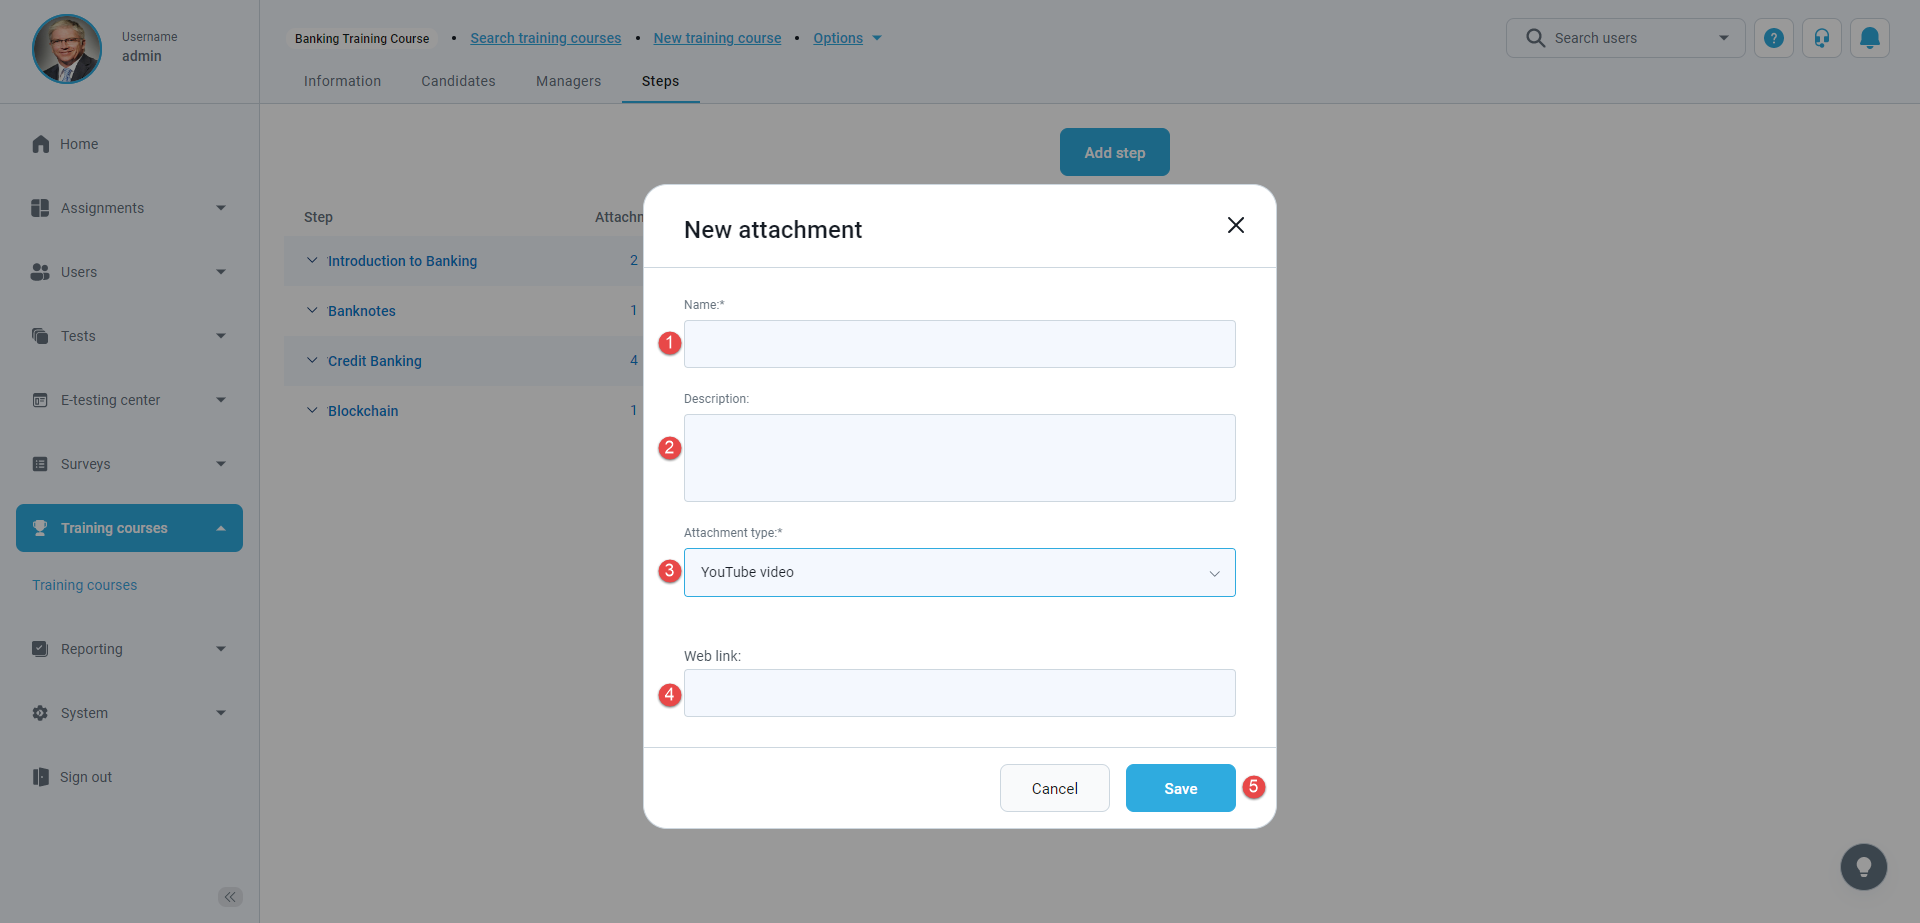
Adding YouTube video
To add YouTube video:
- Enter the attachment name.
- Optionally, enter the description.
- Choose the attachment type – select YouTube video from the dropdown list.
- Insert the link to the YouTube video.
- Click the “Save” button.
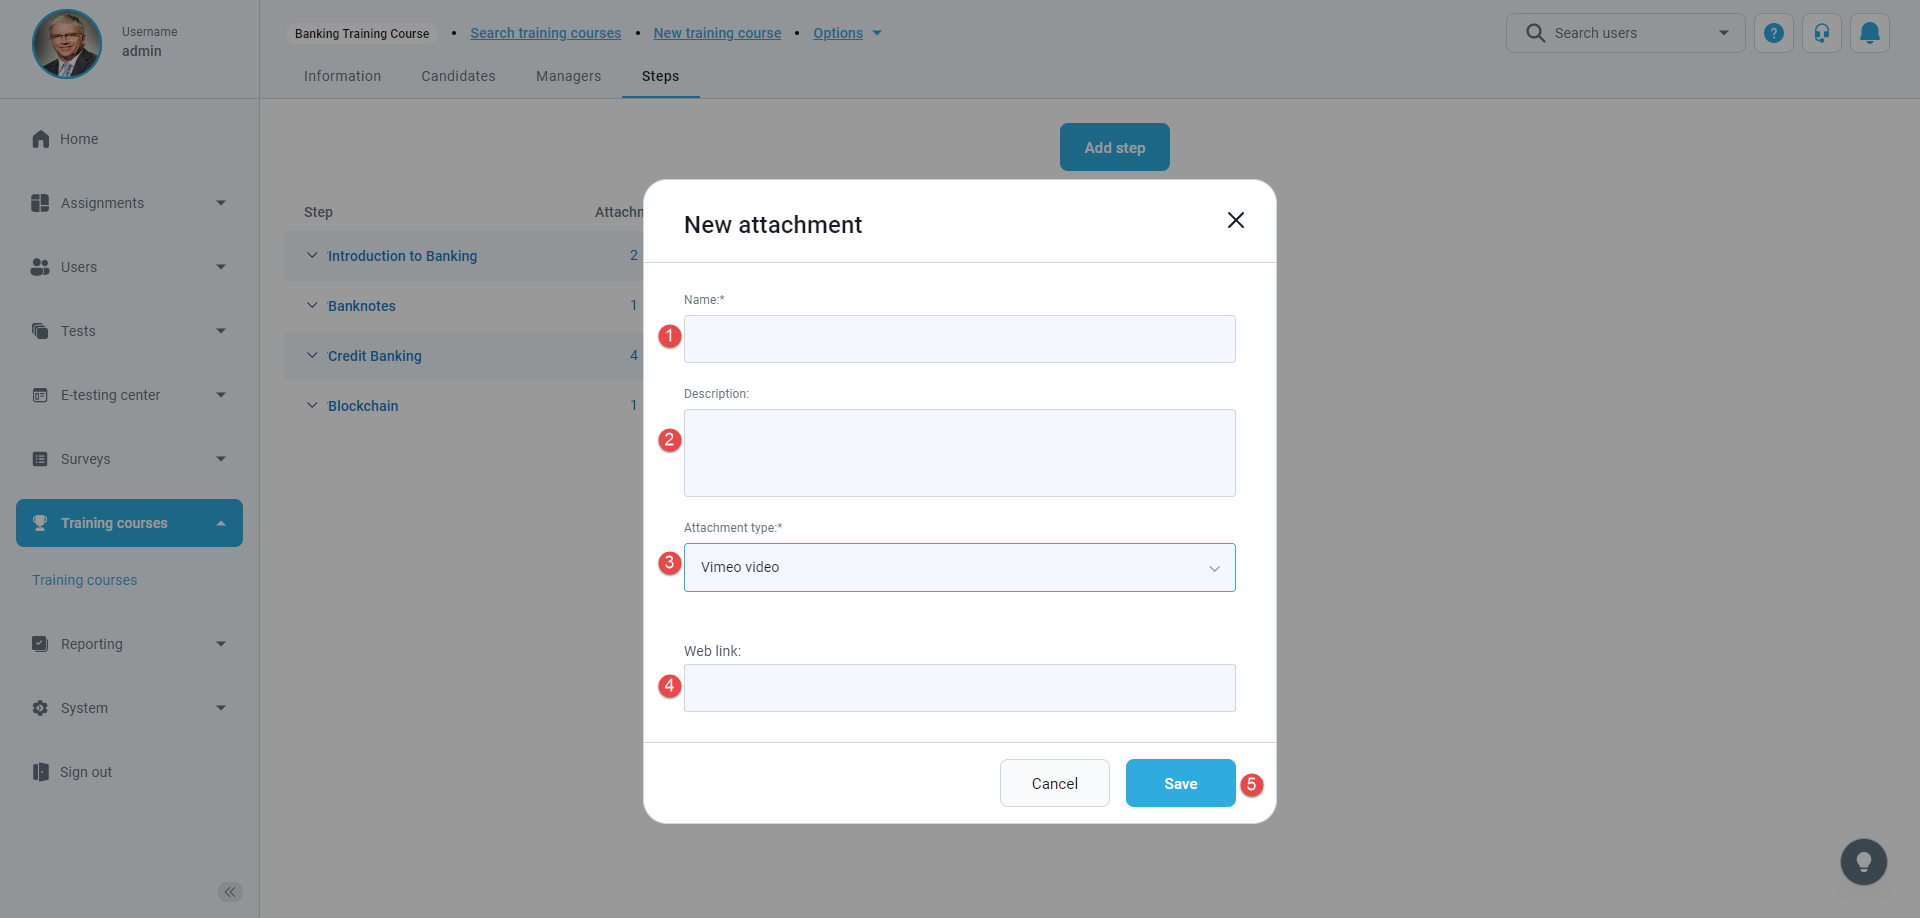
Adding Vimeo video
To add Vimeo video:
- Enter the attachment name.
- Optionally, enter the description.
- Choose the attachment type – select Vimeo video from the dropdown list.
- Insert the link to the Vimeo video.
- Click the “Save” button.
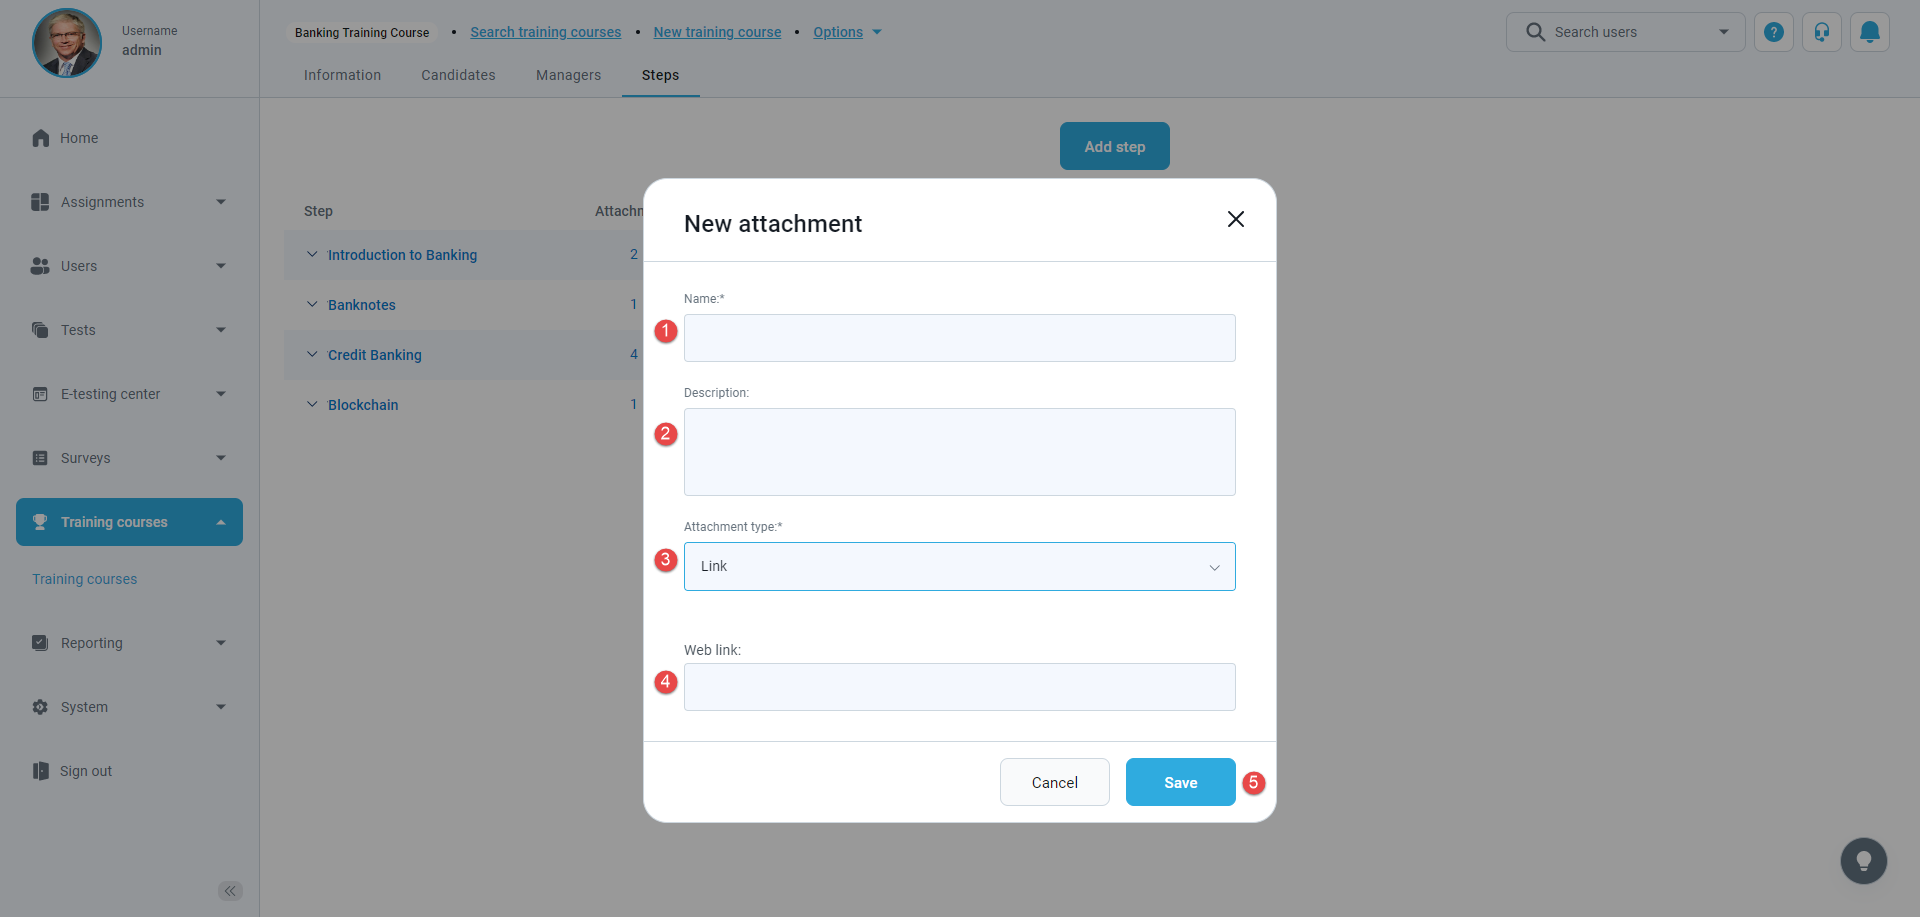
Adding a link
To add a link:
- Enter the attachment name.
- Optionally, enter the description.
- Choose the attachment type – select Link from the dropdown list.
- Insert the link.
- Click the “Save” button.
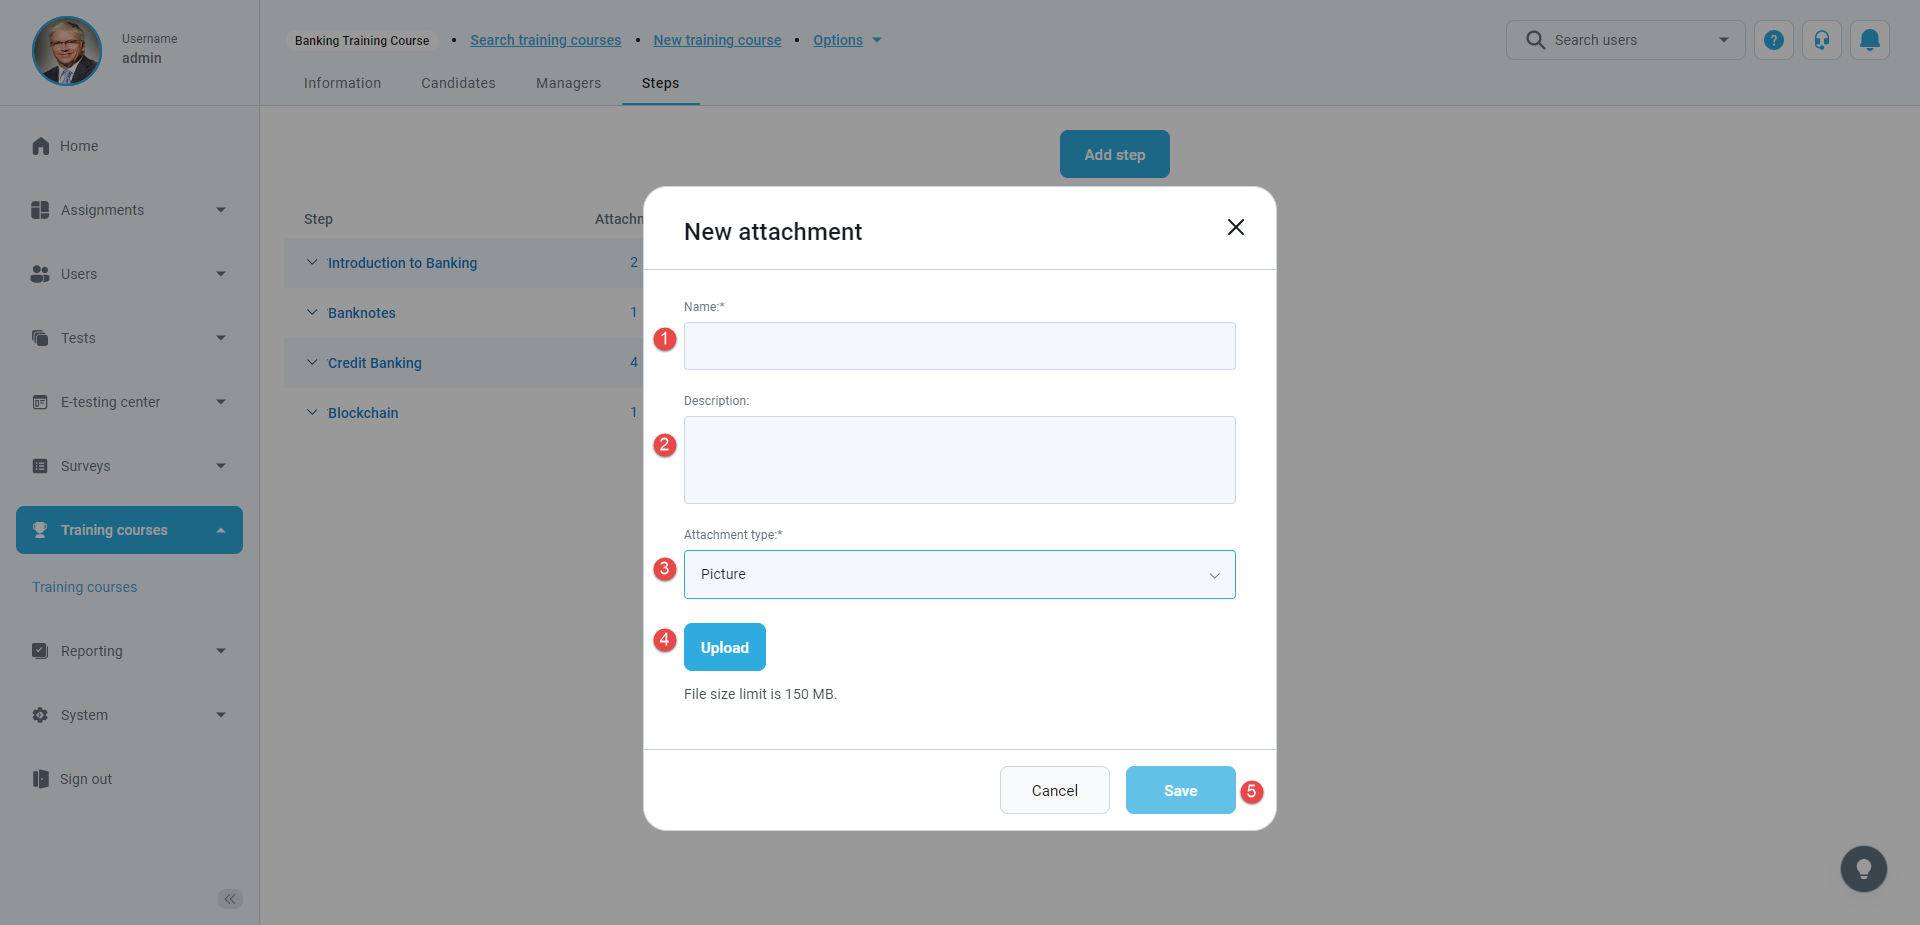
Adding a picture
To add a picture:
- Enter the attachment name.
- Optionally, enter the description.
- Choose the attachment type – select Picture from the dropdown list.
- Upload the file by clicking the “Upload” button.
- Click the “Save” button to add the picture.
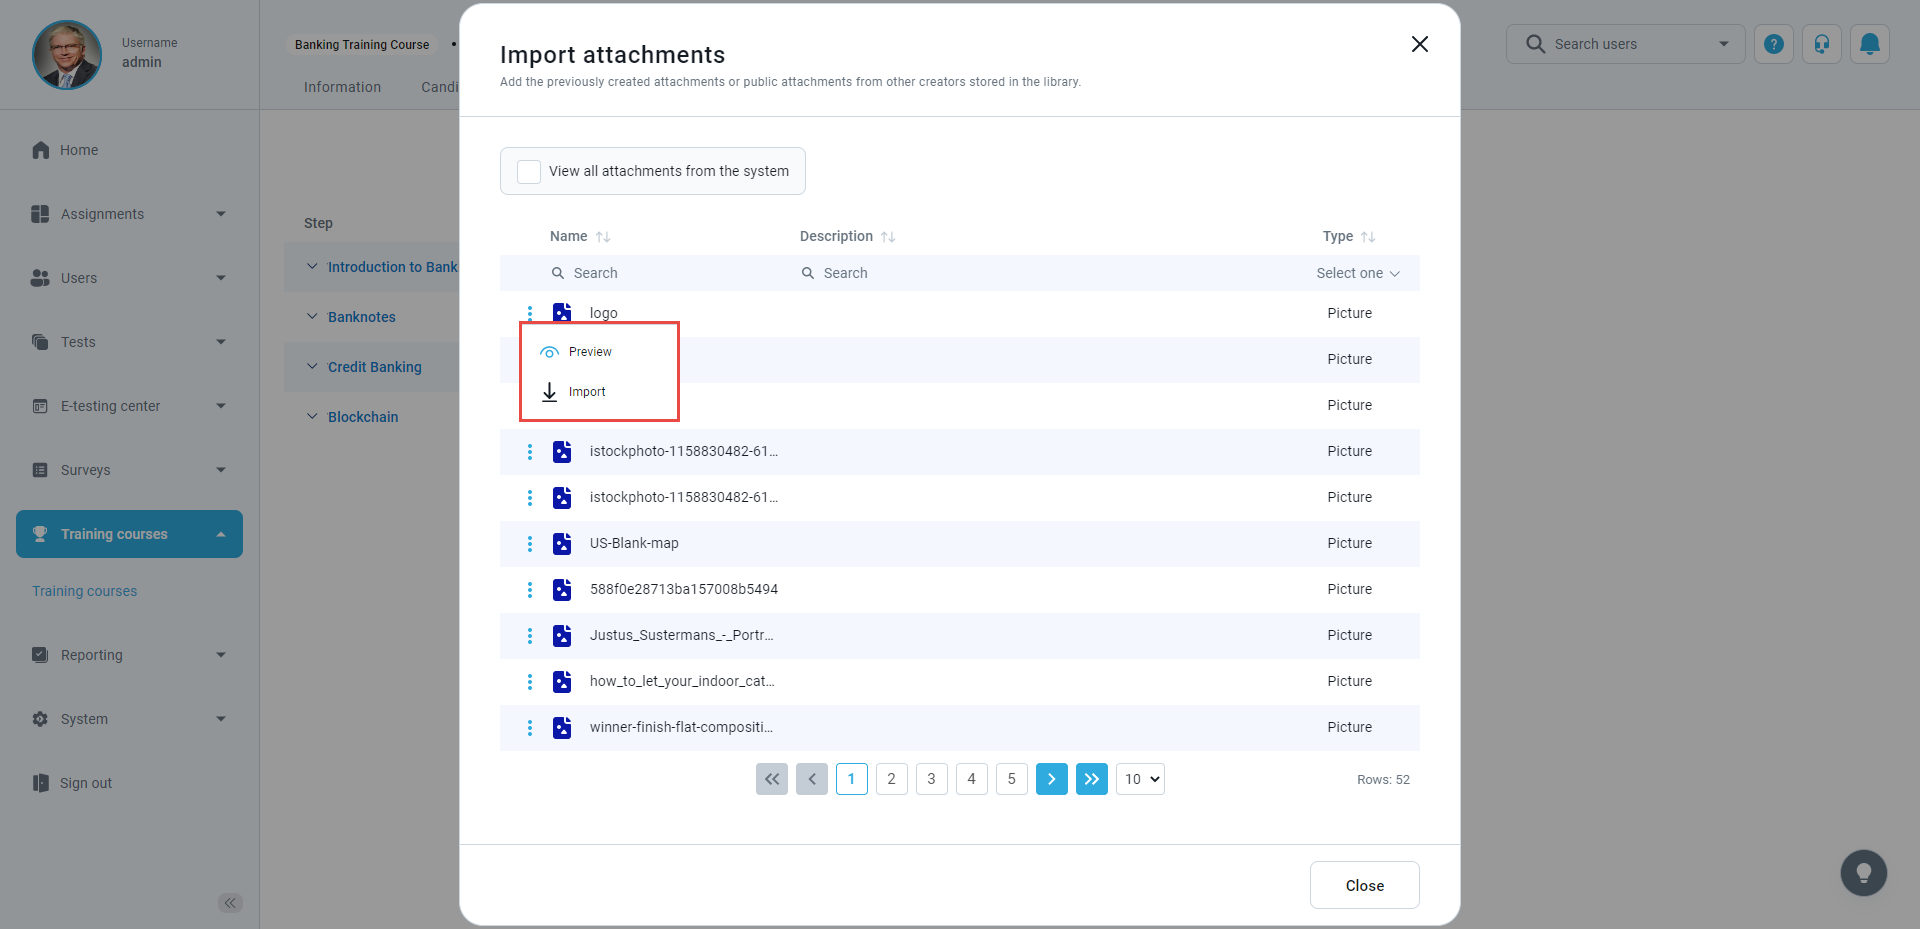
Importing existing attachments from the library
After clicking on the option “Import from library” a pop-up window will appear where will be displayed an action option (three dots on the left side of the screen). Clicking on it, the drop-down list will appear with actions “Preview” and “Import”.