This article explains how to enable additional languages for tests and application interfaces.
Accessing language settings
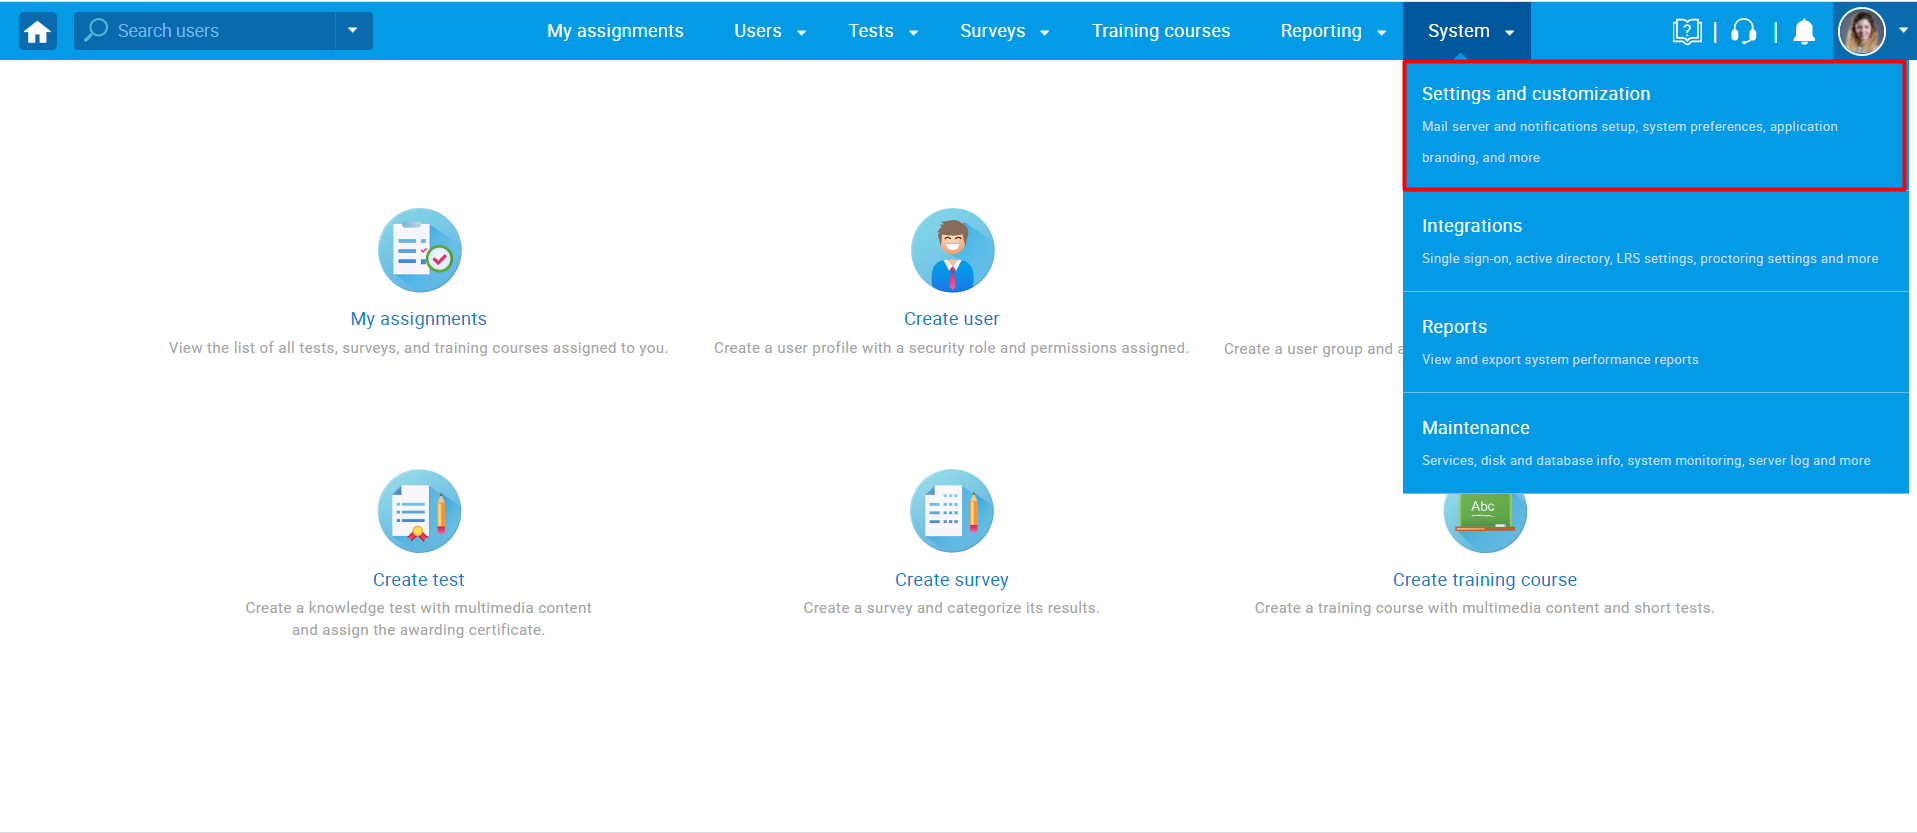
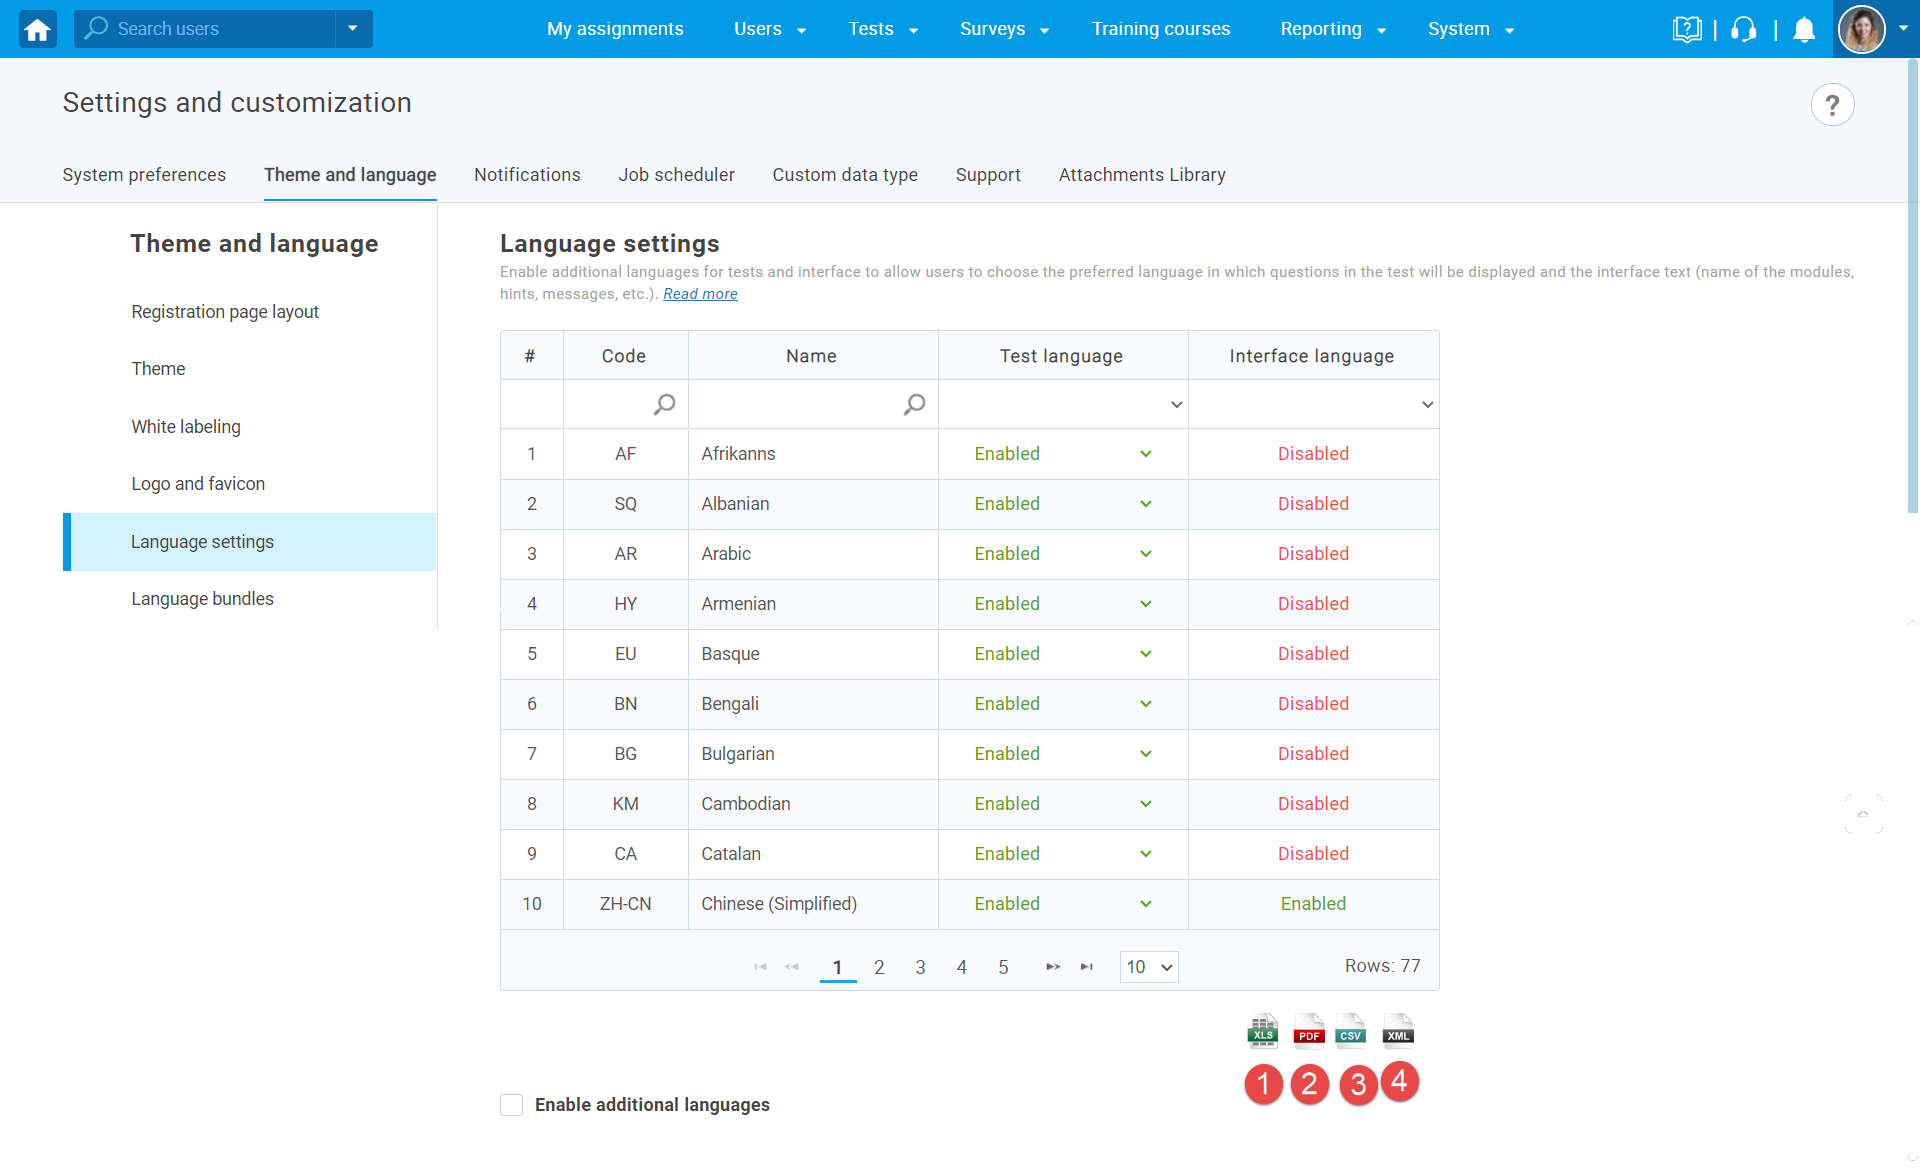
To access the “Language settings”, hover over the “System” in the main menu and select the “Settings and customization”.
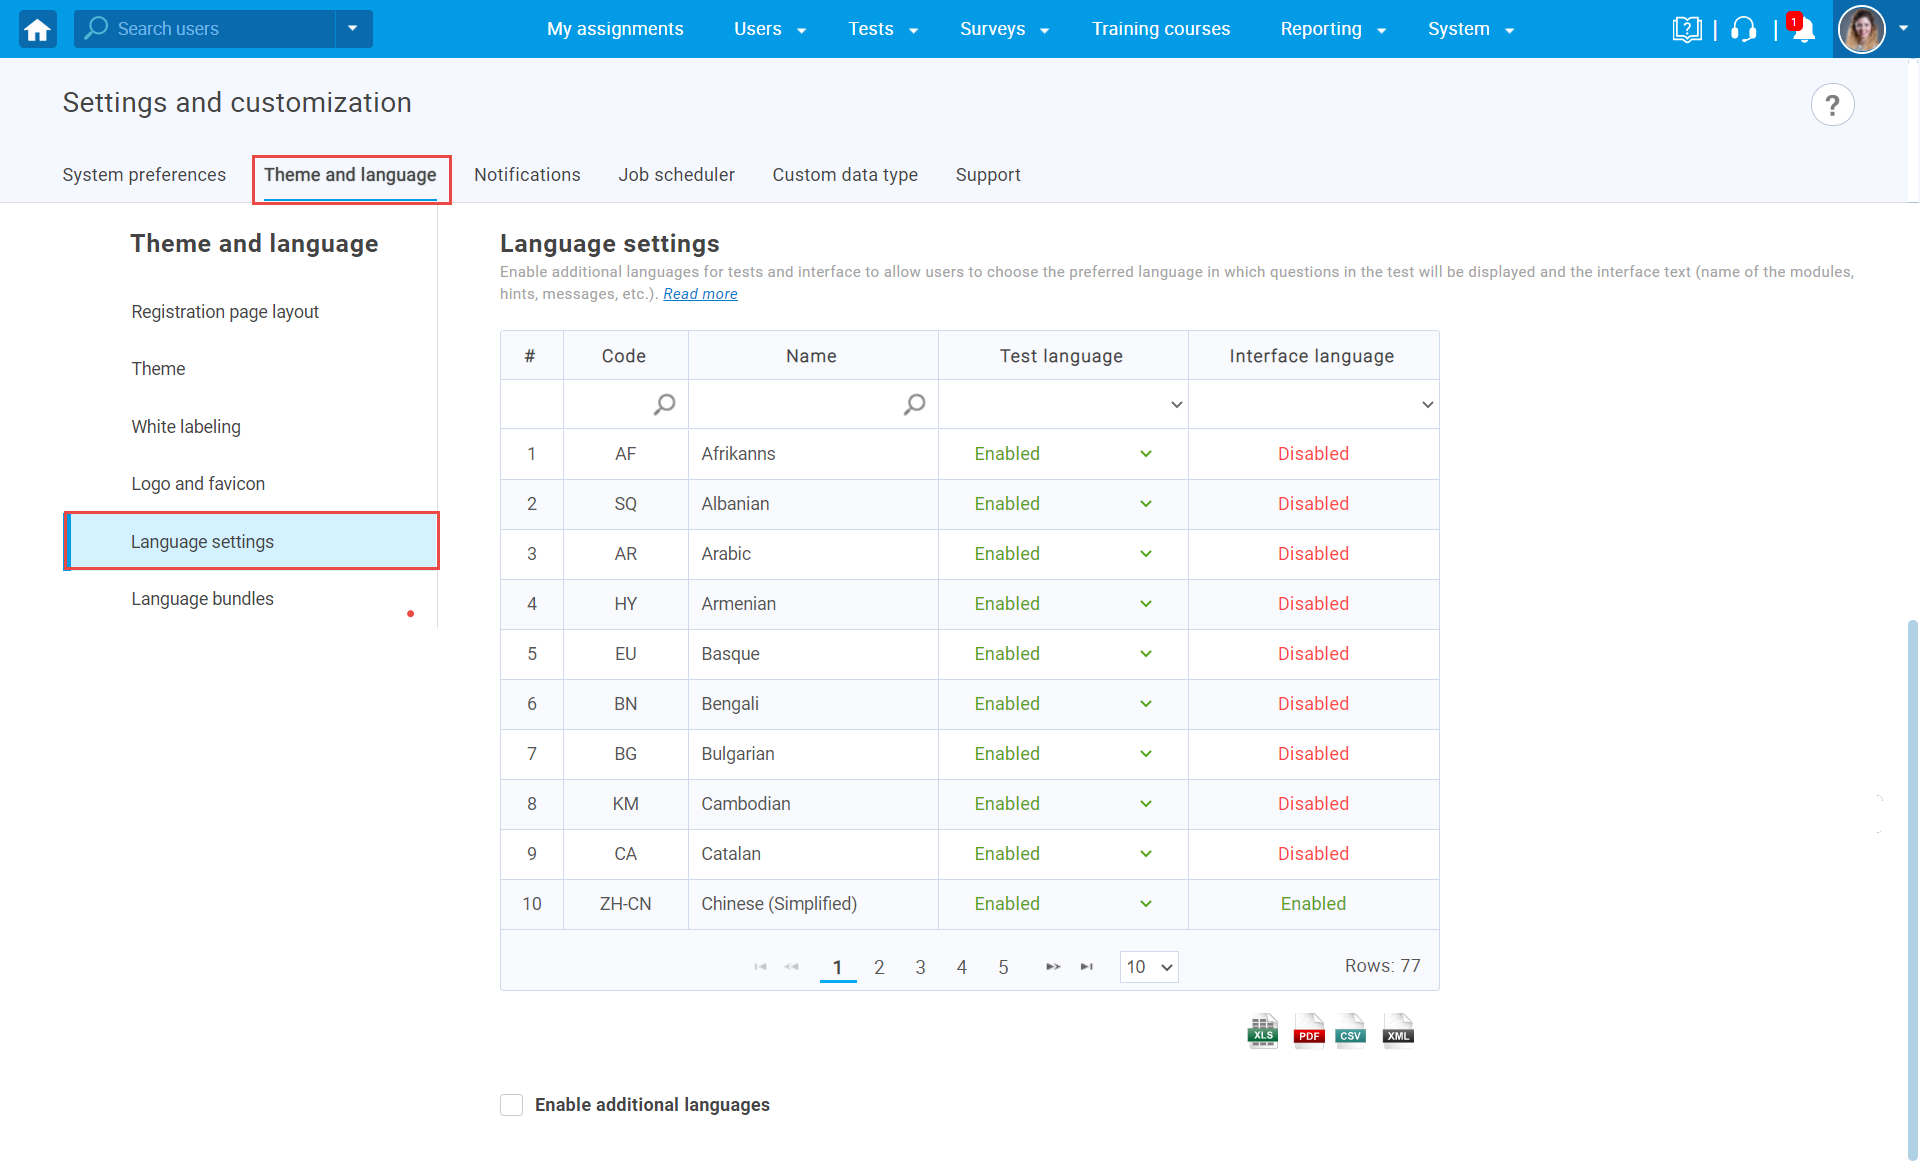
Then, navigate to the “Theme and languages” tab and choose “Language settings”.
Filtering languages
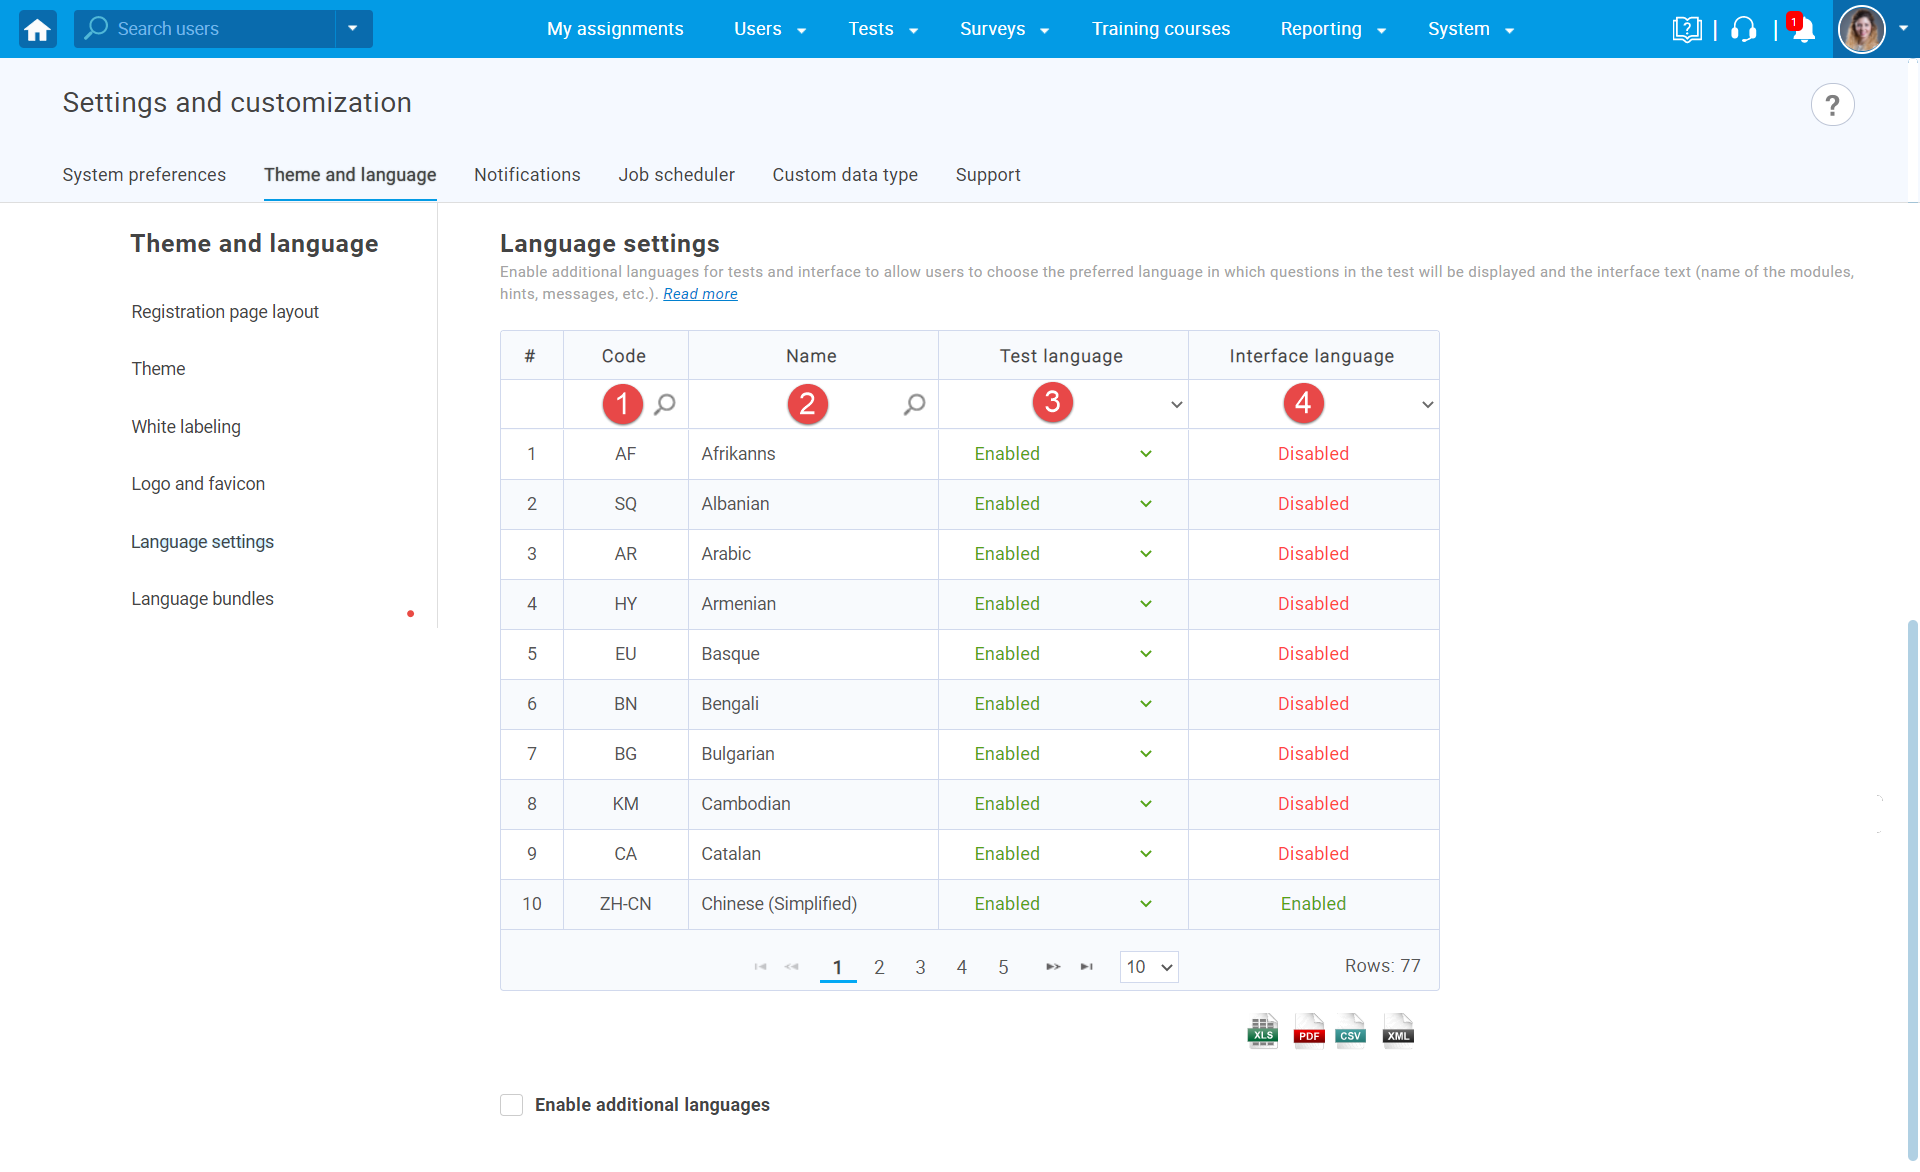
You can search by:
- Language code
- Name of the language
- Status (“Enabled” or “Disabled”)
Status “Enabled” means that users can select that language when setting their accounts and have tests displayed in their preferred language.
- Interface available (“Enabled” or “Disabled”)
Status “Enabled” means that users can change the language of the application interface.
Enabling additional languages
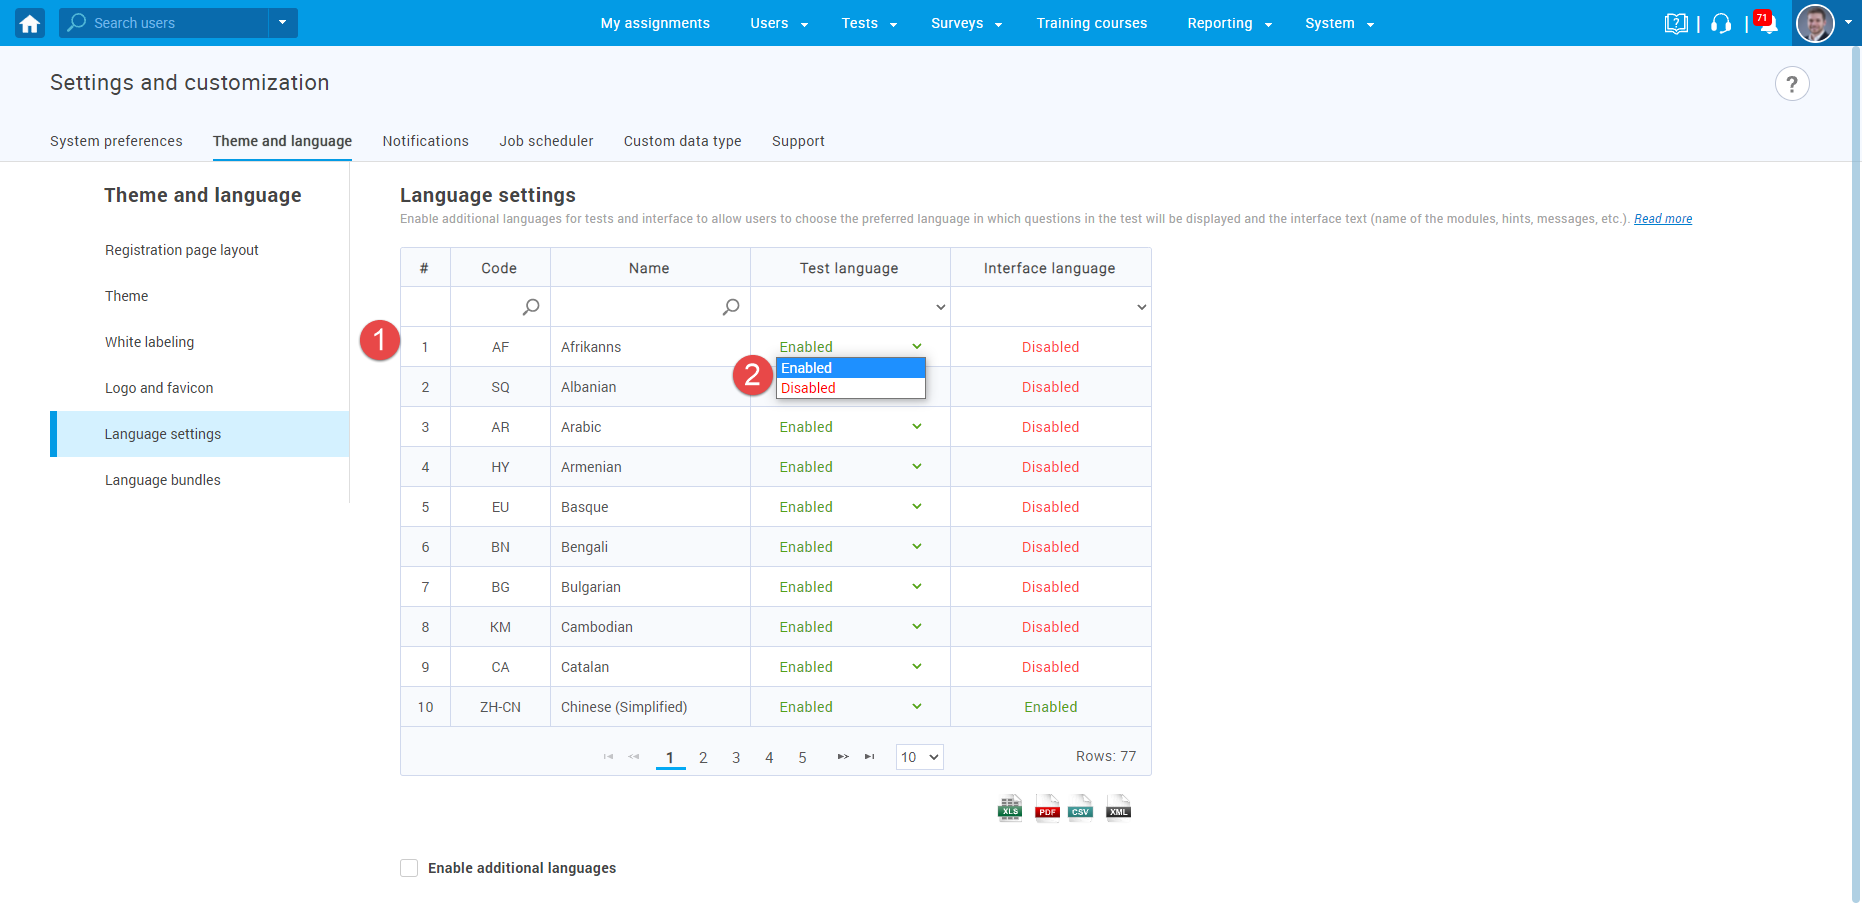
If you want to enable additional languages for users:
- Choose a language.
- Change status for that language by selecting “Enabled” from the drop-down menu.
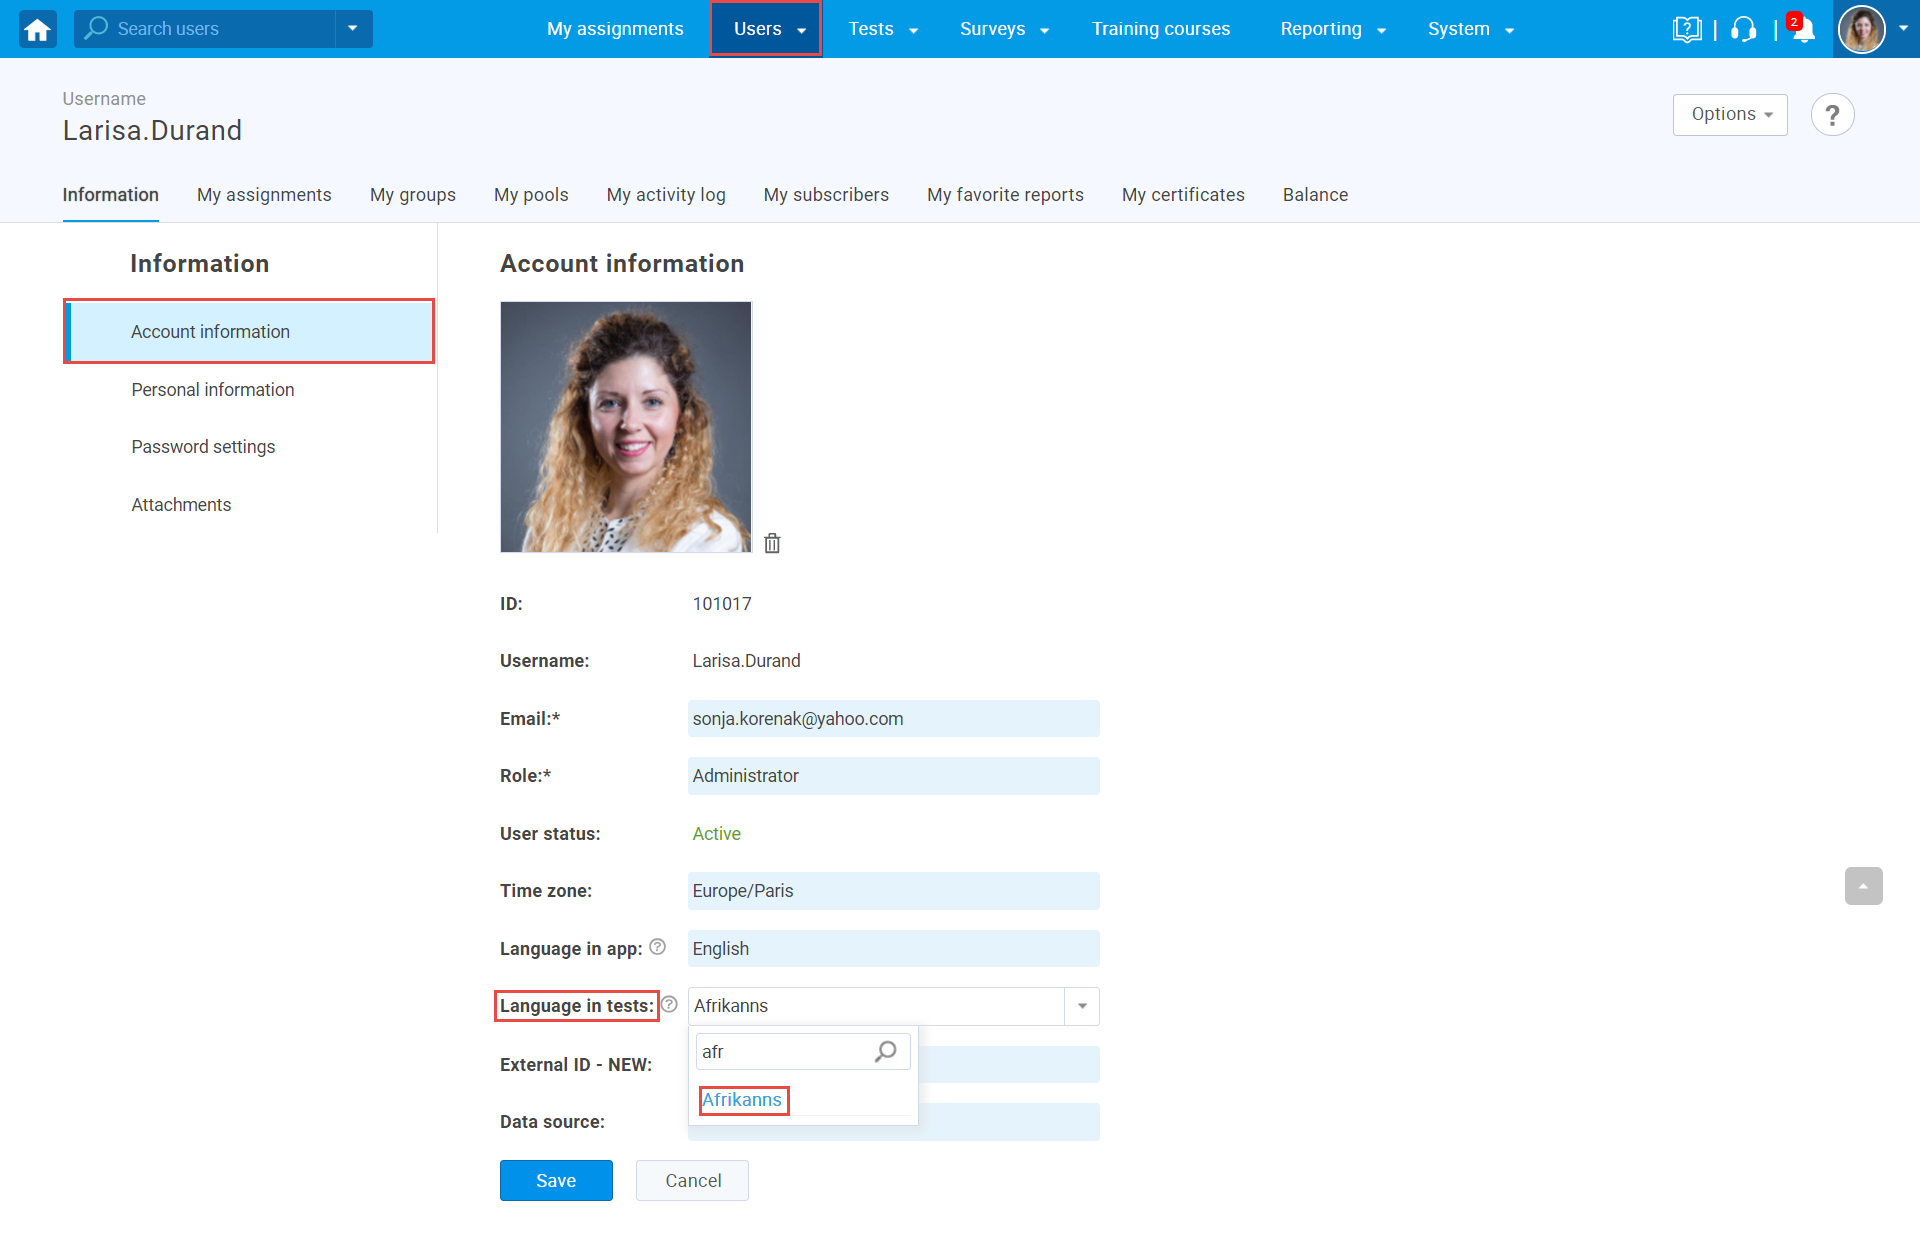
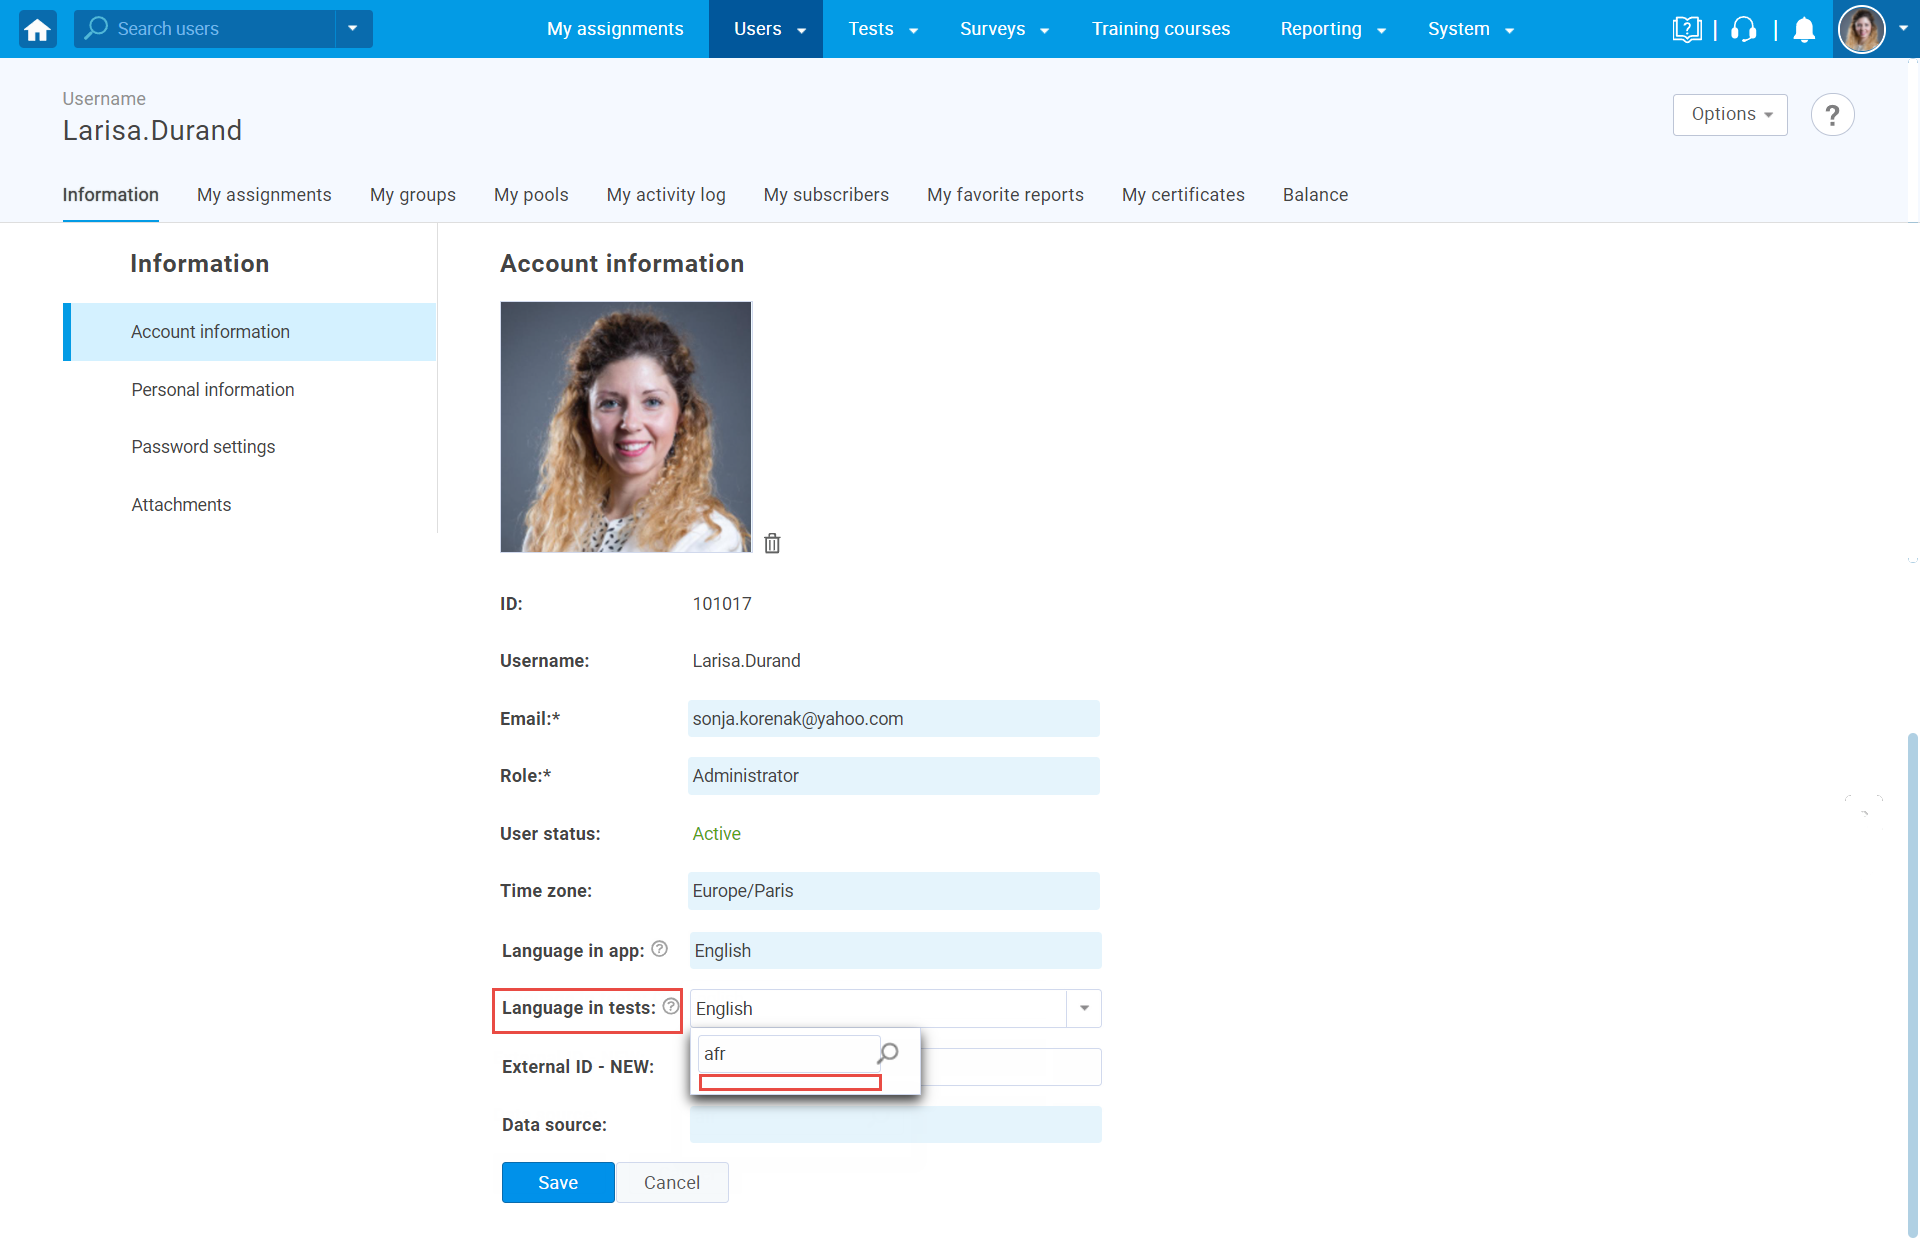
Preview of languages in the user account
To preview the changes, navigate to “Users” in the main menu, then “My profile” and then to “Account Information“.
When the language is enabled.
When the language is disabled.
Exporting the table
You can export the language table with all information in the following formats:
- Excel file
- CSV
- XML
For more related instructional materials, please visit:


