Introduction
This article explains how to integrate YouTestMe GetCertified with ILIAS via LTI.
Integration is conducted with the 5.4. version of ILIAS.
Creating an LTI configuration
To set up the integration:
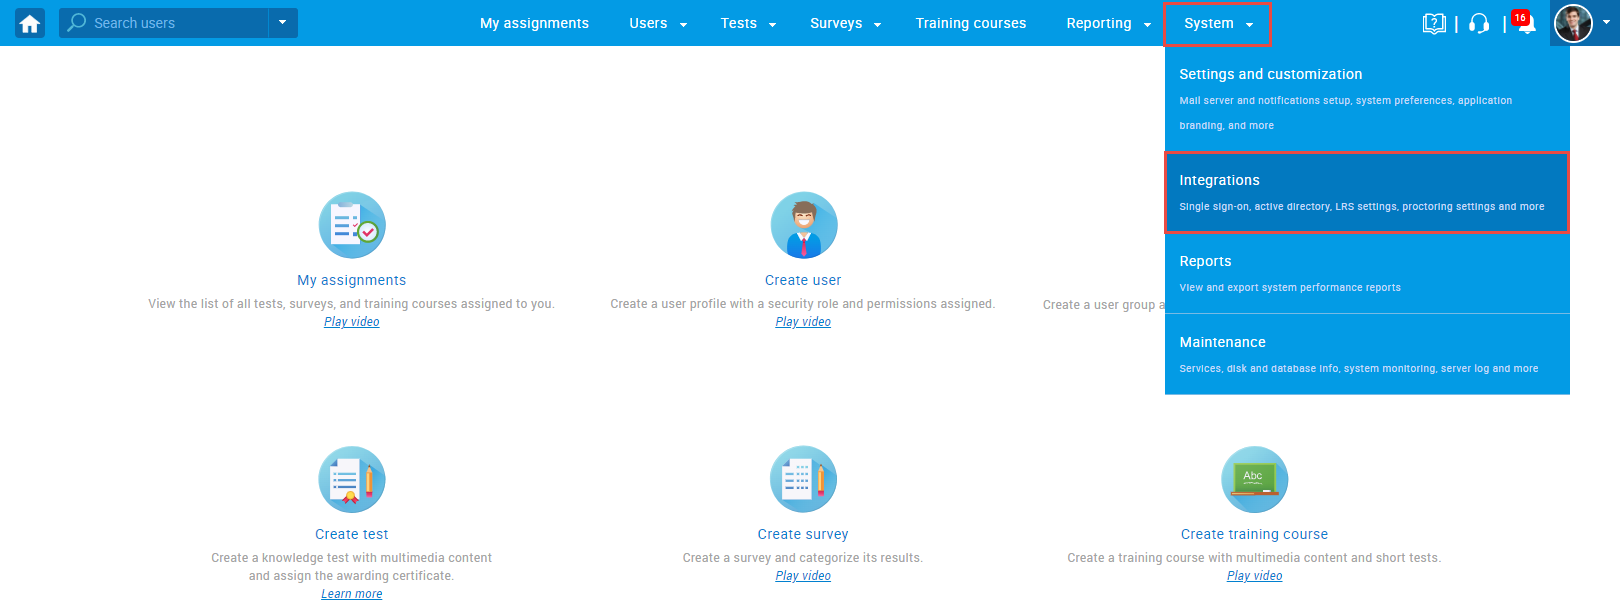
- Hover over the “System” section in the main menu, selecting “Integrations”.
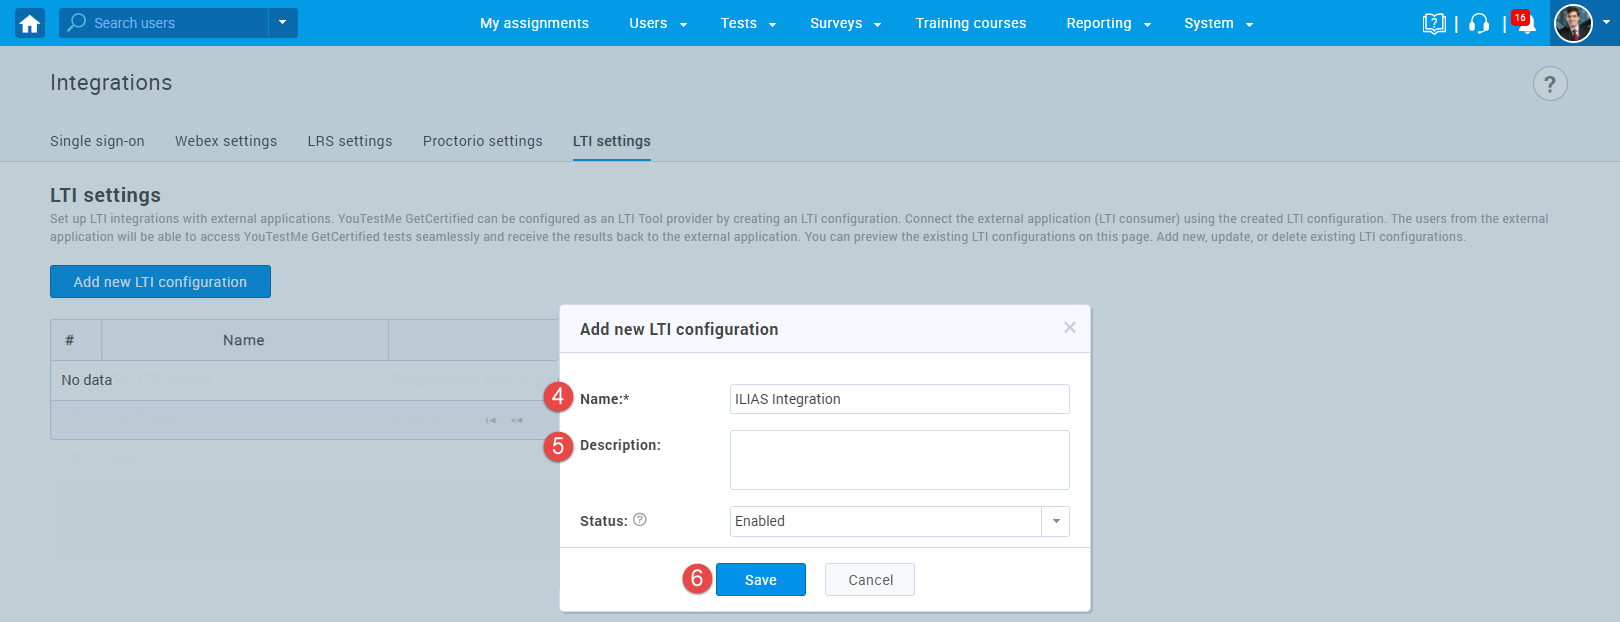
- Navigate to the “LTI settings” tab.
- Click the “Add new LTI configuration”.

- Enter a name.
- Enter a description (optional)
- Click the “Save” button.
The LTI integration will be created. Click the pencil icon to preview integration details or edit the integration name, description, and status.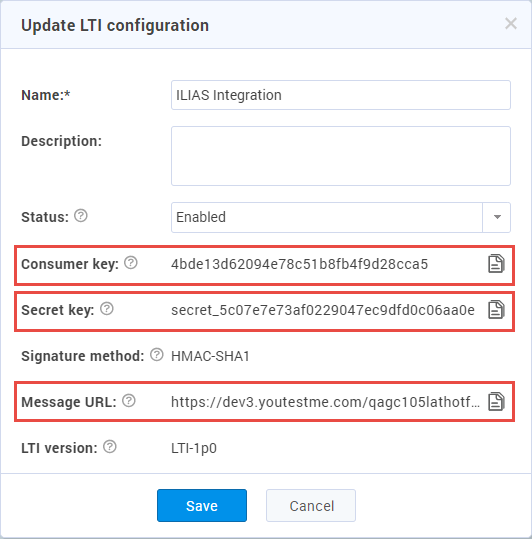
“Consumer key“, “Secret key“, and “Message URL” will be used for External Content configuration in the ILIAS.
Creating a test
For more information on how to create a test, create a testing session, and publish the test, see the following articles:
If candidates are allowed to pause the test and continue the test-taking later, you should enable the “Allow test continuation” option while creating a test.
Additionally, candidates will be able to continue the test without the test manager’s intervention in case of test interruption (e.g. lost internet connection).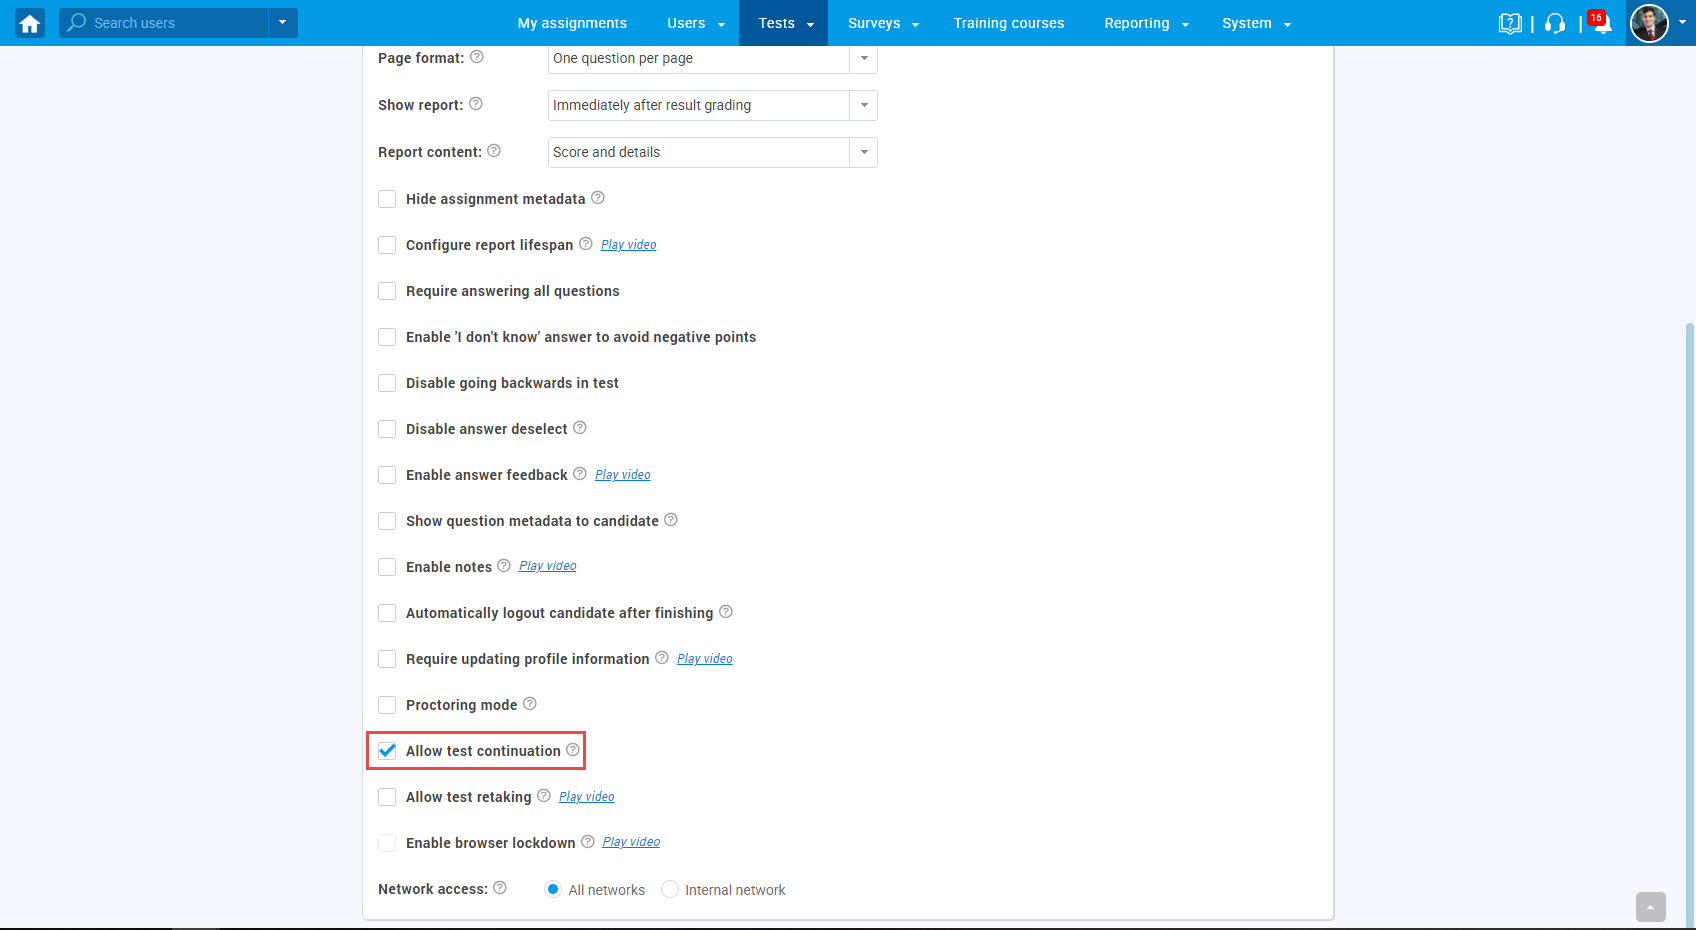
The picture below shows the test-taking page from the candidate’s perspective when test continuation is allowed.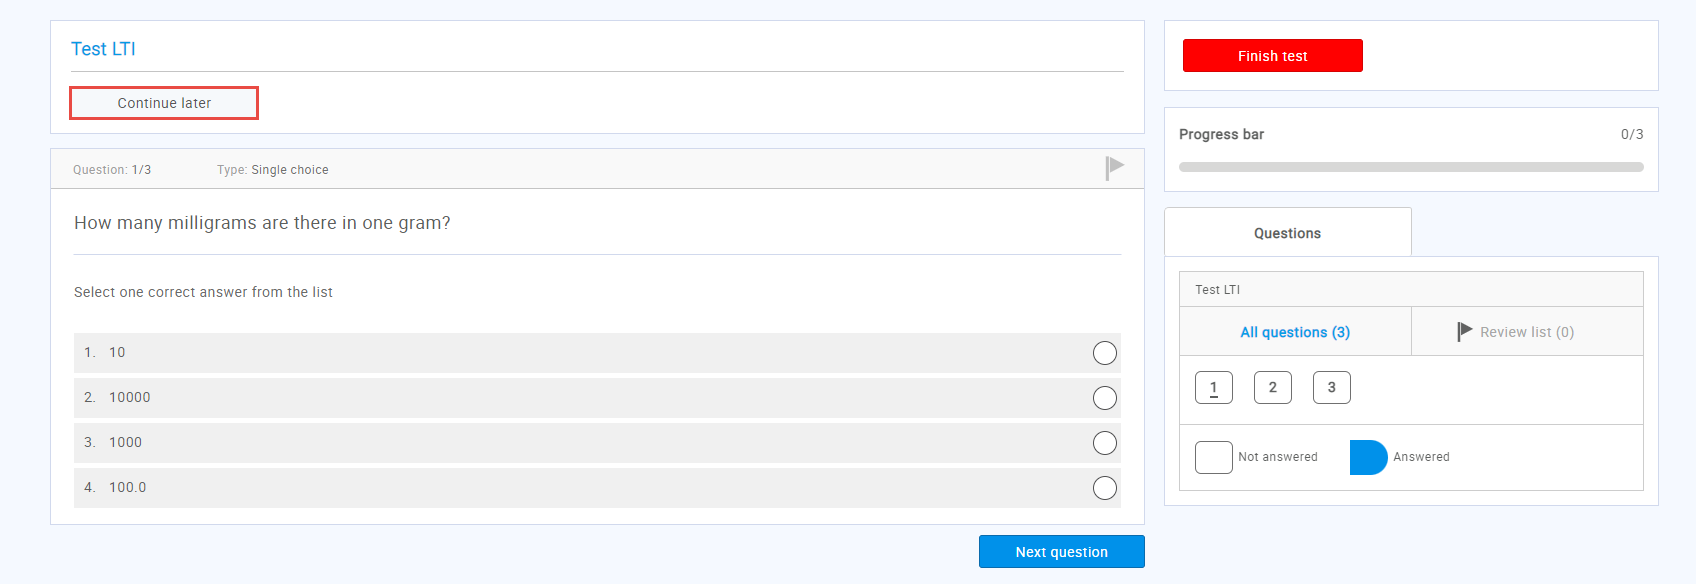
Setting up a course in the ILIAS
Open the desired course and navigate to the “Content” tab.
Click the “Add New Item” button, then choose “External Content”. 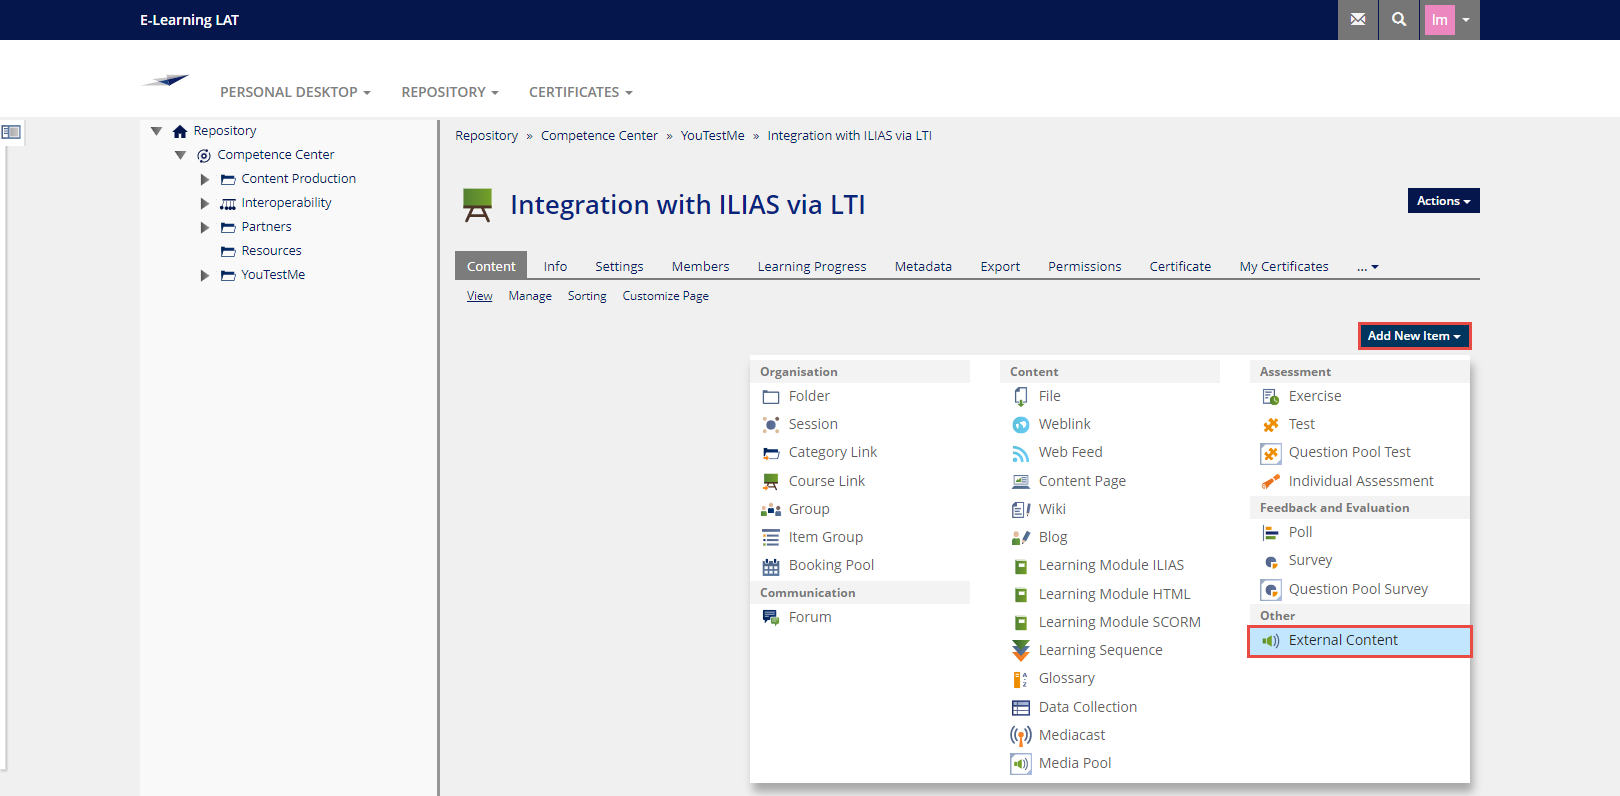
Then:
- Enter a title.
- Select a type.
- Click the “Save” button

- In the “Launch URL” field, enter the “Message URL” from the YouTestMe GetCertified application
- In the “Launch Key” field, enter the “Consumer key” from the YouTestMe GetCertified application
- In the “Launch Secret” field, enter the “Secret key” from the YouTestMe GetCertified application.
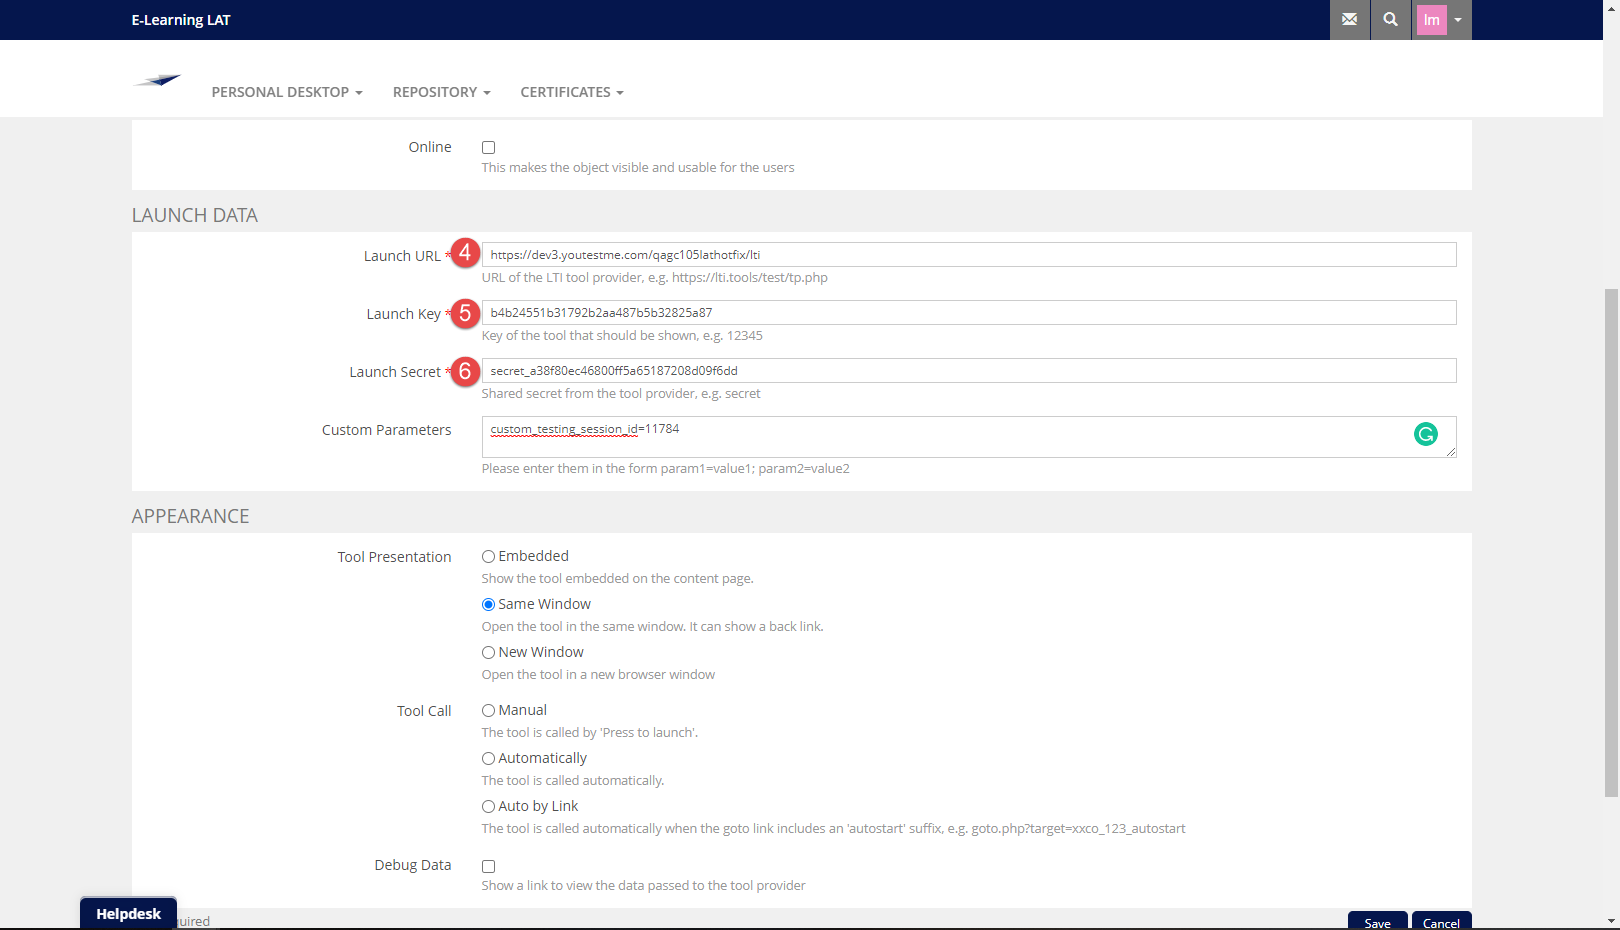
- In the “Custom parameters” field, enter “custom_testing_session_id” and the ID of the testing session in which the candidates need to take the test.The Testing sessions ID in the YouTestMe GetCertified application can be found in the “Details” preview of the “Testing sessions” tab for the desired test.

Please check the picture below to see an example of how to enter text in the “Custom parameters” field properly.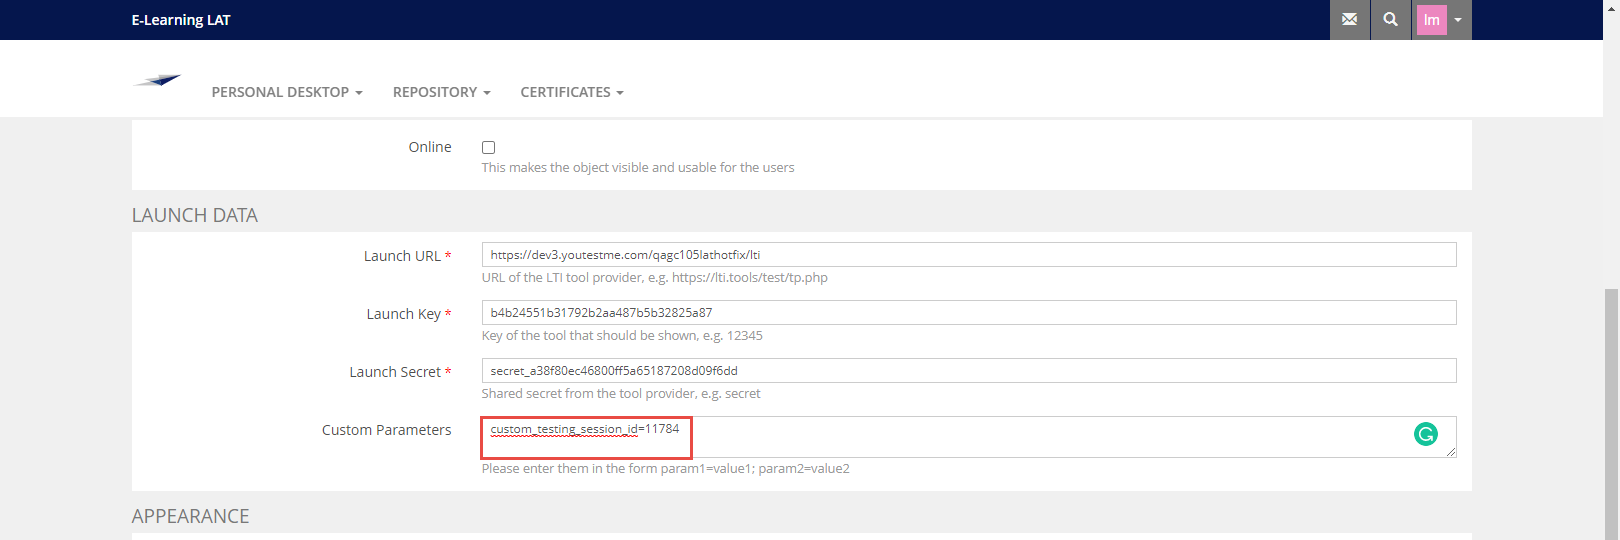
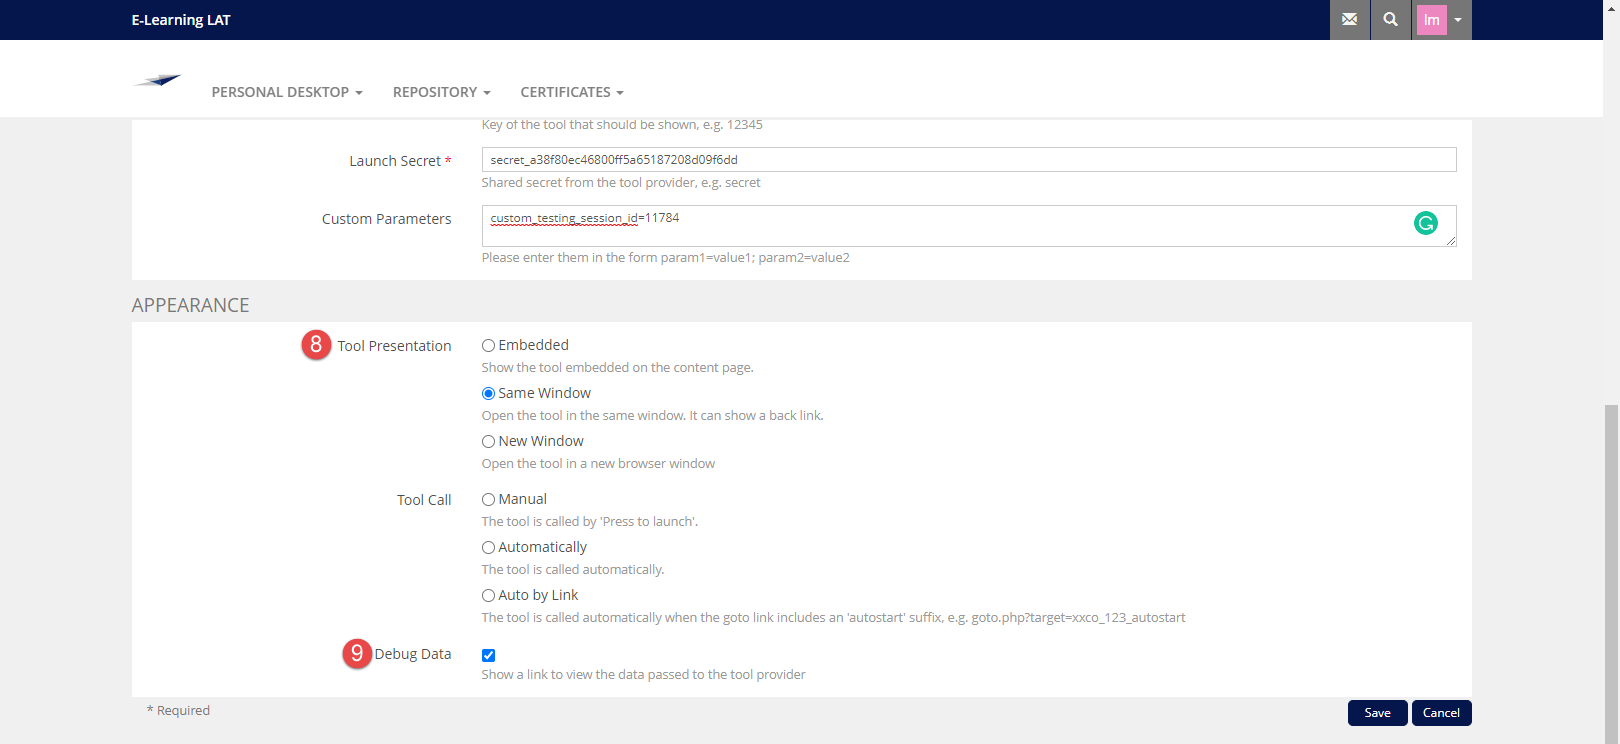
- A suggestion is to check “Same widow” for the “Tool presentation” option.
- It would be useful to enable the “Debug Data” option.
- Navigate to the “Learning Progress” tab.
- For the “Modus” option, set “Active”.
- Click the “Save” button
Assigning members to the course
To assign the desired members to the course:
- Navigate to the “Members” tab.
- Enter a member name in the “User” field and choose the desired account from the list.
- Click the “Add” button.

Taking the test
Once open the desired course, do the following:
- Click on the test name

- Click the “Press to launch” button to start the test.

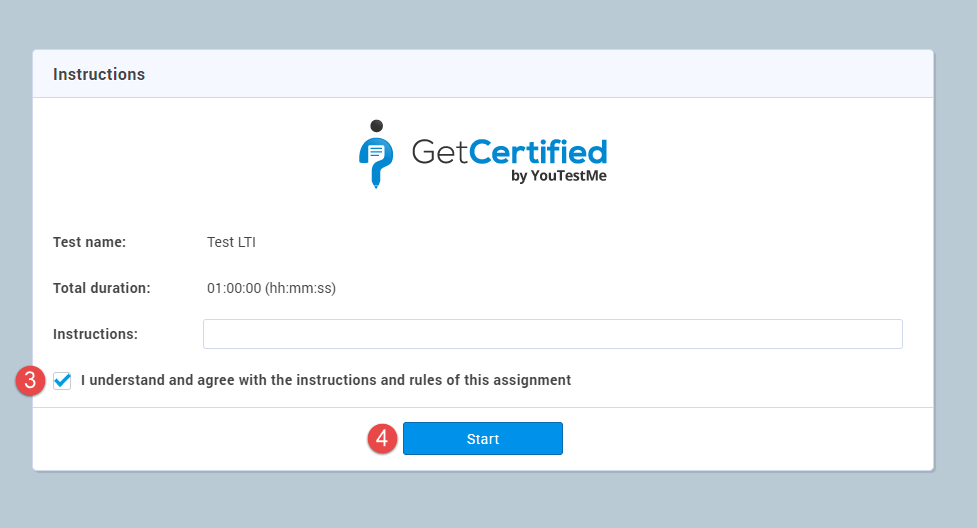
- Acknowledge the test instructions.
- Start the test by clicking the “Start” button.
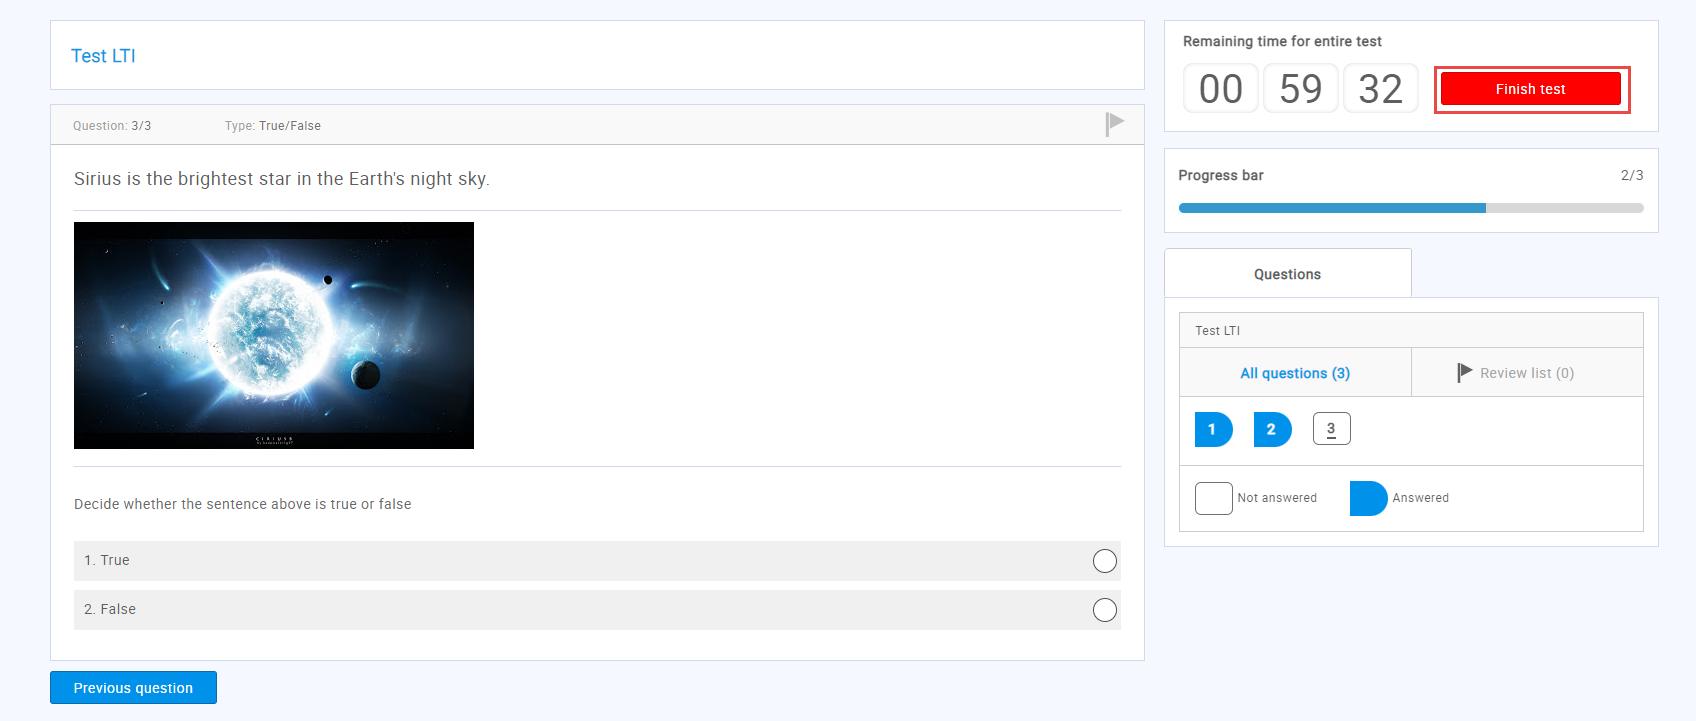
- Answer questions, then finish the test by clicking the “Finish test” button.
Depending on the test settings, you may be able to preview the test report. To log out from the YouTestMe GetCertified application, click the “Sign out” button.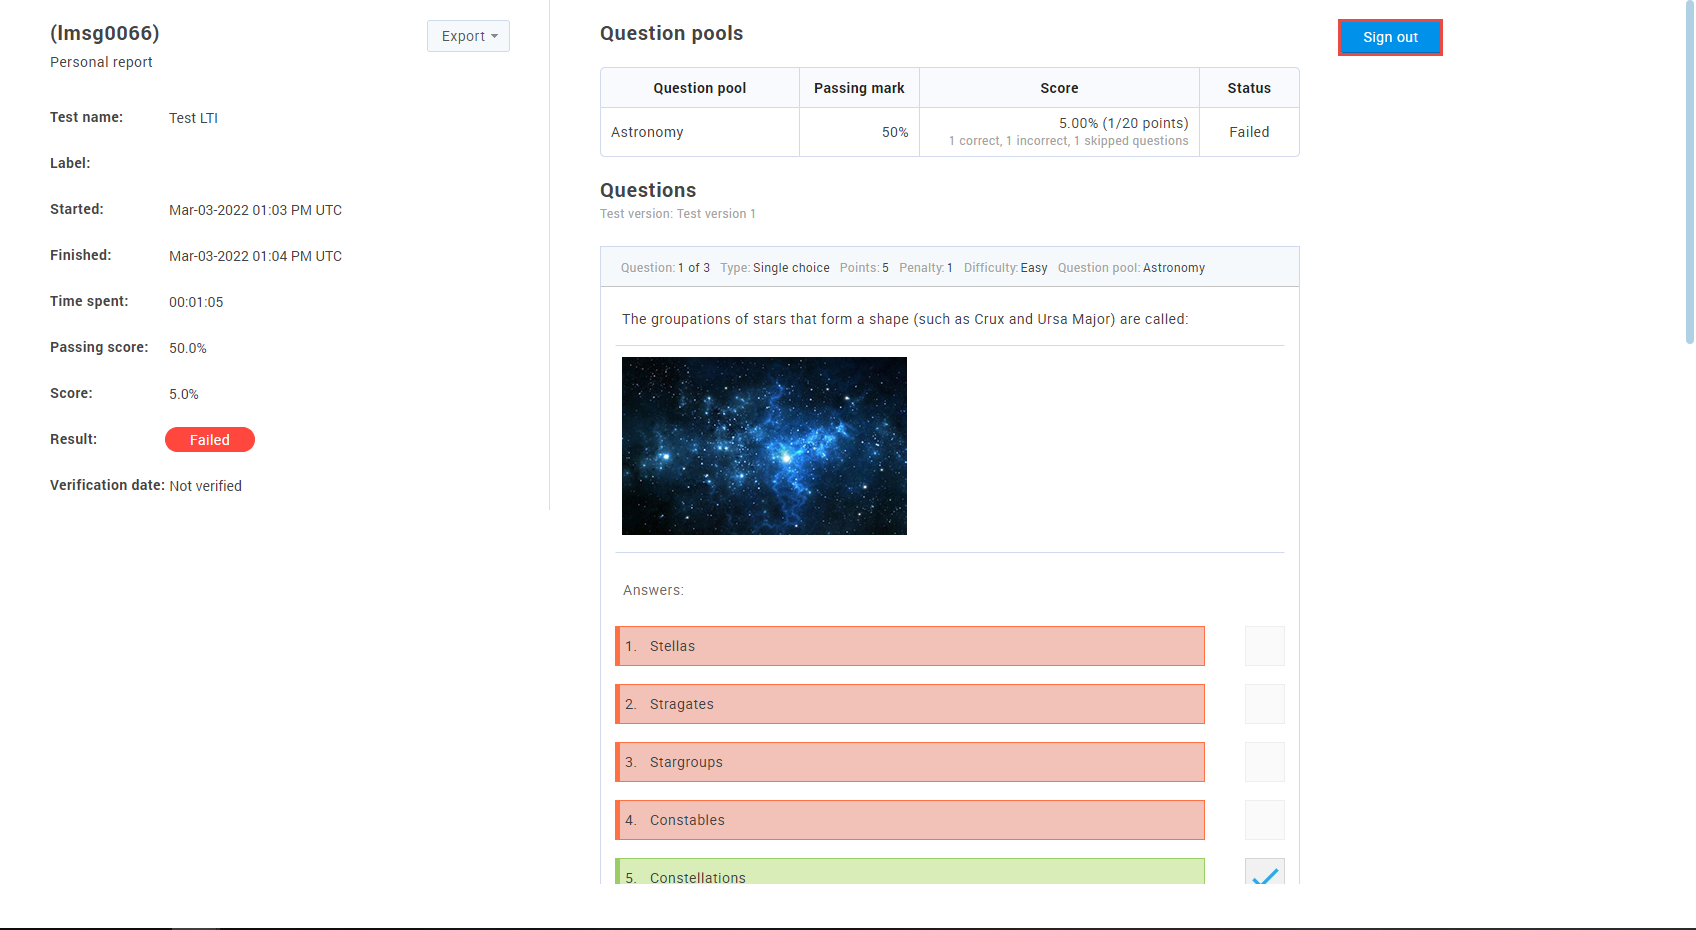
If the “Same Window” is previously set for the “Tool presentation” option in the ILIAS, you will be navigated to the course page again.
If the test continuation is allowed, the candidates can click the “Continue later” button on the test-taking page and then continue the test later in the same way they started the test. The same rules apply if the test is interrupted for some reason (e.g., lost internet connection).
Constraints
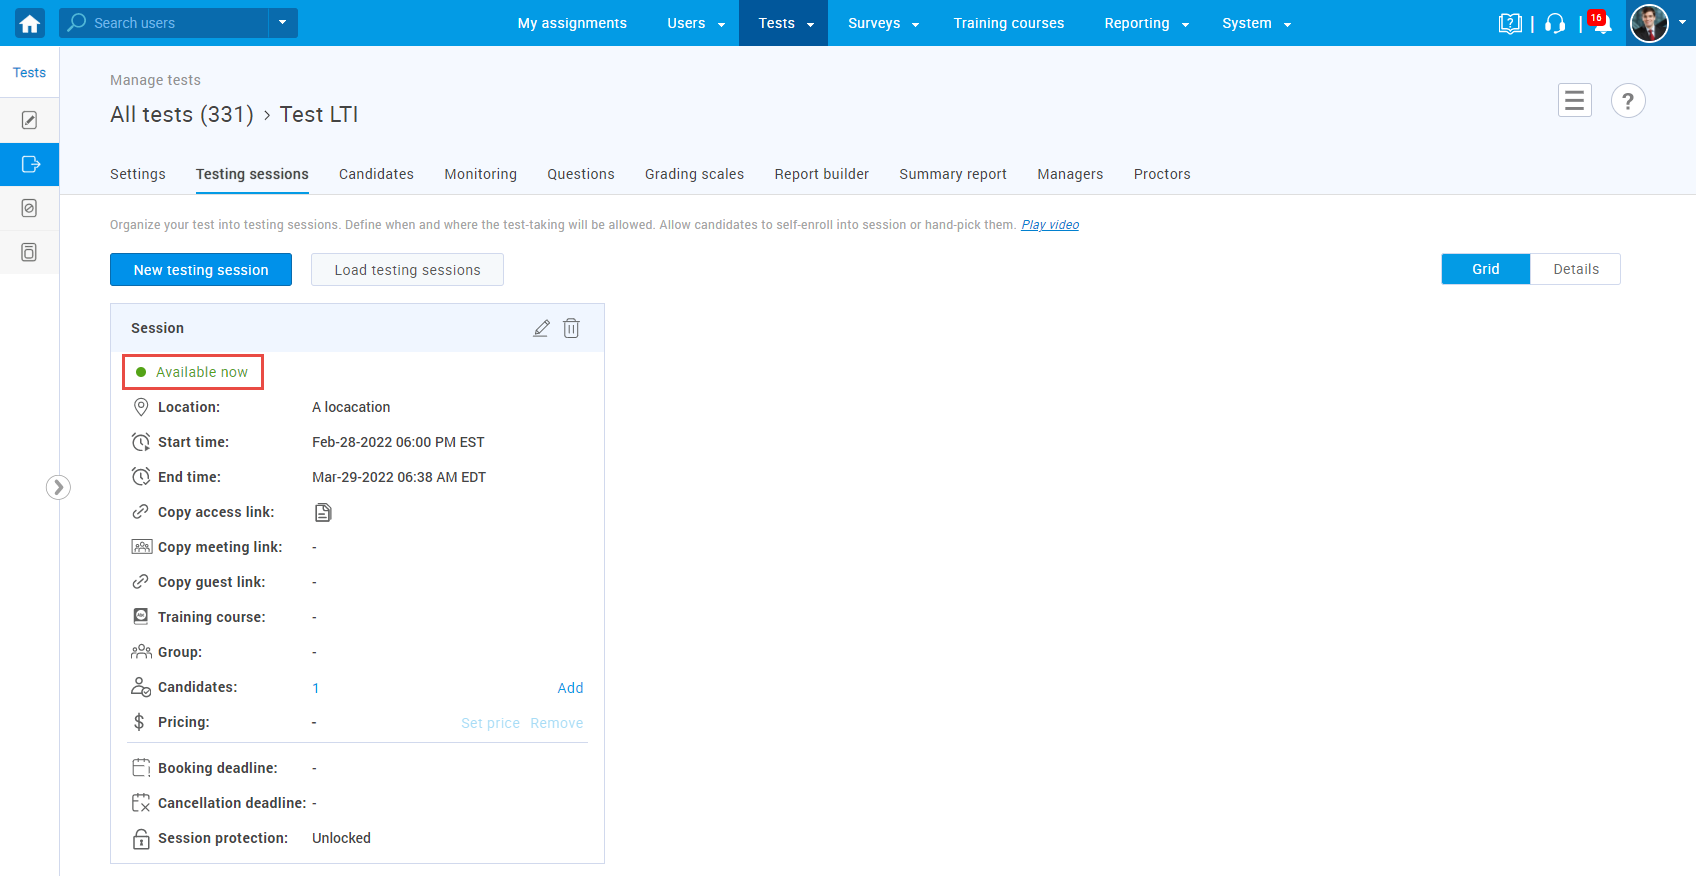
- The assigned testing session must be “Available now” when accessing the test link.
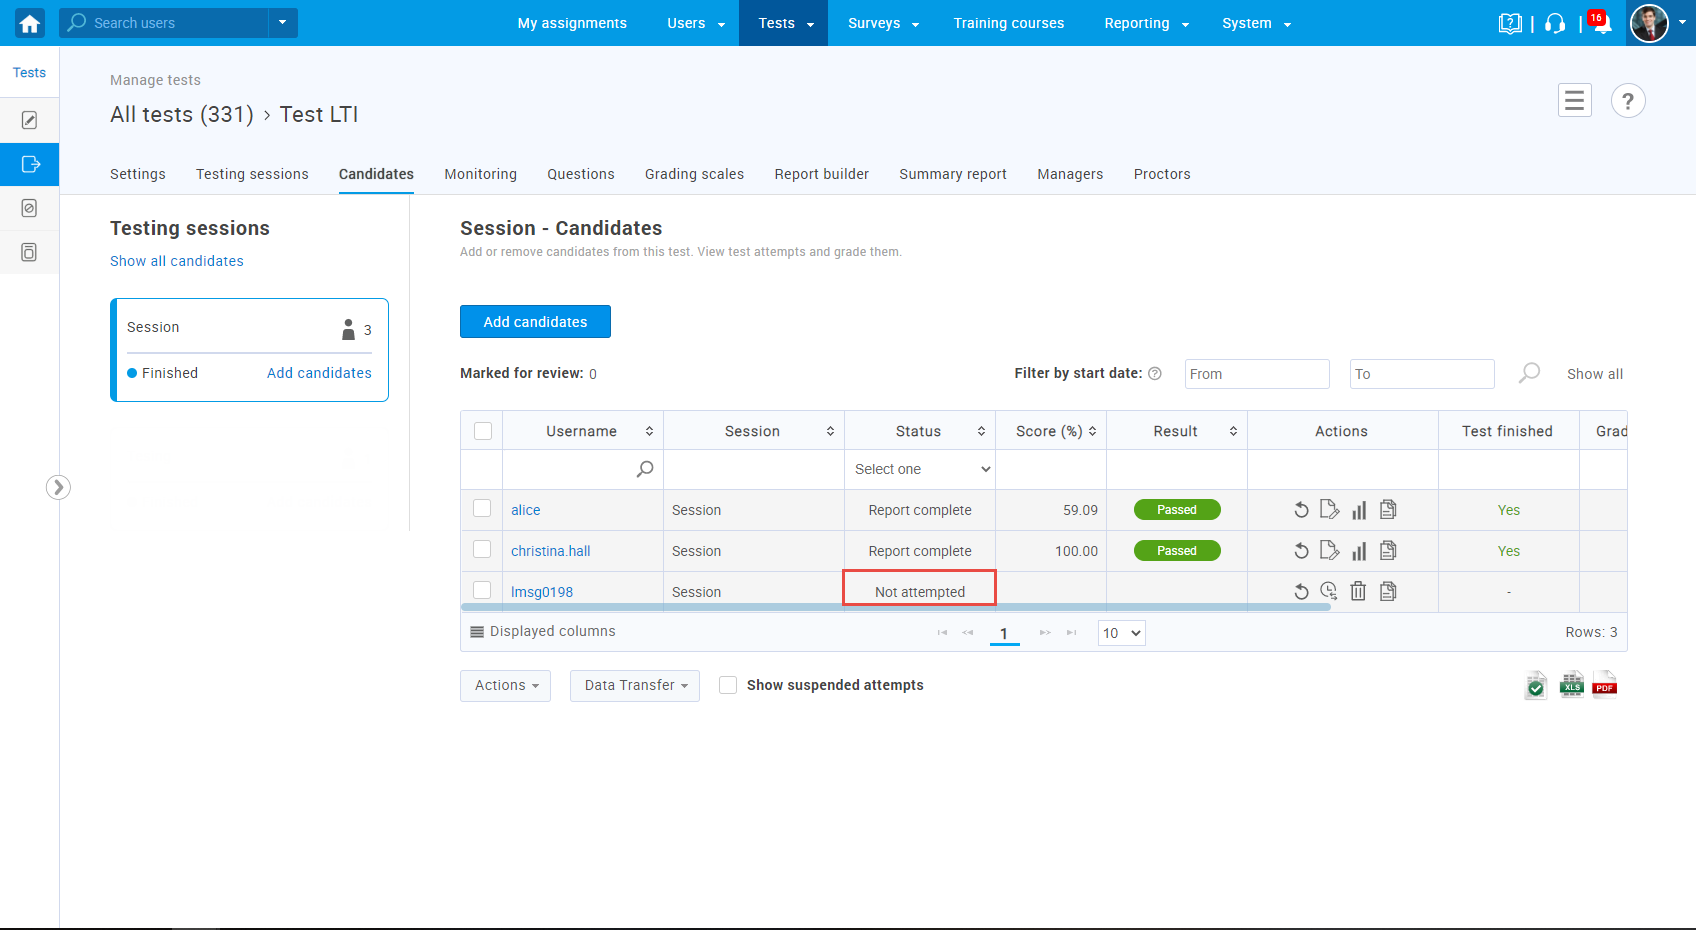
- Test attempts must have “Not attempted” or “Ready to continue” status.
