This article explains how to add new custom fields to record additional user data. Also, it explains how to create new types of dropdown menus for those fields.
Accessing the custom user properties tab
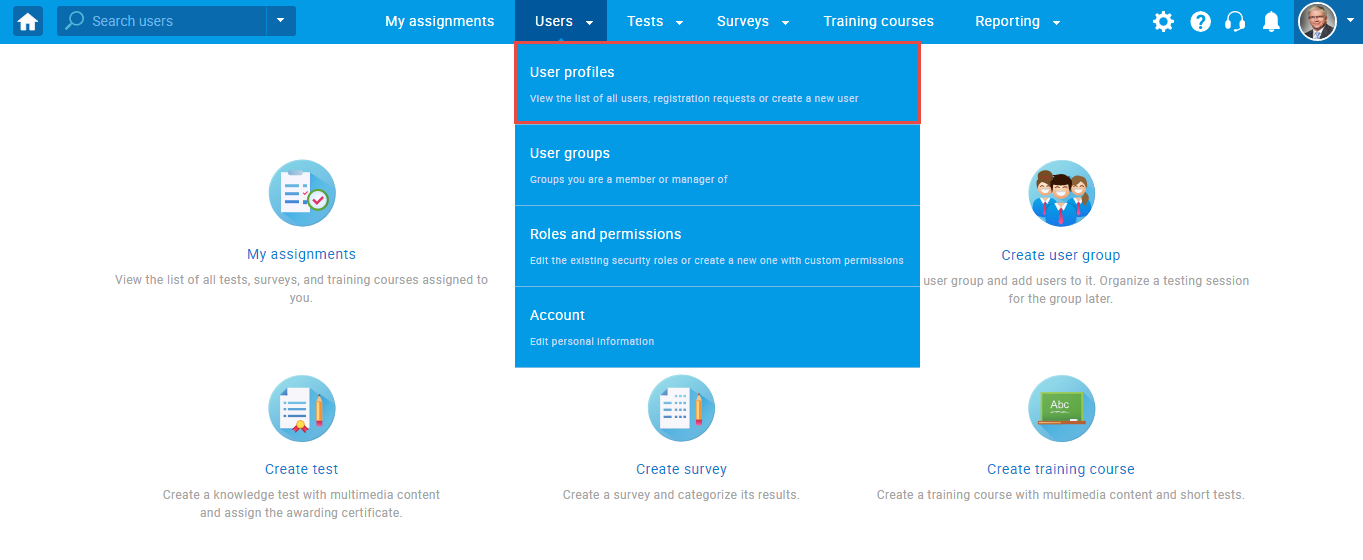
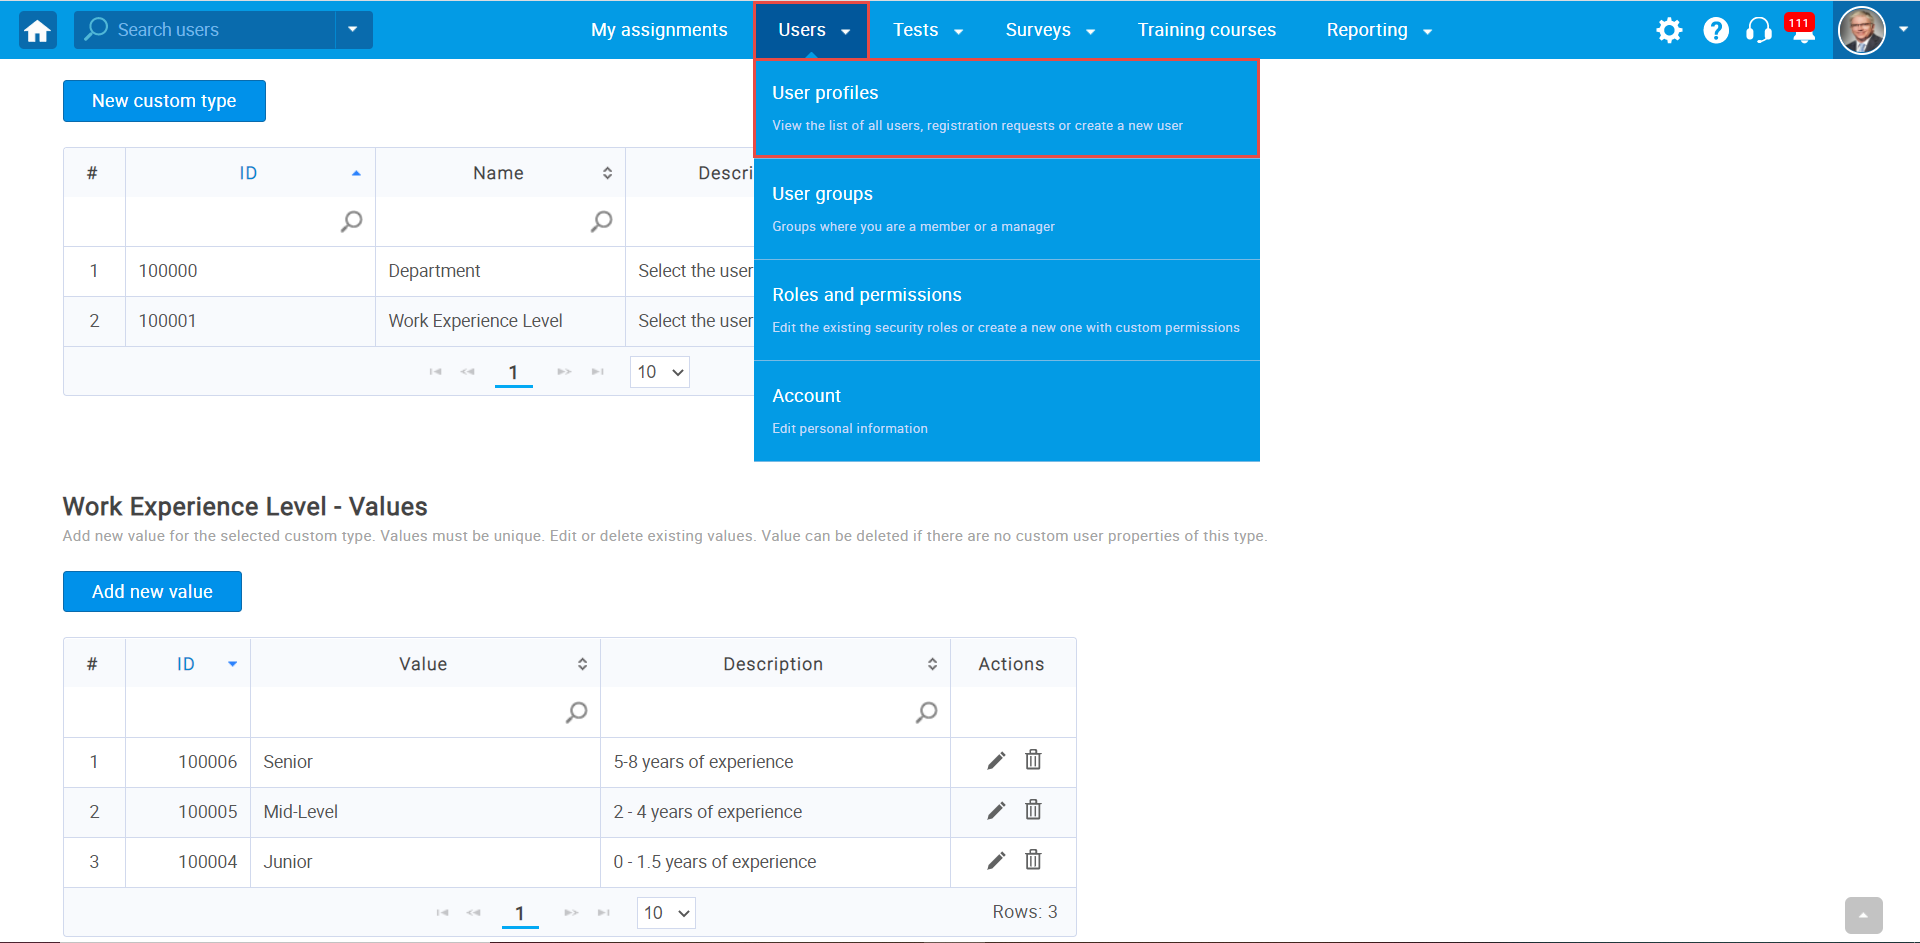
To create a custom user property, hover over the “Users” in the main menu, then choose “User profiles”.
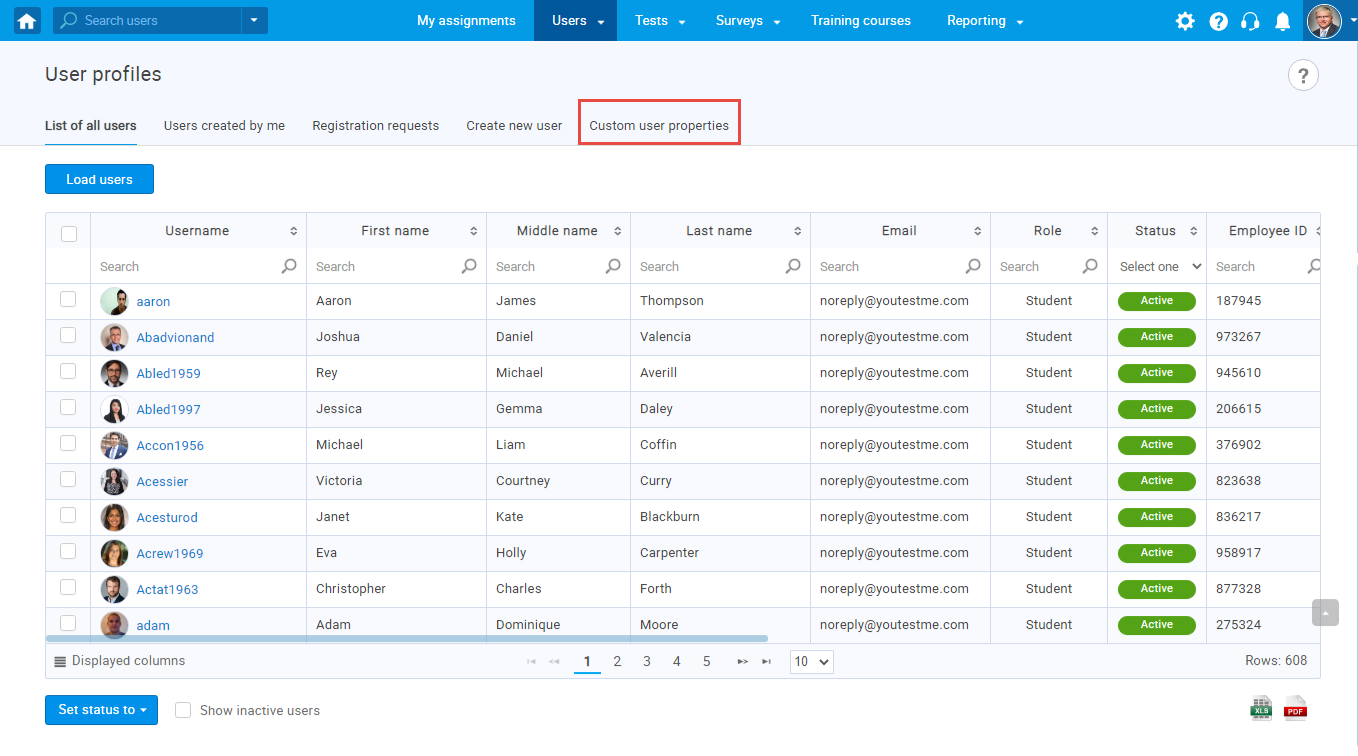
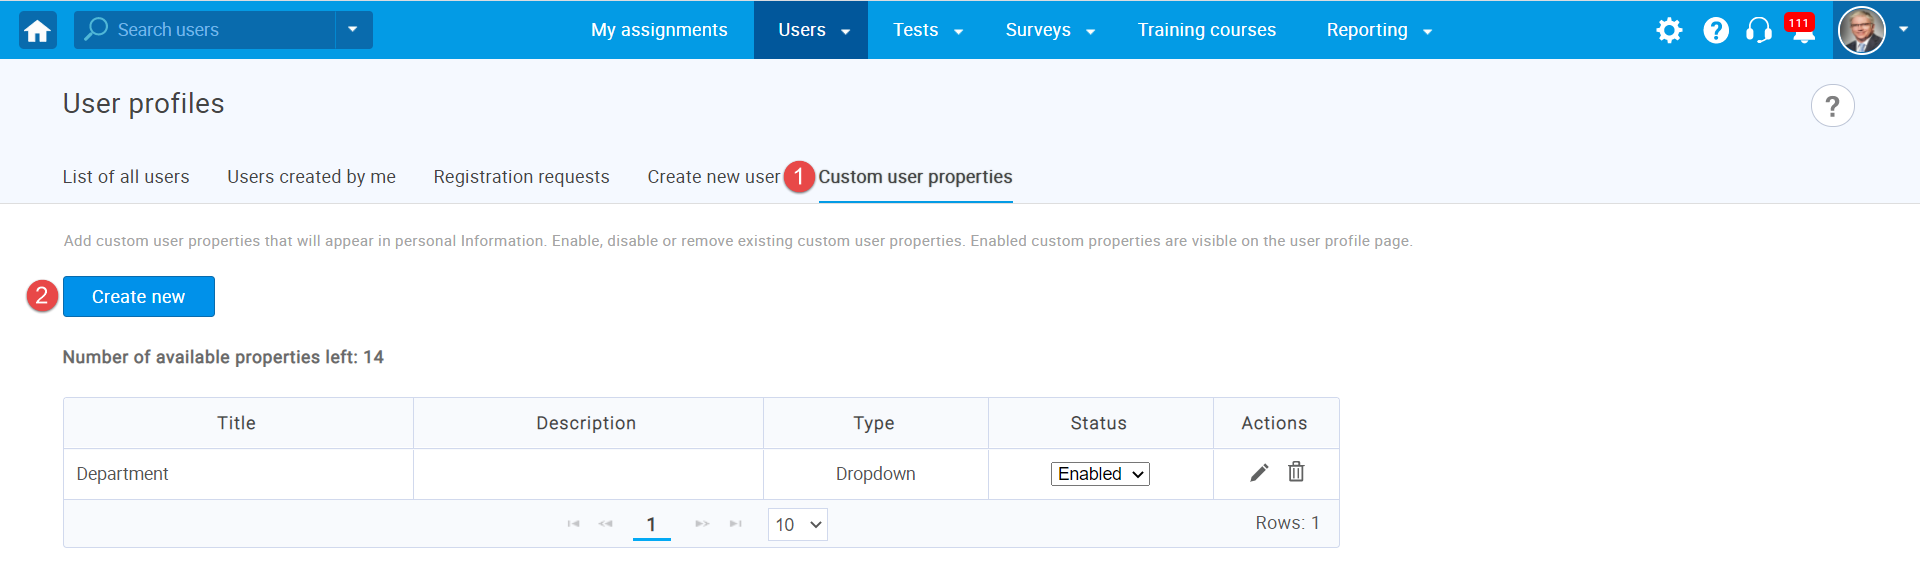
Navigate to the “Custom user properties” tab.
Instructions to create custom fields to record data
To create a custom data field:
- Click the “Create new” button.
- Enter the title that will be displayed on the user profile.
- Enter description (optional).
- Choose the type of custom field from the dropdown menu.
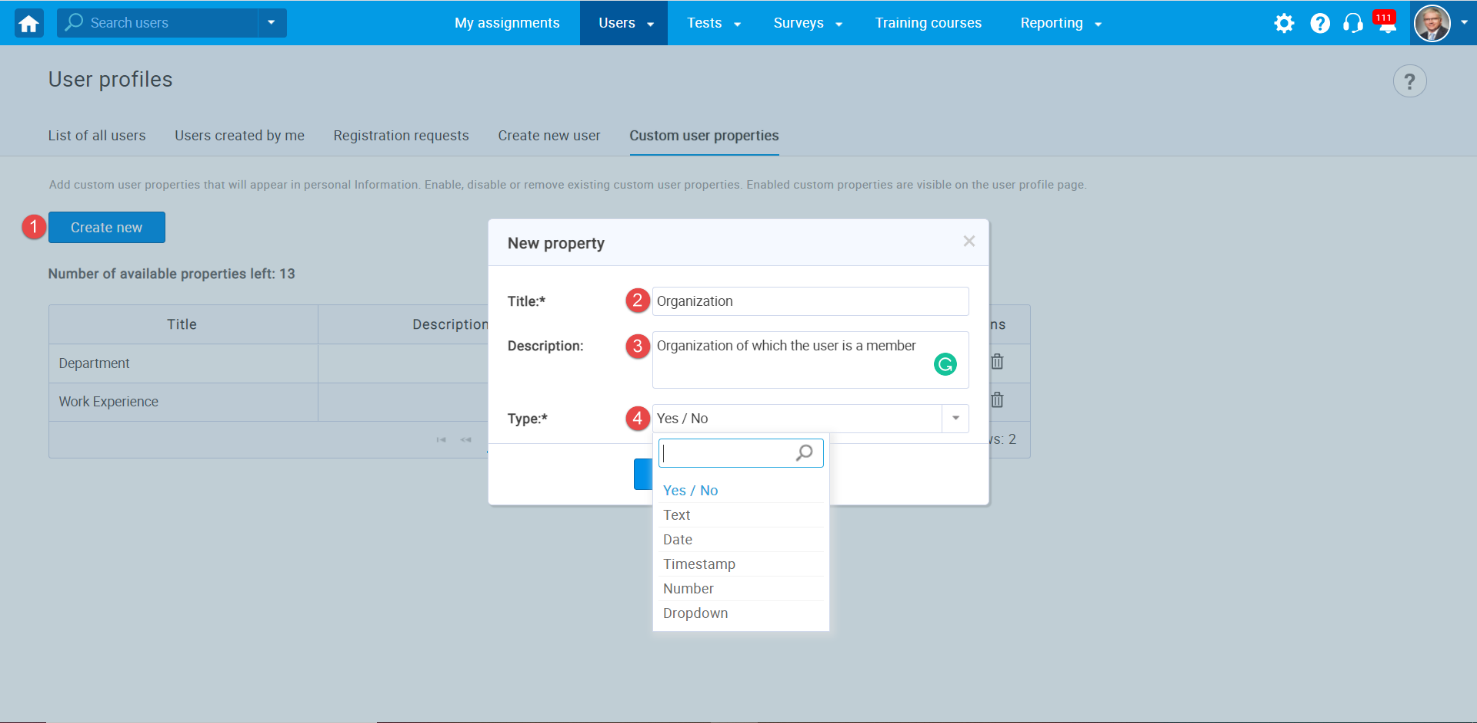
The list of available custom properties types:
- Yes / No
- Text
- Date
- Timestamp
- Number
- Dropdown – represents a field that can be customized in the system settings. To see how to create the dropdown custom property type, see the instructions below “Creating custom type”.
Available options for custom user properties
The list of available options:
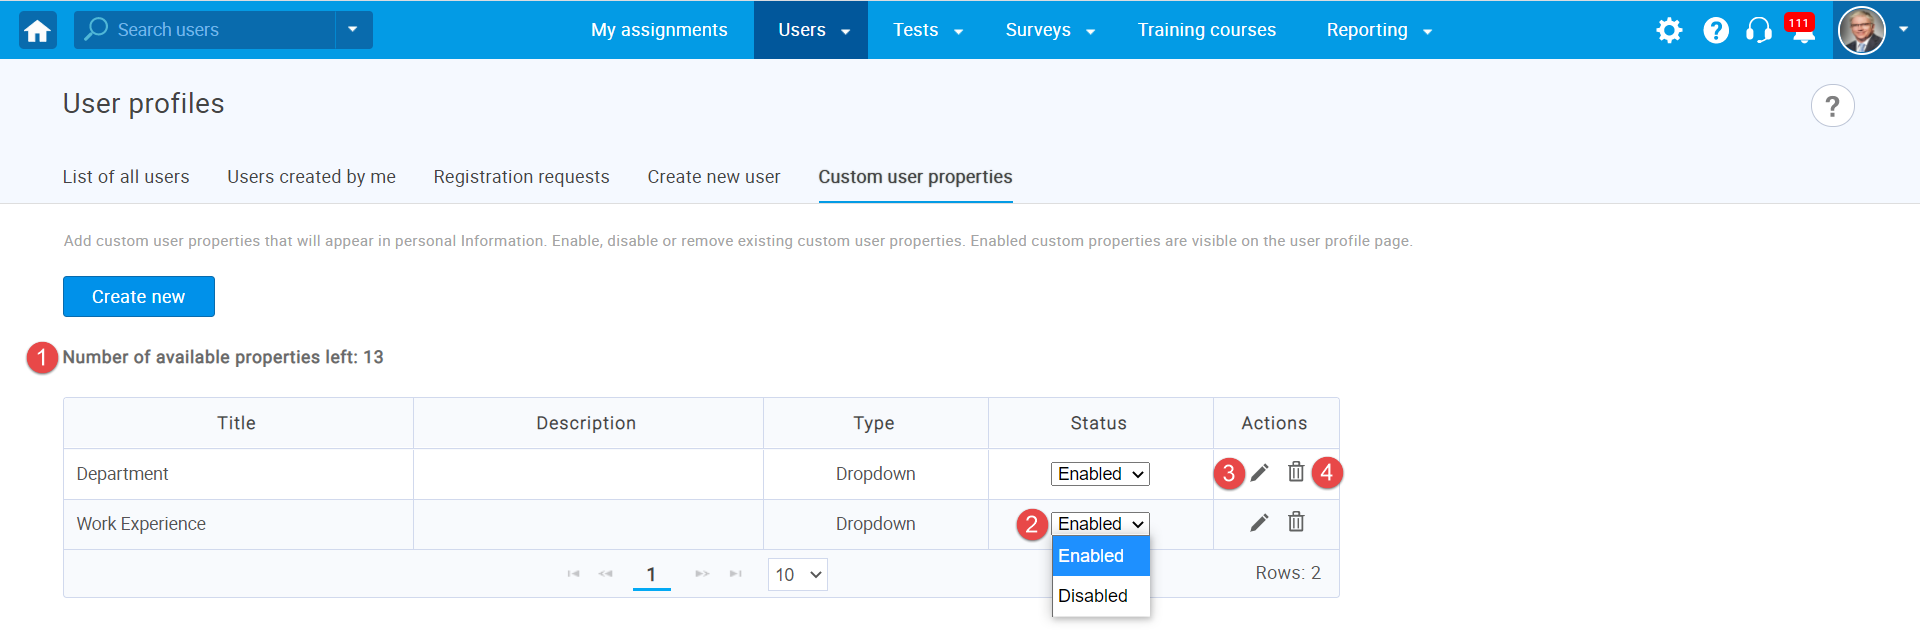
- A remaining number of custom columns you can create.
- By enabling/disabling the custom property, you can control the column’s visibility on the user profile page. If the custom column is disabled, all stored values in the property are persisted but not displayed.
- You can edit the title and description of properties by clicking on the pencil icon.
- You can delete the property by clicking on the trash icon.
Creating a custom type
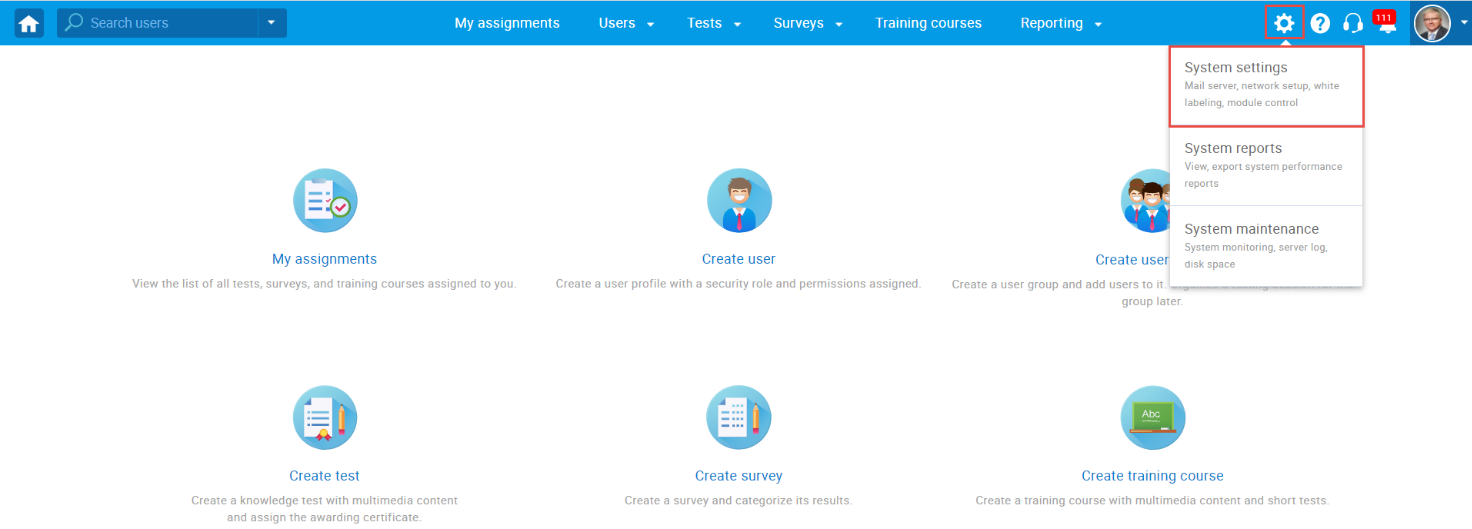
To create a custom type, hover over the system icon in the main menu, and select the “System settings” option.
Then:
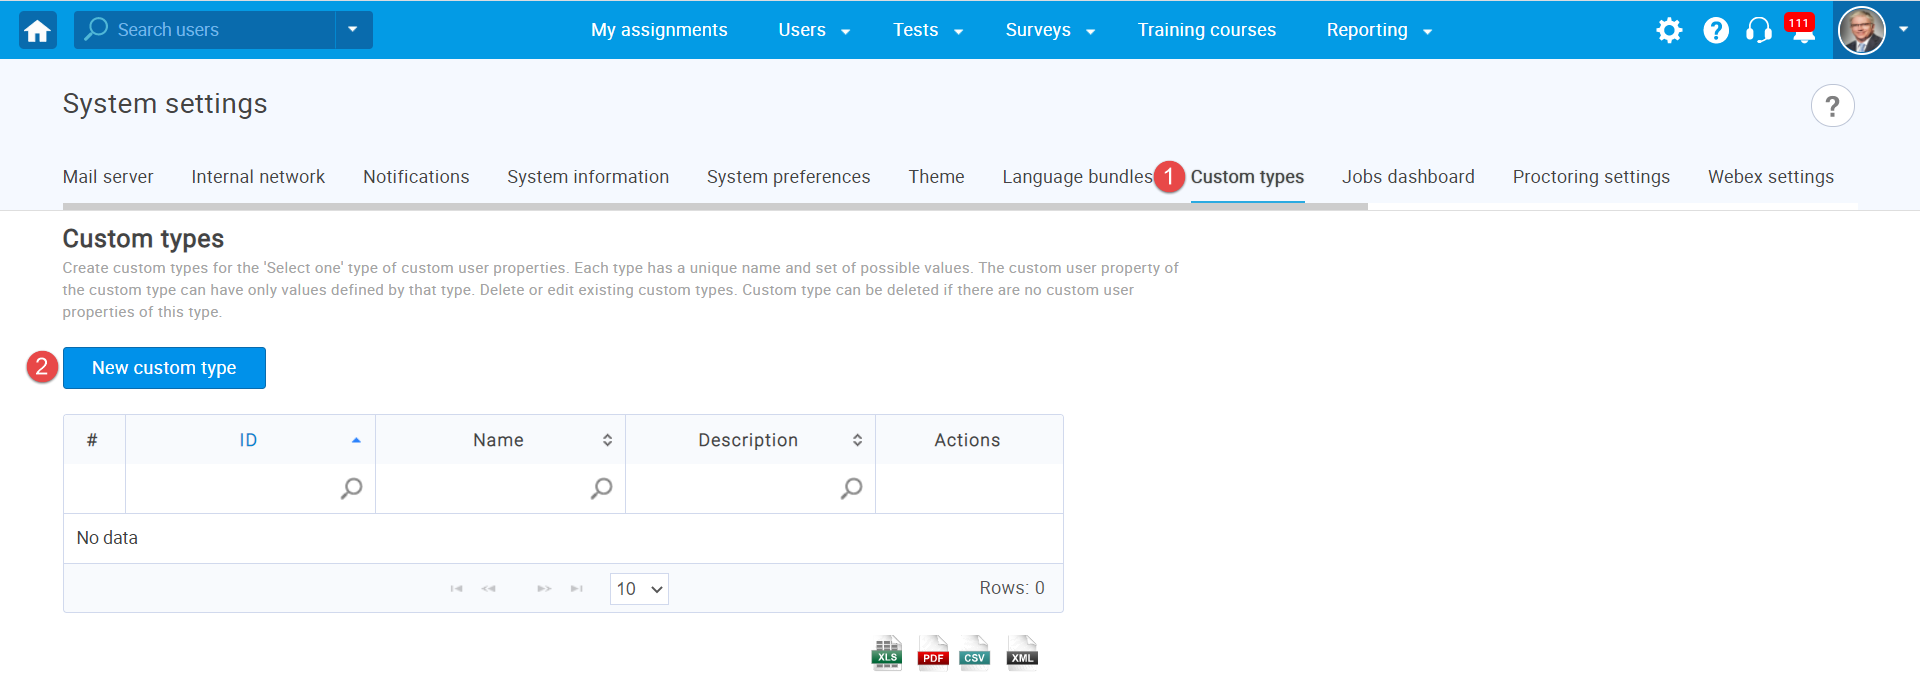
- Navigate to the “Custom types” tab.
- Click the “New custom type” button to create the dropdown type of custom user properties.
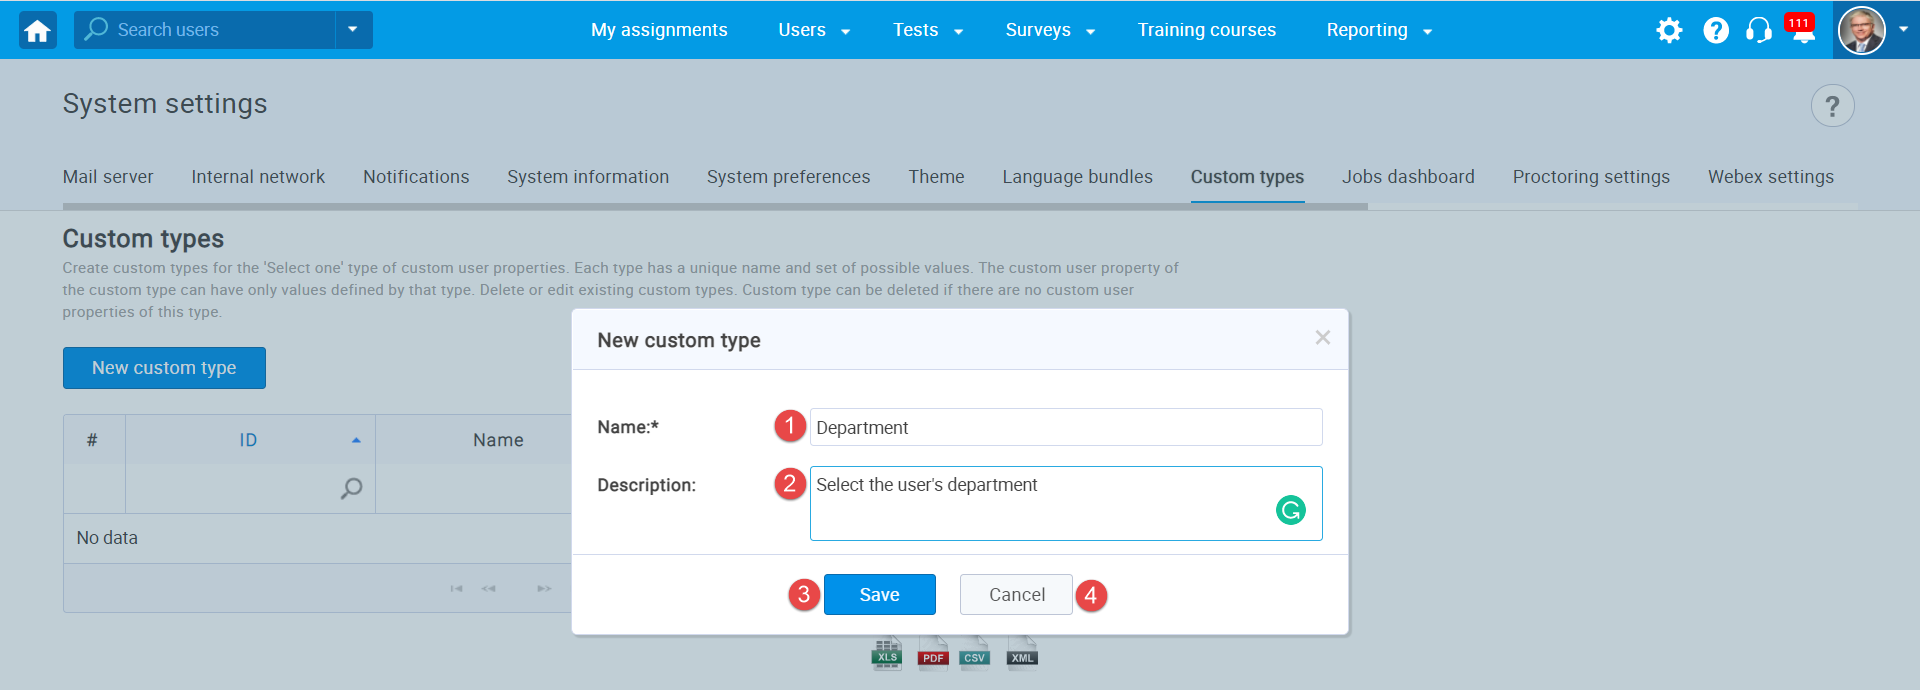
The new pop-up window will show up, where you should:
- Enter the name of the custom type. The name must be unique.
- Insert description (optional).
- Click “Save” to create a custom type.
- At any moment, you can cancel the creation of a new custom type by clicking the “Cancel” button.
Creating values of the custom type
Once you create a custom type, you should add new values. To do so:
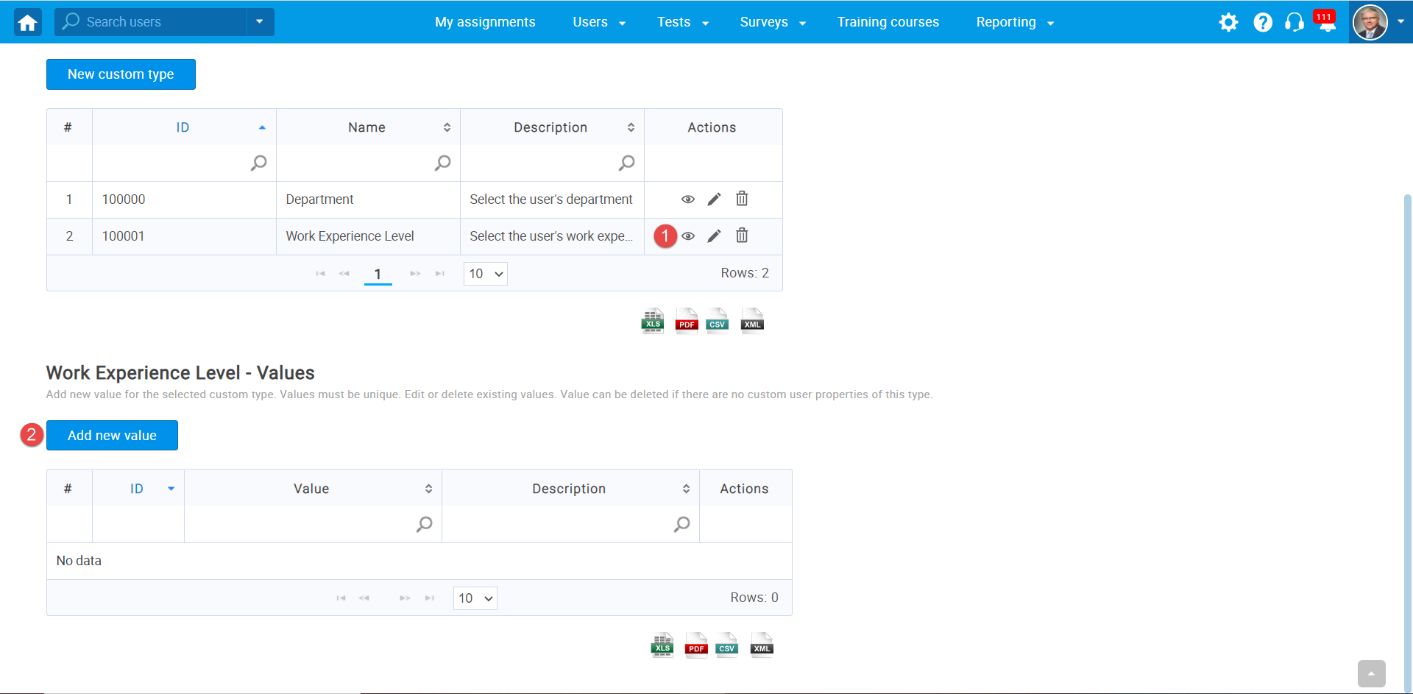
- Click the show values icon (eye) to display a table of values for the wanted custom type.
- Click the “Add new value” button.
The new pop-up will show up, where you should:
- Enter the name of the value. The name must be unique.
- Insert description (optional).
- Click “Save” to add a new value to a custom type.

Editing and deleting custom types and their values
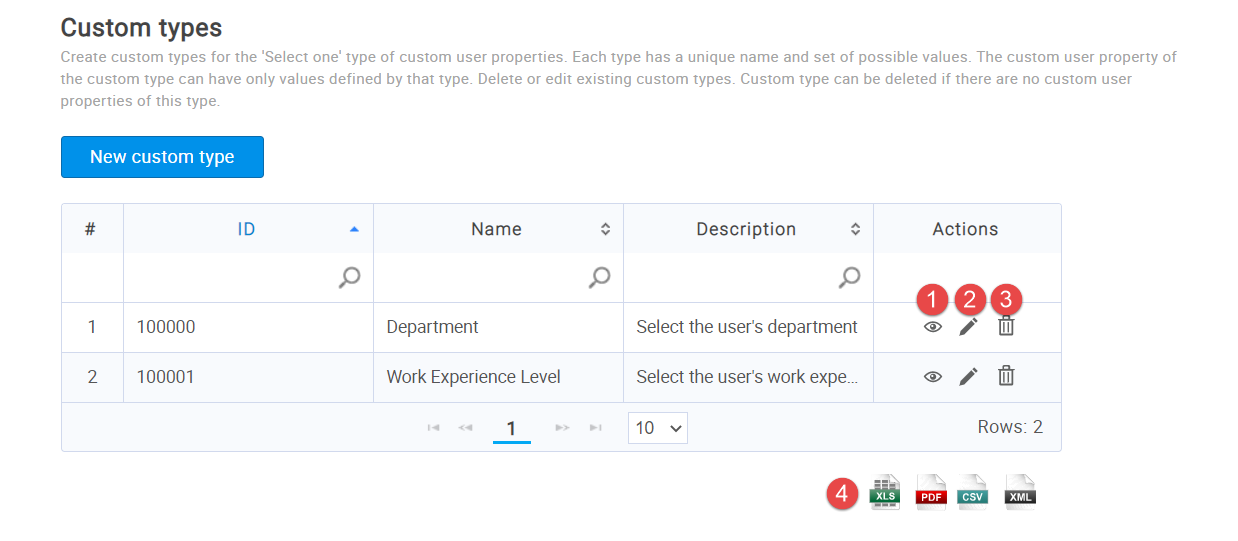
Custom types for custom fields
- At any moment, you can edit the existing custom type by clicking on the “pen” icon.
- You can delete the existing type only if there are no custom user properties of this type. In case you want to delete the type, you will need to delete the custom user property of this type first.
- You can export the list of custom types as XLS, PDF, CSV, and XML files.
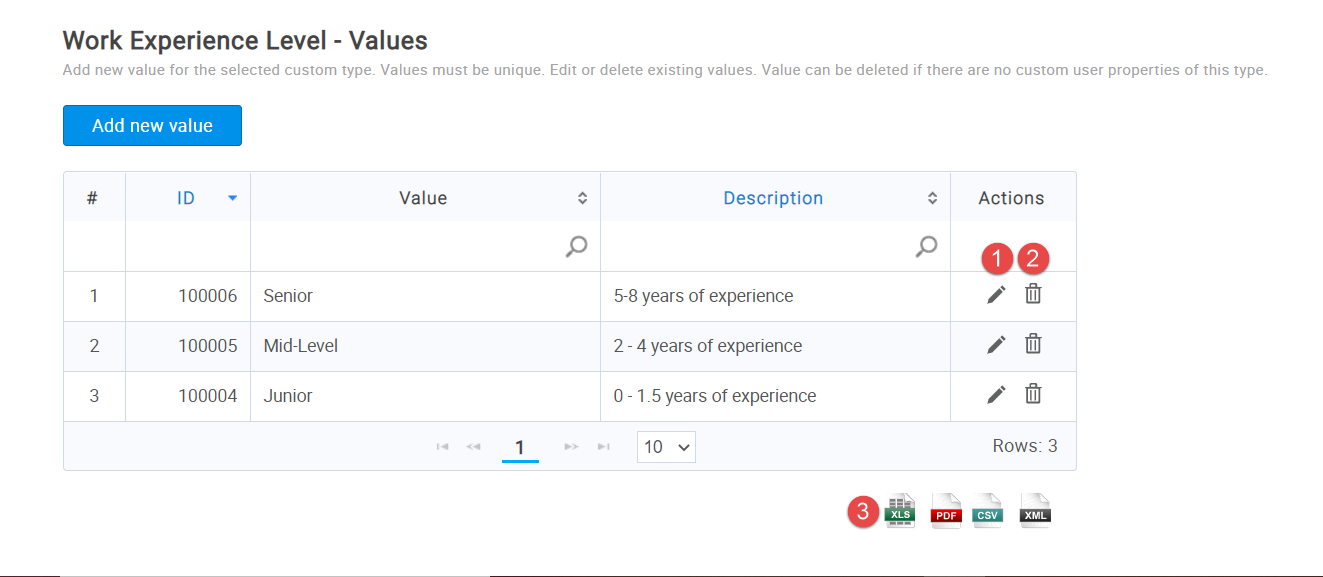
Values of custom type
- At any moment, you can edit the existing value by clicking on the “pen” icon.
- You can delete the existing value only if there are no custom user properties of this type. In case you want to delete the value, you will need to delete the custom user property of this type first.
- You can export the list of custom types as XLS, PDF, CSV, and XML files.
Creating a custom user property with custom fields
Once you create custom types, you can add custom user properties to the user’s personal information.
Navigate to the “Users” menu and select “User profiles.”
Then:
- Click the “Custom user properties” tab.
- Click the “Create new” button to add a custom property.
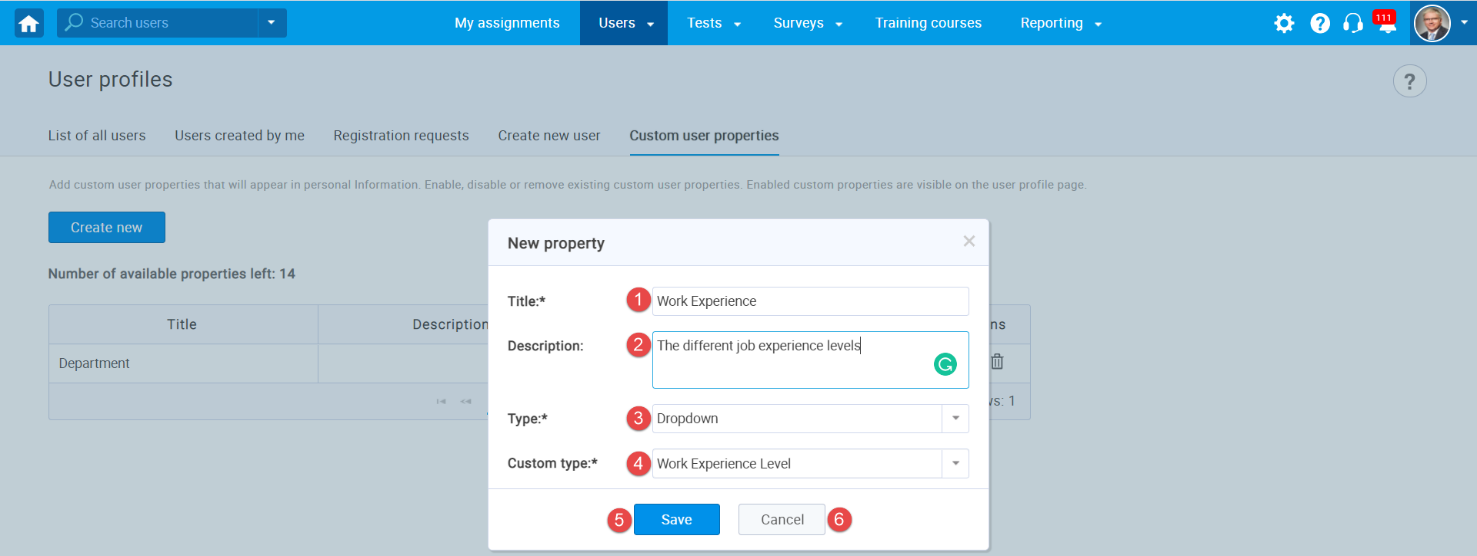
The new window for creating a property will appear, and you should:
- Choose a title that will be displayed on the user profile.
- Enter the description (optional).
- Choose the “Dropdown” as a type of property.
- Select an existing custom type from a dropdown.
- Click “Save” to create a new property, which will be displayed on the user profile.
- At any moment, you can cancel the creation of the custom user property.
Preview
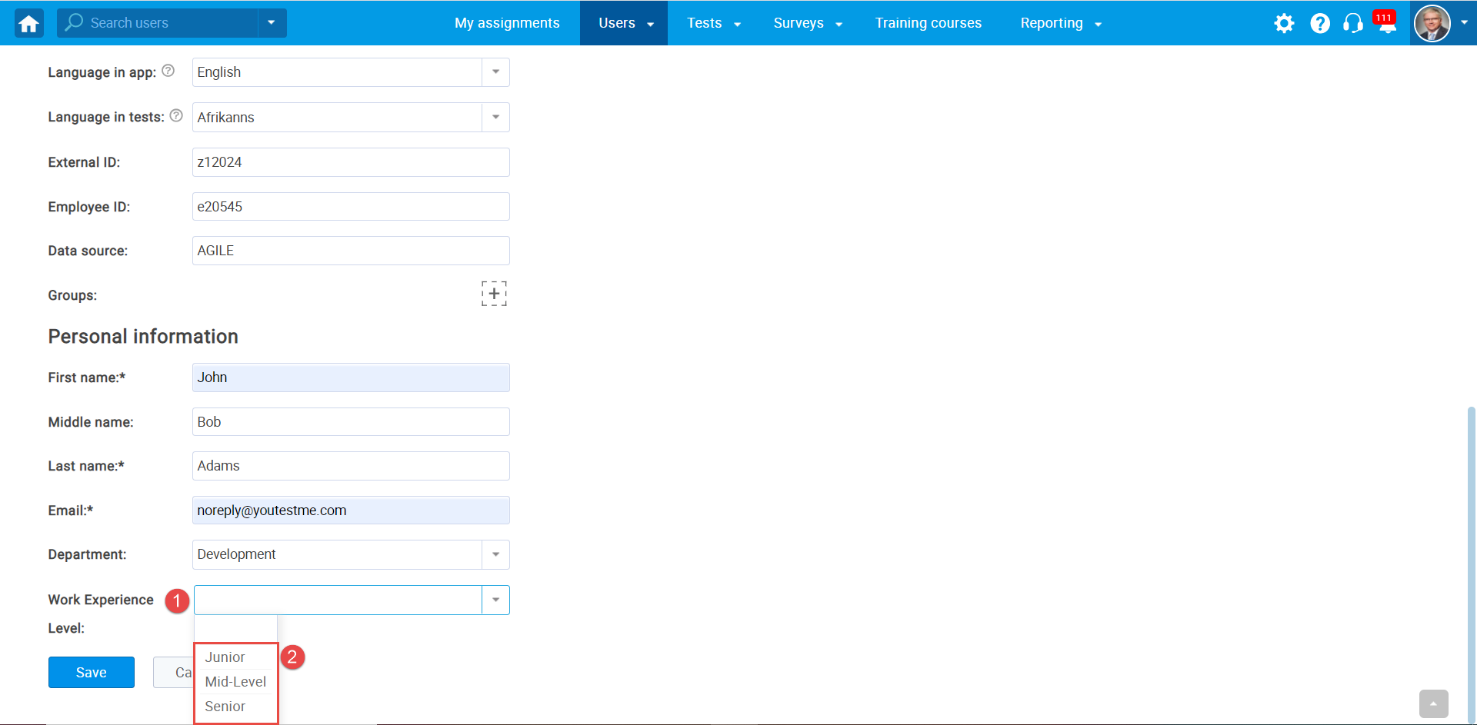
Once created and enabled, custom user properties will be displayed on the user profile.
As well as in the Report Builder.

For a video tutorial on how to add custom fields for the user’s profile, please watch the video.
For more useful instructional materials, please visit:


