This article explains the existing default roles in the system and how to create a new, custom role called group manager.
Accessing the page
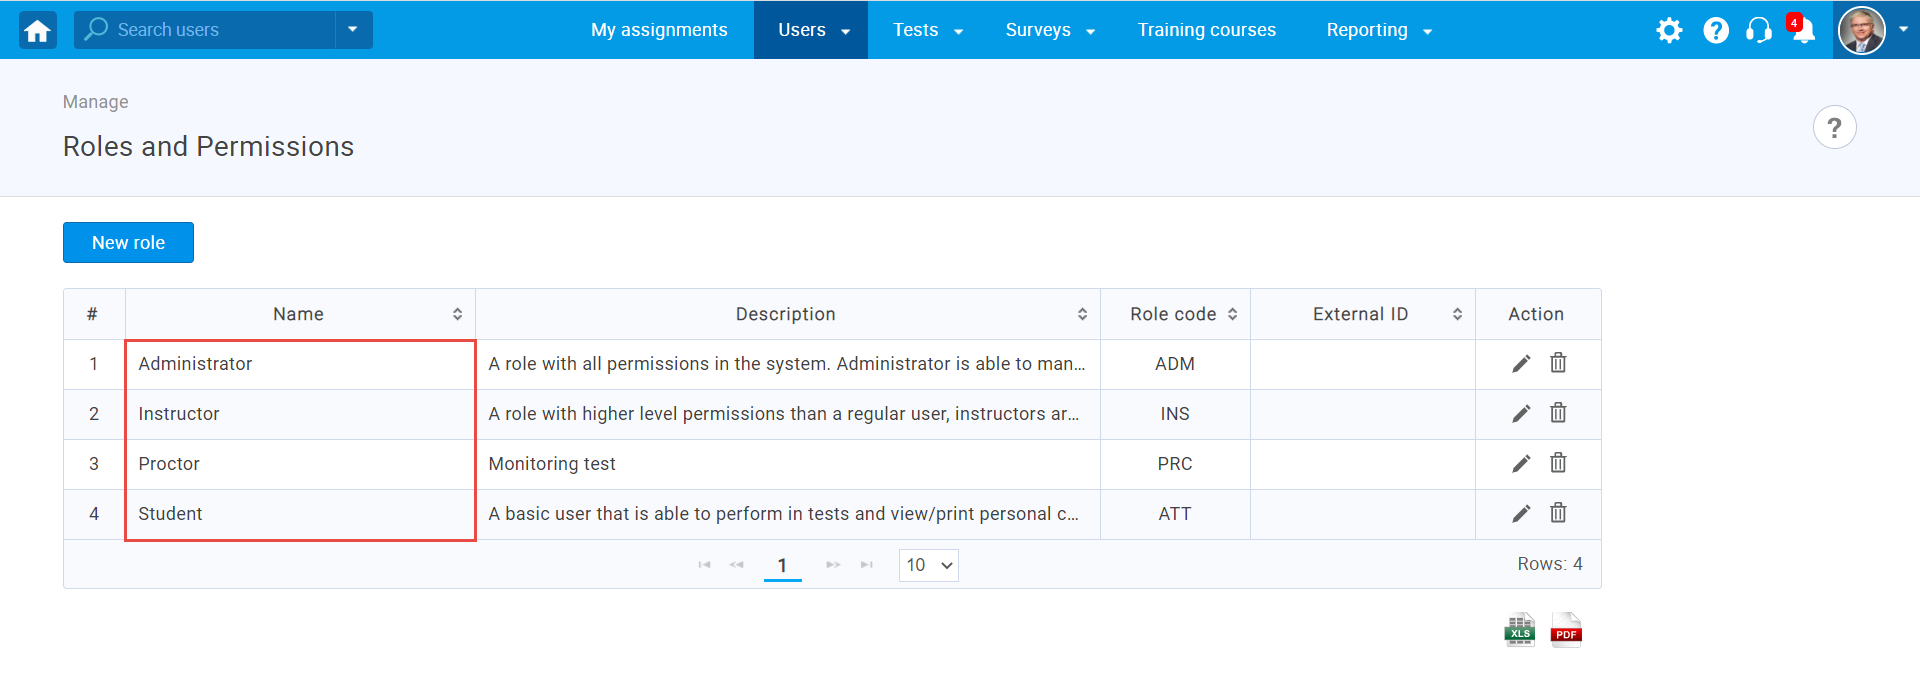
To access the “Roles and permission” page, hover over the “Users” in the main menu and select “Roles and permissions”.
Predefined roles
There are four default roles in the system:
- Administrator – A role with all permissions in the system that can fully access and manage all application modules.
- Instructor – A role with higher-level permissions than a regular user, instructors can manage their groups, question pools, tests, and reports, while only preview the content not managed by them.
- Student – A basic user that can take assigned tests, surveys, and training courses, and view/print personal certificates.
- Proctor – Proctors can monitor candidate progress on tests and supervise them in real-time.

Creating a new role
To create a new, custom role using permissions:
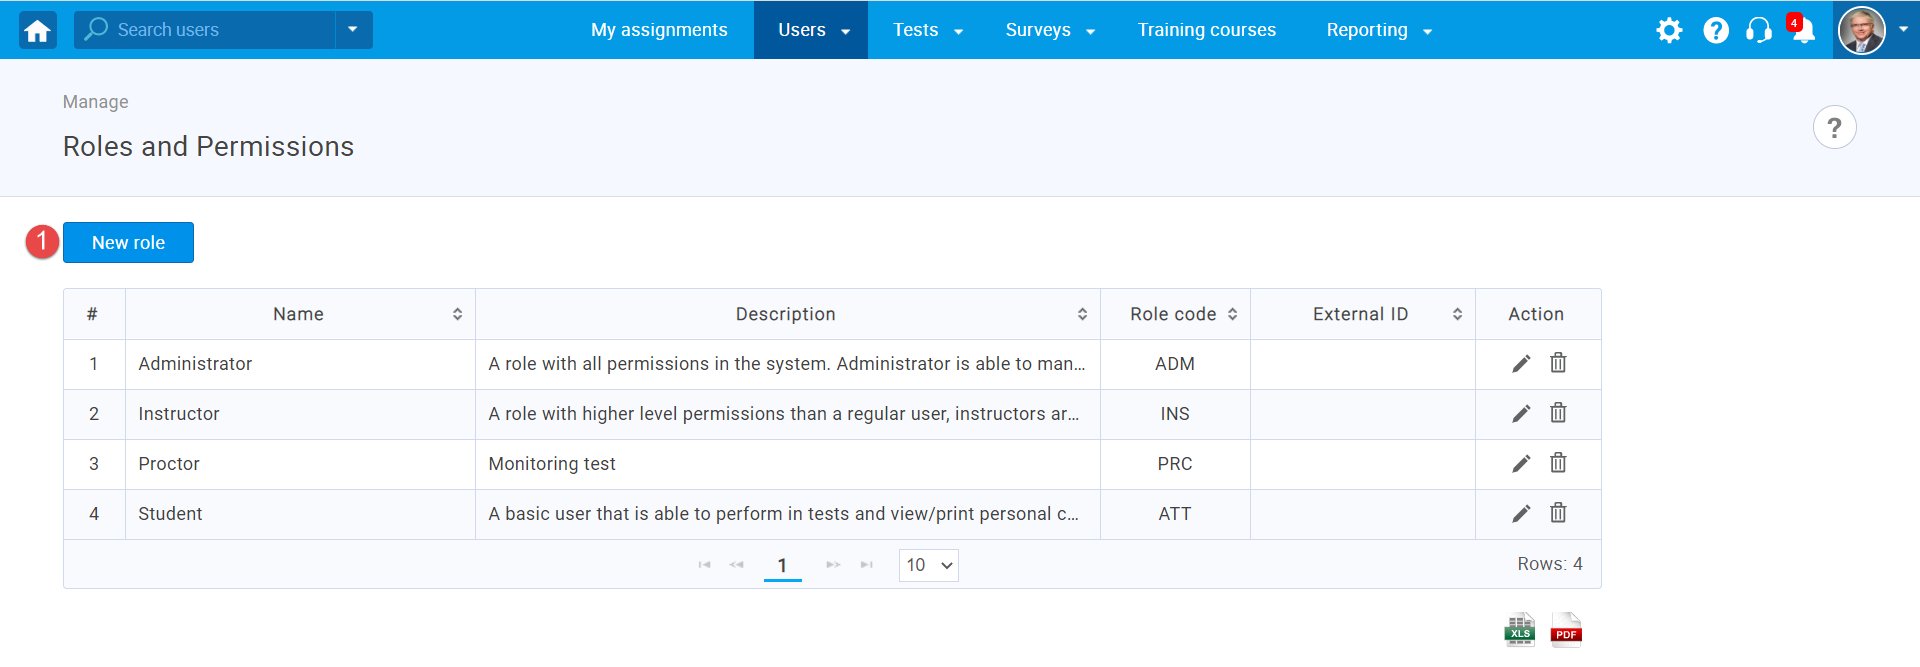
- Click the “New role” button.

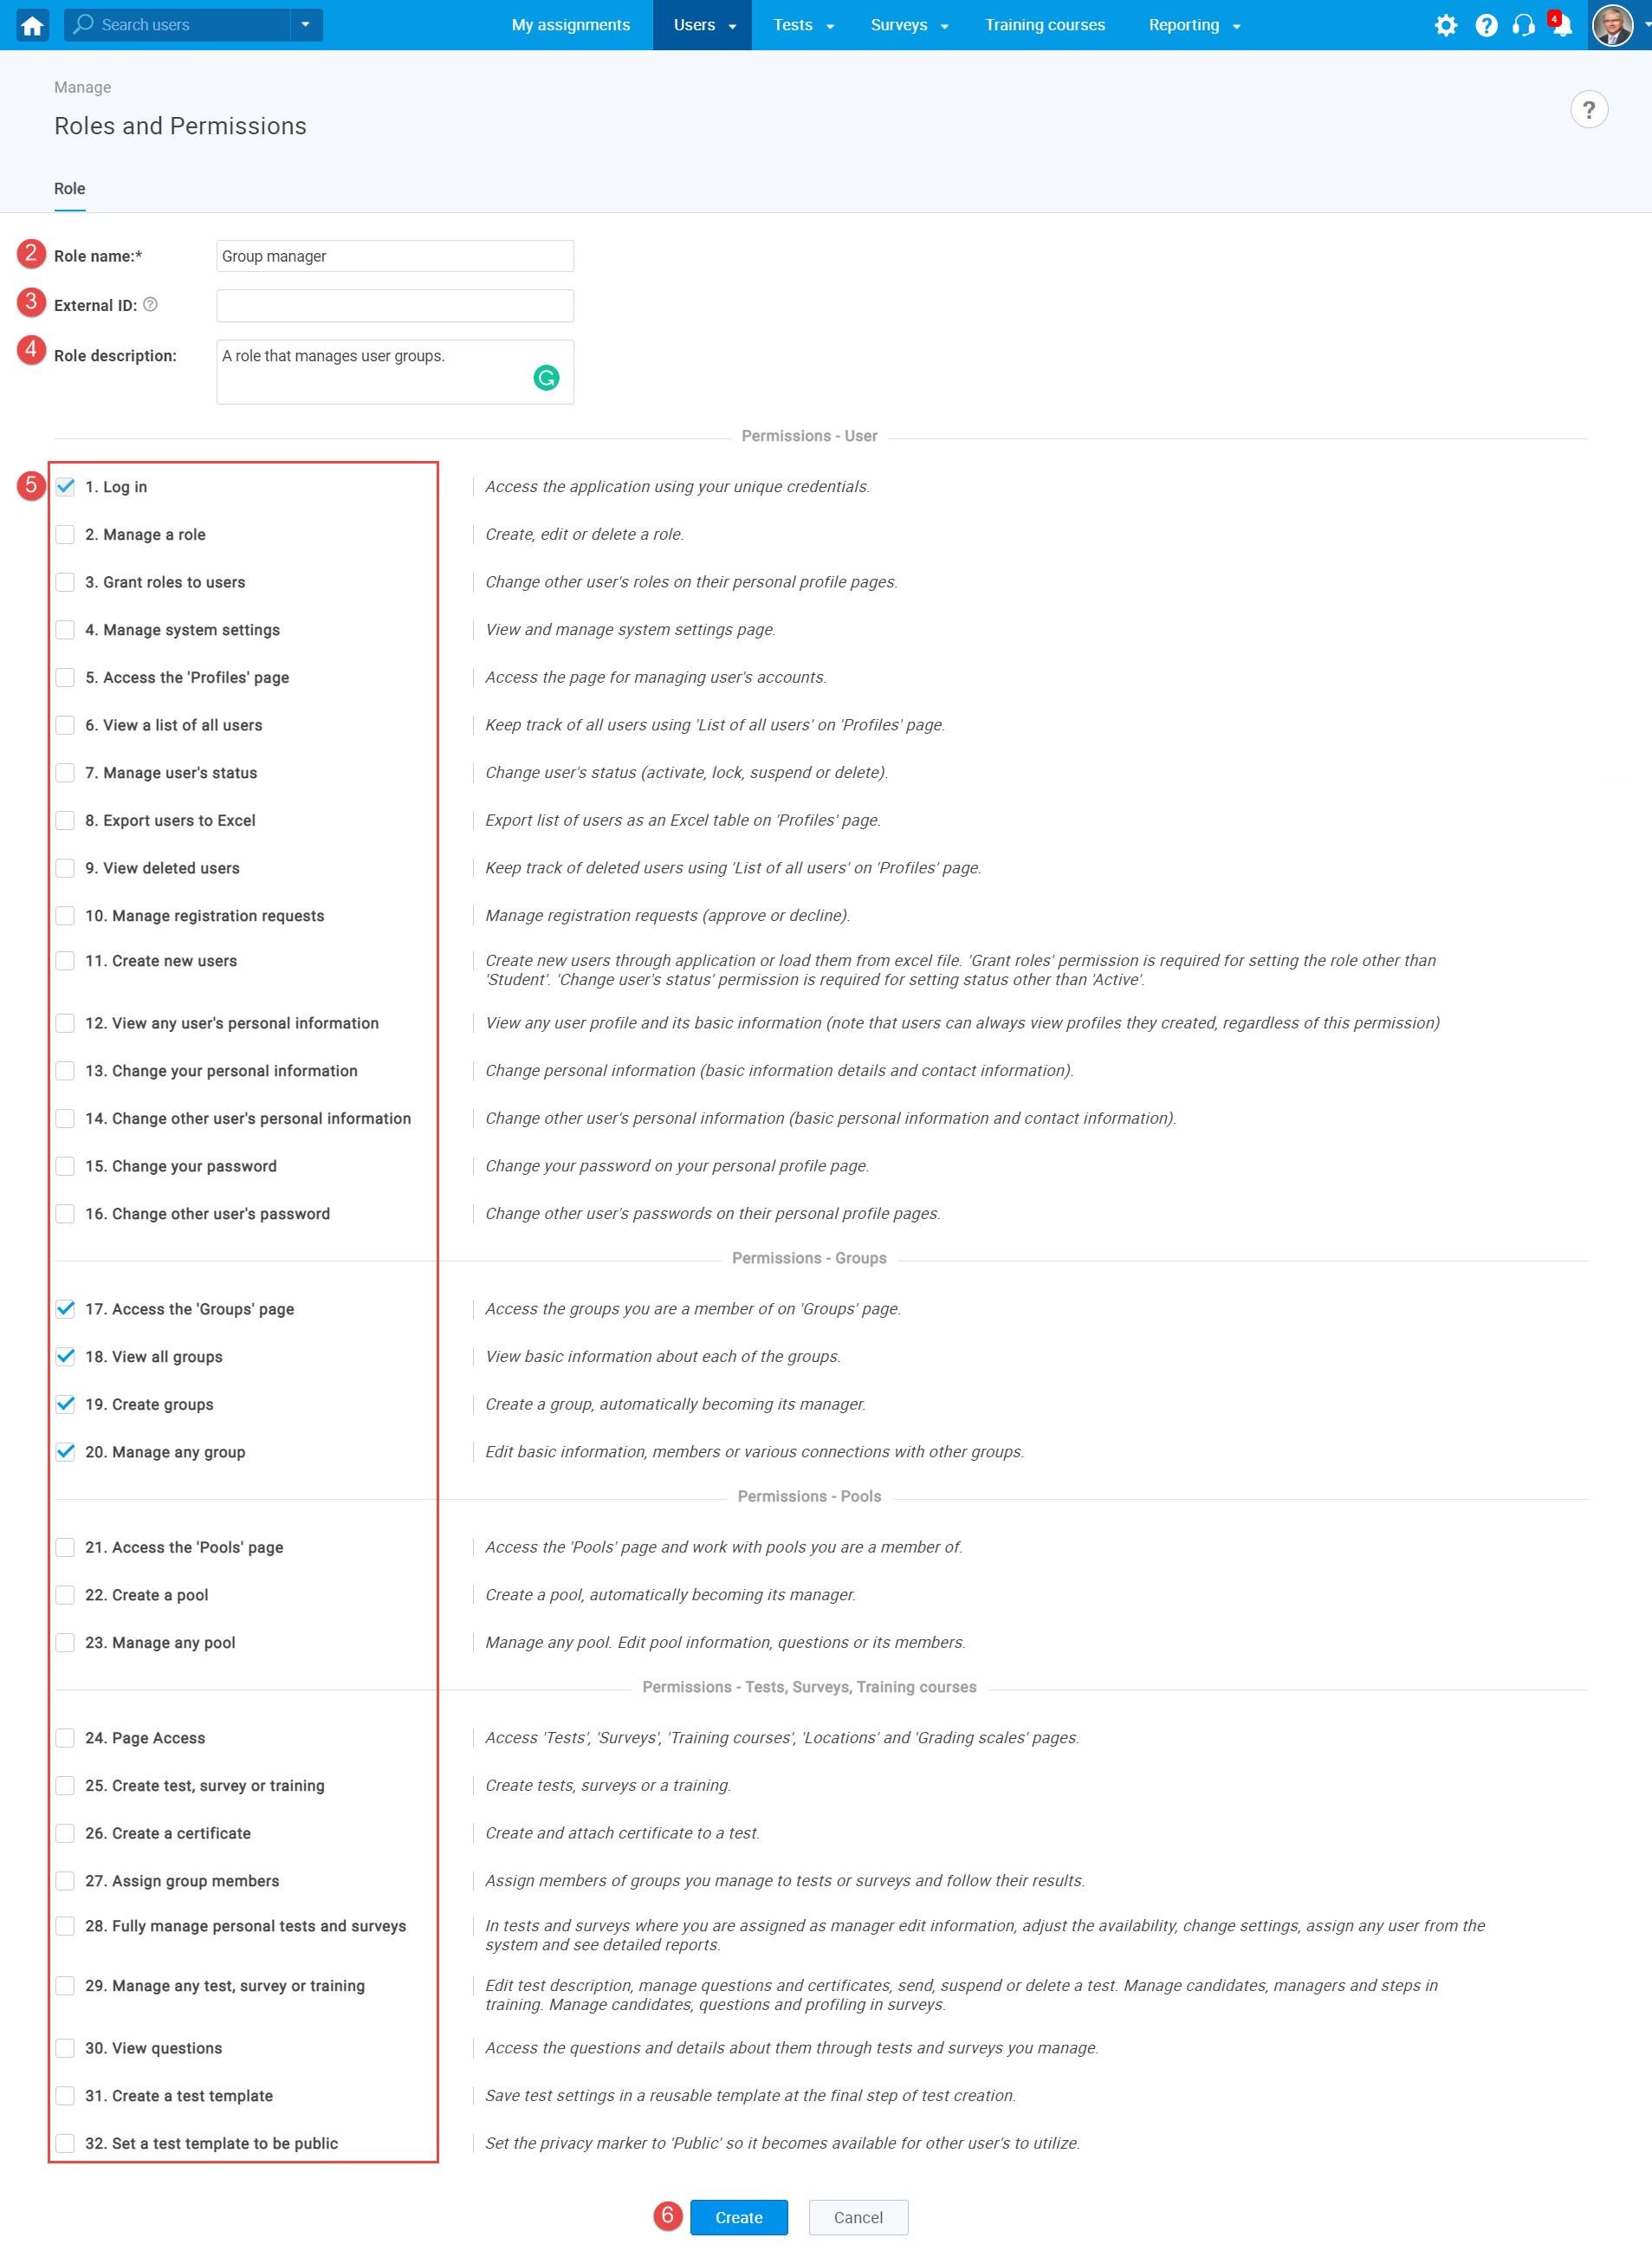
- Enter the role name.
- Enter the external ID (optional).
- Enter a description (optional).
- Select the permissions you want the group manager to have. We suggest choosing permissions from 17 to 20. Permission 1 is selected by default.
- Click the “Save” button.

Assigning the group manager role to users
Once you create a group manager role, you can assign it to the user:
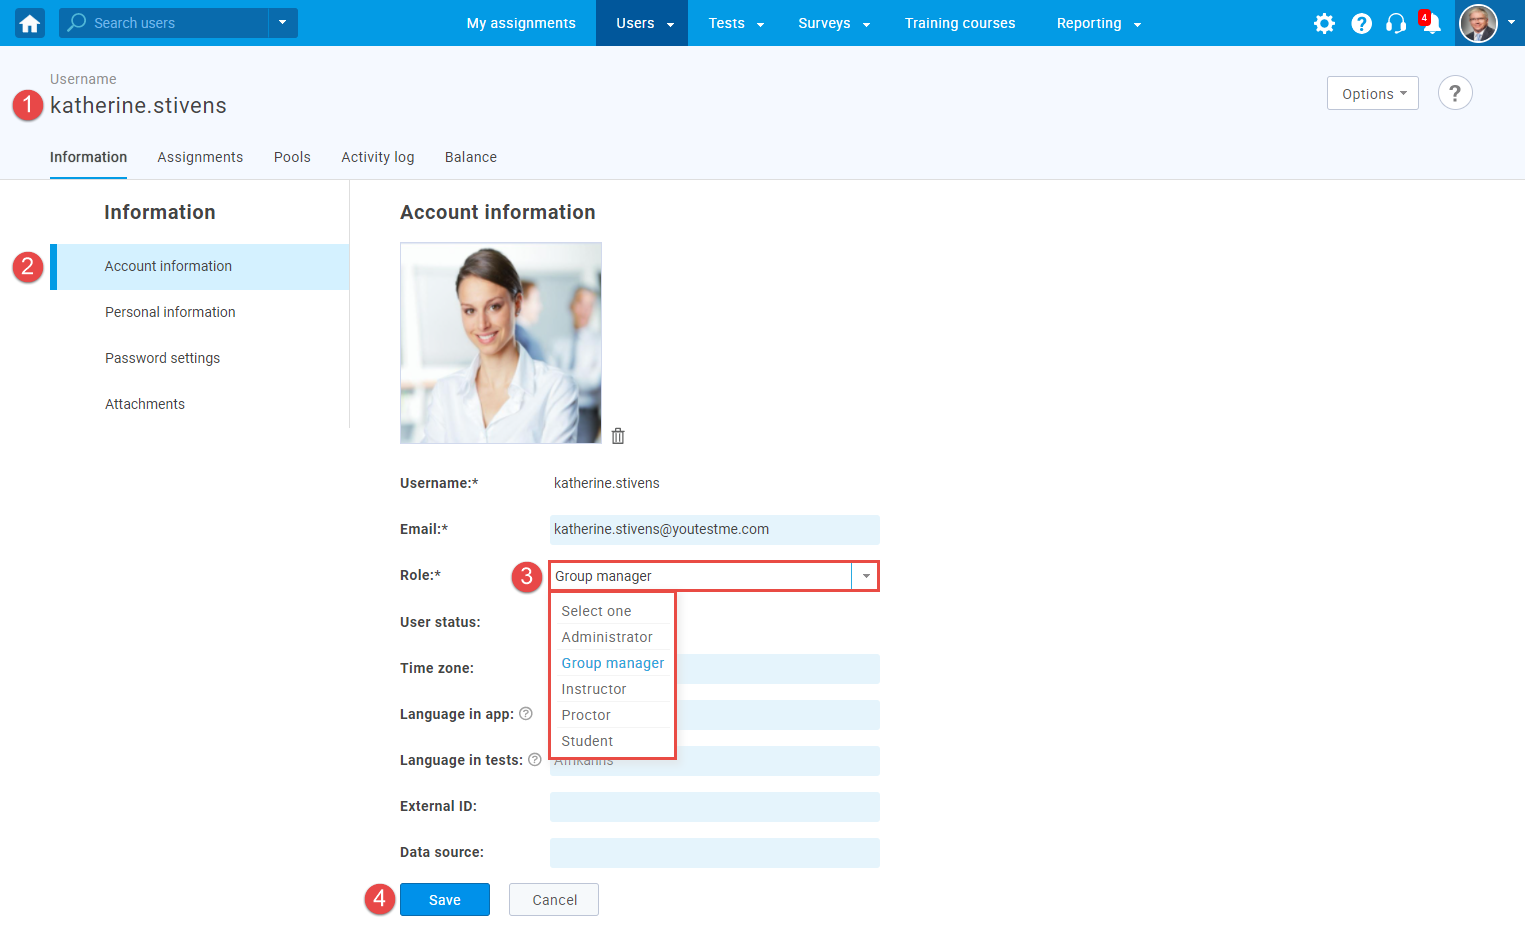
- Open a profile of the user to whom you want to assign a role of the group manager.
- In the “Information” tab, select “Account information” from the side menu.
- Change the user’s role by selecting “Group manager” from the drop-down menu.
- Click the “Save” button.

For a video tutorial on how to create a user group manager role, please watch the video.
For more useful instructional materials, please visit:


