This article explains how to filter proctoring reports. Proctors can review all test attempts in the testing sessions that they are assigned to. But also, they can use the search to display only the desired sessions or attempts.
Accessing the proctoring reports
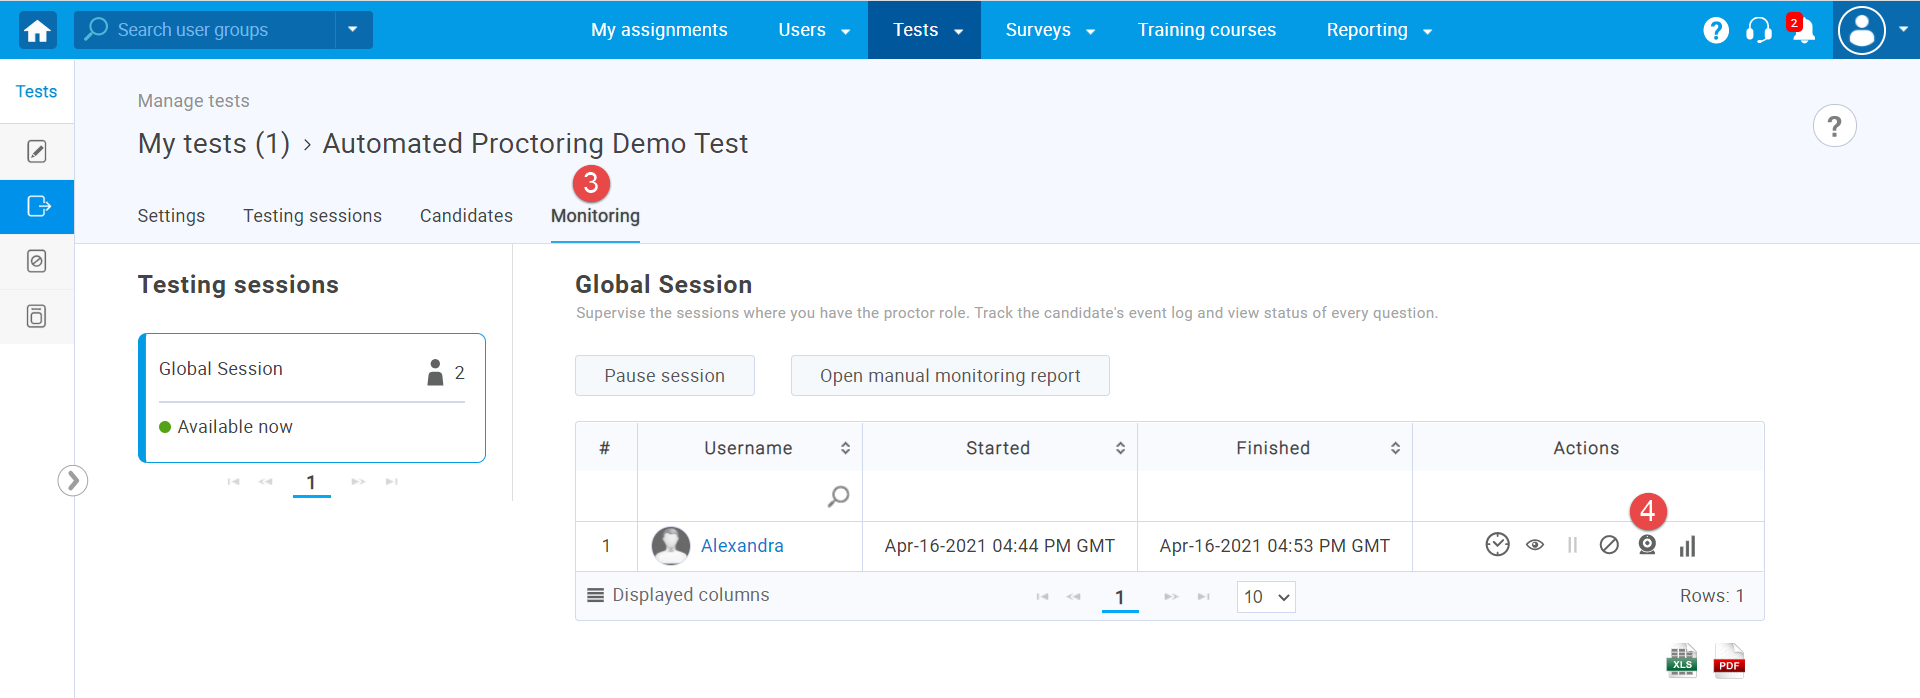
To access the proctoring reports. a proctor should:
- Hover over the “Tests” tab in the main menu, then choose “Manage tests“.

- Choose the desired test.

- Navigate to the “Monitoring” tab.
- Click the “camera” icon to open the proctoring report.

Filtering the reports
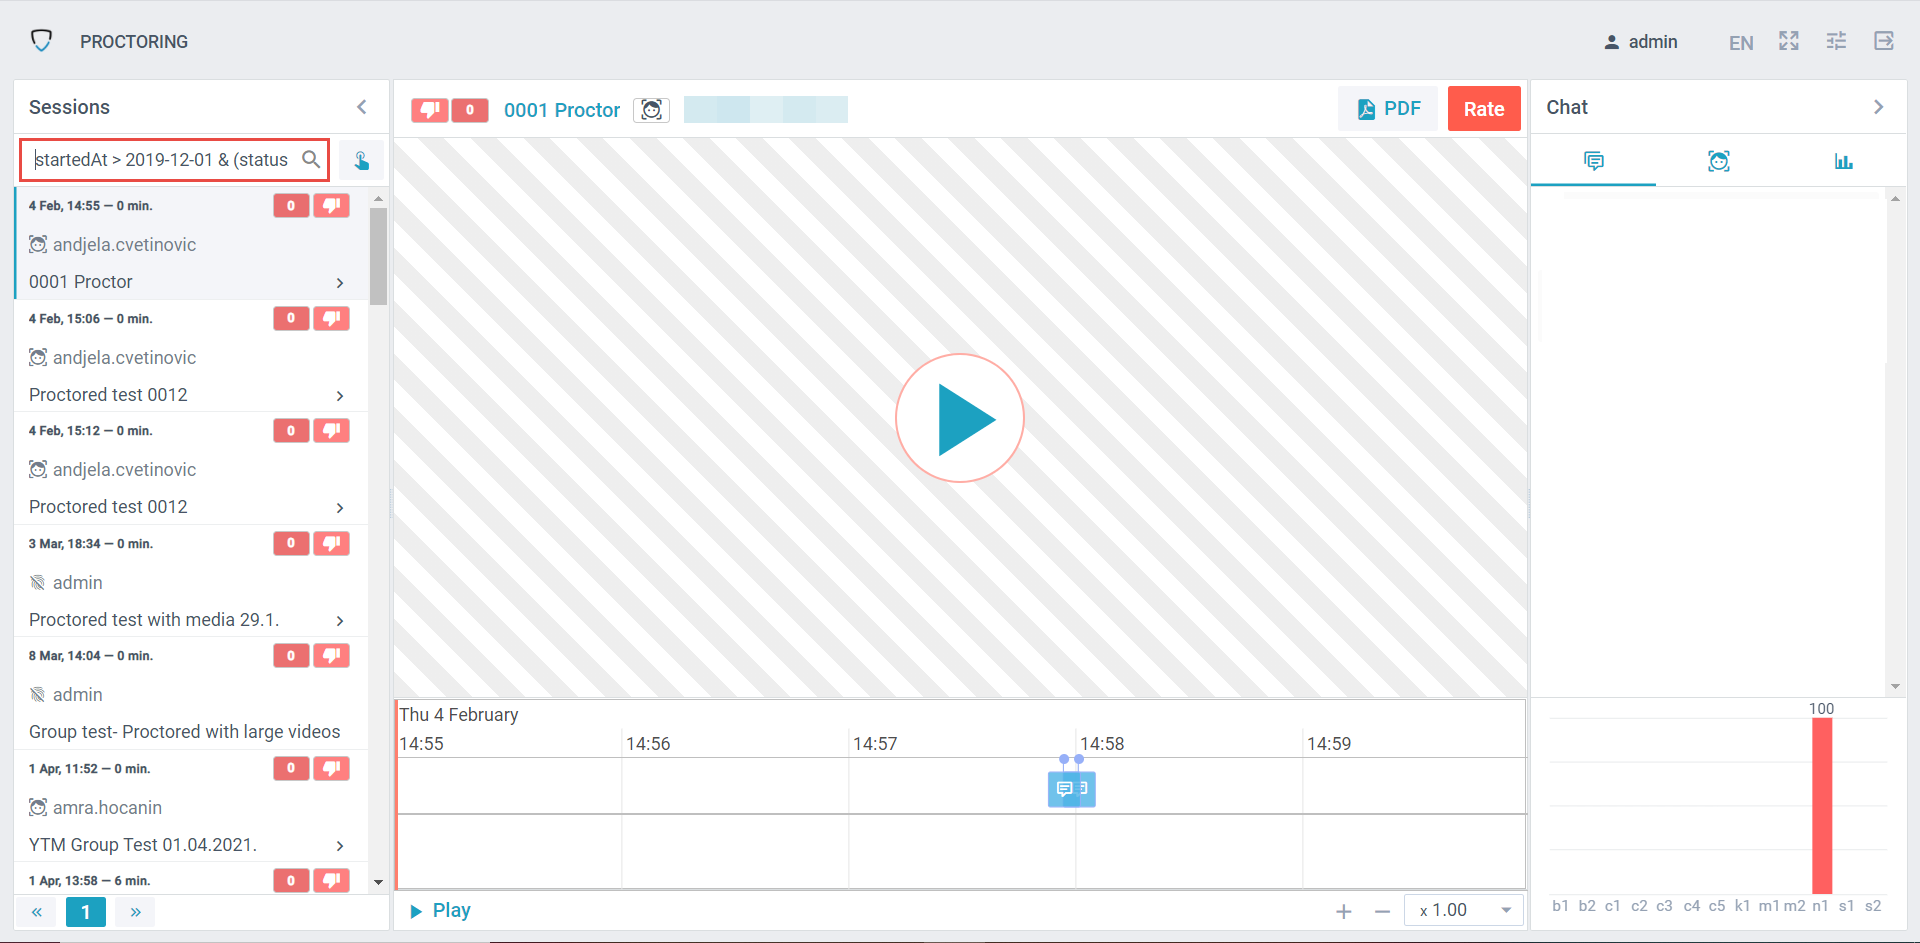
Once you open the proctoring reports of one candidate. You can search all proctoring reports of candidates that you monitor.
You can filter the reports, by entering the appropriate regular expression syntax in the search field:

Here are some examples:
- find the session with the desired identifier: ^123$ (123 — search identifier, require exact match);
- find sessions with the right student: student1 (student1 — student’s login);
- find sessions with the necessary participants: ^proctor1|proctor2$ (proctor1 or proctor2 – proctor logins, the symbol “|” means the condition OR);
- find sessions starting with the word “Entrance”: ^entrance (not case sensitive);
- find sessions containing the word “exam” in the name: exam.
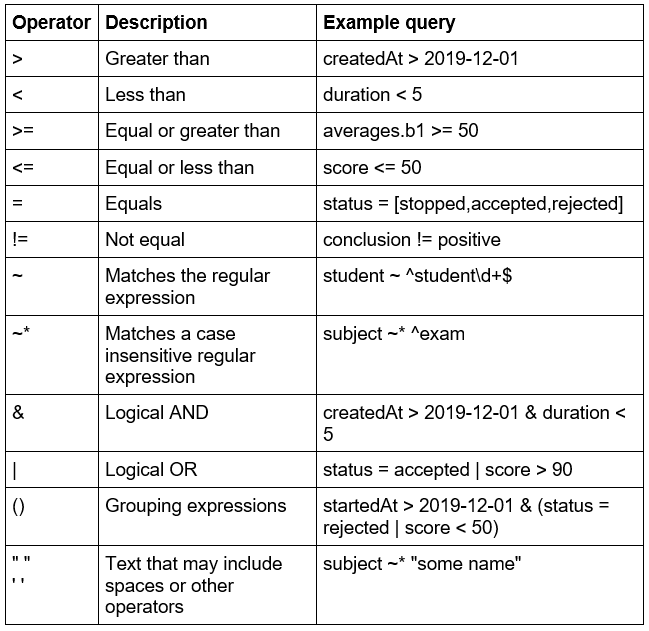
Summary of operations that can be used:

Note: The date and time format are ISO-8601 (YYYY-MM-DD hh:mm:ss).
For more related instructions materials, please see:


