YouTestMe GetCertified, through its integration with Webex, Skype, Google Meet, Zoom, or any other conference tool, provides an affordable alternative to the professional proctoring tool, enabling the monitoring examination process remotely in real-time.
This article aims to provide a complete guide on organizing a test proctored by different meeting tools.
How to Organize Tests with Meeting Tools
The test module allows you to create and customize a candidate’s learning experience. Learn how to create tests using different meeting tools.
Please read this article, for step-by-step instructions on how to assign a test manager, a role that can create and edit tests, create new sessions, assign users to that session, and monitor those users while taking the test.
Creating a Test
Please read this article for a detailed explanation of how to create a simple test without sections and assign candidates to it.
To see how to create a test with sections, please watch this video.
Please read this article to learn how to use all three different methods for creating and adding questions to the test.
Configuring a Proctoring using Meeting Tools
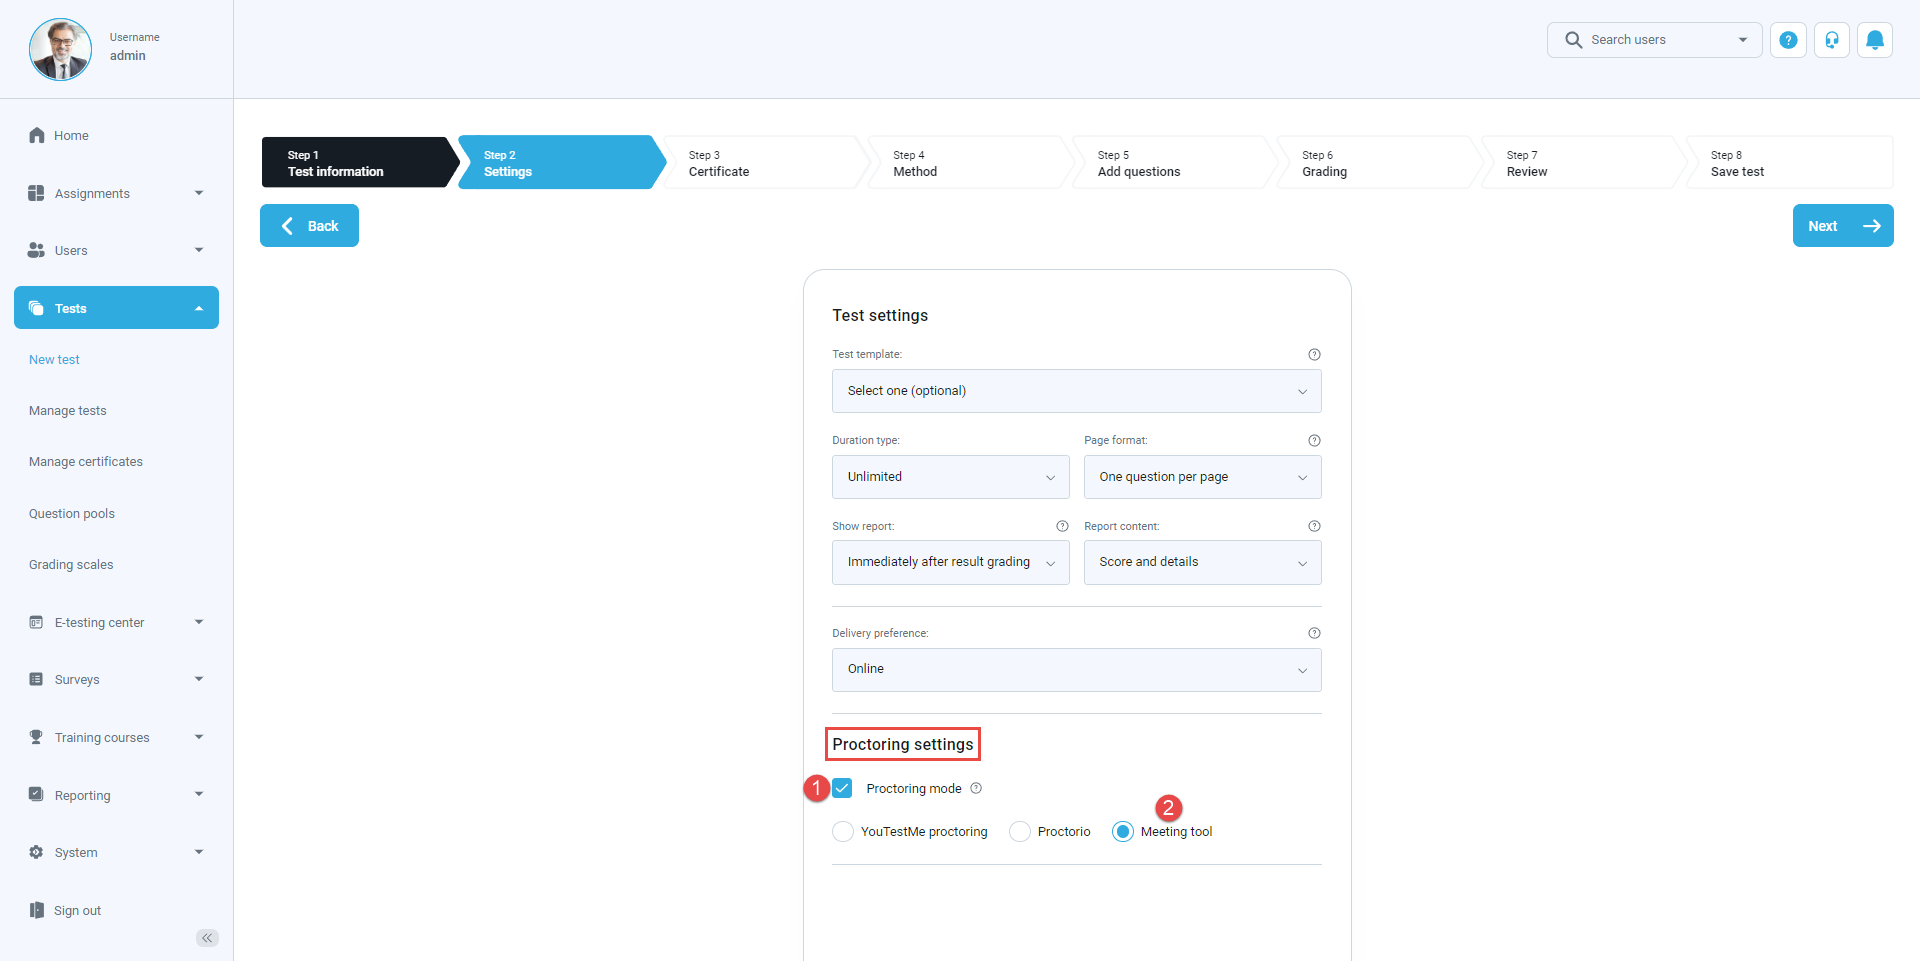
During the test creation, under the advanced settings of the second step, it is necessary to:
- Turn on Proctoring mode
- Select Meeting tool
Creating Testing Sessions
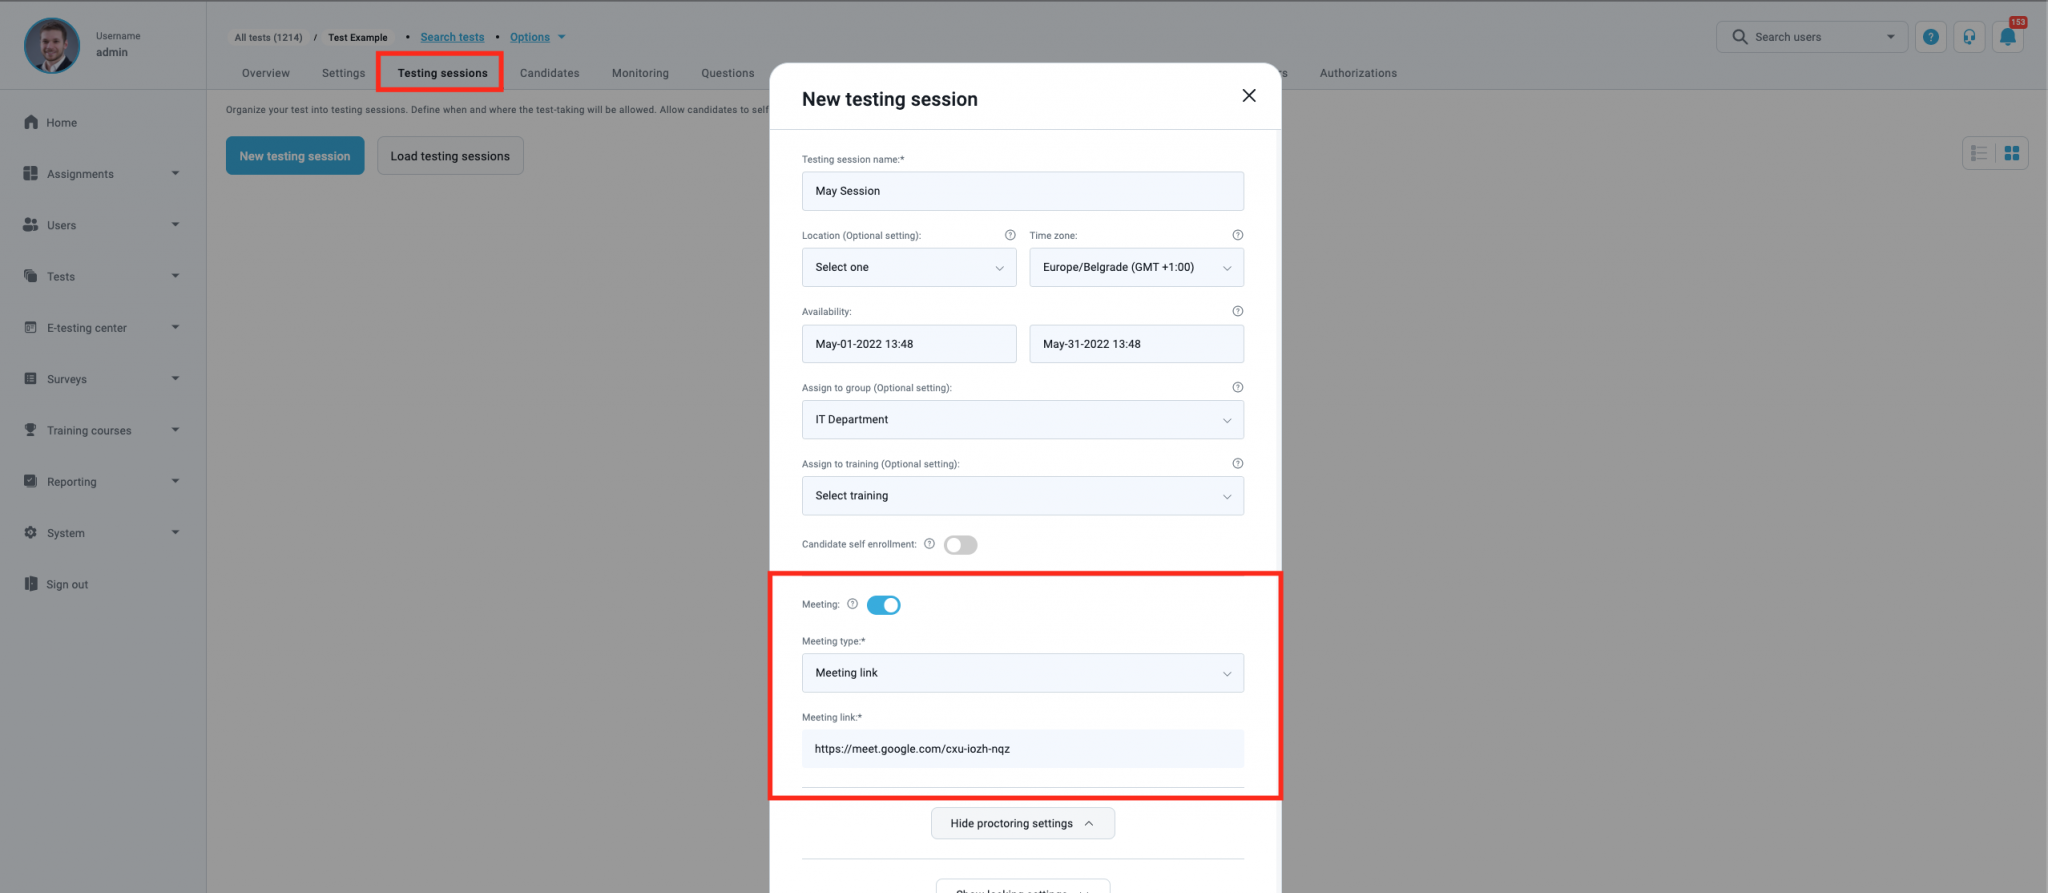
Proctoring by meeting tools is also configured while creating a testing session – after you have completed the Test Creation Wizard, you should navigate to the Testing sessions tab to schedule a test.
- Enter the session name, define availability, and optionally configure other settings
- Enable the Meeting tool and for the Meeting type choose between the Webex meeting and Meeting link if you want to create. latest proctored by any other conference tool – Zoom, Skype, Google Meet, etc.
- If you choose Meeting link, schedule a meeting in the desired tool and paste the link to created meeting
To provide additional security to the exam, you can optionally set a session password that the students will be required to enter upon starting the exam.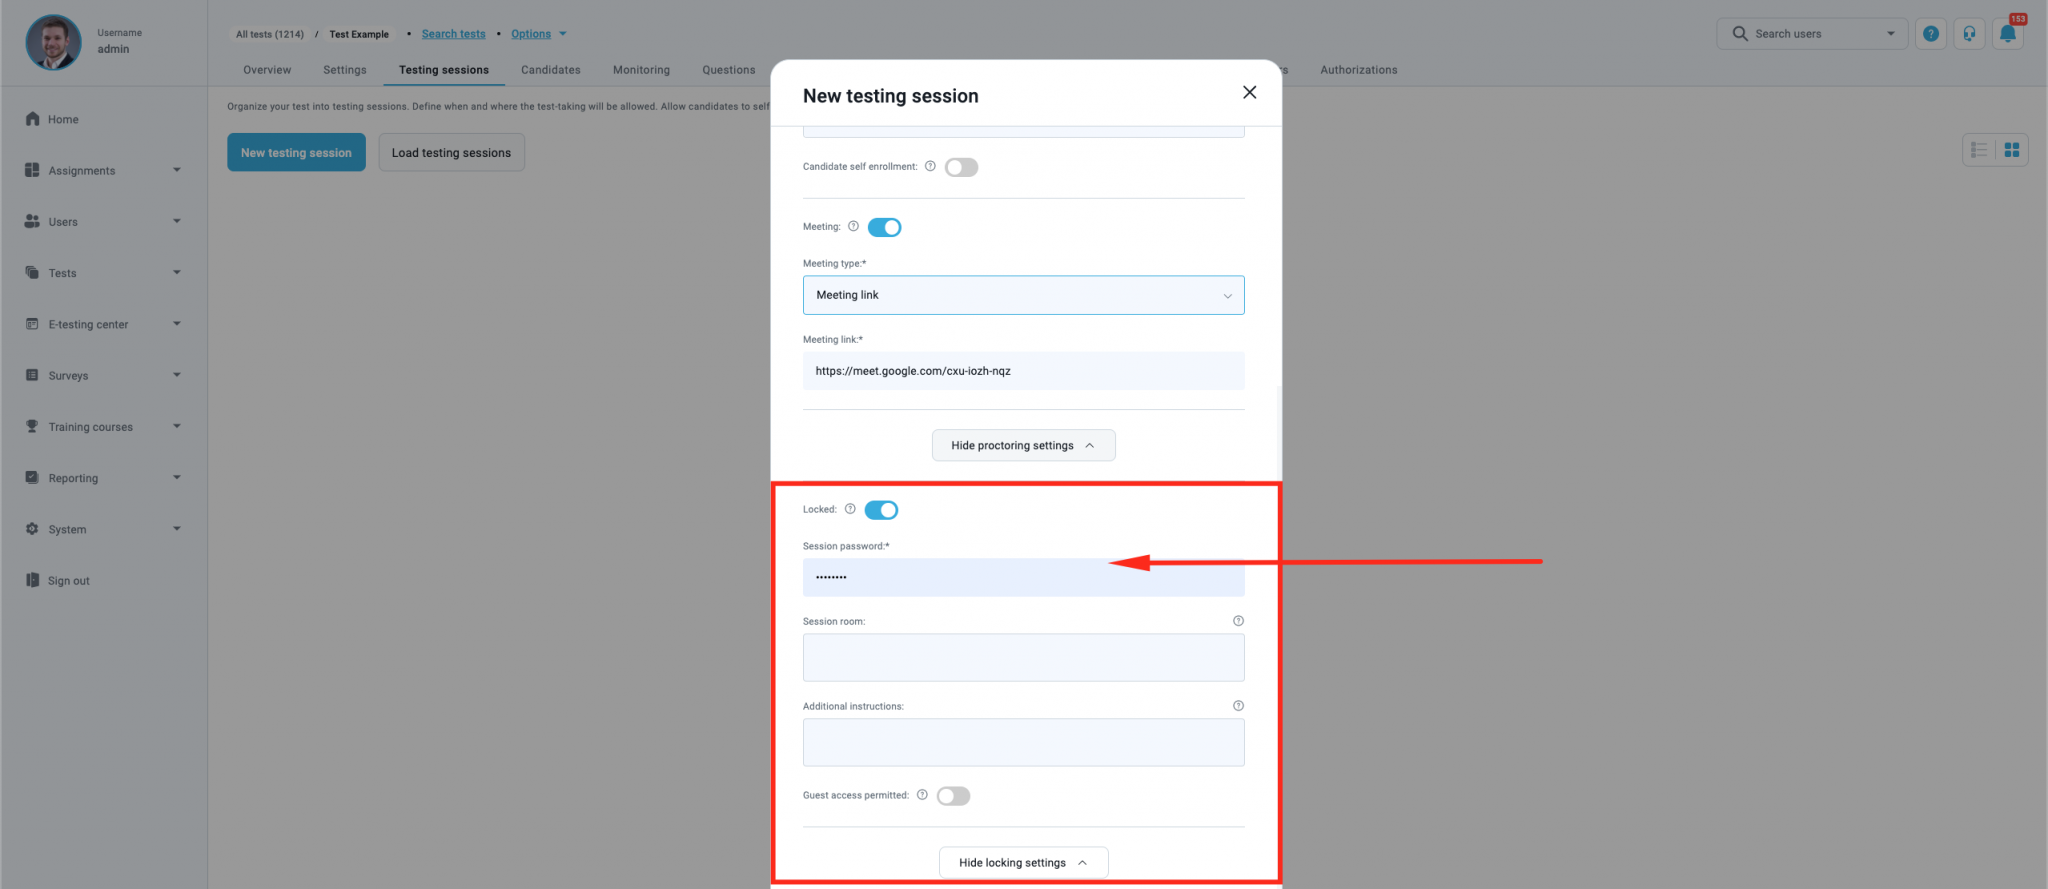
Lastly, publish the test to make it available to all assigned students.
For more information about proctoring using meeting tools, please see:
- Video Demonstration of Live Proctoring with Conference Tools: Webex, Zoom, Skype, Google Meet
- How to Organize a Secure Test Proctored by Zoom
- How to Set Up the Webex integration
Joining a Meeting
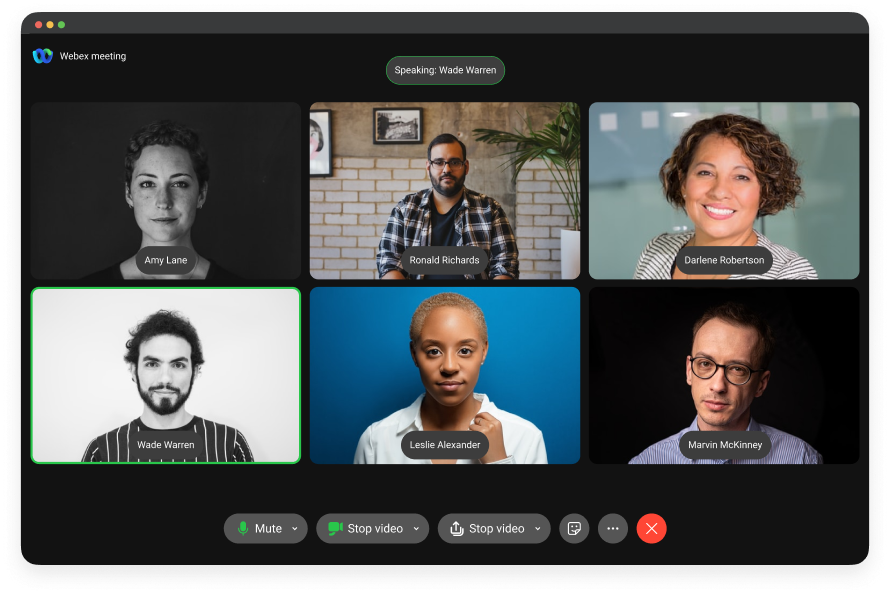
Before the testing session starts, the proctor starts the Webex meeting directly from the testing session page and awaits the candidates to join the meeting.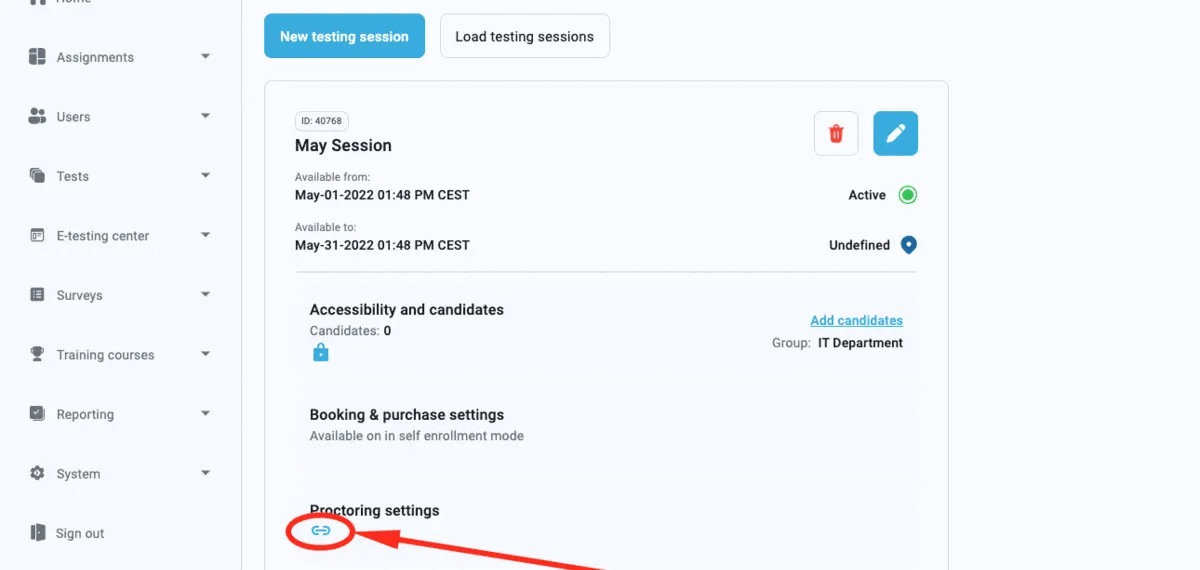
Starting a Test
When all candidates join the meeting, the proctor unlocks the testing session, and candidates can start the test.
Testing Session Monitoring
Proctor monitors the testing session through the detailed event log in the monitoring dashboard, audio, and video recordings from the Webex meeting.
If the proctor notices the suspicious behavior, he can pause multiple candidates’ test attempts to warn them.
Reviewing the Ended Testing Session
Webex dashboard offers a meeting overview and easy navigation to the suspicious moments.
Registering suspicious behavior
Proctor marks suspicious activities during or after the testing session in the predefined Excel form, which can be uploaded back to YouTestMe and incorporated into reports.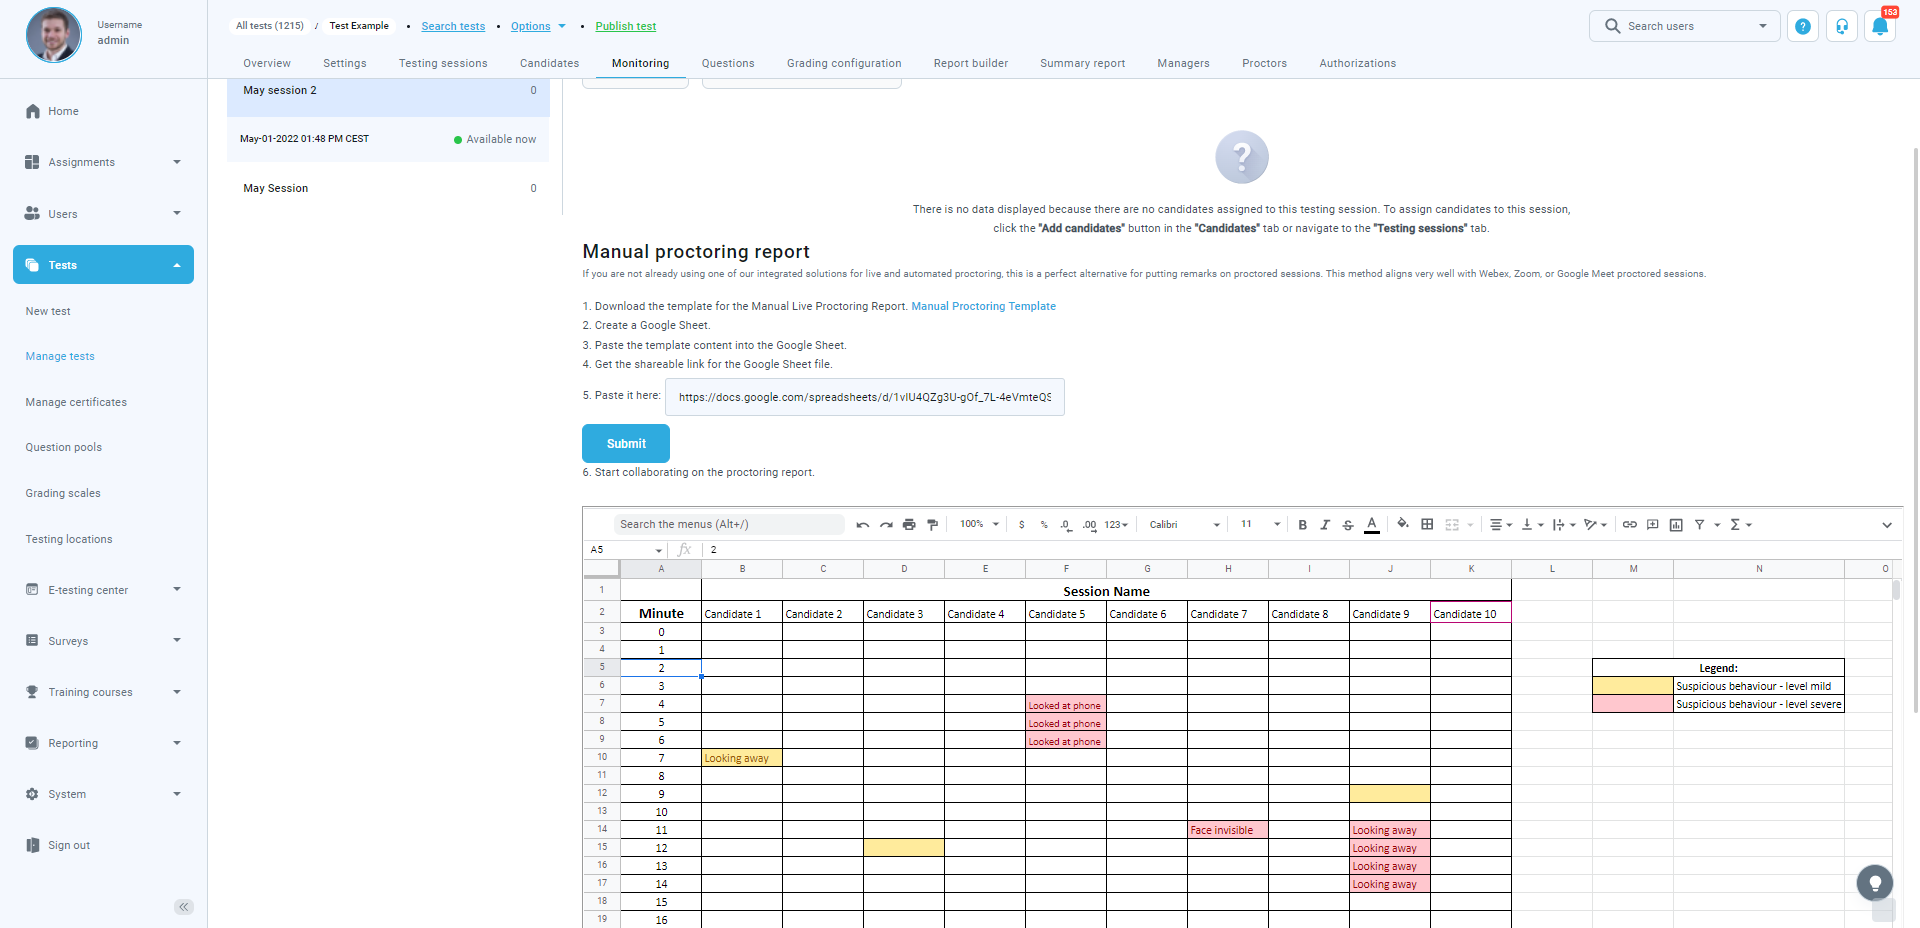
Grading Candidate Behavior
Accessing Results Reports
Proctor has a full overview of testing session analysis, candidate results, and various reports in the YouTestMe application.


