This article explains the existing default roles in the system, how to assign default roles to users, and create new custom roles.
User roles are formed based on the set of permissions that grant users different authorization rights within the application. These authorization rights convey different levels of access.
Roles
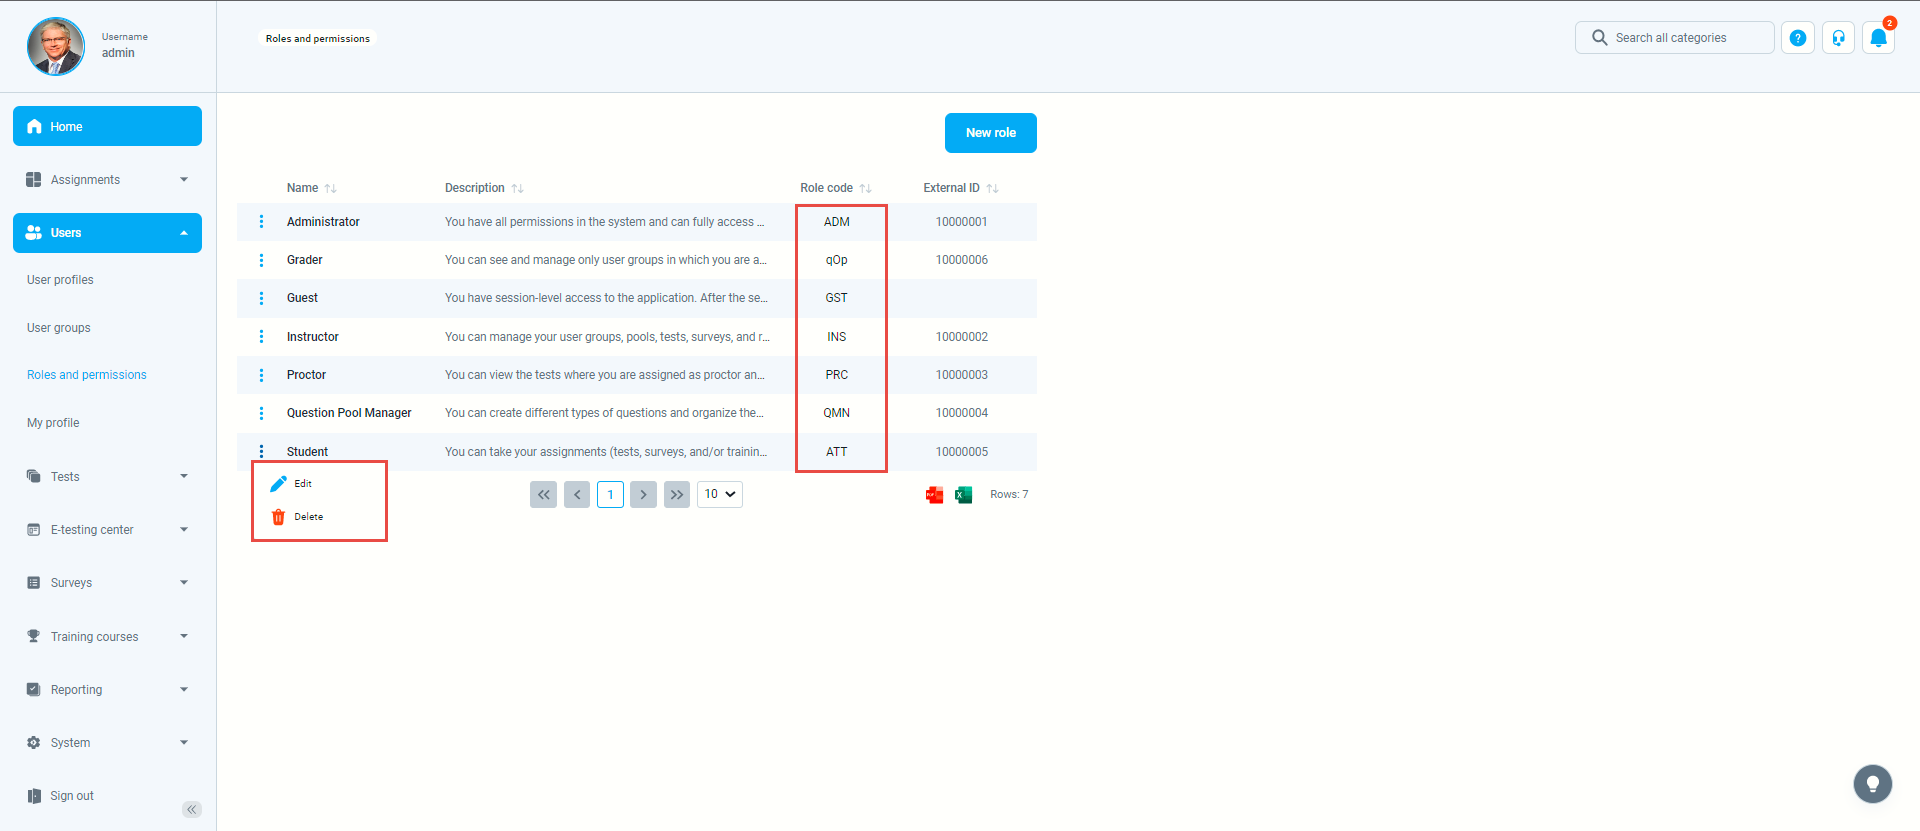
There are four default roles in the system:
- “Administrator” -A role with all permissions in the system that can fully access and manage all application modules.
- “Instructor” – A role with higher-level permissions than a regular user, instructors can manage their groups, question pools, tests,
and reports, while only preview the content not managed by them. - “Proctor” – Proctors can monitor candidate progress on tests and supervise them in real-time.
- “Student” -A basic user that can take assigned tests, surveys, and training courses, and view/print personal certificates.
Each role has its code. Role codes are required for loading users through an Excel file. They link users you want to load with existing roles in the application. You can edit or remove each role in the system by selecting the pen and trash icon in the “Action” column.

Permissions
- Permissions grant users different authorization rights within the application. These authorization rights convey different levels of access and allow you to create a new, custom role by combining the set of permissions. To create a new role, select the “New role” button.

- Enter the role name (e.g., Question Manager, User Group Manager), which is a mandatory field, and optionally add a description.

- Each assigned permission defines actions a role can perform. Select the permissions from the list, and click on the “Create” button to create a new role.

- A newly created role will be assigned a role code so that you can grant this role to users uploaded through an Excel file.

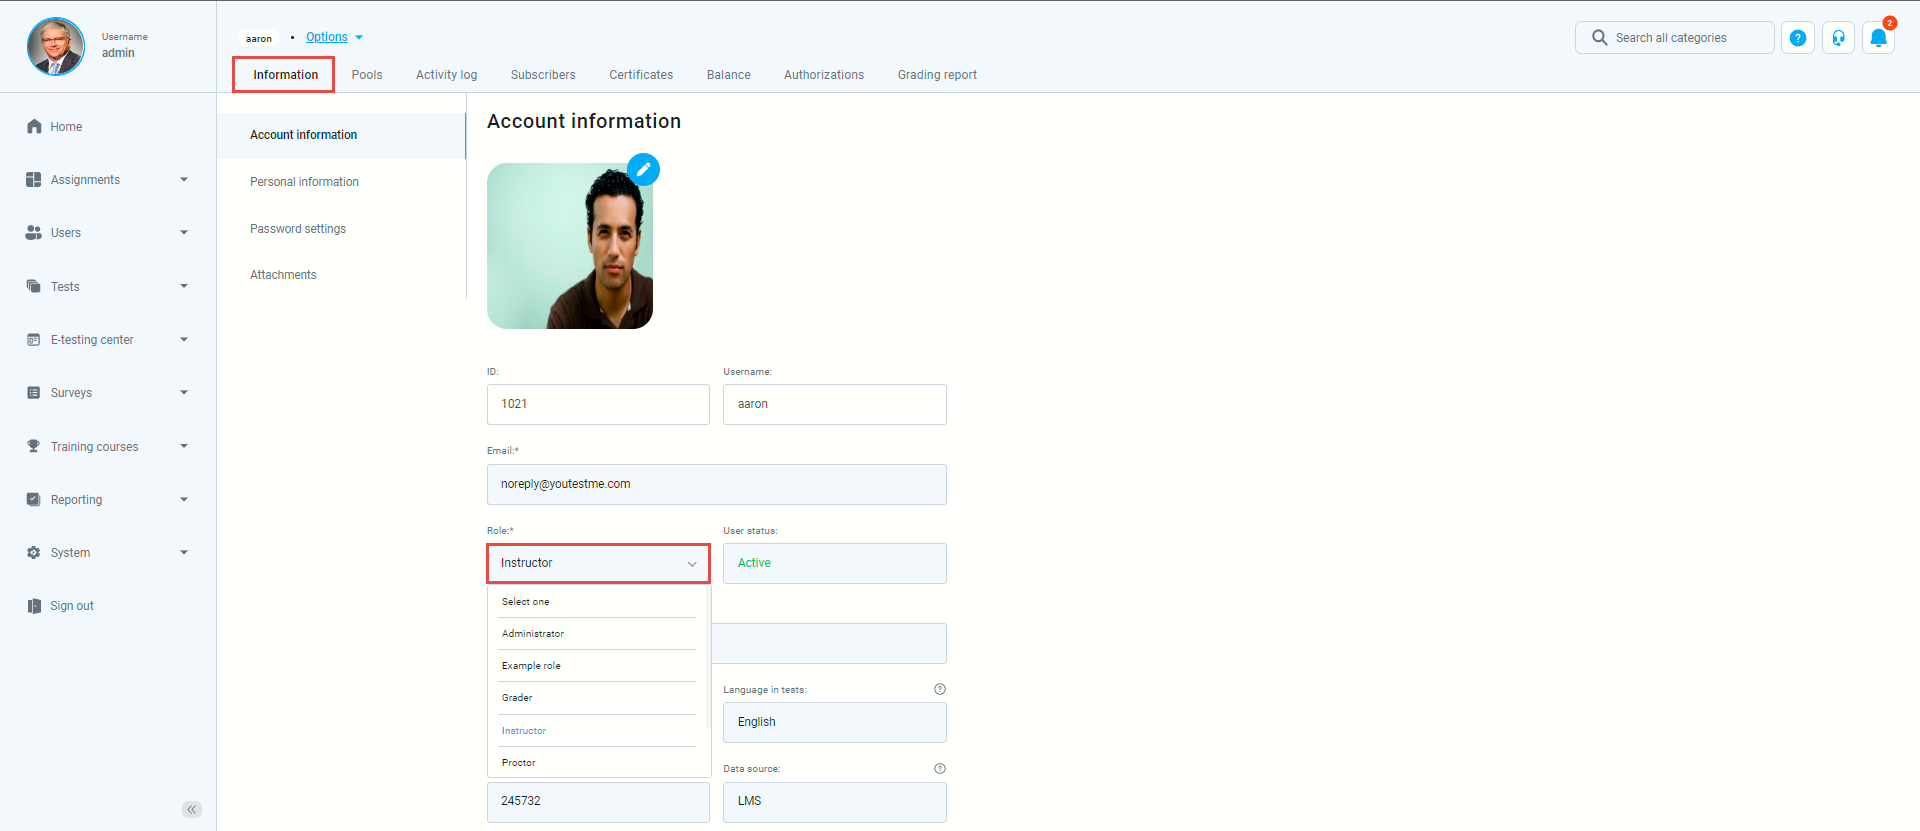
- You can assign a newly created role to any user in the system. Navigate to the user’s profile, and then to the ‘’Account information’’ in the ‘’Information’’.


