This article will explain how to create shared test links. Using these URLs allows you to test users without requesting them to register or giving them a username and password.
Creating a test
To generate the shared test links, you should create a test and assign candidates to testing sessions. For more information on creating a test, you can see How to create a simple test.
Generating shared test links
Once you create a test and assign candidates to the session, you can generate shared test links.
To generate user-specific (personalized) direct access links:
- Click the “Data transfer” button.
- Choose the “Export direct testing links” option.

The system will provide the links in an Excel file, so you can copy the links and embed them in an external system, for example, in emails.

Note: The Excel file will contain meeting links if the test is proctored using conference tools.
Upon the test completion, the candidate is redirected to the URL you specified, while the results are saved in the system and available for the instructor’s review.
Specifying the URL users will be redirected to
To specify the URL, the user will be redirected to:
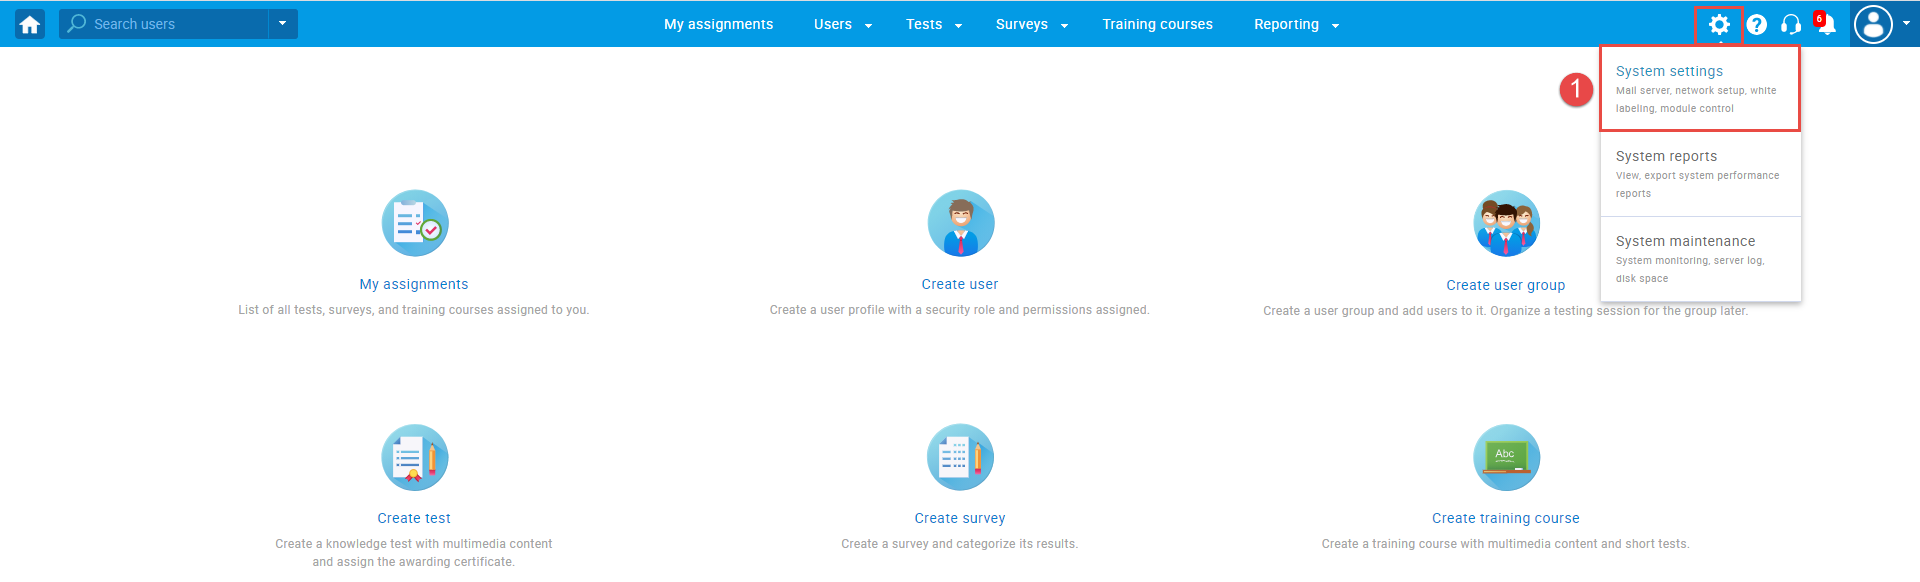
- Navigate to Settings, then click the “System settings“.
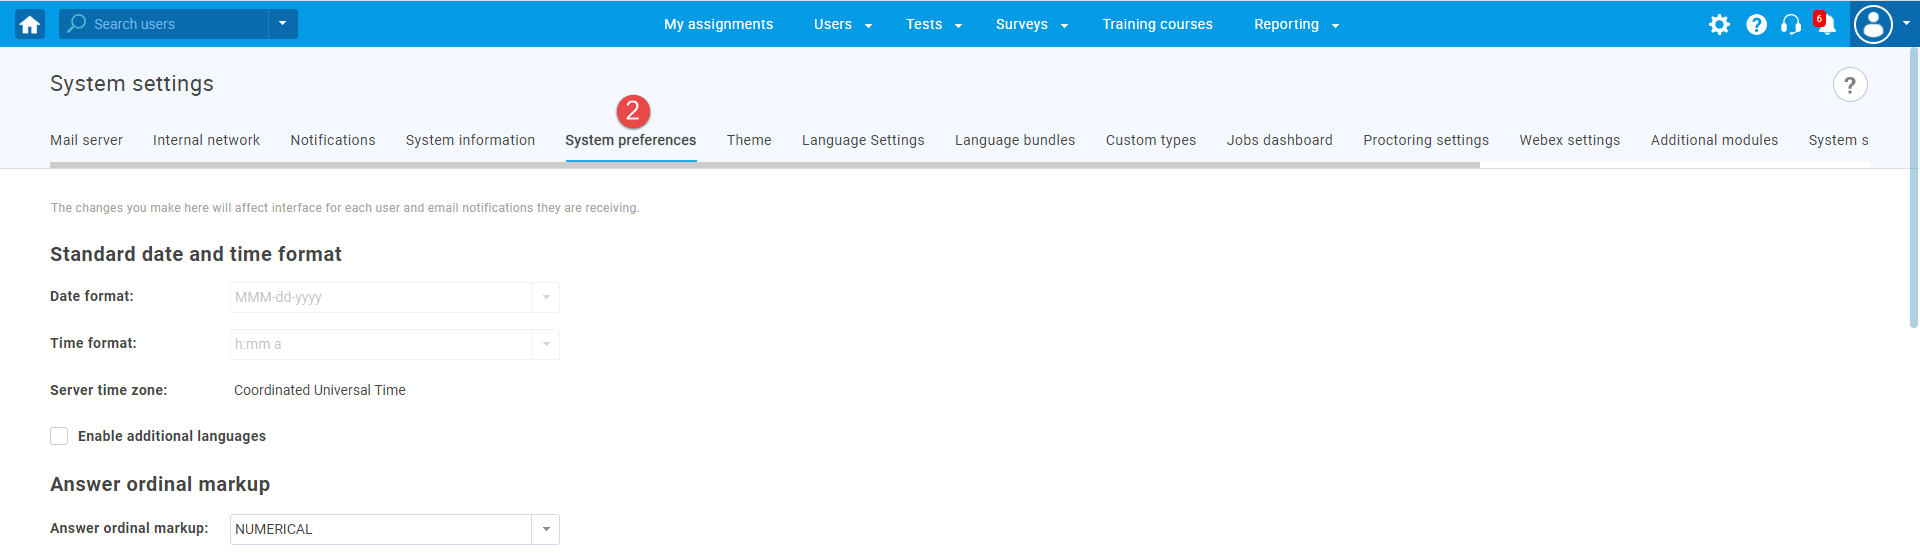
- Choose the “System preferences” tab.
- In the “Finish test redirect URL” field at the bottom of the page, define the desired link.
- Click the “Confirm” button to save the changes.
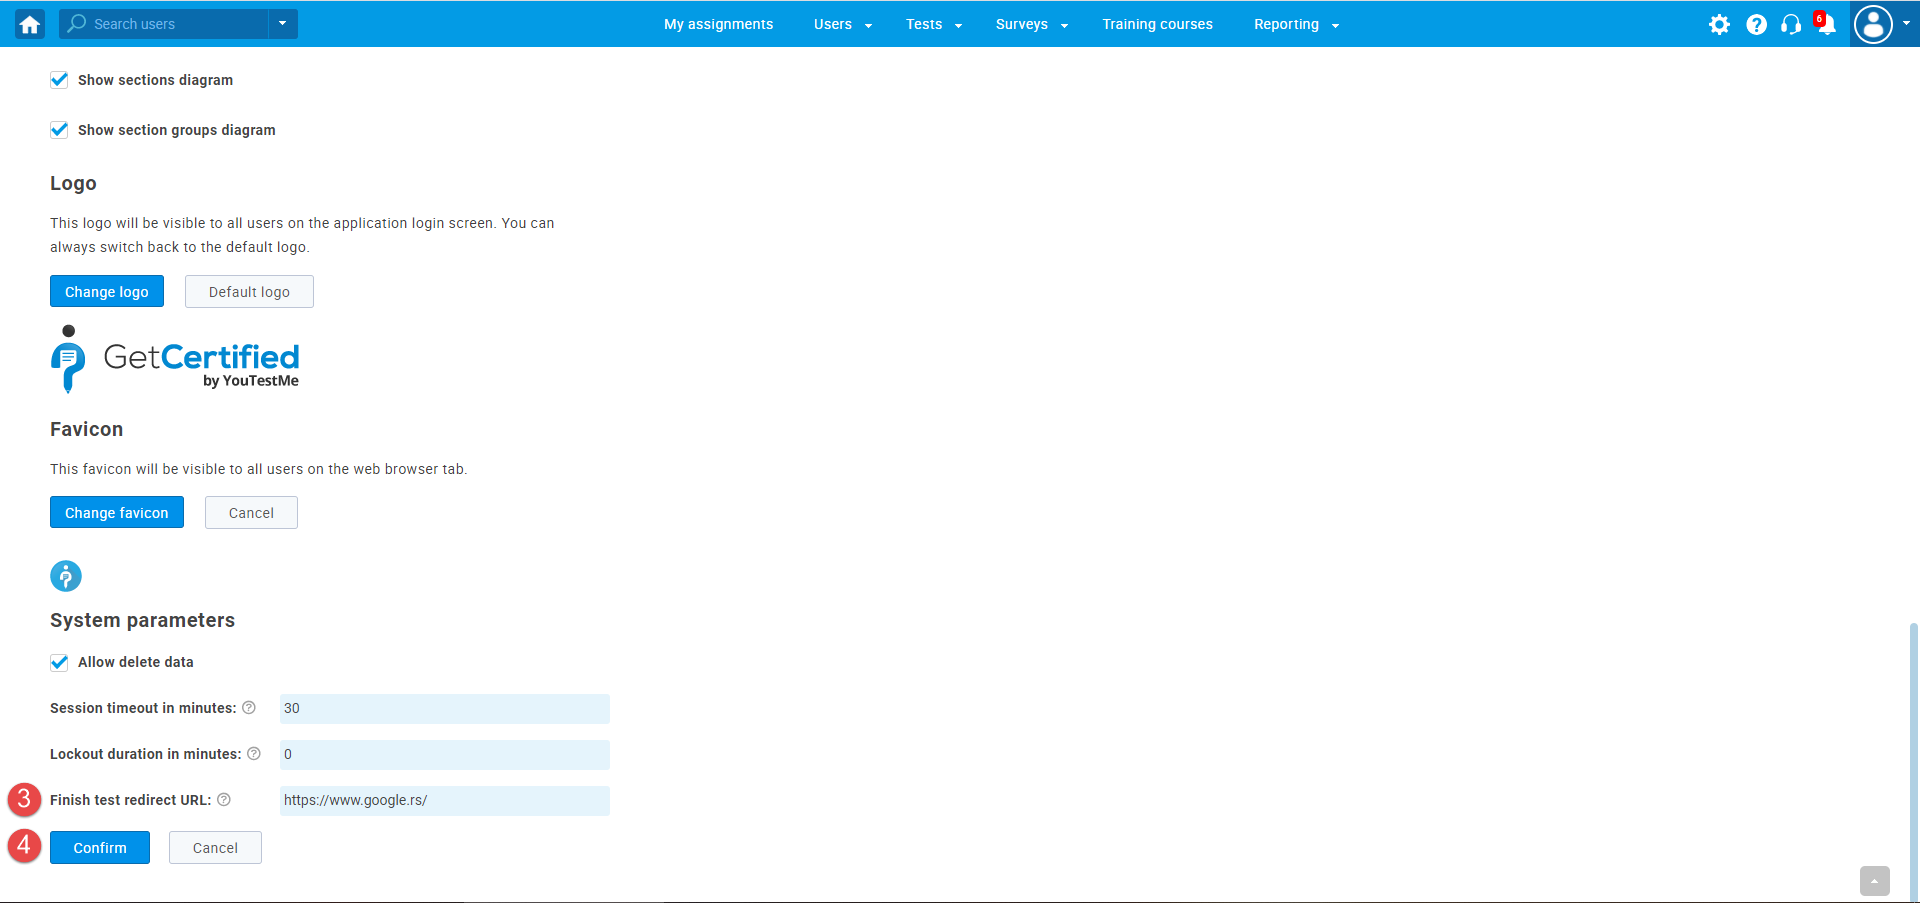
Note: If the field is blank, they will be redirected to the login page.
For more related instructional materials, please visit:


