This article explains how to create a test and assign candidates to it.
Creating a test
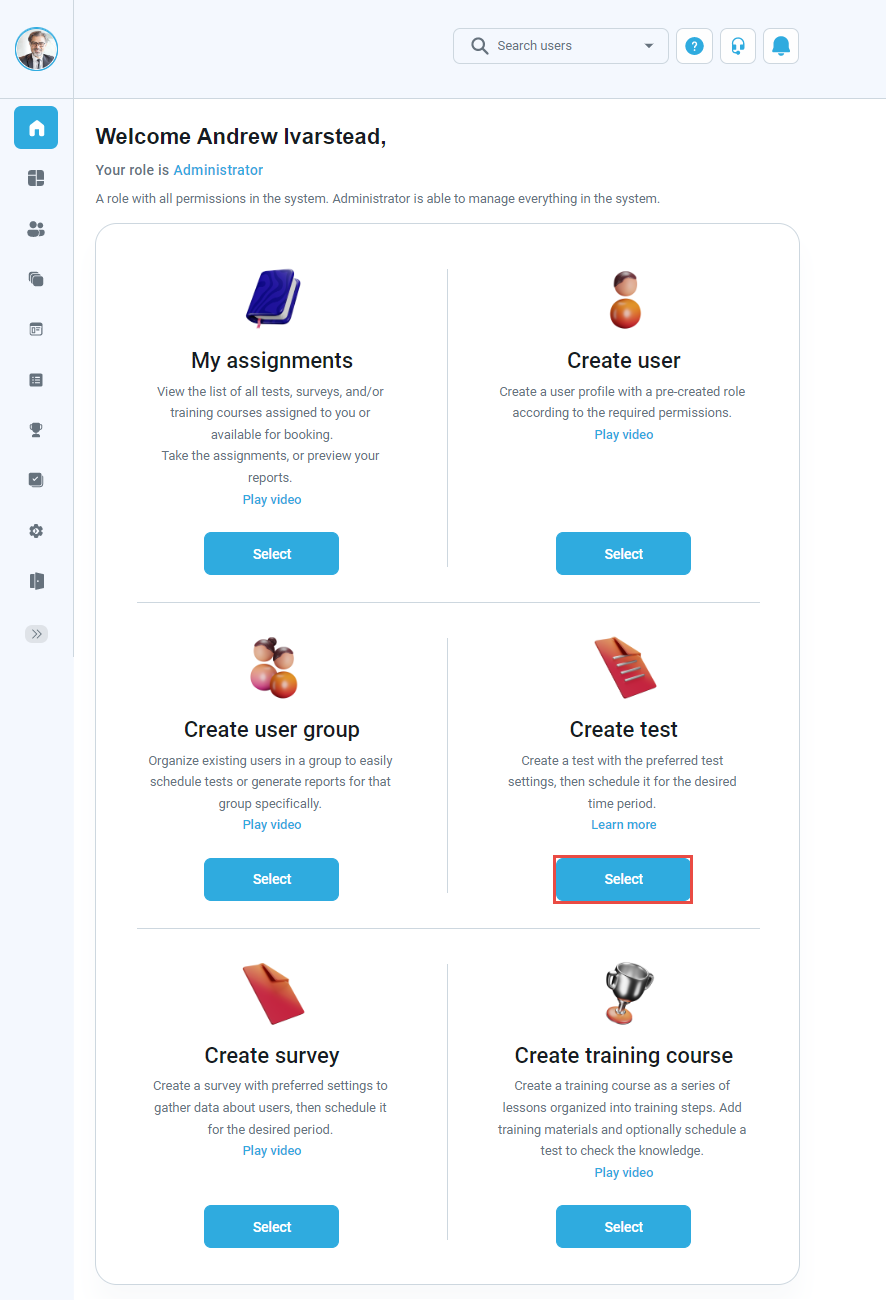
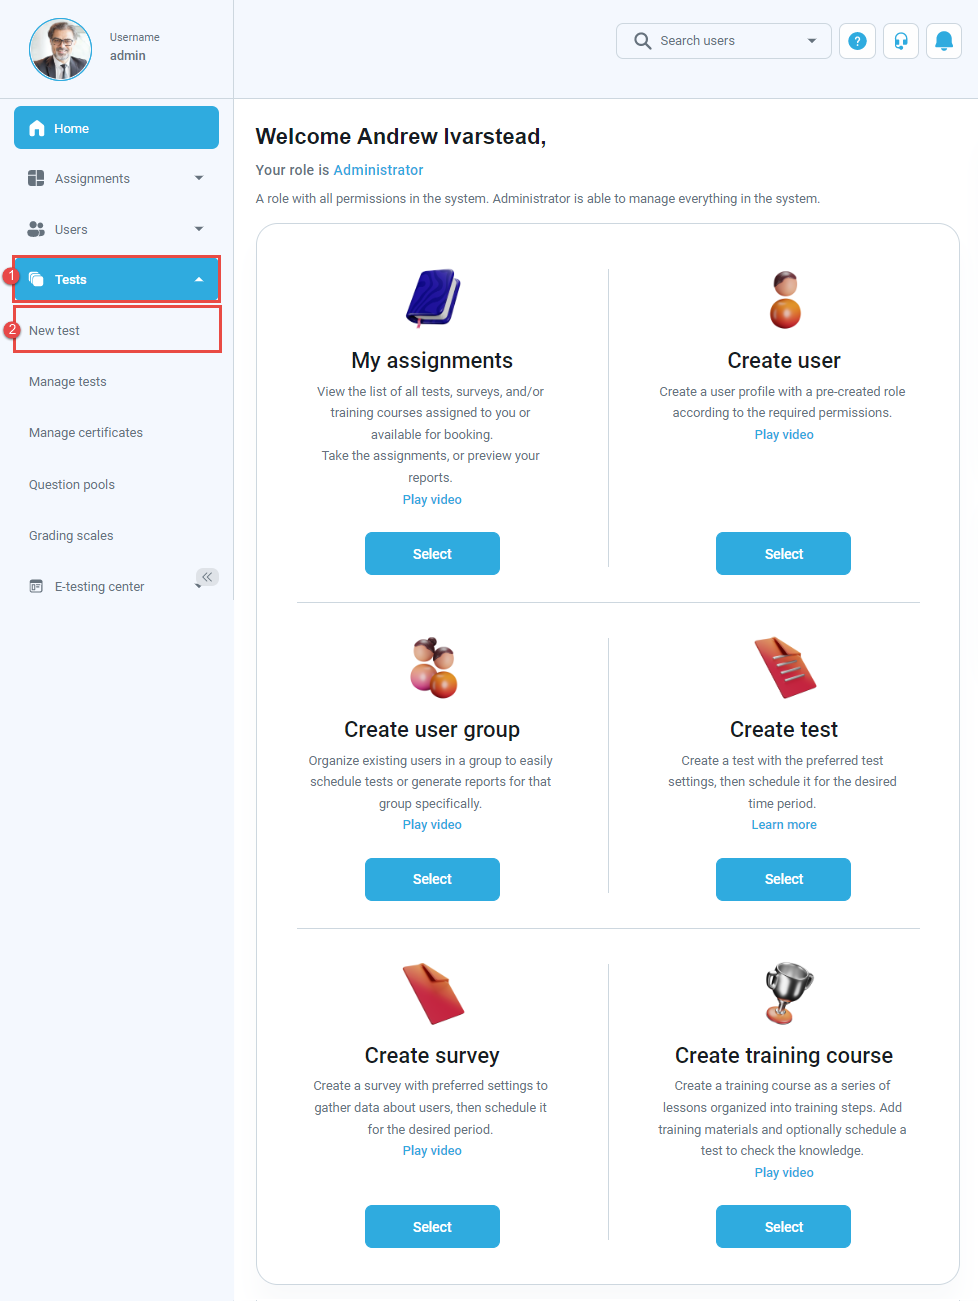
You have two ways to access the “Create Test Wizard” from the homepage:
- Select the “Create test” quick action button.
- Navigate to the “Tests” option in the application’s main menu and select the “New test” option.
You can create two types of tests:
- Test with sections
- Test without sections
Sections could represent different areas of knowledge or topics the test covers. If you leave the “Test with sections” checkbox empty, you will create a test without sections.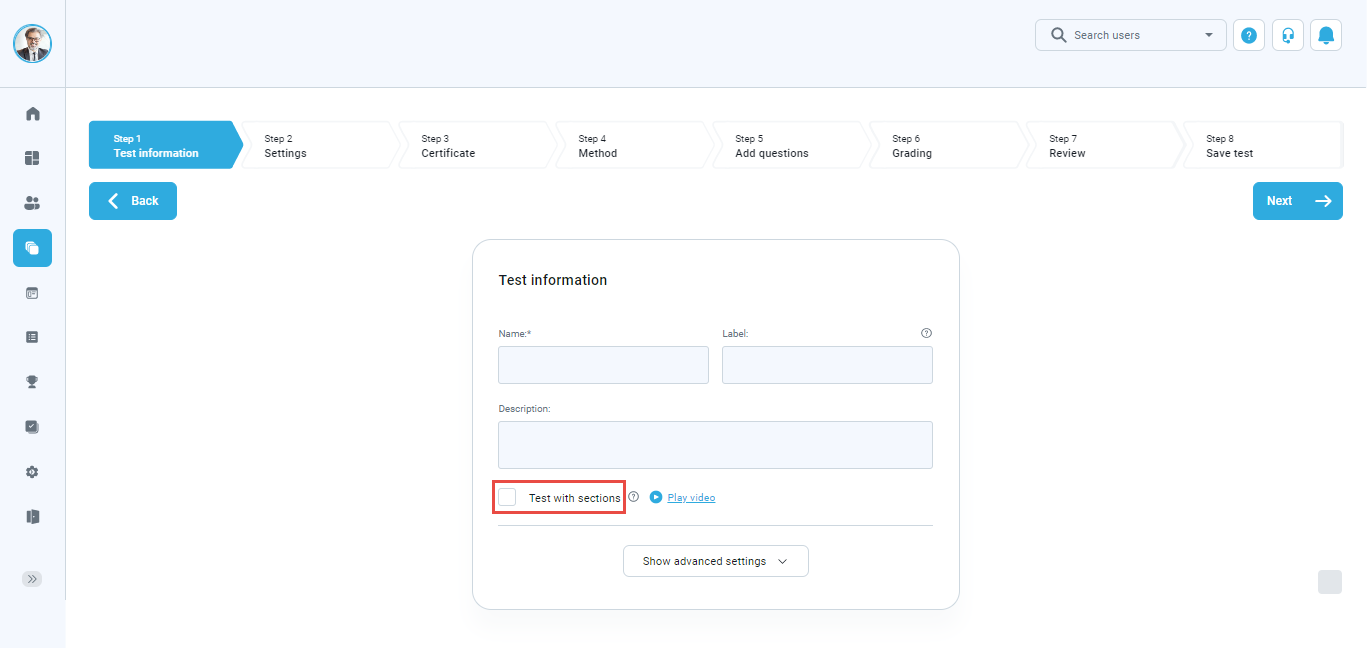
When creating a test without sections, the “Create Test Wizard” has seven steps.
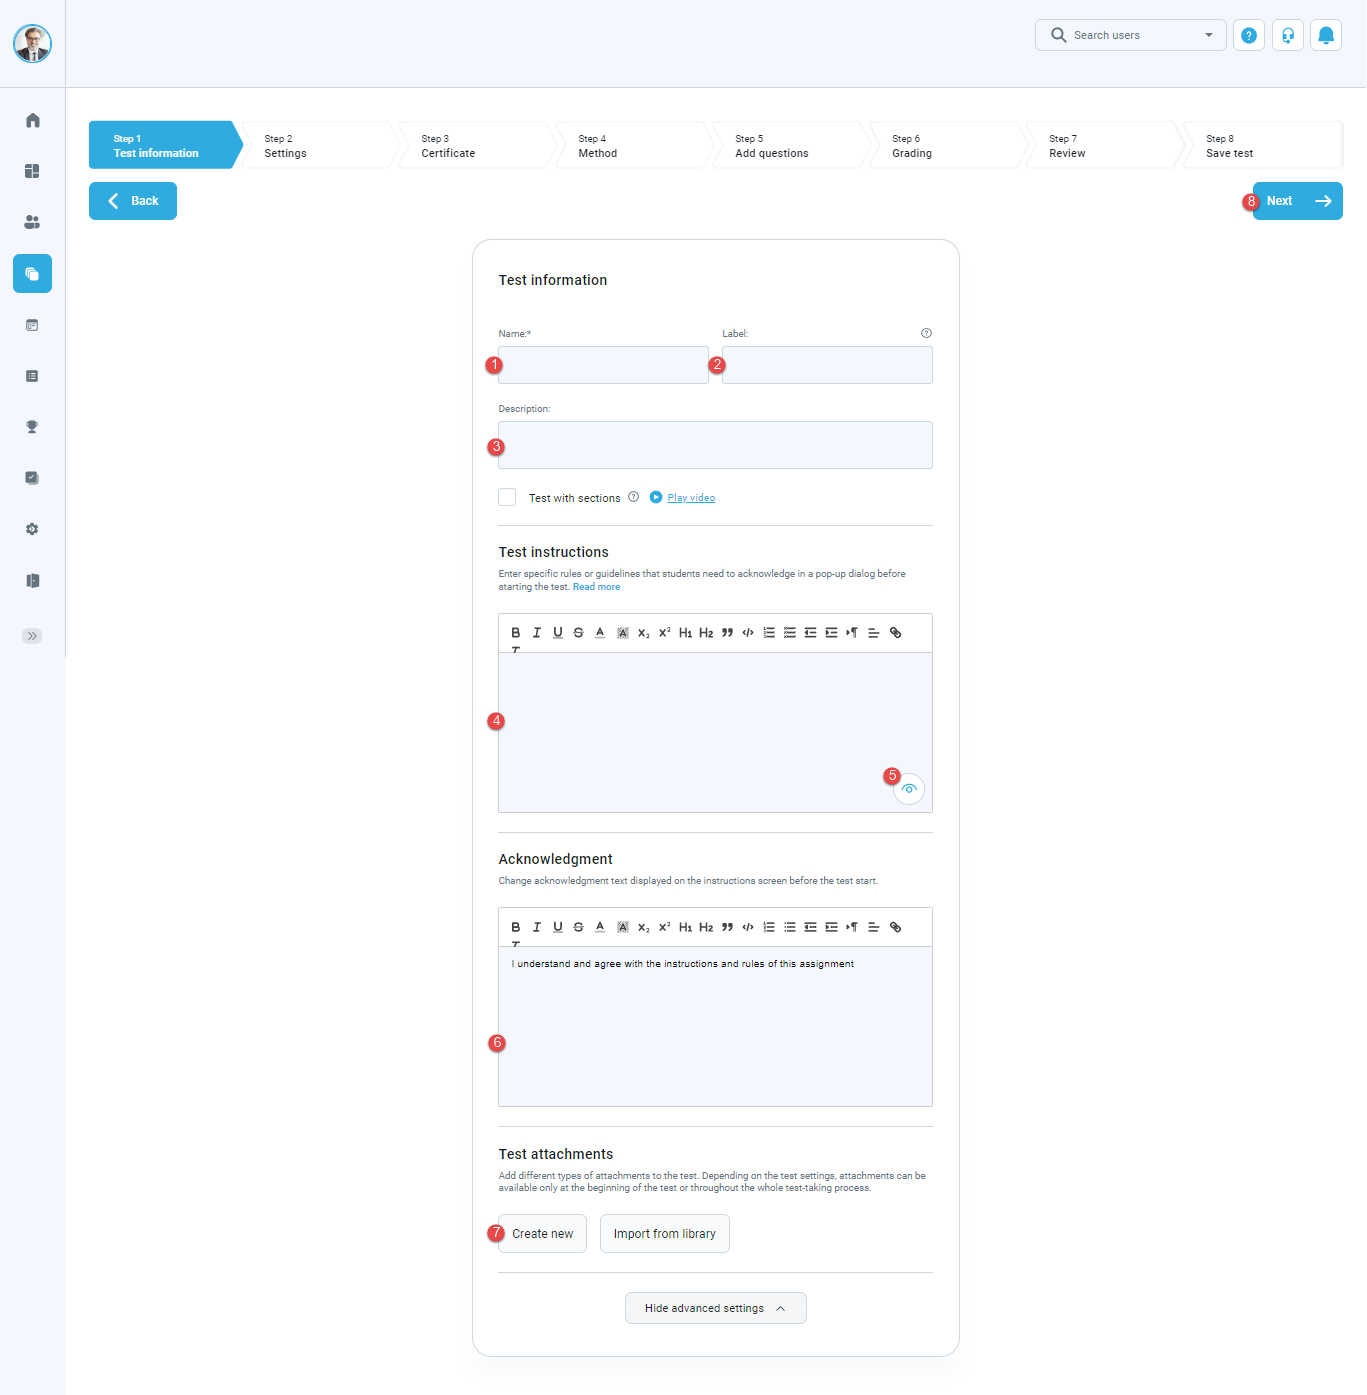
Test information
- Enter the “Name“ of your test – this field is mandatory.
- Add the test “Label“ – an optional label used for additional classification that will be displayed in every exported report. Eg. “Classified“, “Confidential“…
- Enter its “Description“ – can be used to explain the test details.
- Change acknowledgment text displayed on the instructions screen before the test start.
- Enter new “Test instructions“ – specific rules or guidelines that students need to acknowledge in a pop-up dialog before starting the test and in the notes during the whole test-taking process.
- “Open instructions preview“ – use this option to preview the test instructions and description.
- Add “Attachments“ – click the “Create new” button to import a new attachment from your computer or “Import attachments“ to add new attachments from the library of previously imported or created attachments.
- Click the “Next“ button to proceed to the next step of test creation.
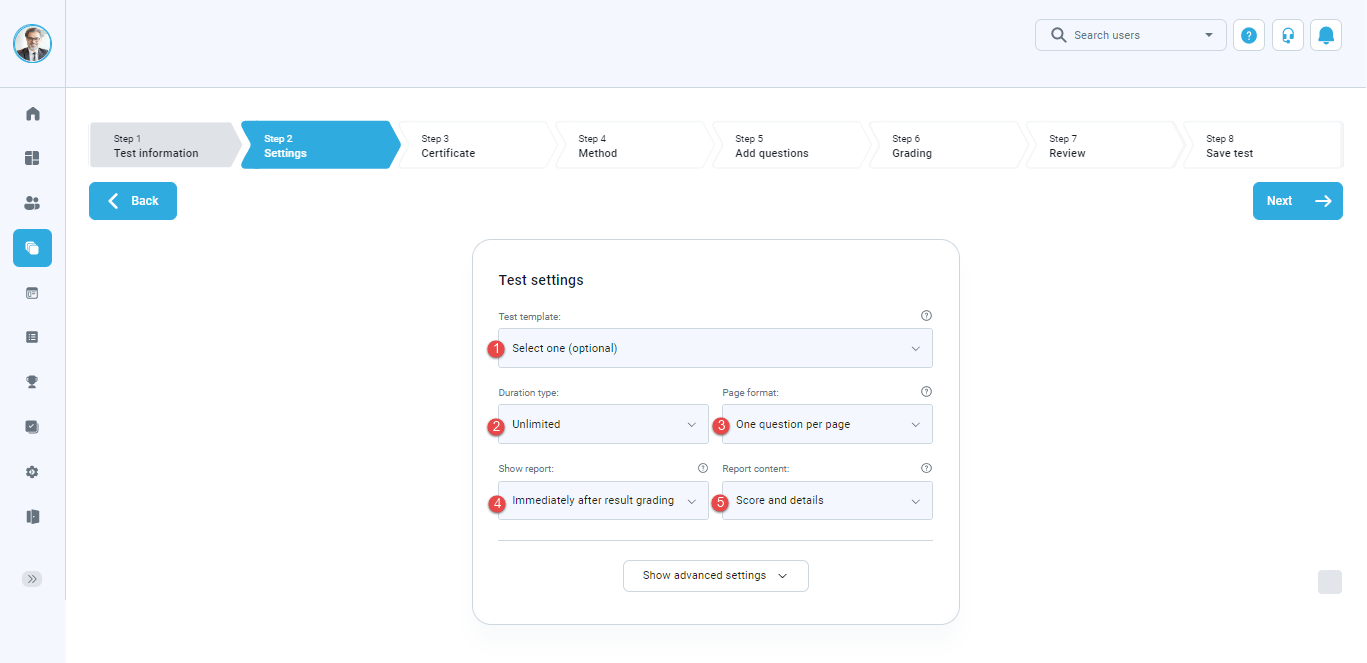
Settings
The “Settings“ step contains the following options for configuring your test:
- “Test template” – when creating a test, you can save its settings and question pools configuration as templates. You can use one of the previously created test templates by choosing it from the dropdown menu.
- “Duration type” – choose how you want to time-limit your test by selecting the duration type:
- “Unlimited” – the test will not be time-limited.
- “Time per question” – each question in the test will have its time limit. The exact time limit for each question can be configured during the question creation process.
- “Time to answer all questions” – set the time limit for the whole test.
- “Page format” – set how the questions will be displayed. You can choose between:
- “One question per page“
- “All questions on one page“
- “Show report” – decide when will the report be available to users:
- “Immediately after finishing the test“ – users will see the report immediately after completing the test.
- “Immediately after result grading“ – users will see the report after the test manager grades all questions that require manual grading.
- “Immediately after result verification“ – users will see the report after the test manager verify their test attempt.
- “On manager’s approval“ – users will see the report after the test manager approves it.
- “Real-time grading“ – during the test-taking process, users will see the changes in their test score after submitting each answer.
- “Report content“ – define the content of the report the user will receive. You can choose between two options:
- “Score and details“ – the user will see his score and all question and answer details – e.g., his answer and the correct answer.
- “Score only“ – the user will see only the score.
Note: By clicking on the “Show advanced options” button, you can enable/disable desired options.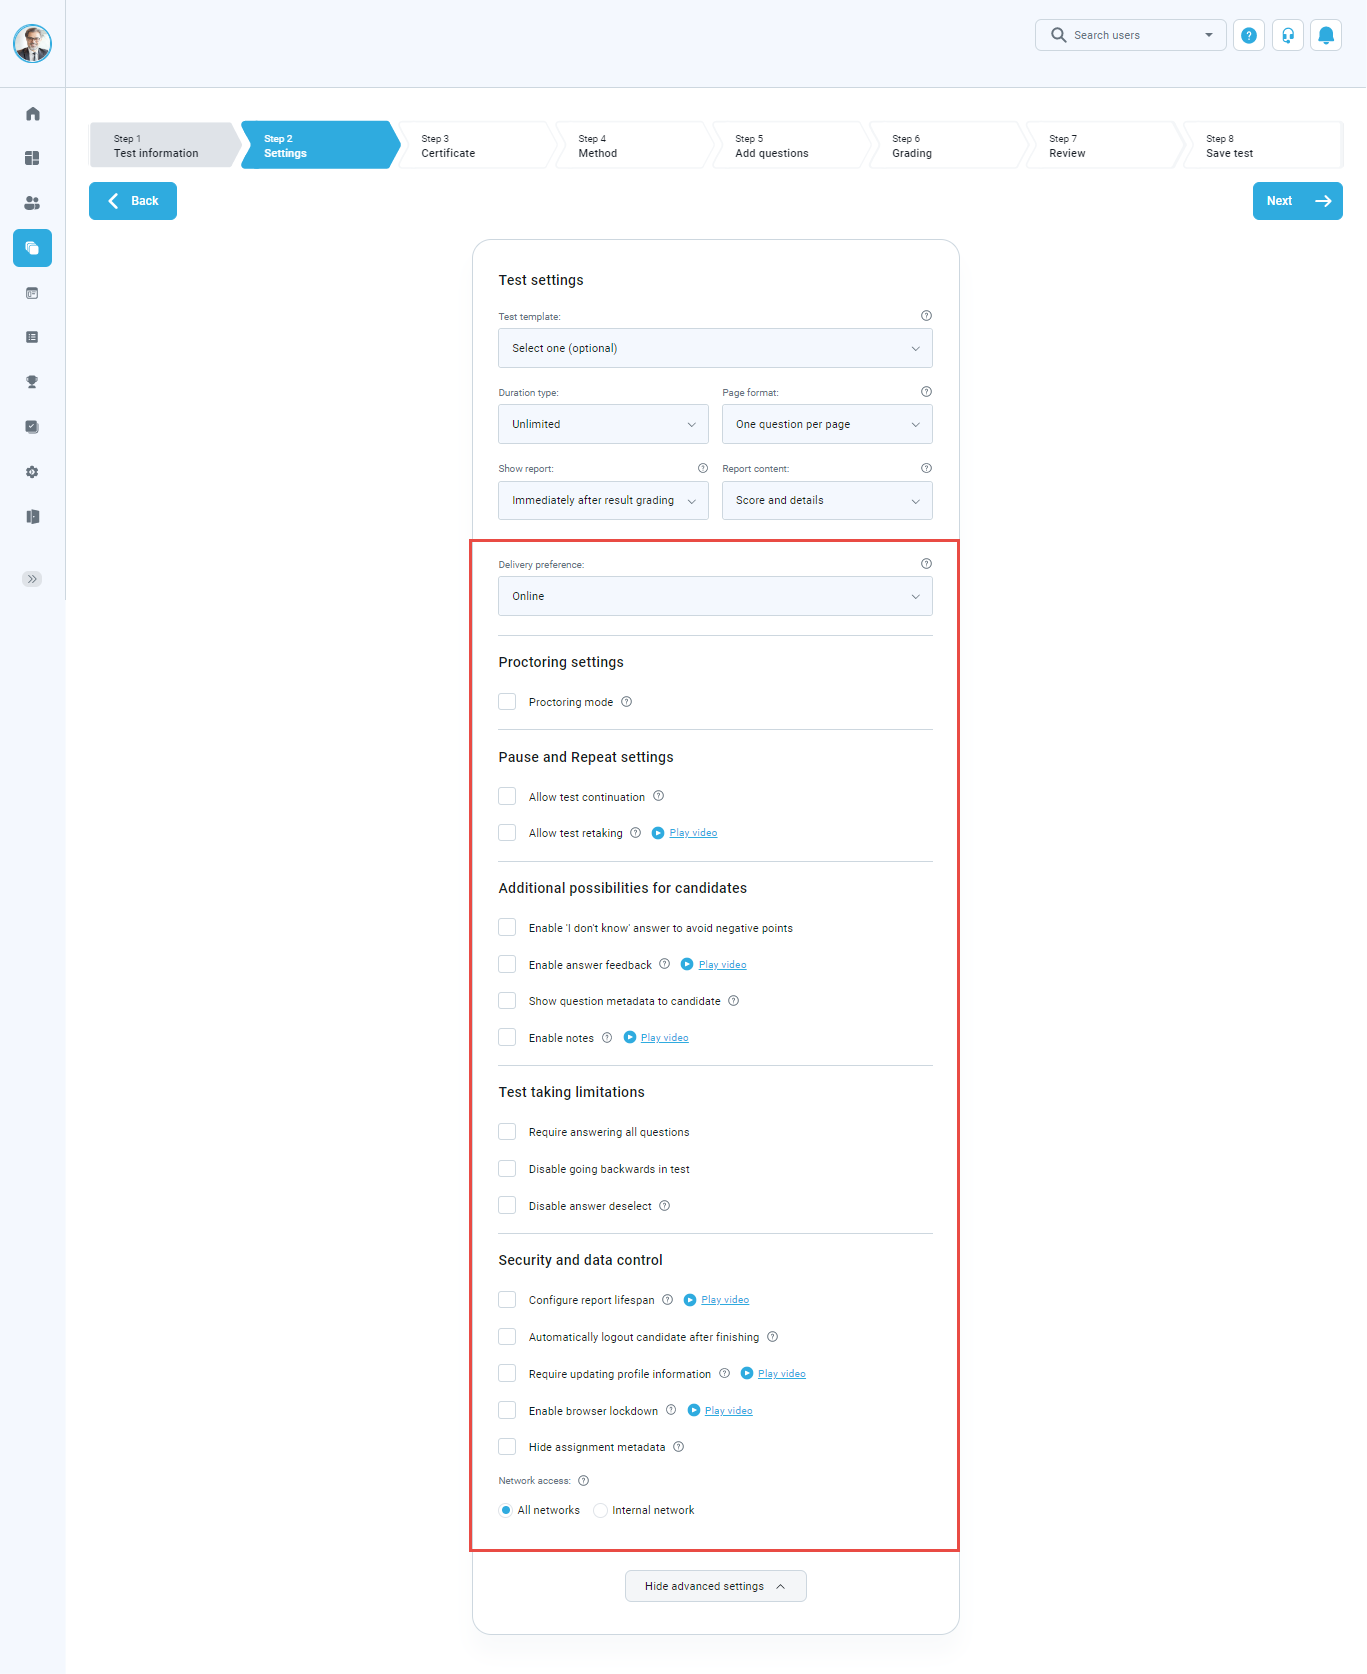
Certificate
A test can have its own certificate granted to users who successfully complete it.
- Click the “Add certificate“ button to add the certificate to the test.
- Click the “Skip“ or “Next“ button to move on with test creation without adding the certificate.
- Click “Help“ if you need any assistance with this part of the application.

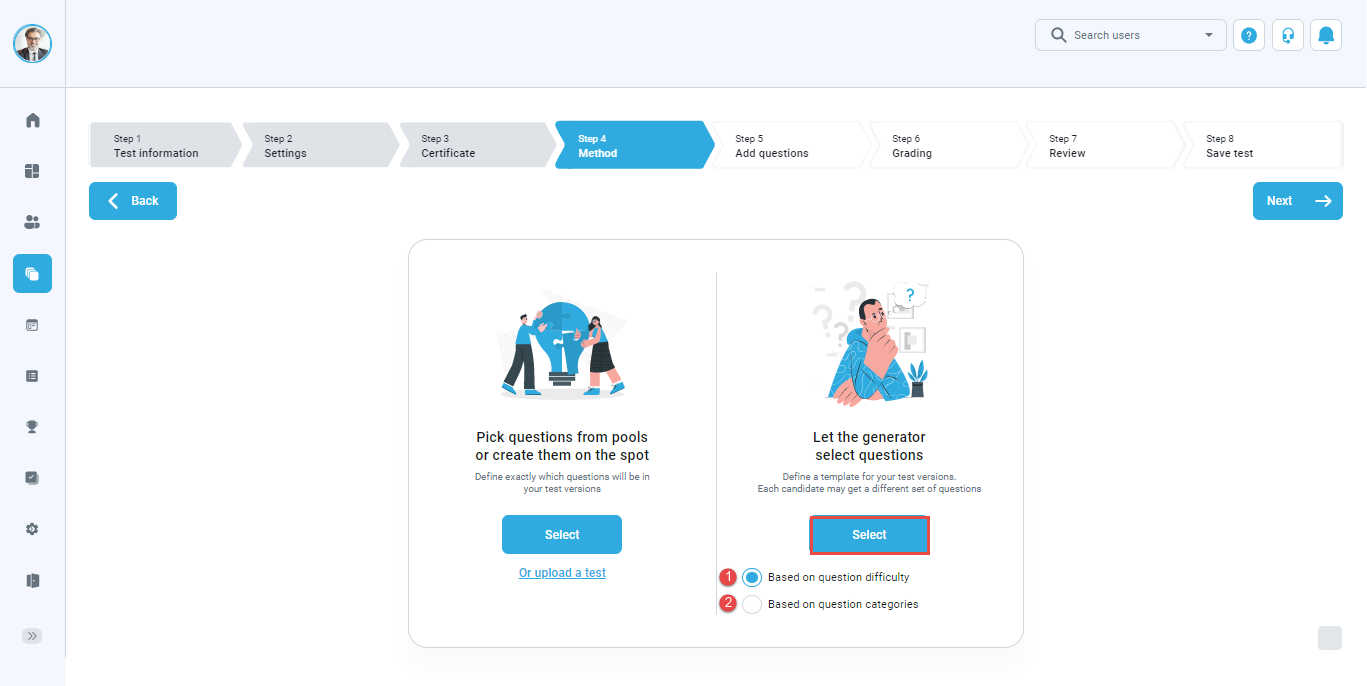
Method
You can choose between the following methods for adding questions to your test:
- “Pick questions from pools or create them on the spot” – create questions manually or add the existing ones from question pools. Define exactly which questions will be in your test versions. This method creates a unique test version. One test version can contain independent combinations of questions imported from pools and manually created questions.
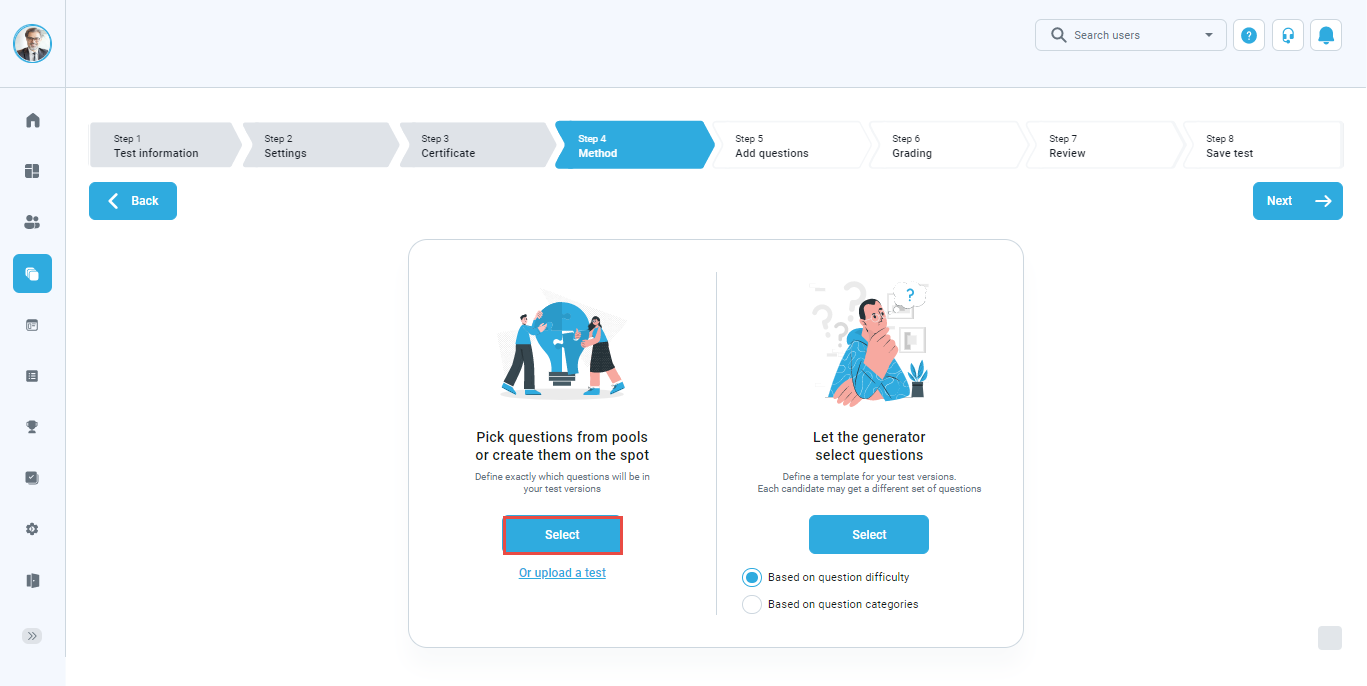
- “Let the generator select questions“
- “Based on question difficulties“ – this method allows you to create an unlimited number of versions of the same test. These test versions will be unique but comparable since they will contain the same ratio of easy, medium, and hard questions.
- “Based on rules with question categories“ – Each unique version will have a set of questions based on the defined rules. One rule may contain filtering by question categories made in the system.
Add questions
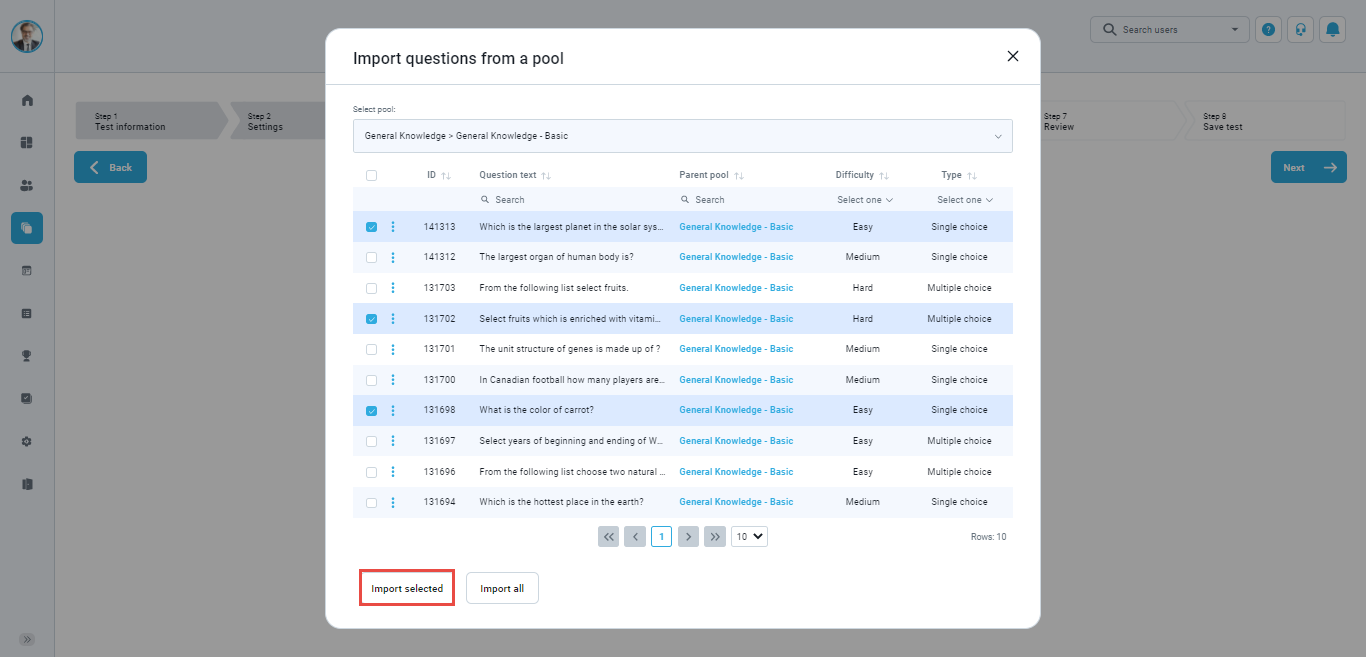
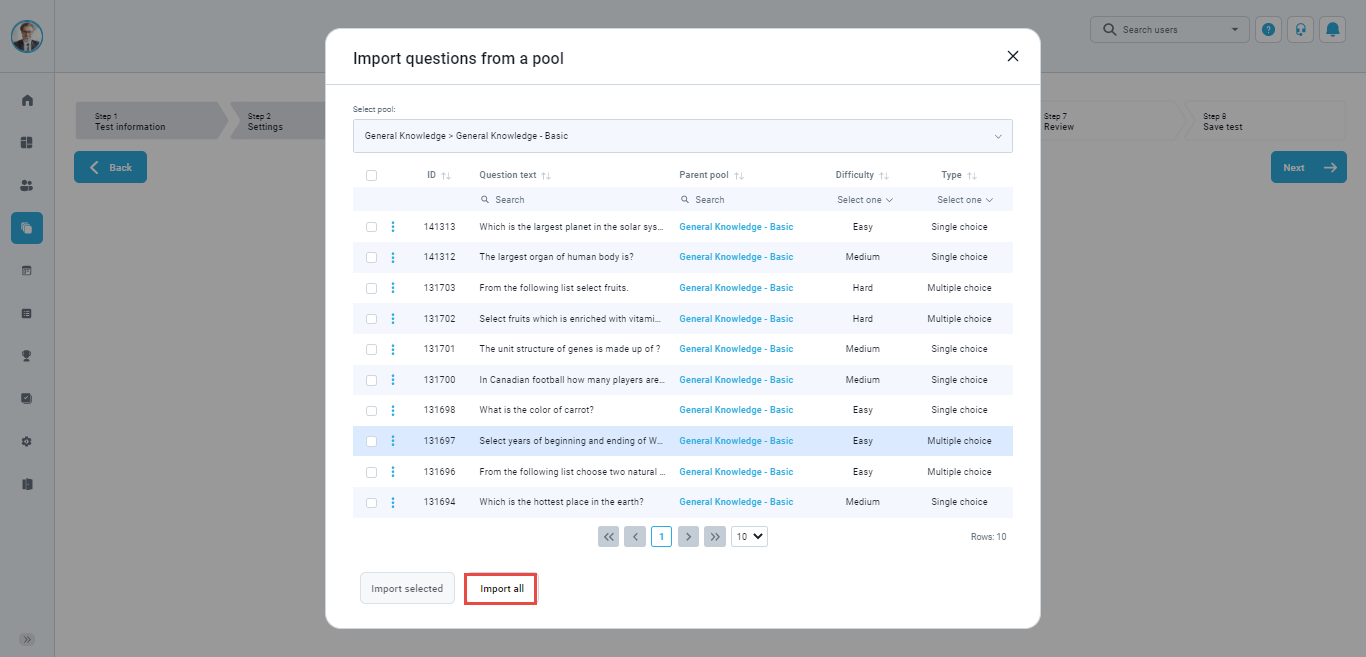
To add questions to a test from an existing question pool, follow the steps below:
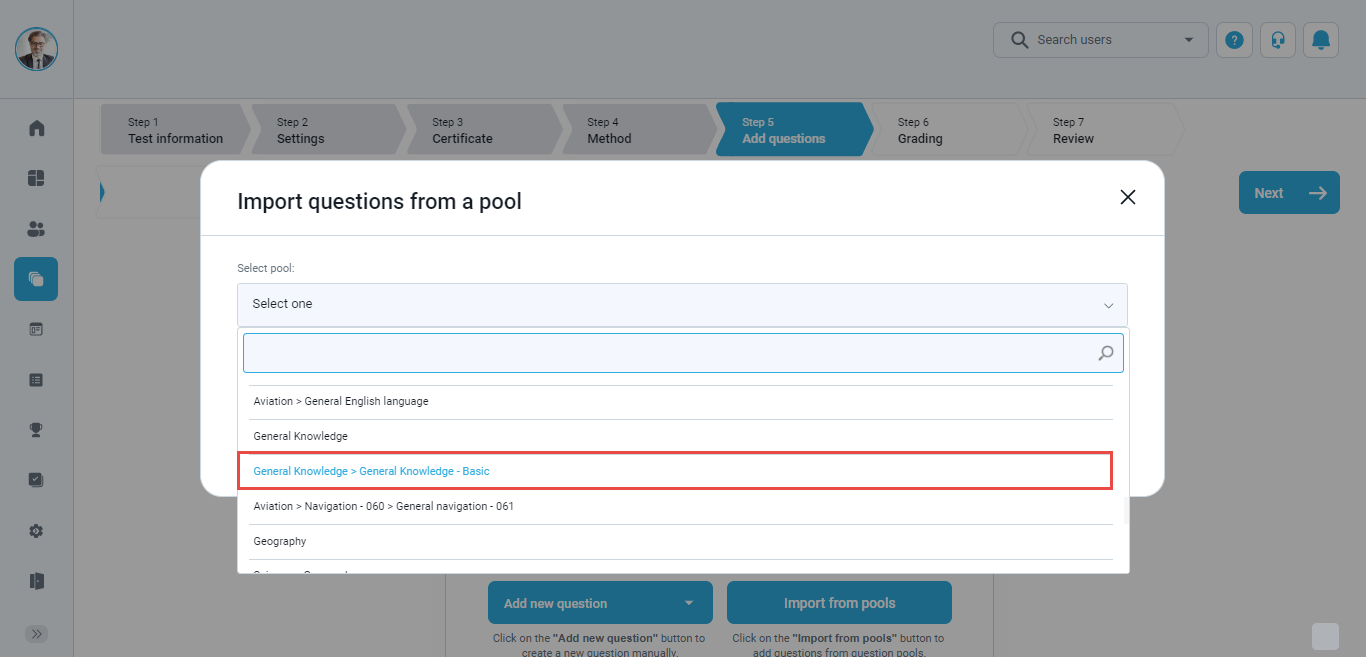
- Select the“Import from pools“ option.
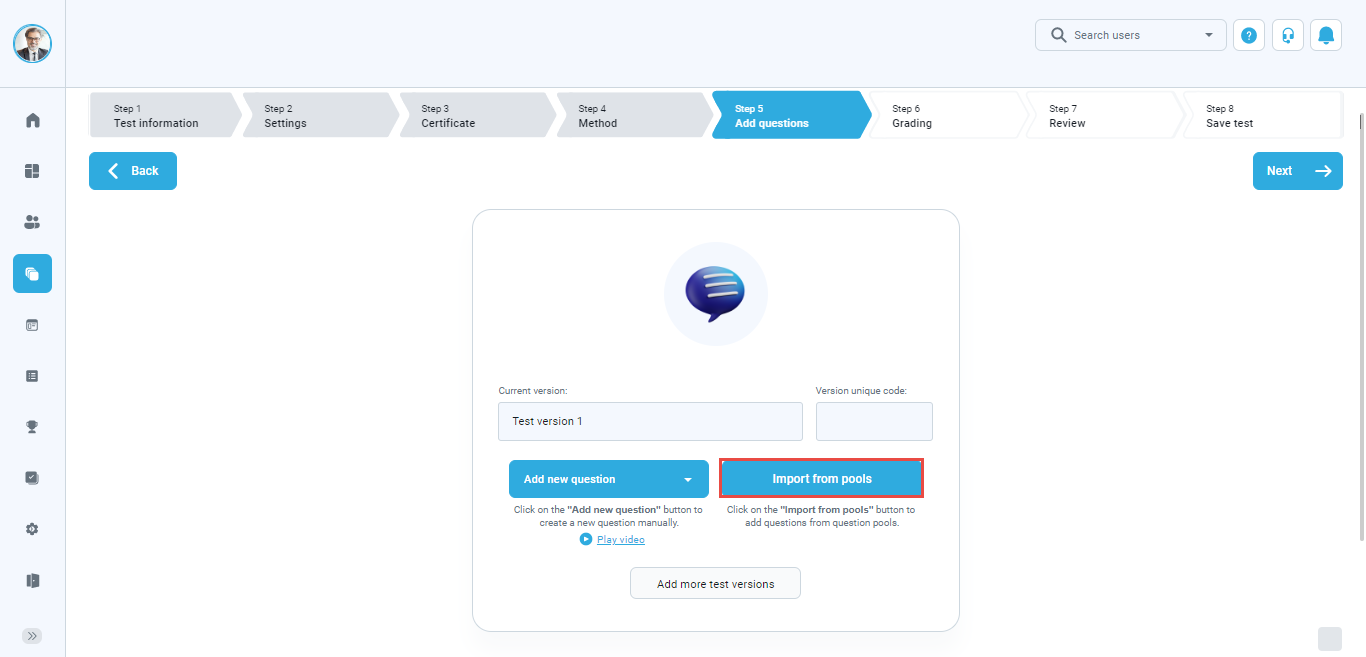
- Click on the drop-down menu to view all available pools. You can choose only the pools you created or managed.
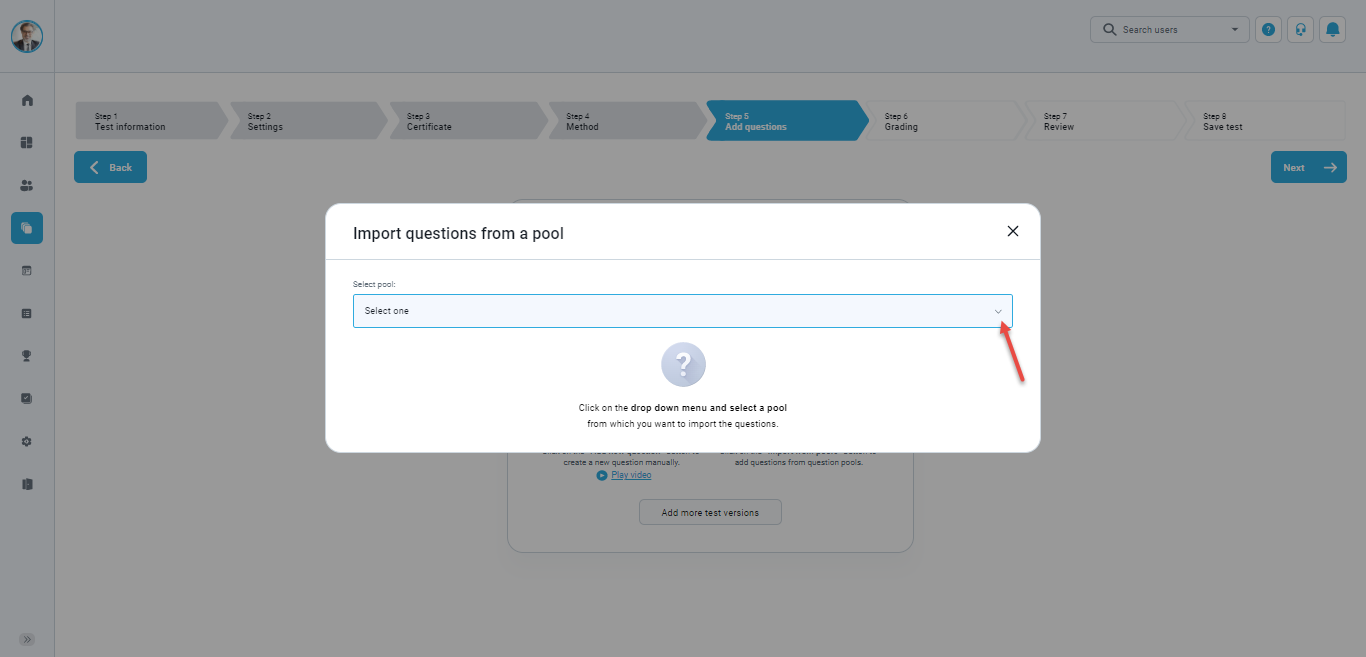
- Select the desired question pool.
- Import questions
- Import only selected questions
- Import all questions from the selected pool
- Import only selected questions
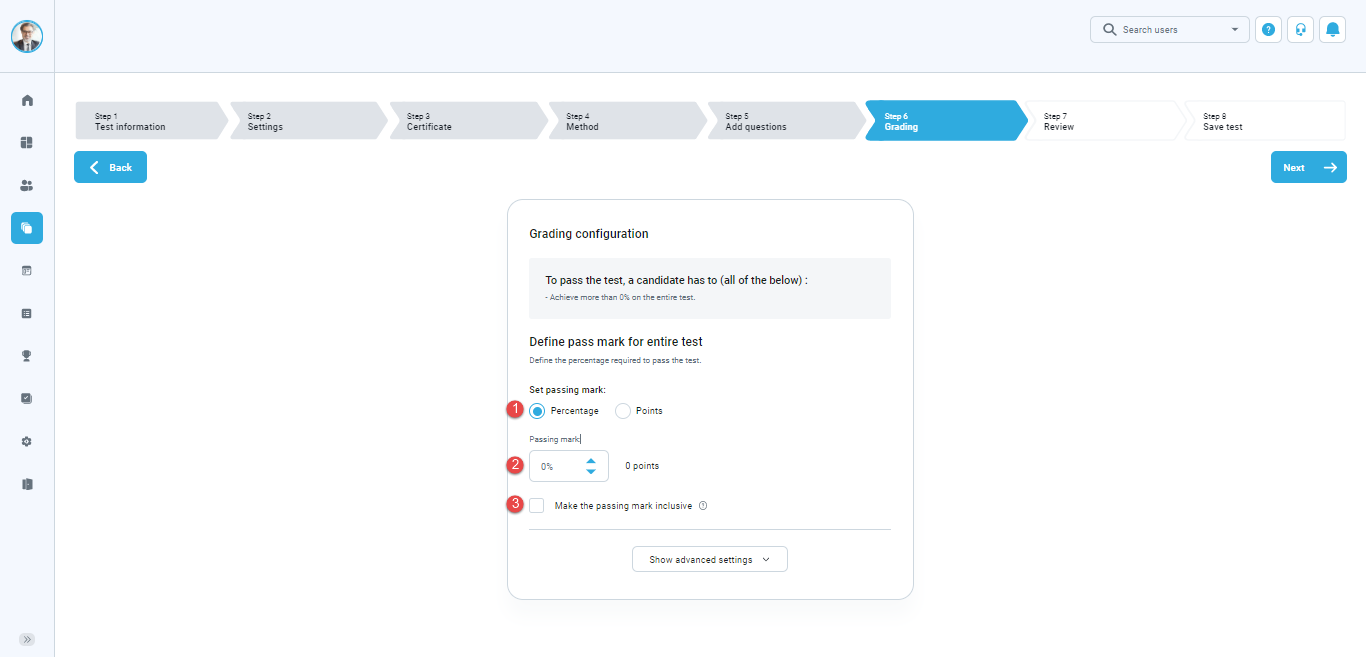
Grading
To configure the grading for the entire test, you should:
- Choose whether the passing mark for the whole test will be expressed in points or percentages.
- Set the value of the passing mark for the whole test.
- If the option “Make the passing mark inclusive“ is selected, users will pass the test if they gain a score equal to or higher than the passing mark.
Review
The next step in the test creation process is “Review.” It contains a summary of the test settings and a list of questions or question pools used. If you are satisfied with your test settings, you can press the “Next” button to continue with the test creation process. If you want to make changes to the existing test, you can still go back and edit them.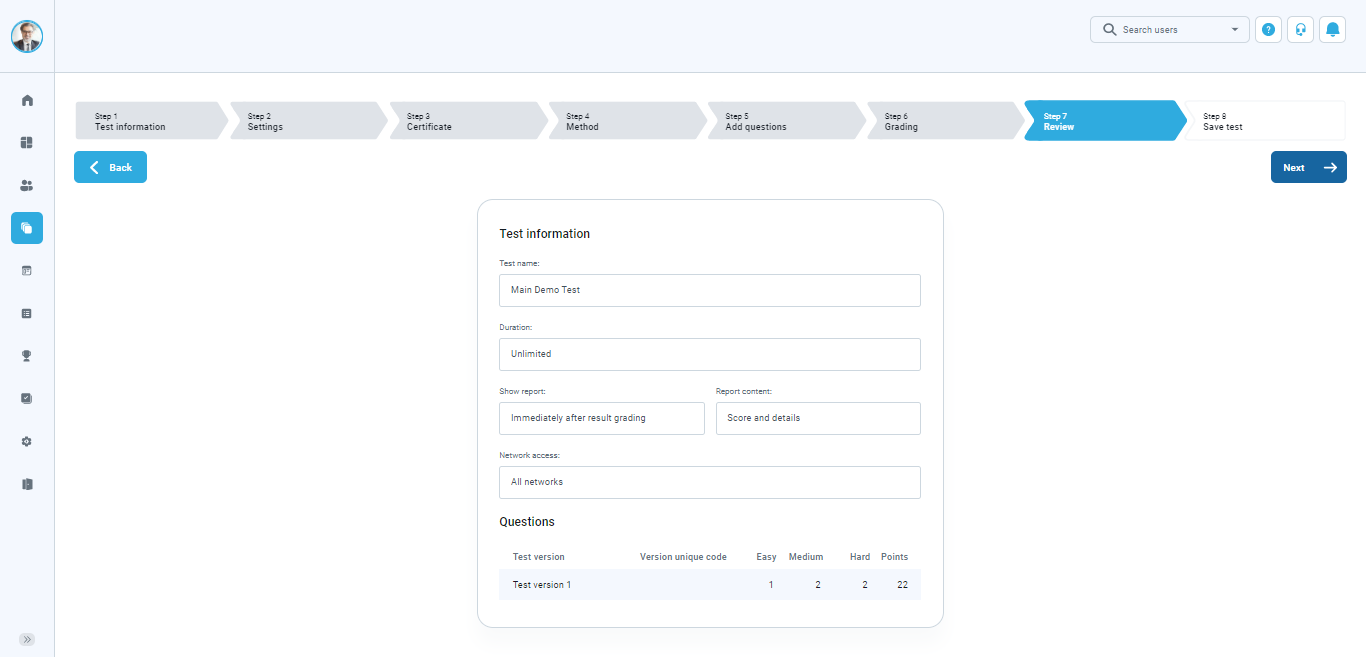
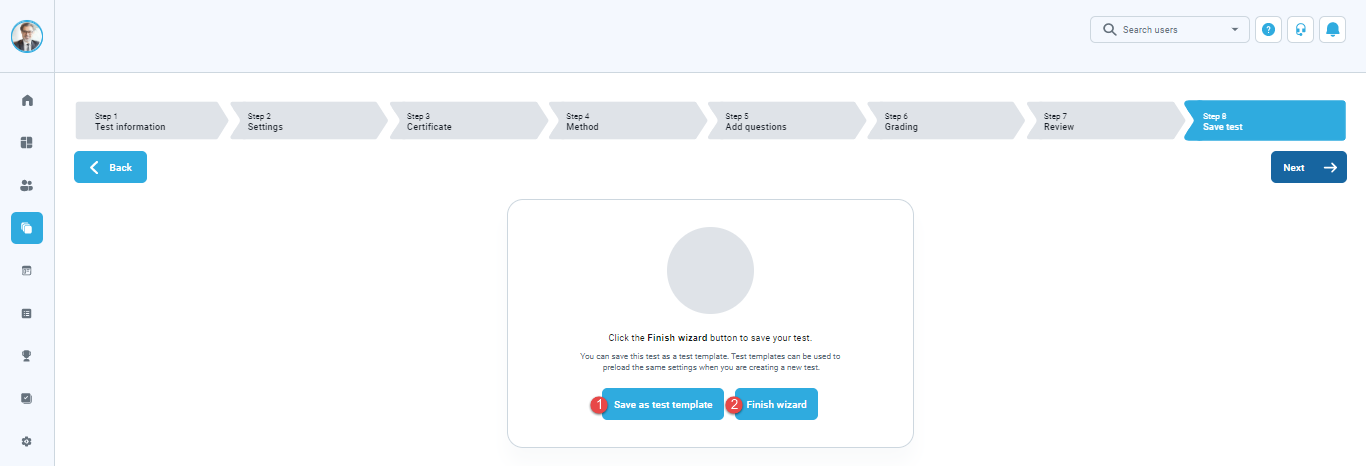
Save test
The last step in the test creation process is the saving of the test:
- You can save the test settings as a test template
- Click the “Finish wizard” button to save your test
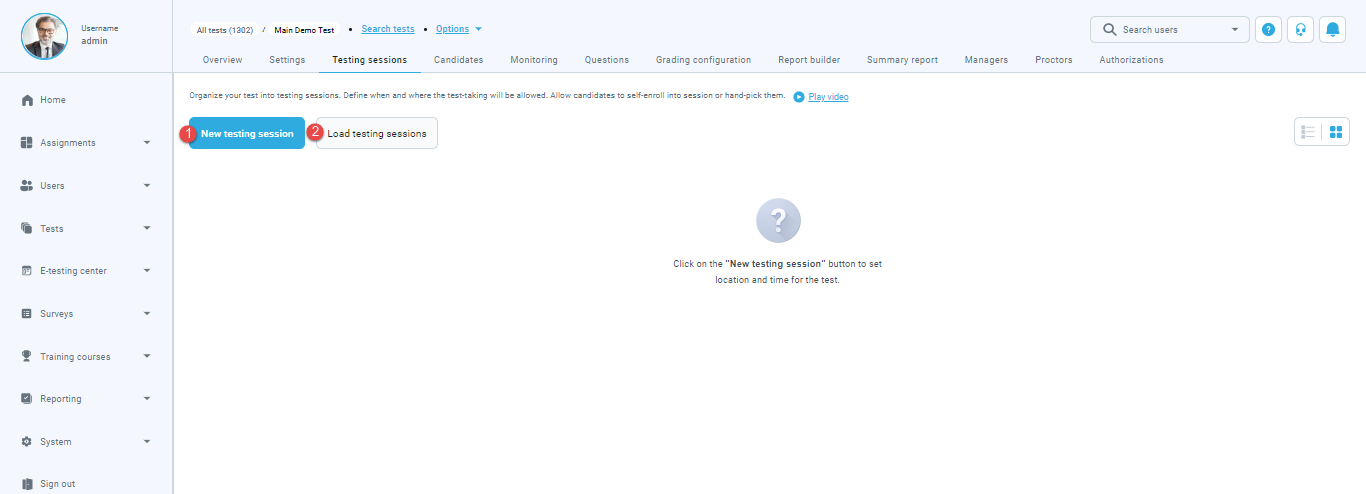
Creating testing session
You should create the testing session that allows you to organize candidates located at different locations to take the created test(e.g., different time zones, states, continents, etc.).
When the creating test process is complete, you will be redirected to the page from which you need to click the “Organize testing sessions” button.
There are two ways to create new testing sessions:
- Click on the “New testing session” button
- Click on the “Load testing sessions” button to load testing sessions using the predefined excel template.
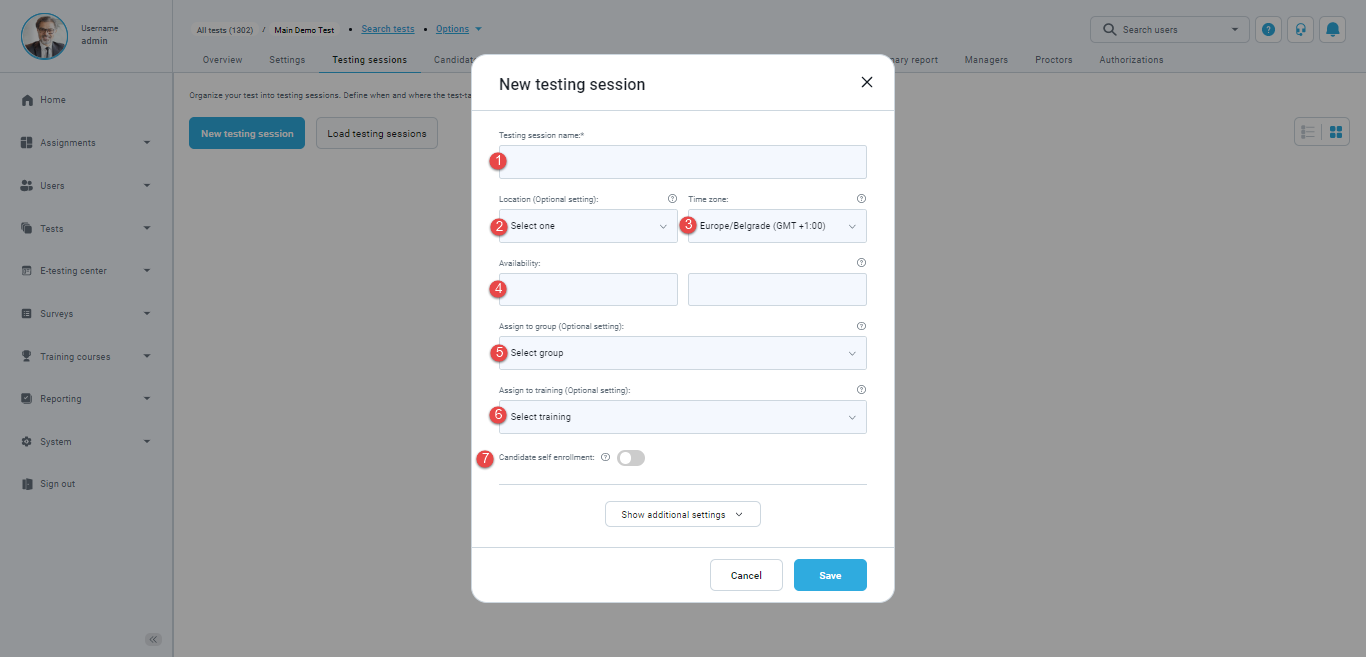
When creating the test, the pop-up window will appear where you should follow the define the following options:
- “Testing session name“.
- “Location” – Choose one of the previously defined testing locations
- “Time zone” – The field displays the time zone of the user creating the session. The dates and times below are defined according to this time zone.
- “Availability” – Define “start” and “end” time, when the candidates must begin a test within that time limit.
- “Assign to group” (Optional setting) – if you use this option, only users from a group you choose will be able to enroll in the session. Upon selecting the group, you will have to hand-pick the group members who will have access to the session or turn on the option of Self-enrollment to grant access to the whole group.
- “Assign to training” (Optional setting) – If you enable this option, the test can be started only from the selected training course.
- “Candidate self enrollment” – If you enable the “Candidate self enrollment” option, the “Booking deadline” option will appear. The “Booking deadline” option can be set manually or automatically. To set the booking deadline manually, select the booking deadline for this session and define until the candidates can book assignments.
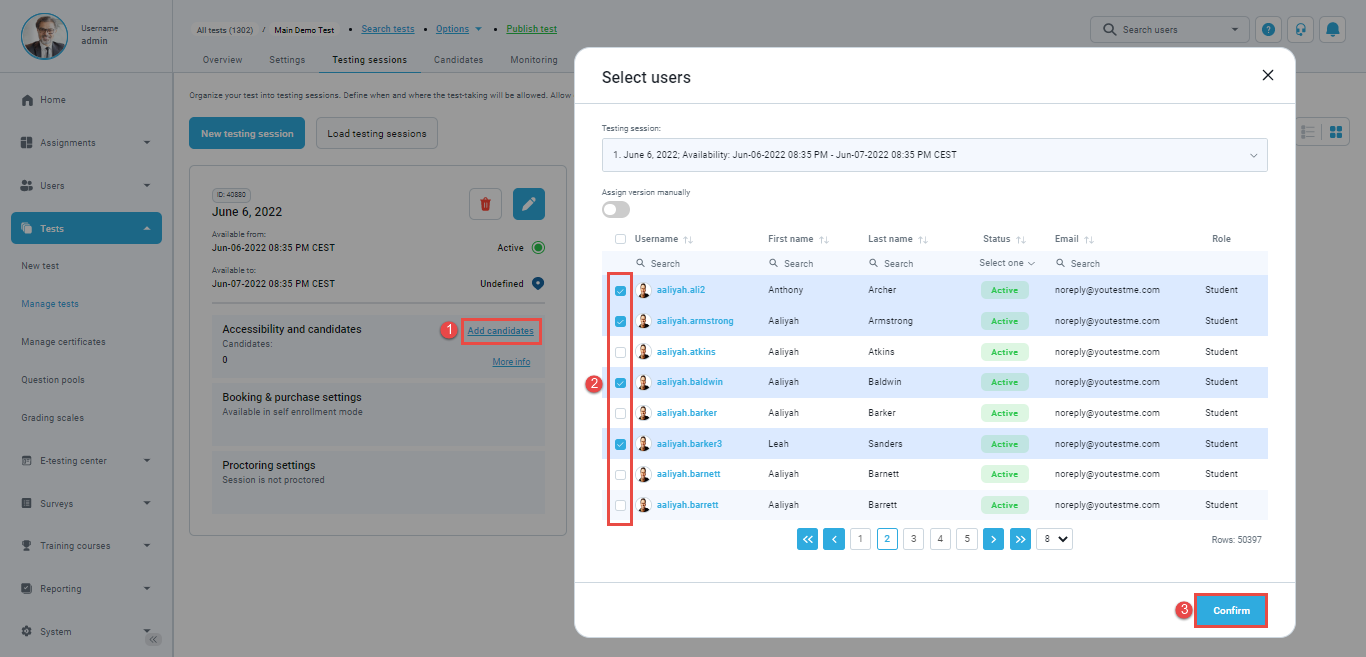
Assigning candidates to a testing session
If the “Candidate self enrollment” option is disabled, you should add the candidates to the desired testing session by following next steps:
- Click on the “Add candidates“.
- Select the candidates you want to add.
- Click on the “Confirm” button.
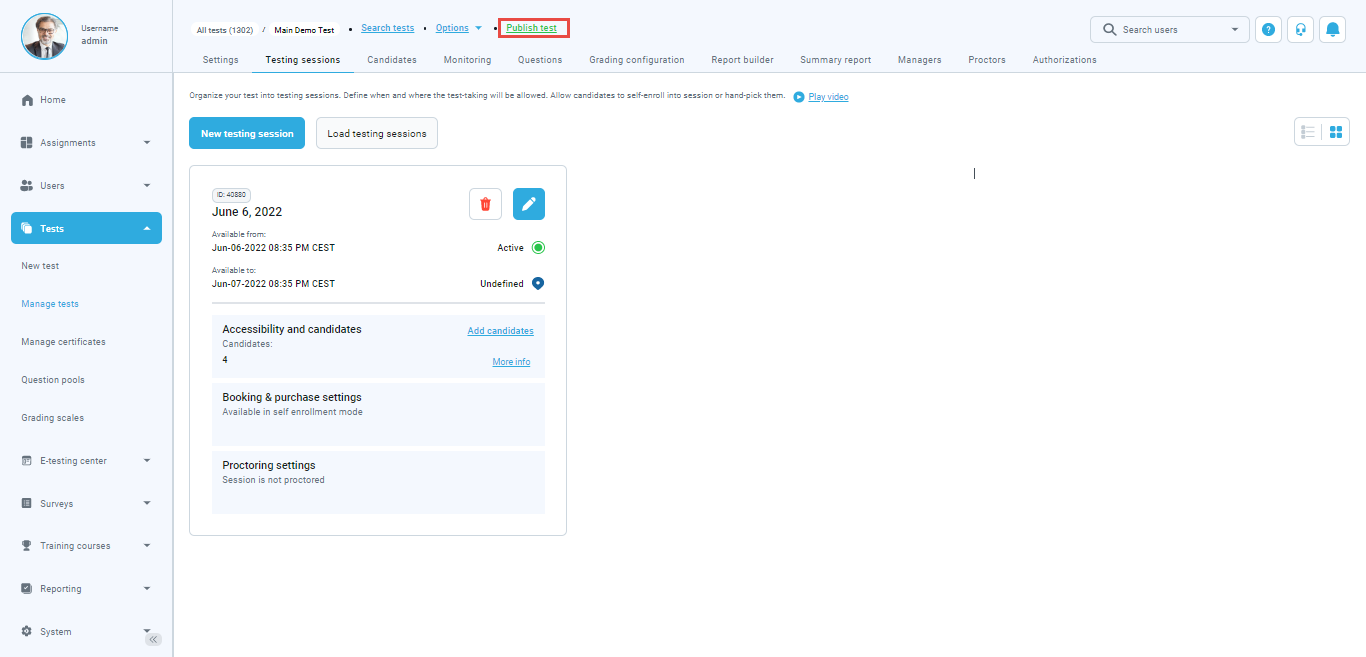
Publish test
Once you finish the test creation, the test needs to be published so the candidates can start the test.