This article explains how to create a test with attachments and import questions that contains attachments in it. To see how to add attachments to existing questions in the question pool, please check this article.
Creating a new test
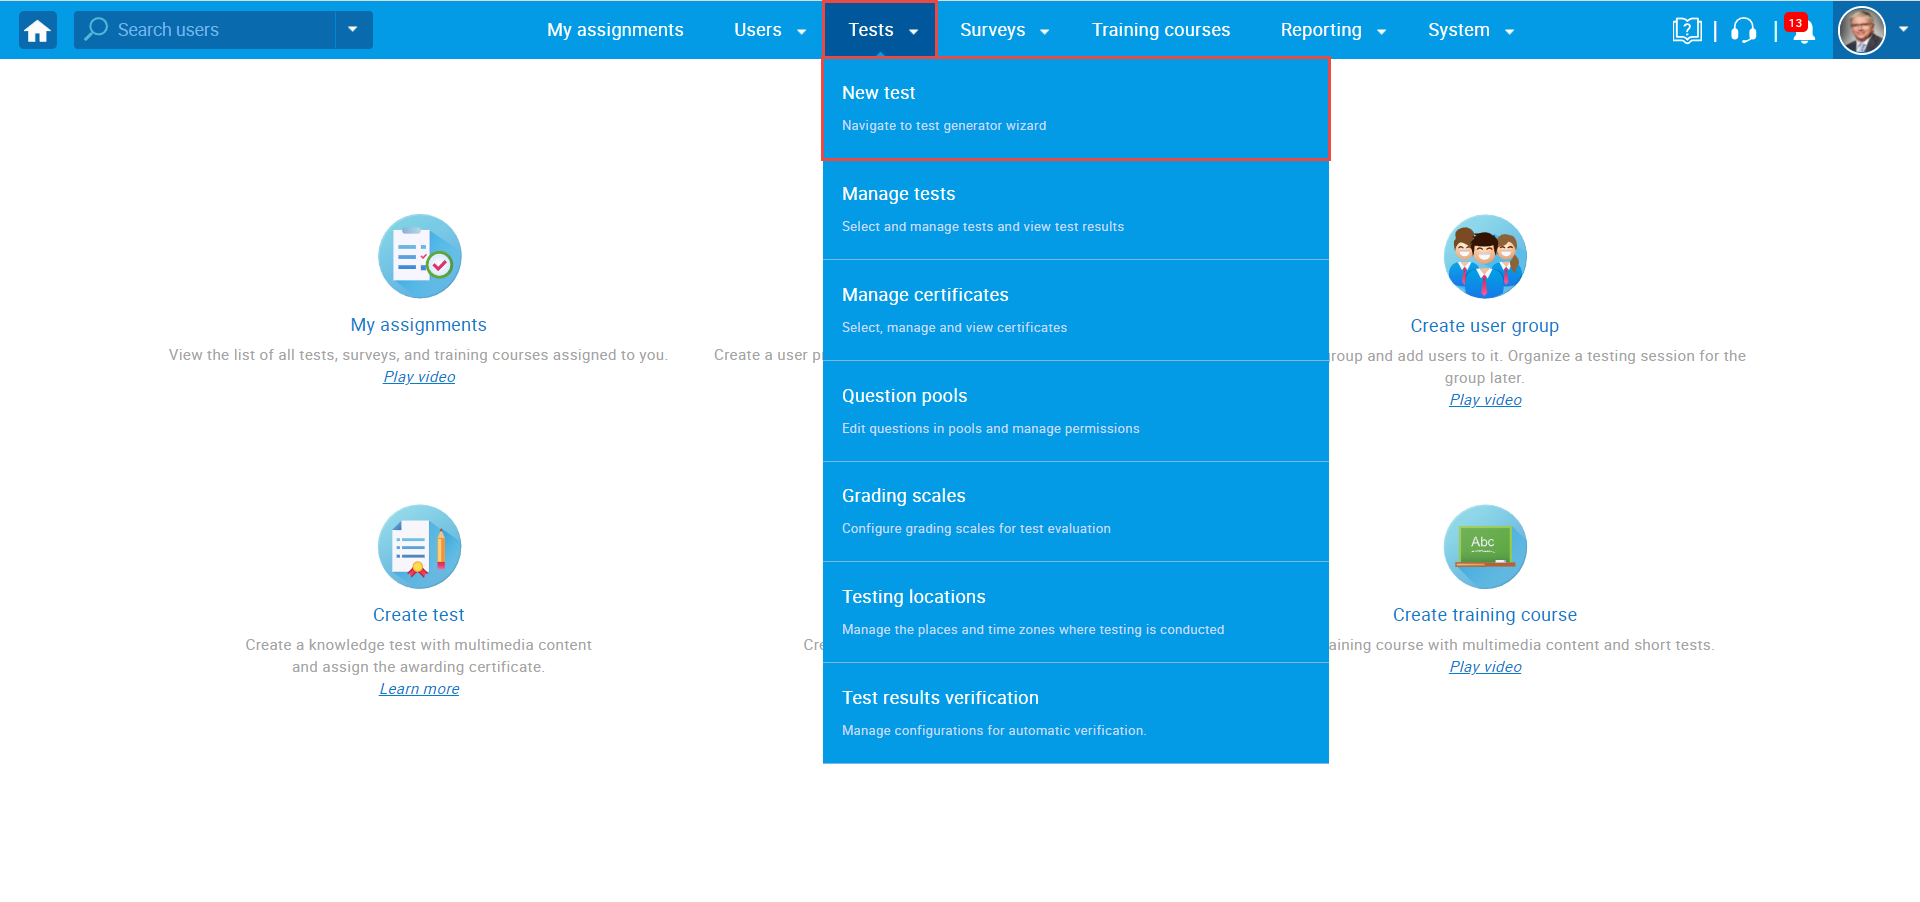
To create a new test you should navigate to the “Tests” and select “New test”.
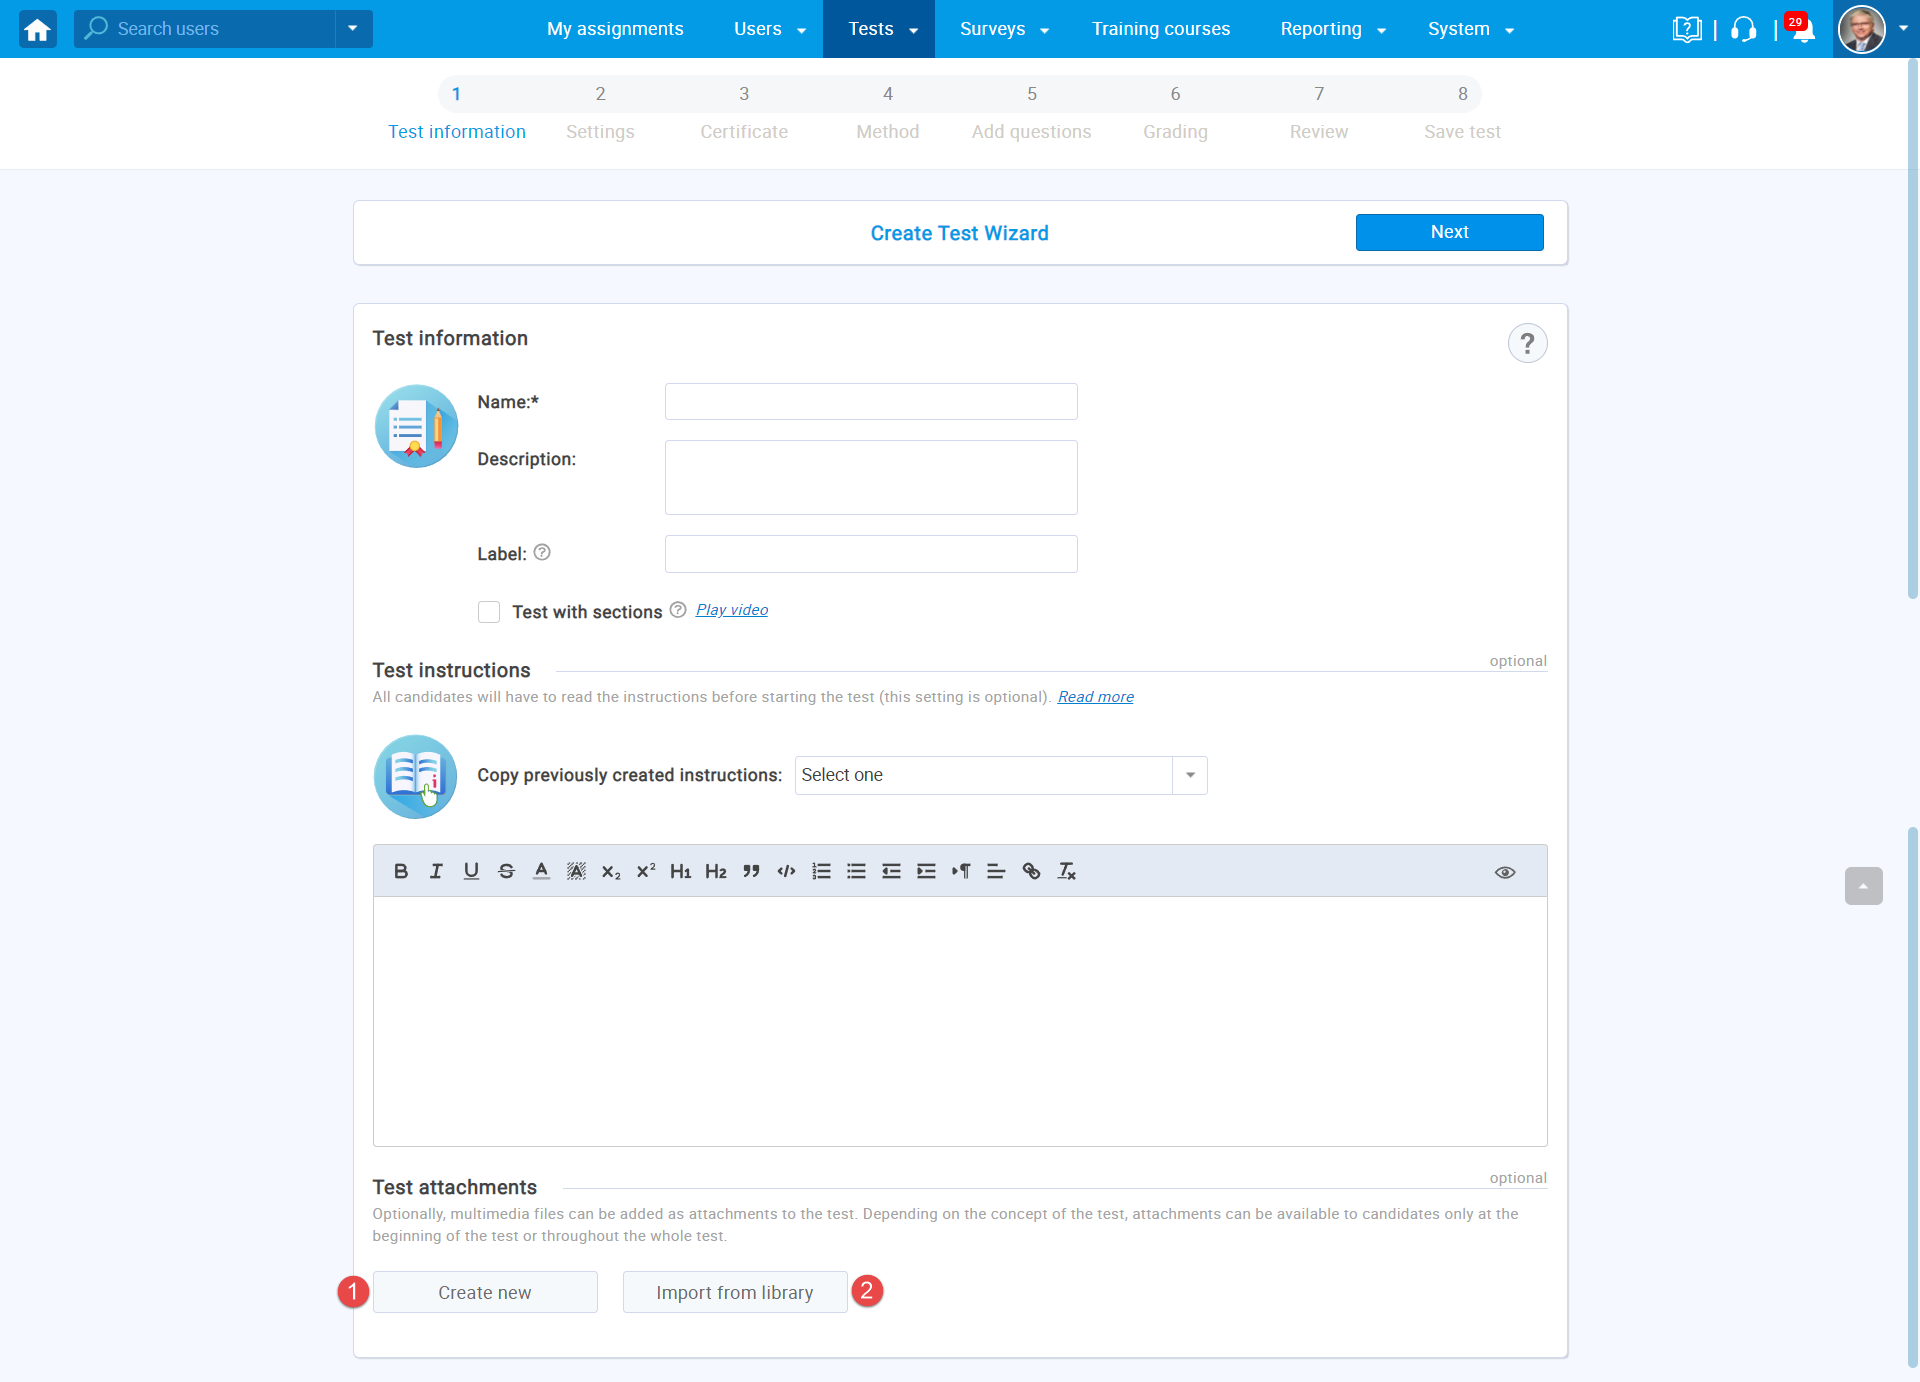
The “Test Wizard will appear”. In the first step of the test wizard, you can add attachments that can be displayed to candidates only at the beginning of the test or throughout the whole test-taking. To do so, you should choose one of the offered options:
- Click the “Create New” button to import a new attachment from your computer. The attachment will be stored in the library for further use.
- Click the “Import attachments” to add new attachments from the library of previously imported or created attachments.
Test attachments
Create a new test attachment
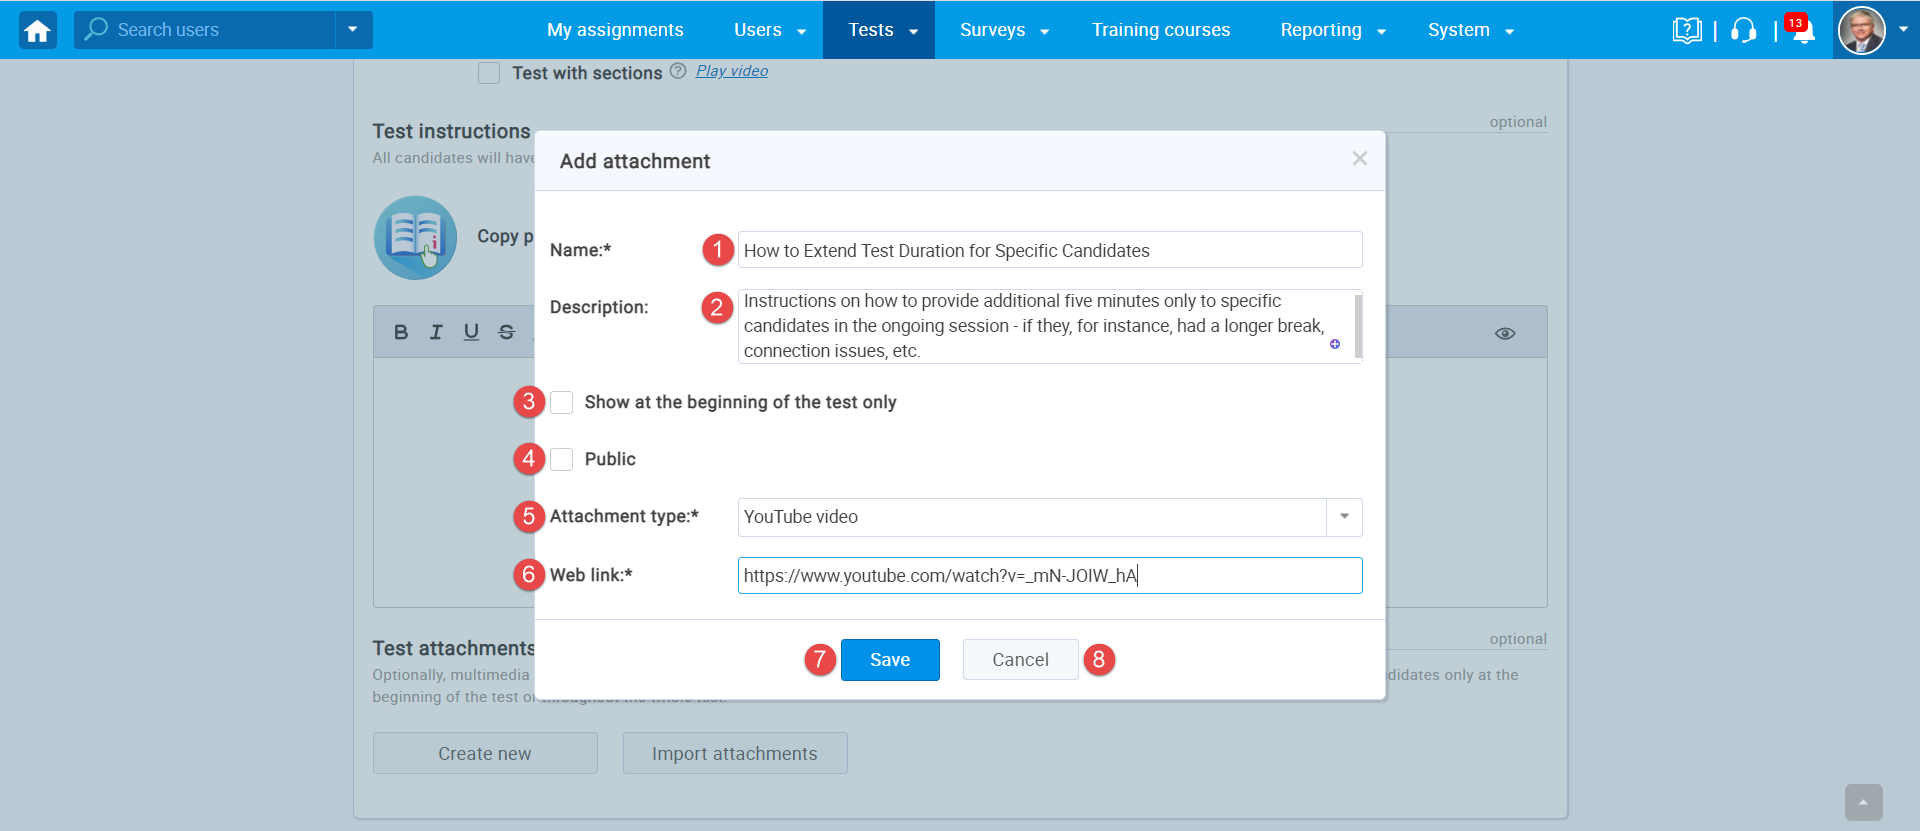
If you select the “Create new” button, the new window will appear where you should:
- Enter the name of the attachment.
- Optionally enter the description.
- Define whether you want to display attachment to candidates only at the beginning of the test or throughout the whole test-taking.
- Define whether this attachment will be private (you are the only user that will be able to use it for other tests and questions) or to be public (other users will be able to use this attachment. They will not be able to edit or delete it).
- Select the “Attachment type”.
- Enter the “Web link” for the YouTube video attachment type.
- Click “Save” to add this attachment to the test and store it in the attachment library.
- Click “Cancel” if you don’t want to add an attachment.
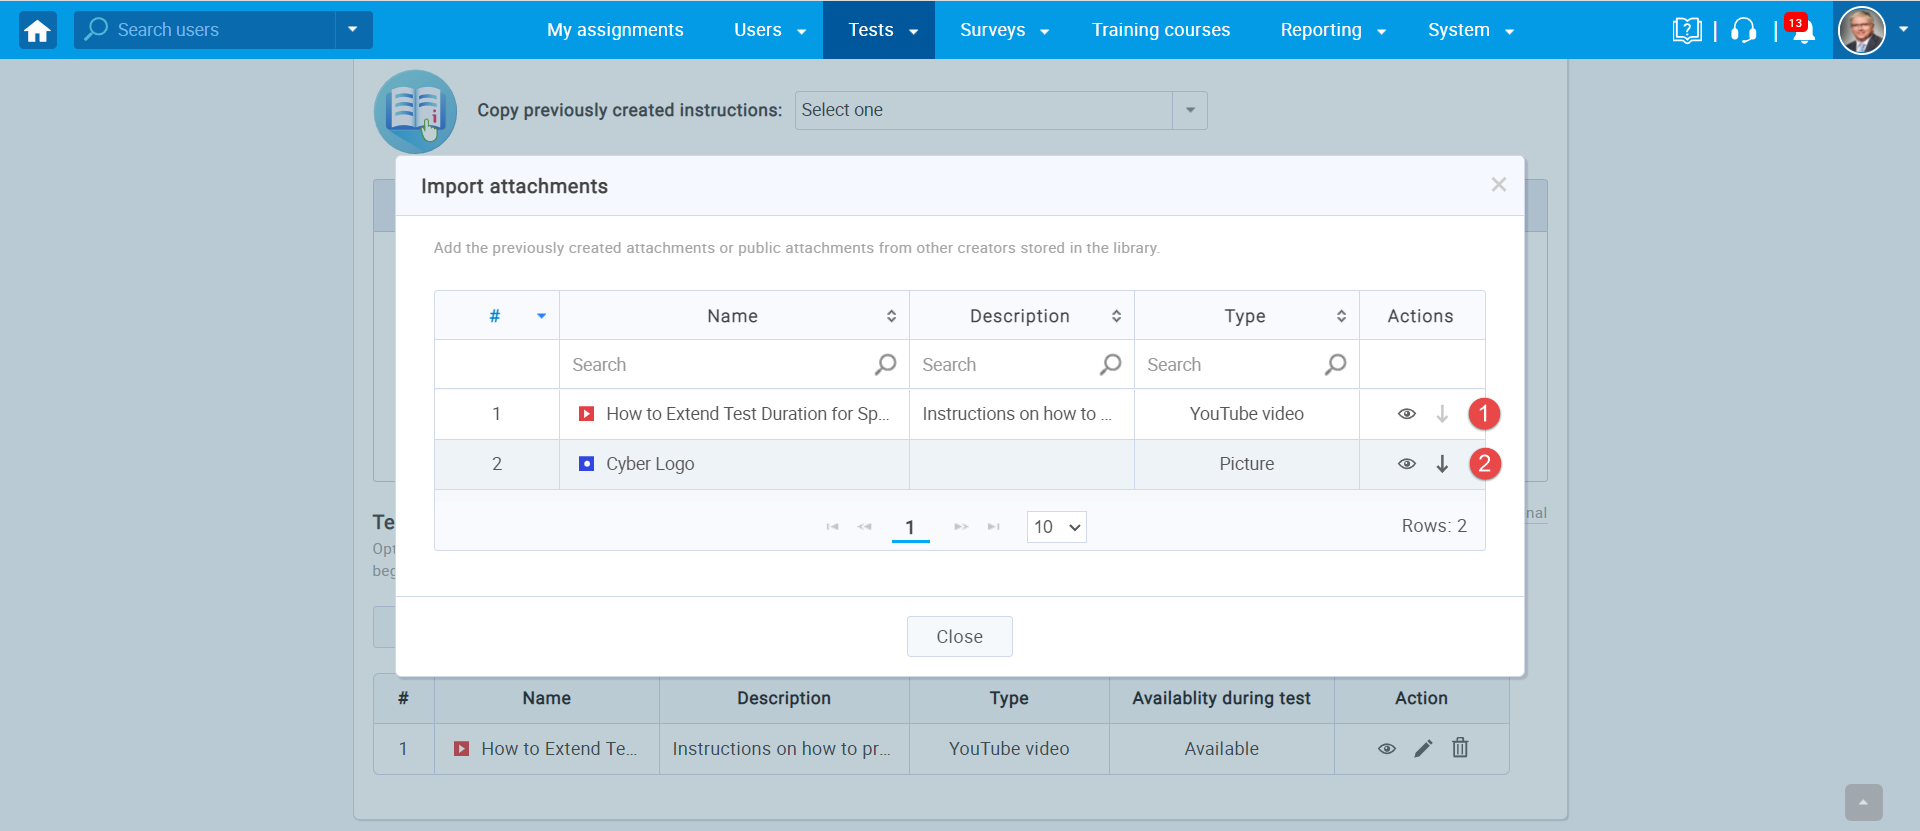
Import test attachments
If you select the “Import attachments” button, the new window with the attachment library will appear. In this window, you can see all previously created attachments or public attachments from other creators stored in the library. To see how to access and manage the attachment library, please check this article.
- The attachment you created for this test – since you already added this attachment in the test you are not able to import it again.
- The attachment stored in the library – You can add it to the test by clicking on the “Arrow” icon.
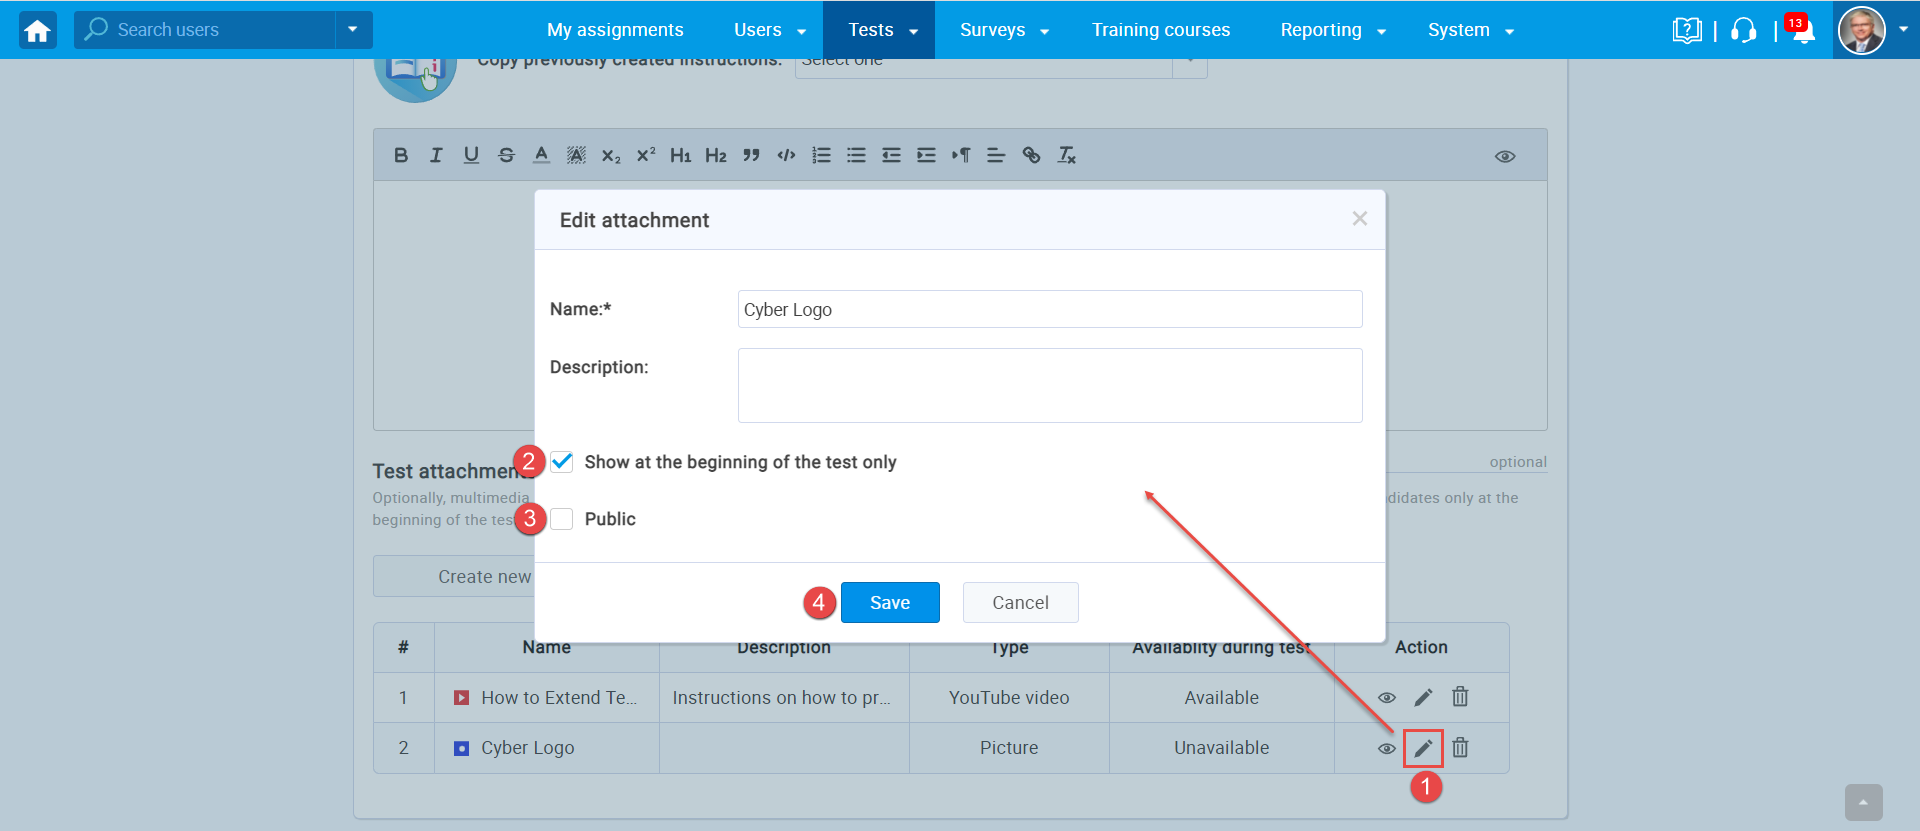
Editing test attachment
If you imported an attachment from the library, you can edit it to define the visibility and availability.
- Click on the “Pen” to open a window for editing.
- Define whether you want to display attachment to candidates only at the beginning of the test or throughout the whole test-taking.
- Define whether this attachment will be private (you are the only user that will be able to use it for other tests and questions) or to be public (other users will be able to use this attachment. They will not be able to edit or delete it).
- Click the “Save” button to confirm the changes.
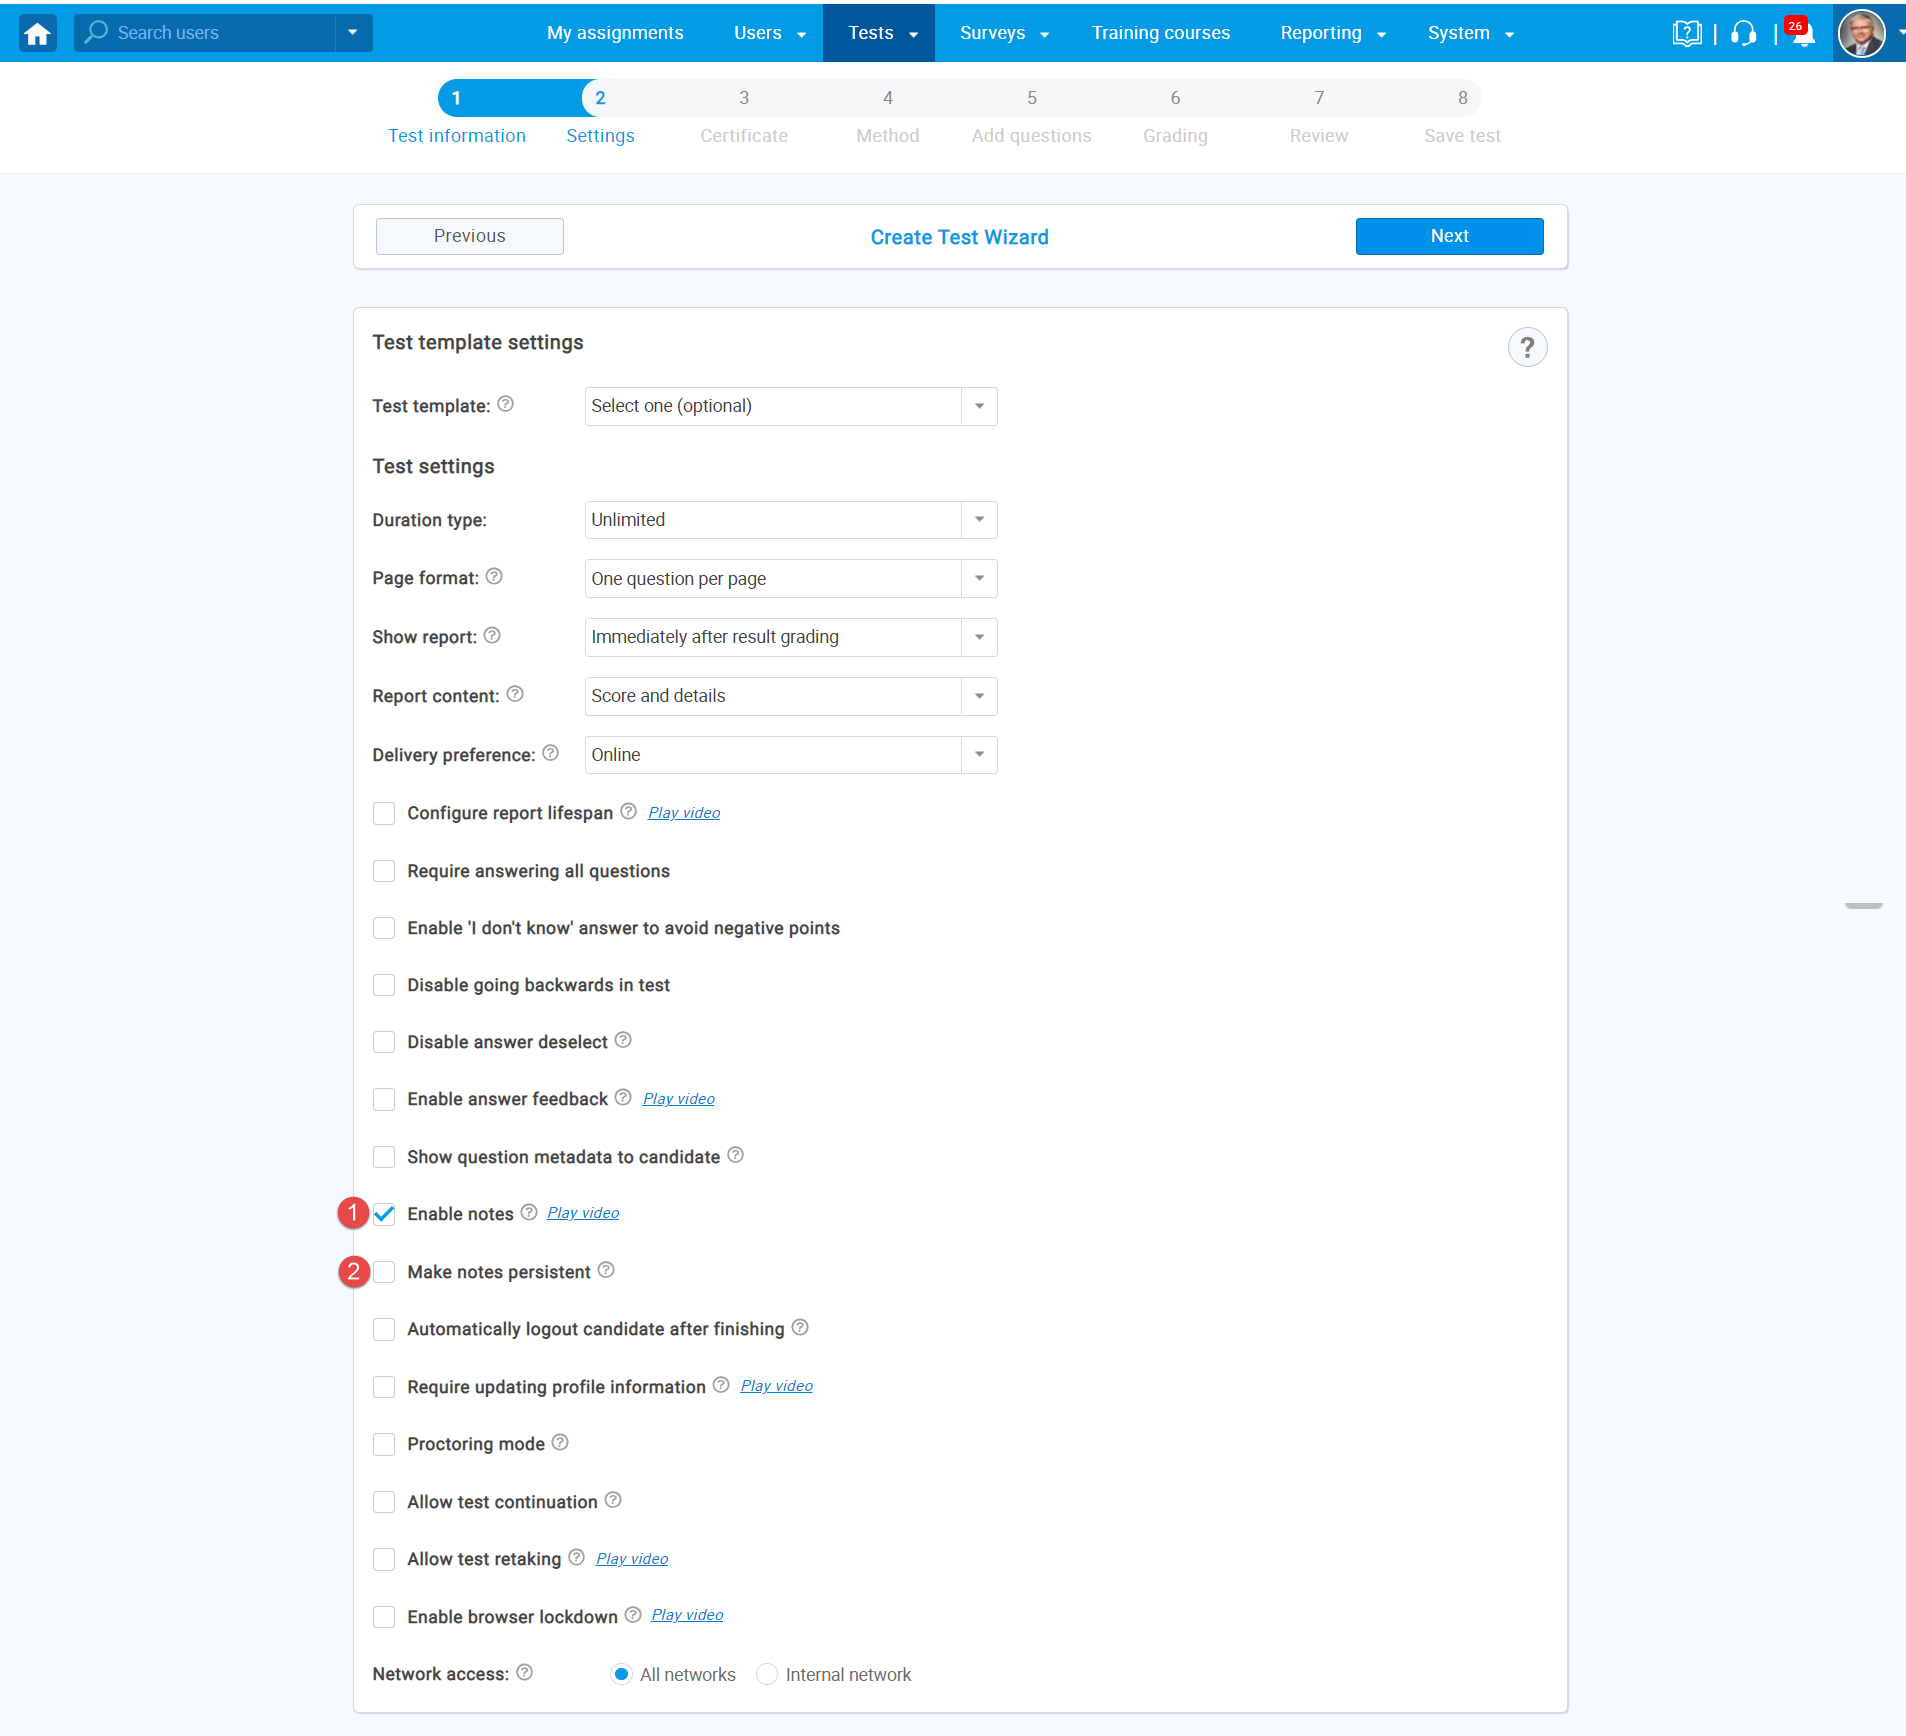
In the second step of the test wizard, you should:
- Select “Enable notes” in order for candidates to be able to add notes to attachments.
- Select “Make note persistent” if you want to see the notes candidates took during the test.
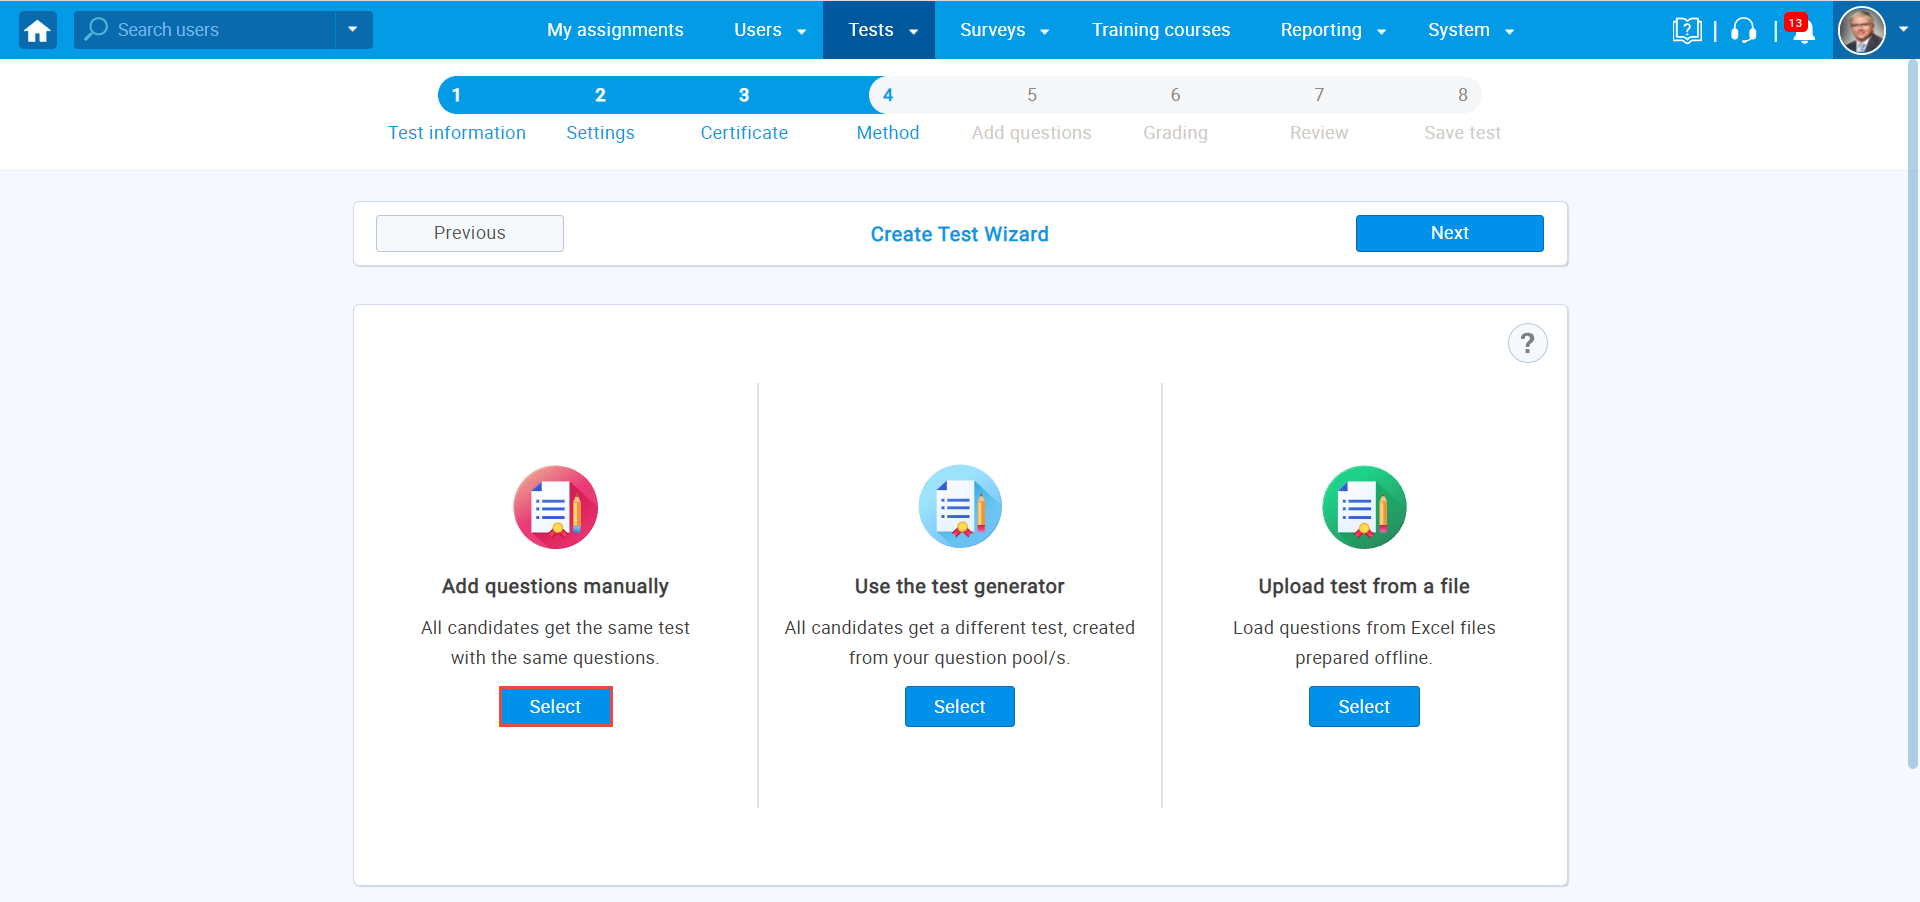
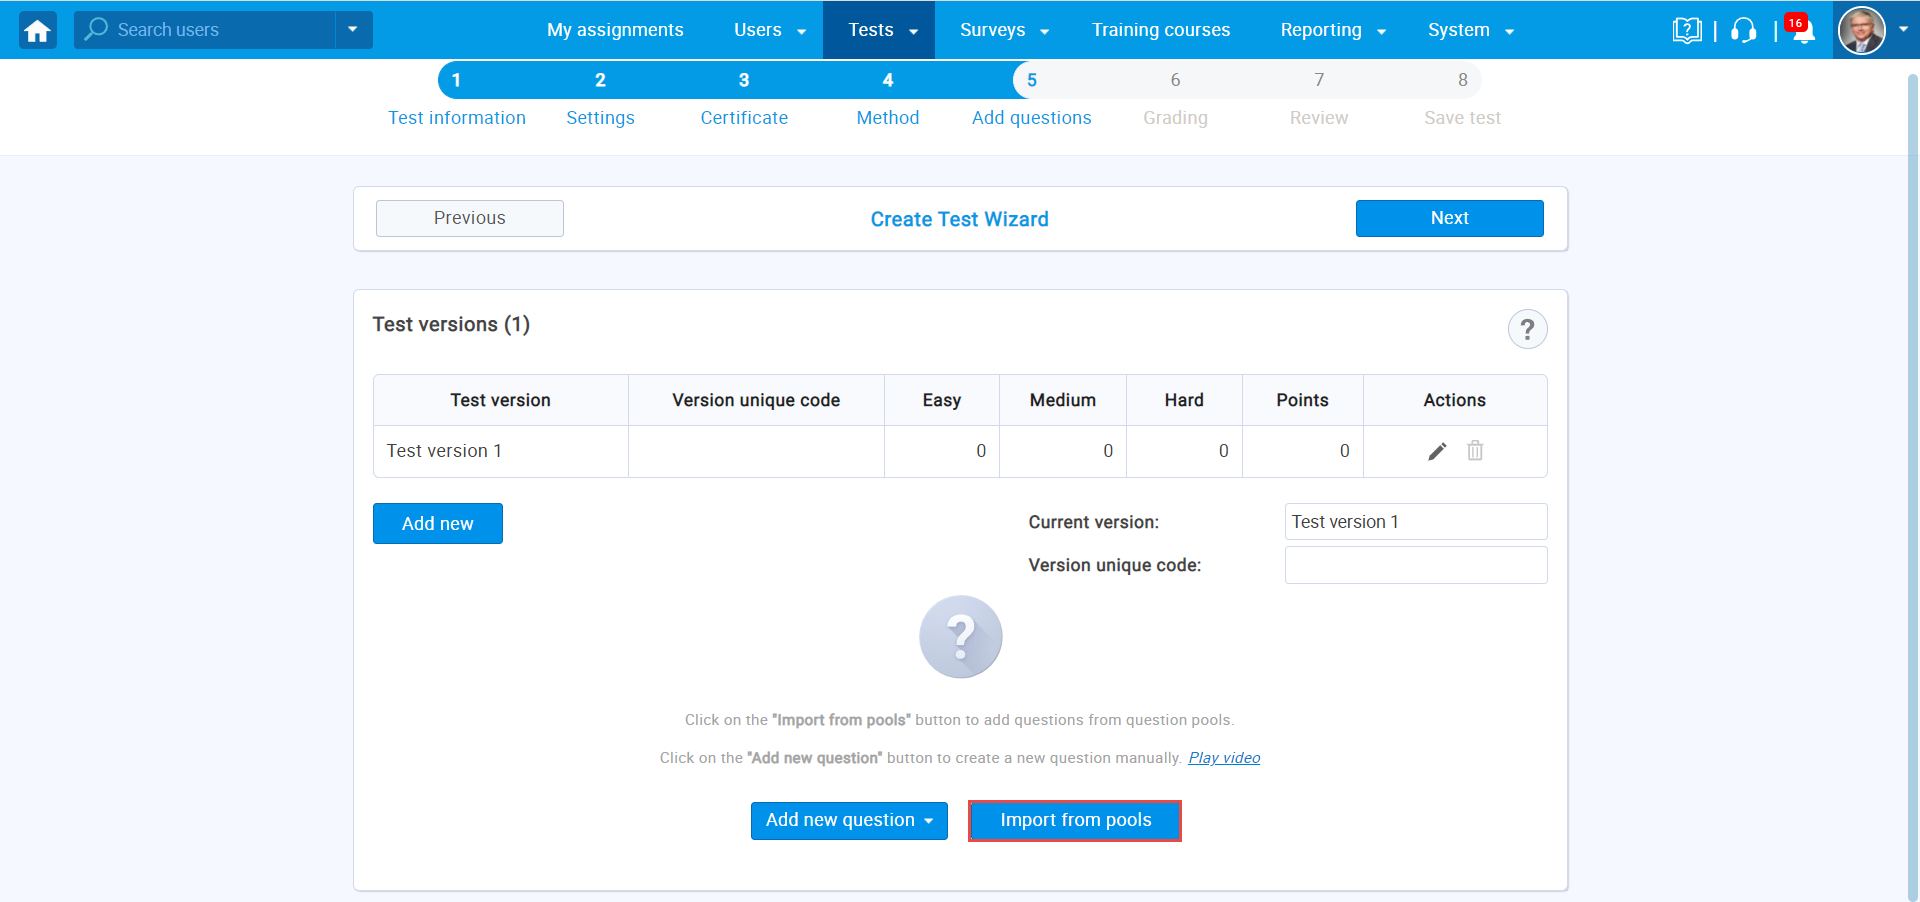
Once you get to the “Method” step in “Create Test Wizard,” select “Add questions manually.”
To add a new question from a question pool, select “Import from pools.”
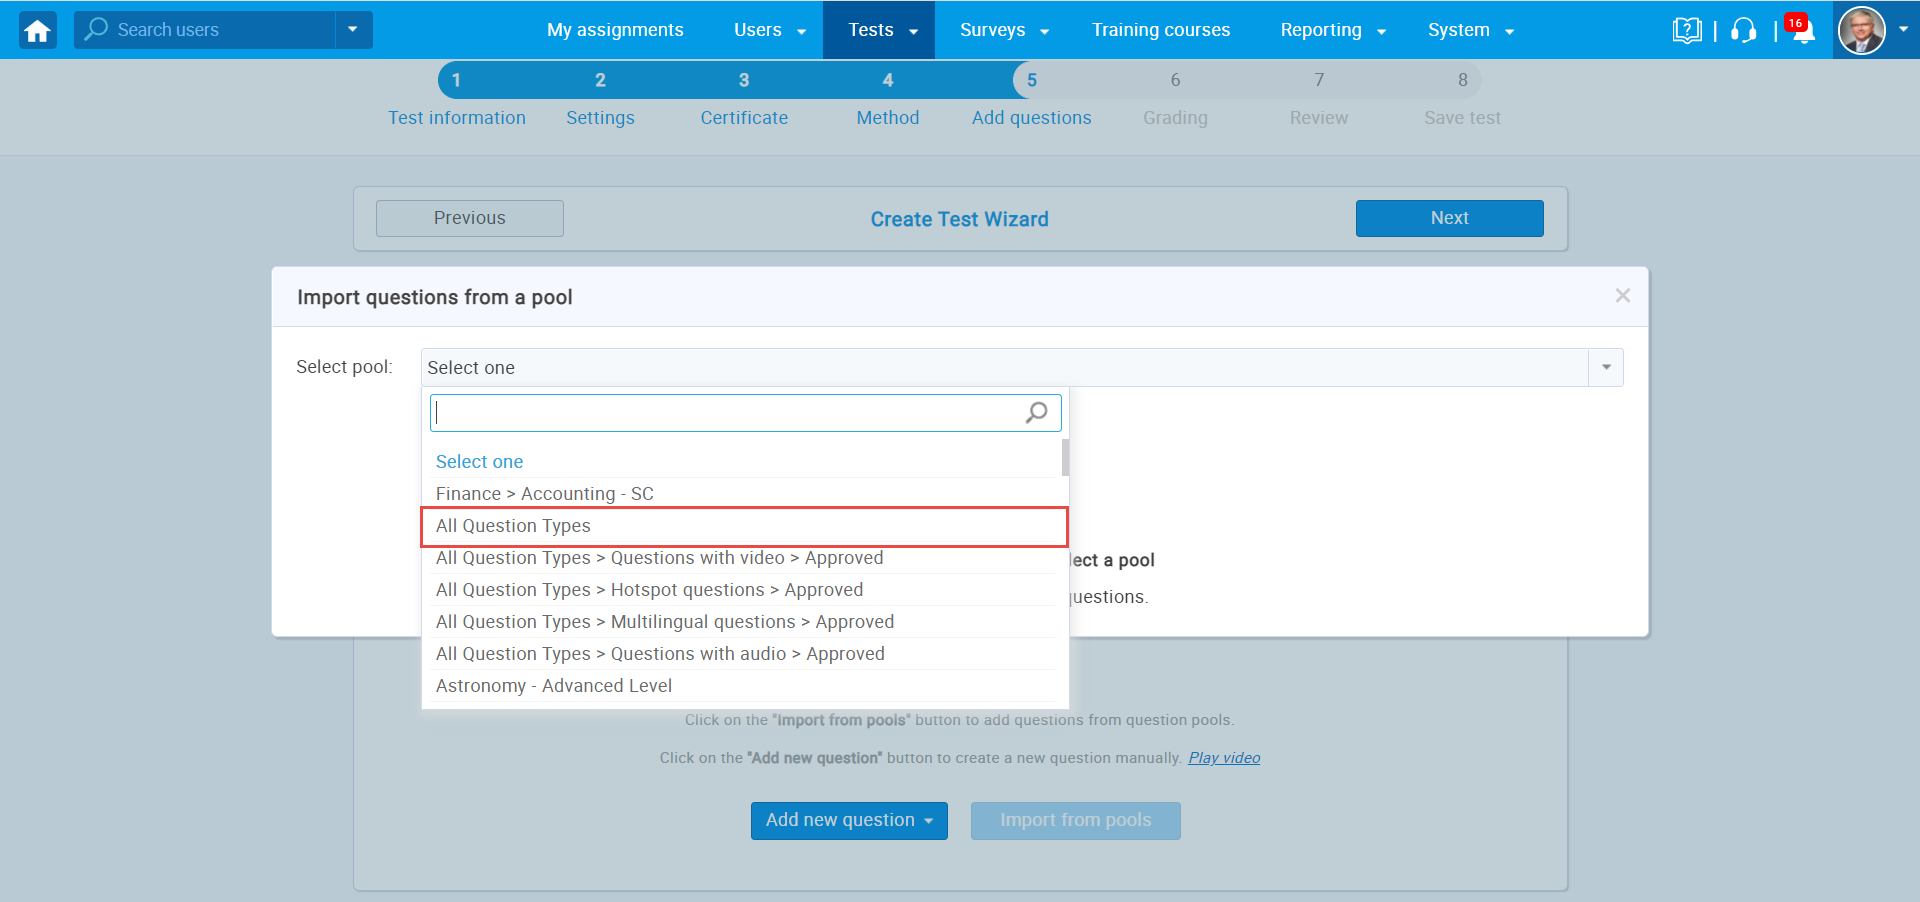
A new pop-up window will appear, with a dropdown menu that allows you to select one of the previously created pools you want to import the questions.
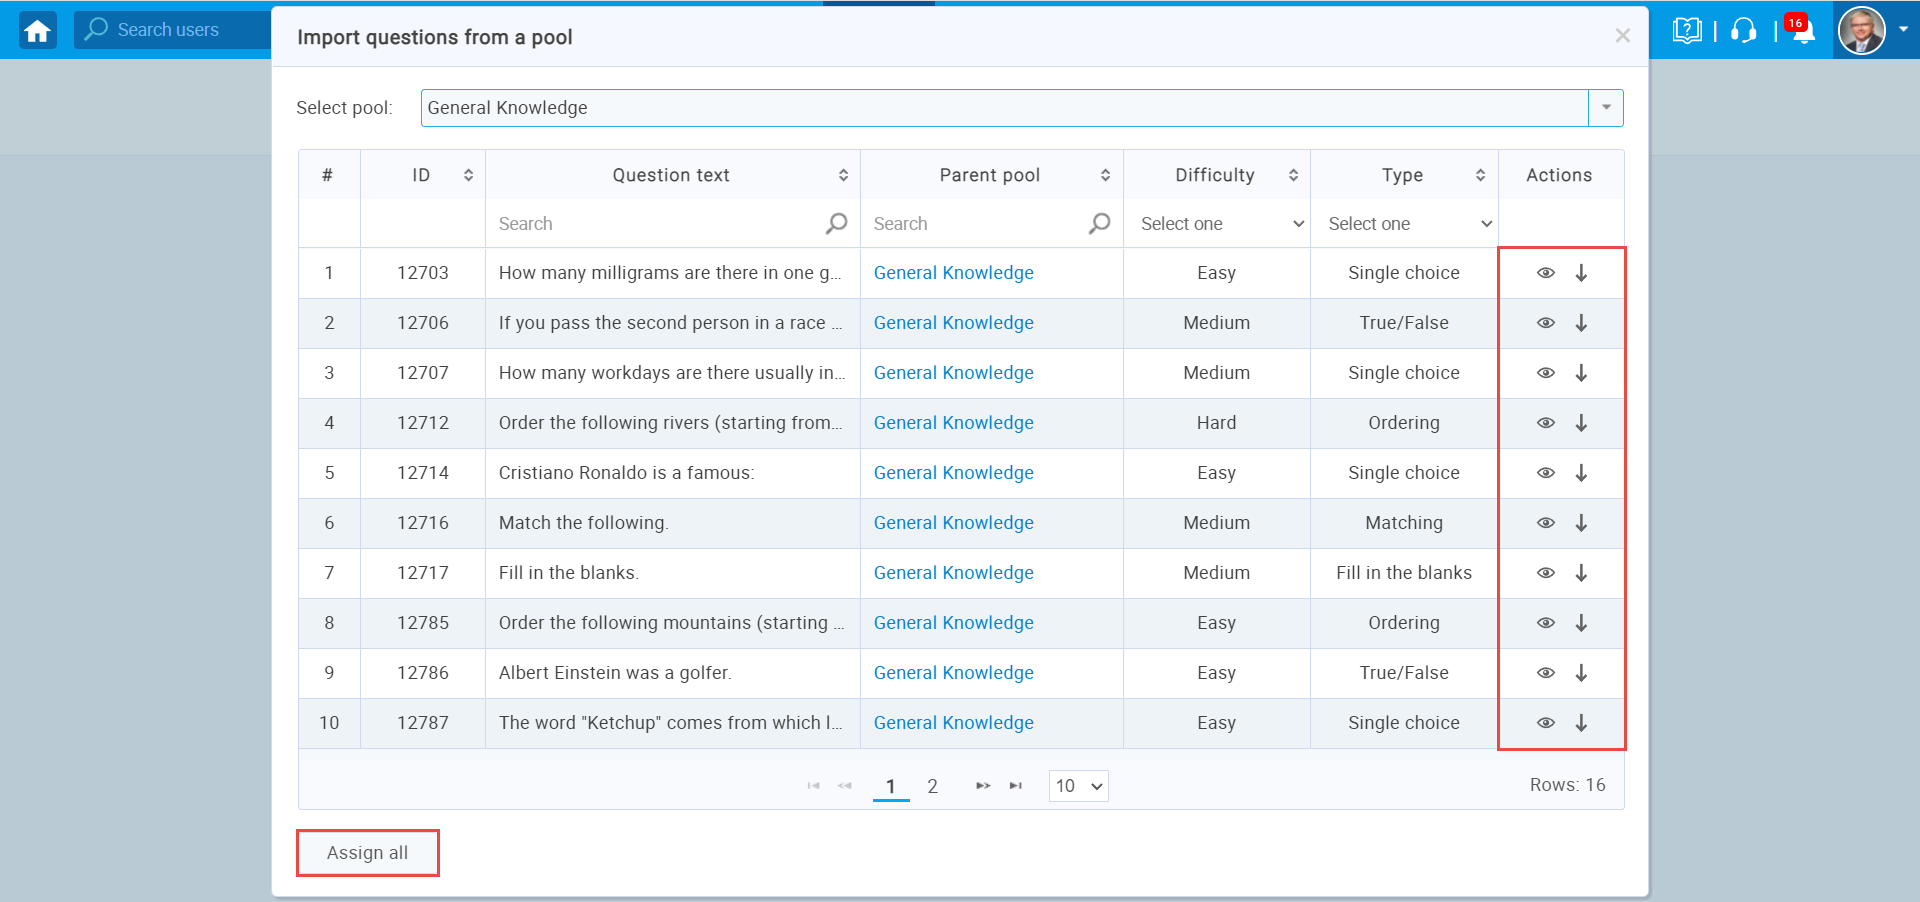
Preview a question by clicking the magnifying glass icon or assign questions individually by clicking the arrow icon. You can assign all questions simultaneously by clicking the “Assign All” button.
Candidates’ perspective
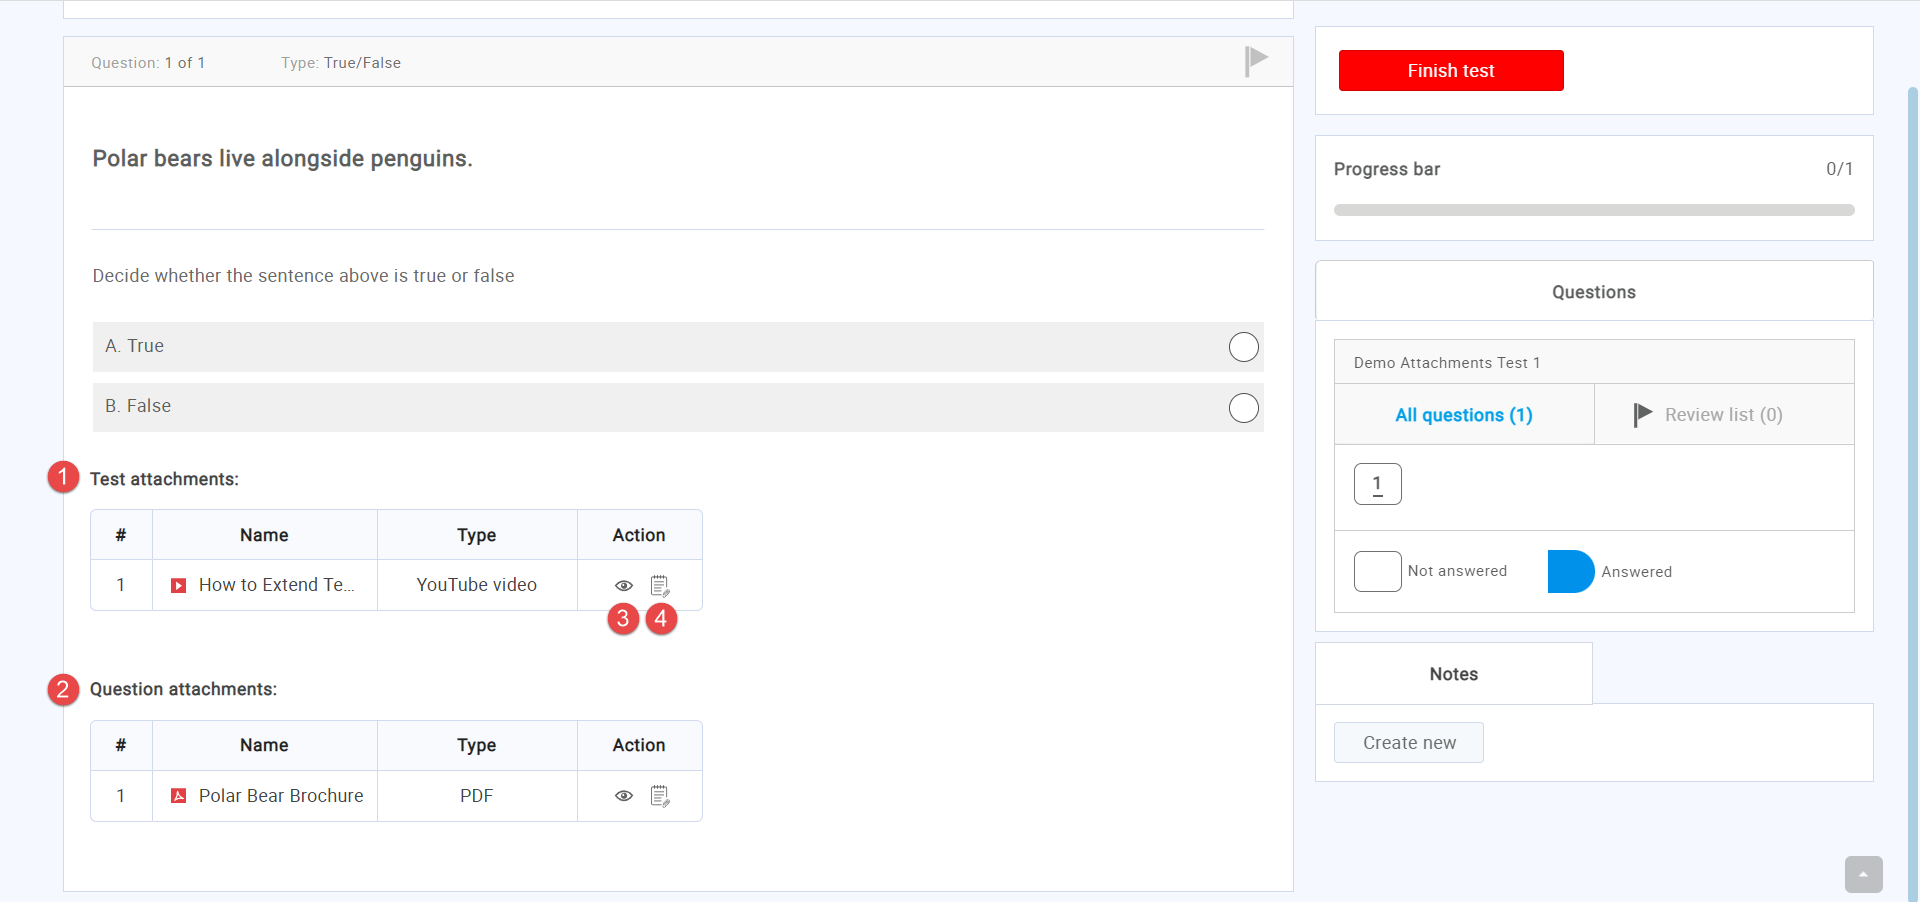
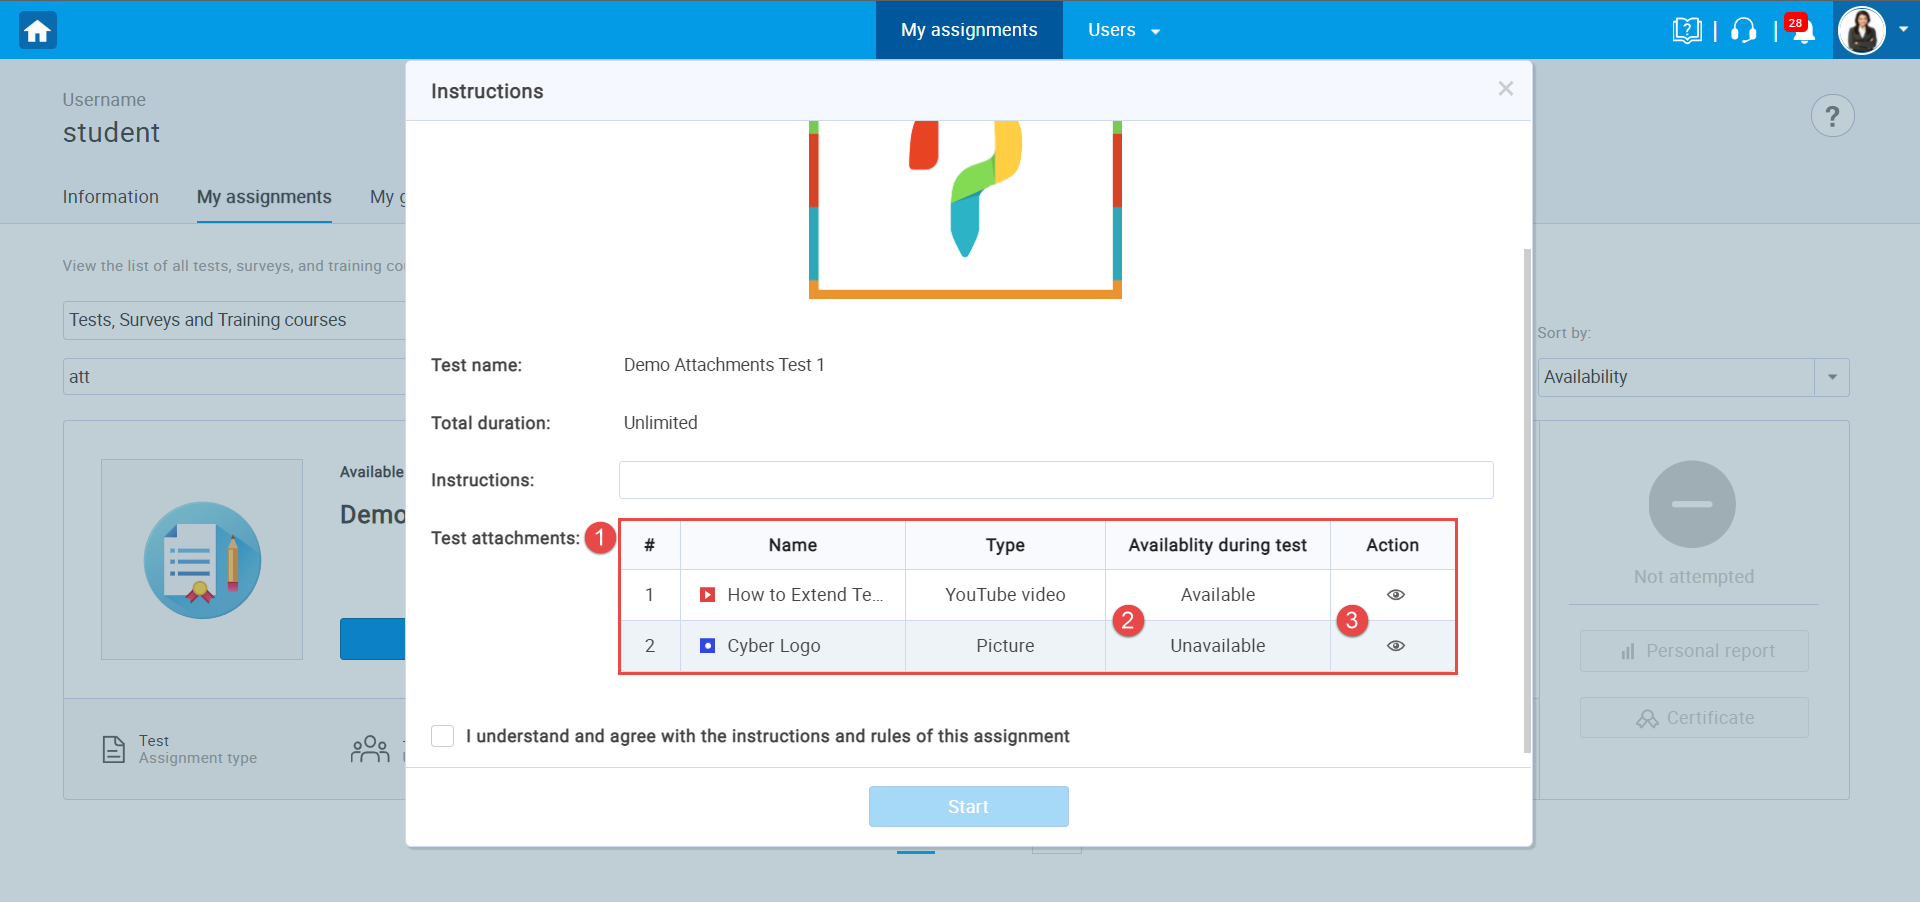
Once candidates start a test, they will see:
- A list of Test attachments in the “Instructions” window.
- Whether the attachment will be available only on the “Instructions” window or during the test as well.
- Click on the “eye” icon to preview the attachment.
In the test-taking window, candidates will be able to see:
- Test attachments.
- Question attachments.
- Preview the attachments.
- Add a note for attachments.