This article will explain different ways to edit published test settings, add new questions, or delete existing ones, change the passing mark for the test and preview all the changes.
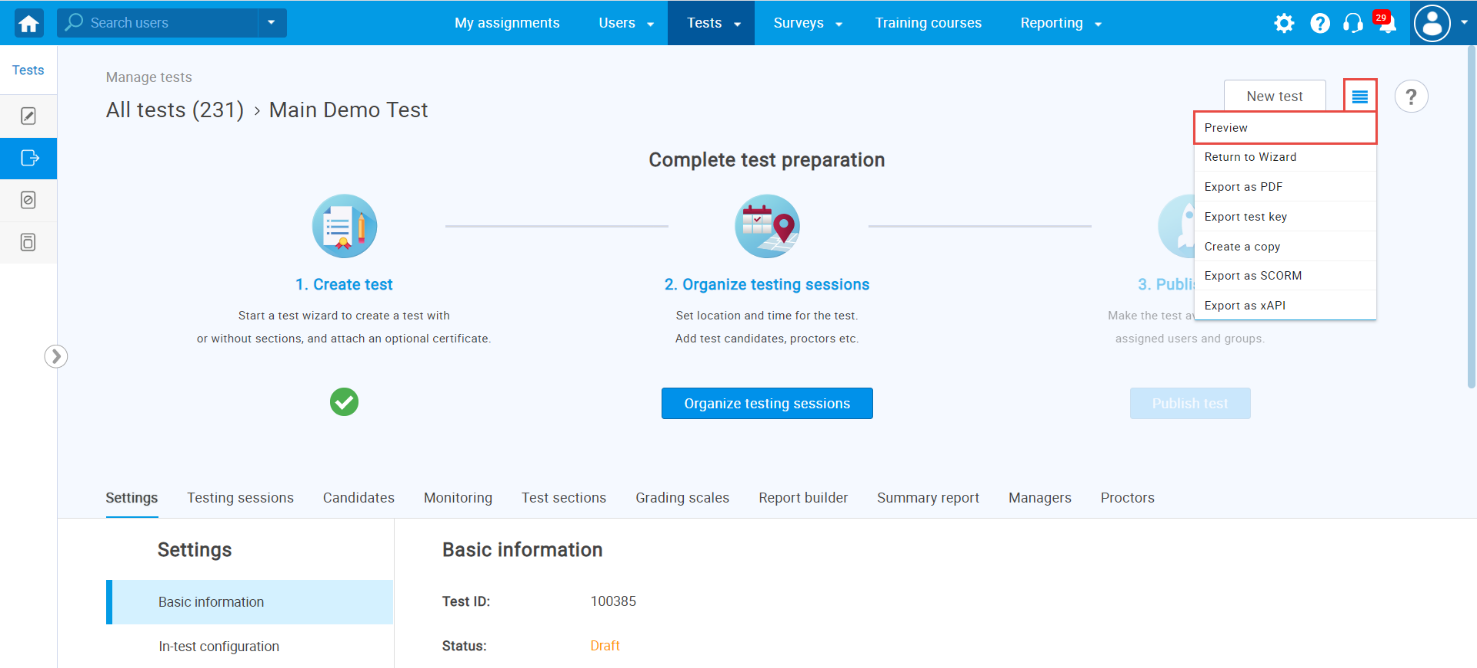
Once you import/create a test, we recommend using the preview option before publishing the test to simulate test-taking and ensure test settings are configured as desired.
Previewing draft version of the test
Once you finish the wizard, at any moment, you can simulate the test-taking process and review the test you made before publishing it.
Editing draft version of the test
If you want to change the test settings or add questions for the draft test, you can always navigate back to the Test Creation Wizard.
Click on the “Settings” icon in the upper right corner, and choose the “Return to Wizard” option.
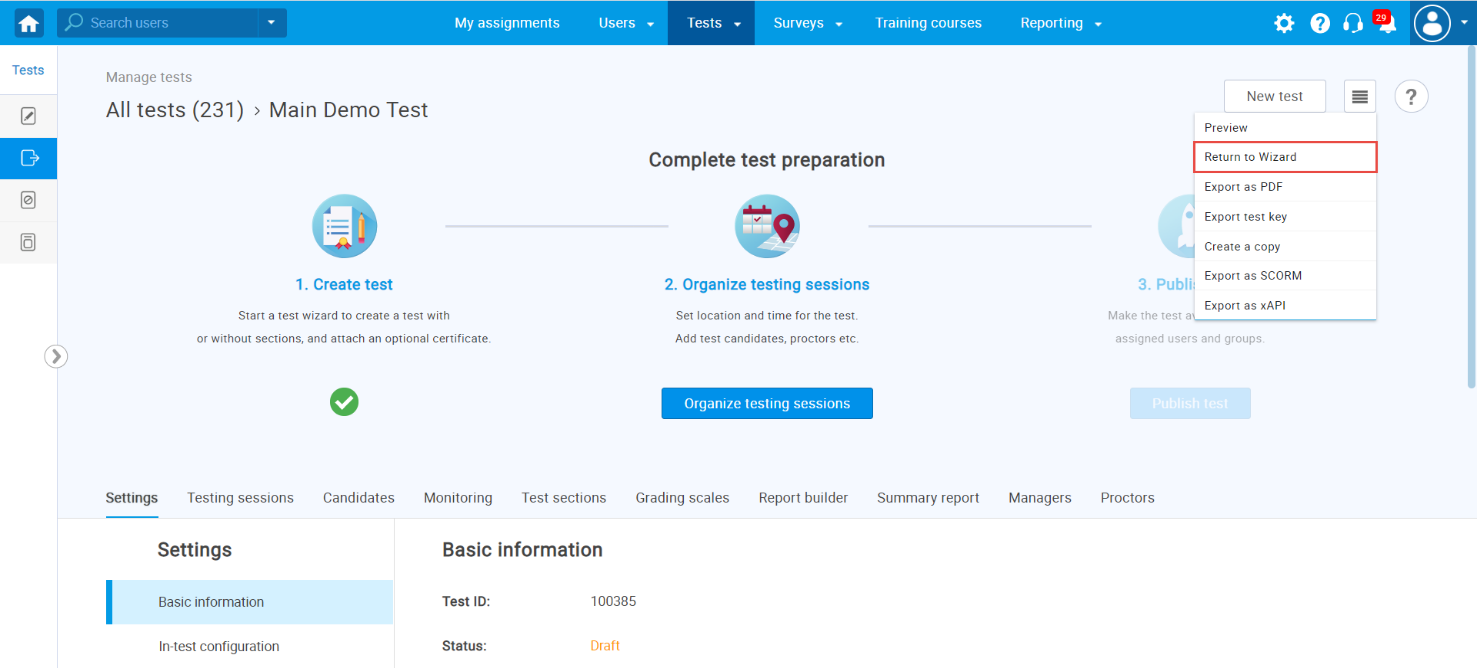
You can go through the whole Wizard again, change the settings, options, and add, delete or edit questions.
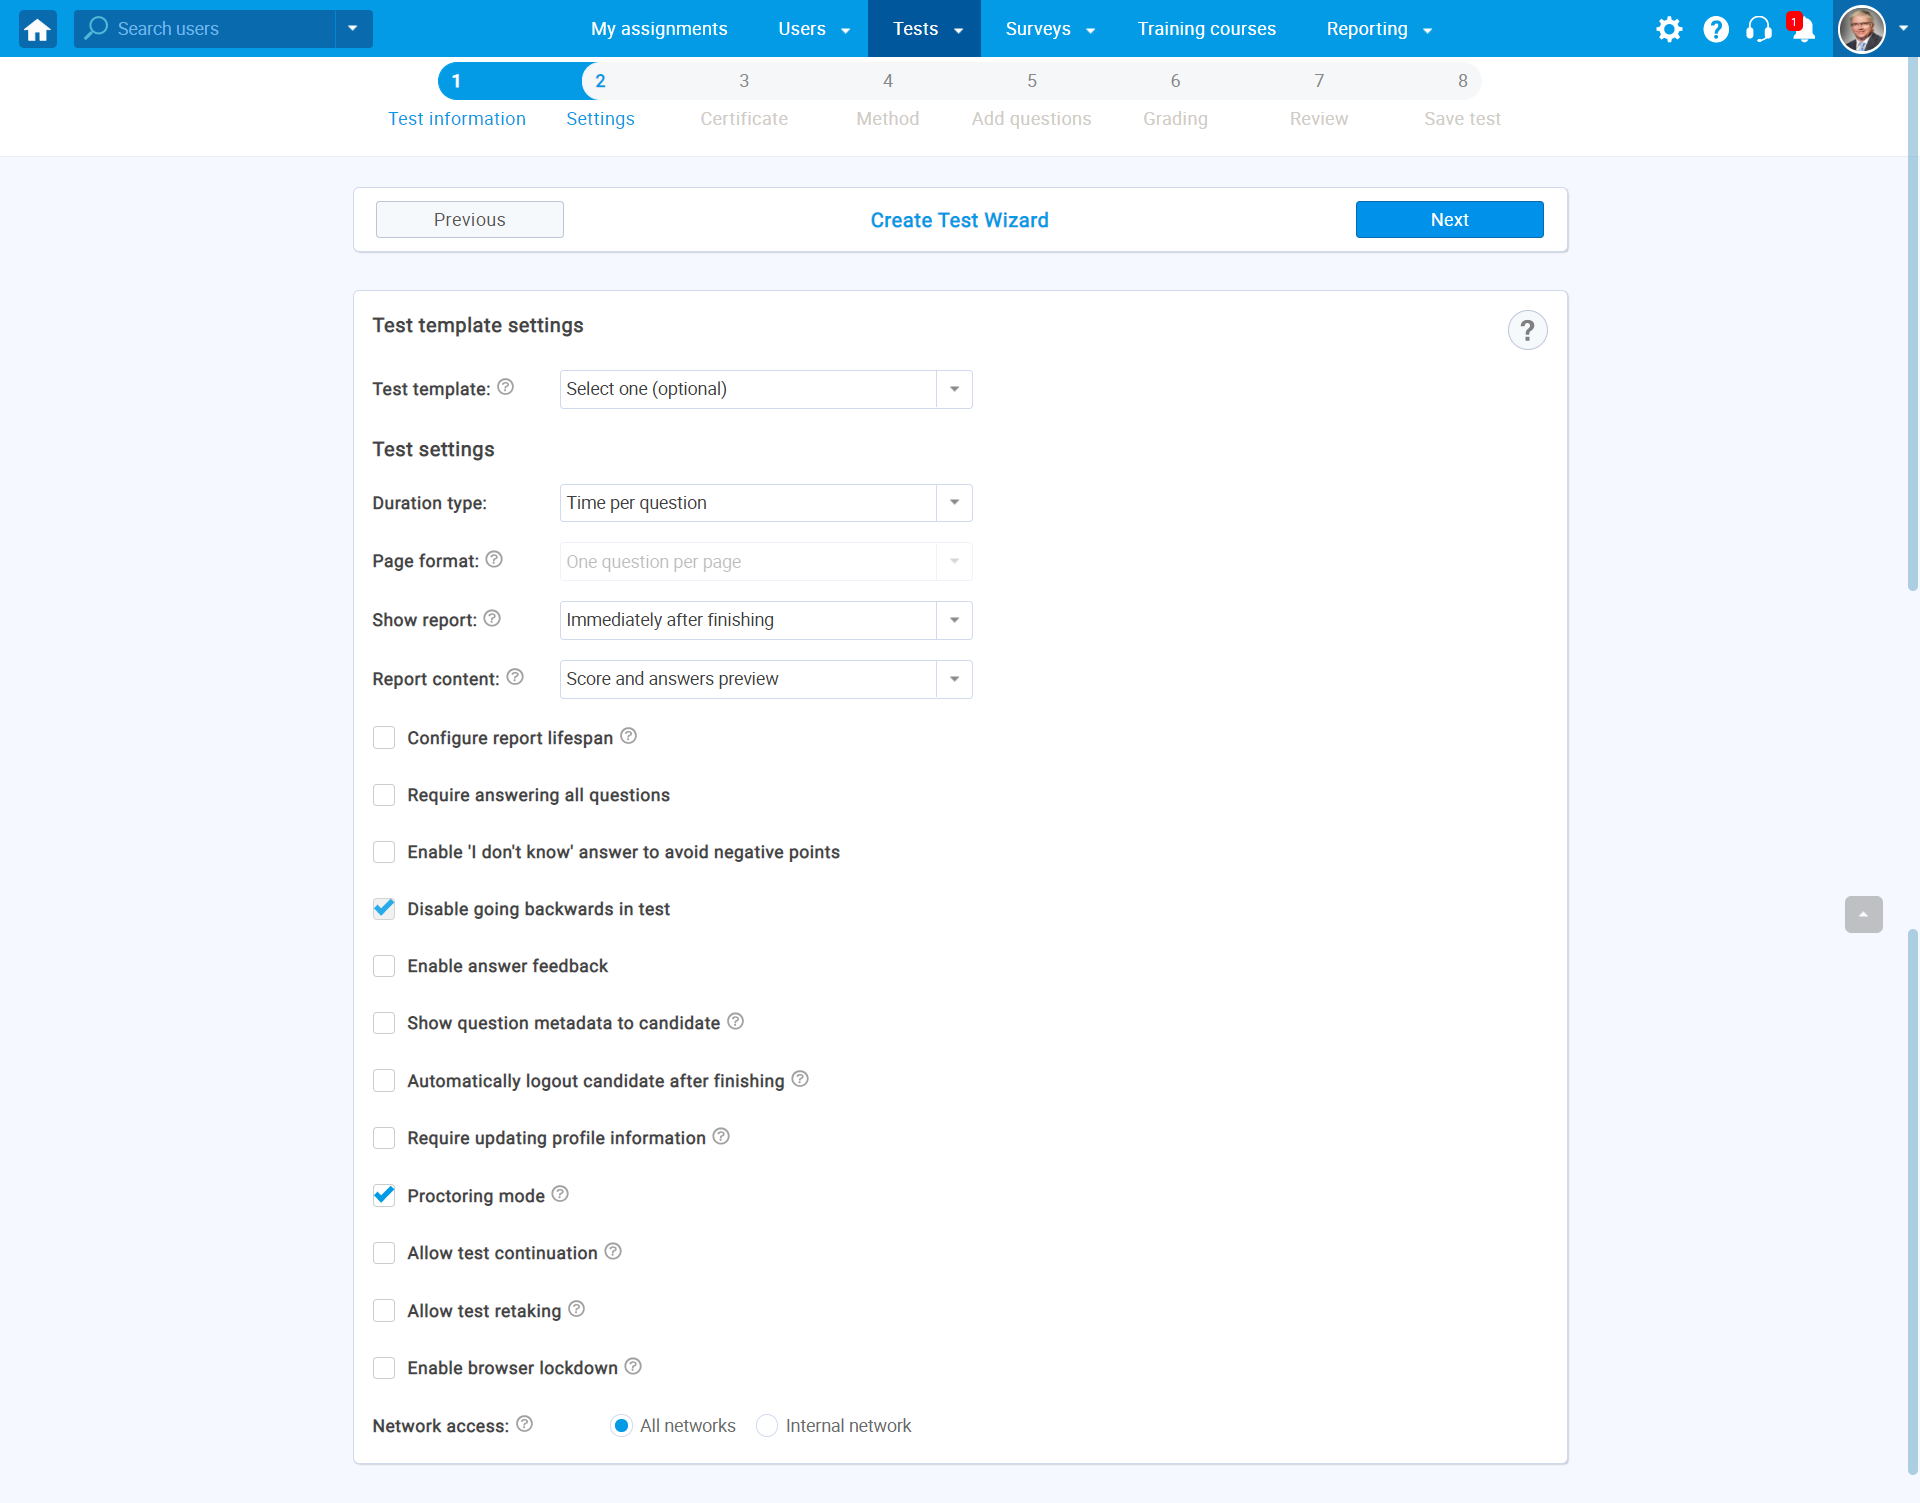
After the changes are made, and you are finished with Test Creation Wizard, you can create a new testing session, add candidates and publish the test.
Editing of published test settings
In case that you have already published the test but you want to make changes, you can do so as follows:
Questions editing
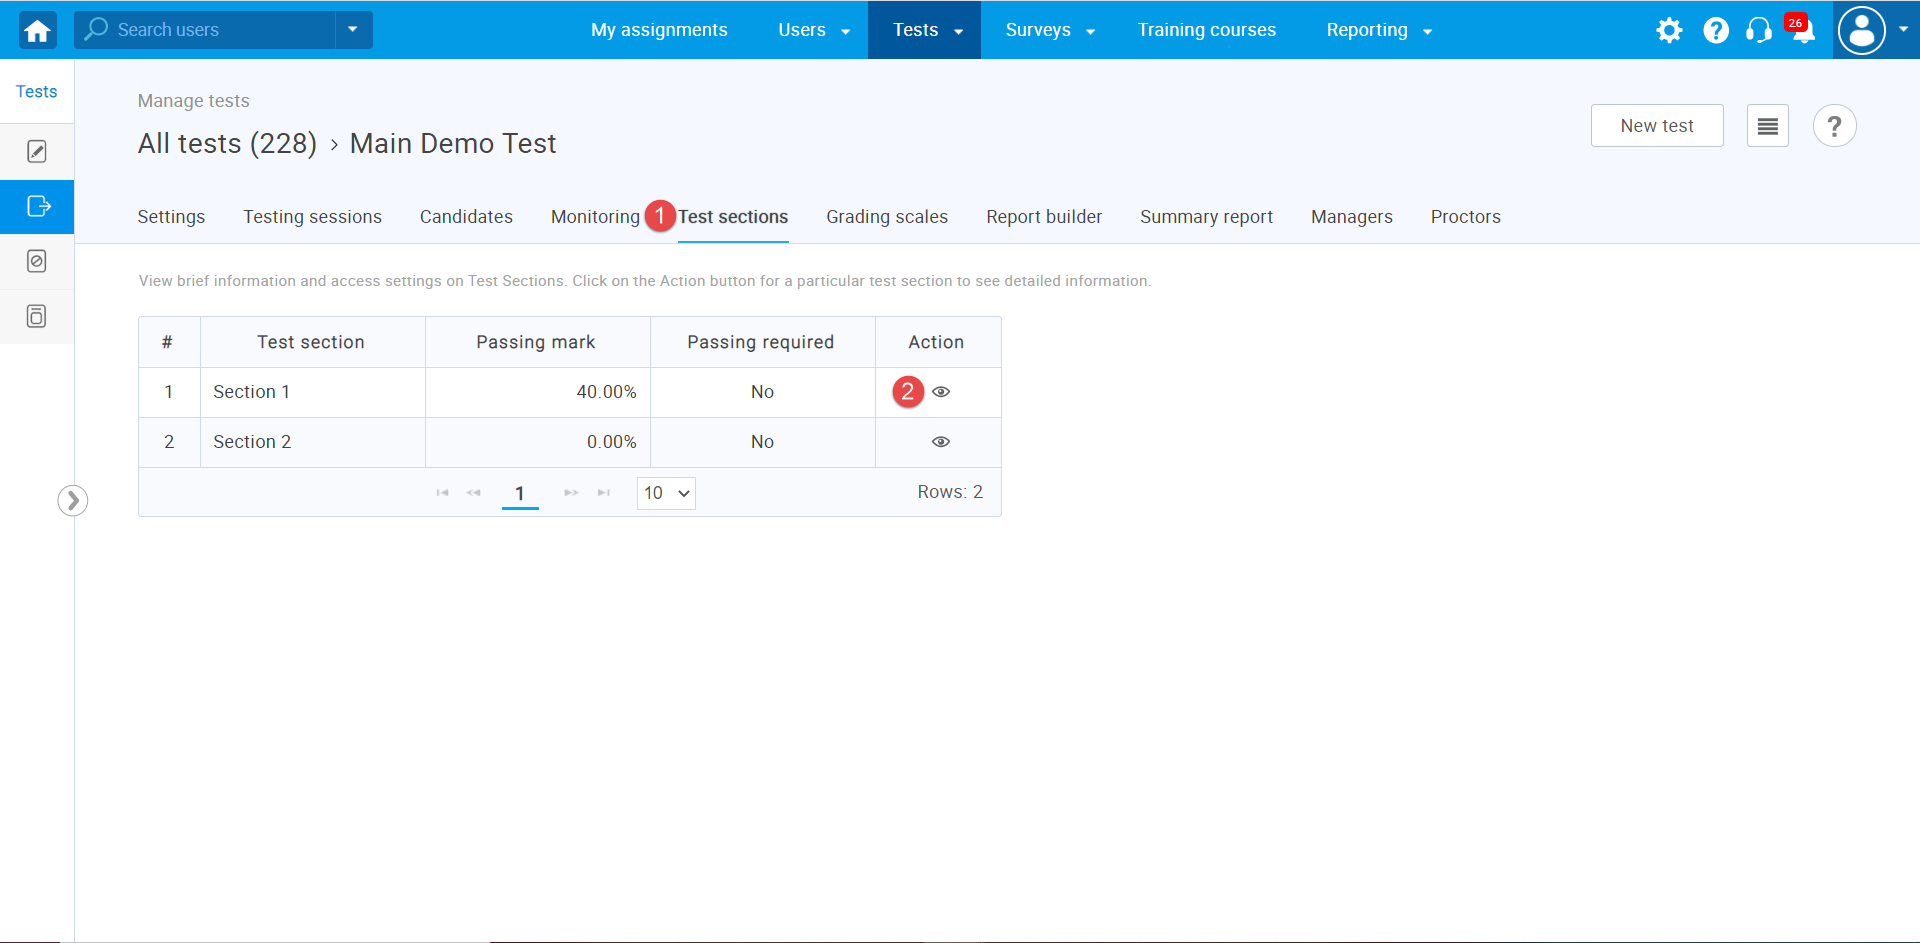
Once you open the test that you want to edit, you should:
- Click on the “Test sections” tab. In case the test is without sections, click the “Questions” tab.
- Click on the preview (eye) icon.
You can add, delete or edit questions of the published test by following:
- Click on the “Questions” tab.
- Click on the “Edit questions” button to start editing.

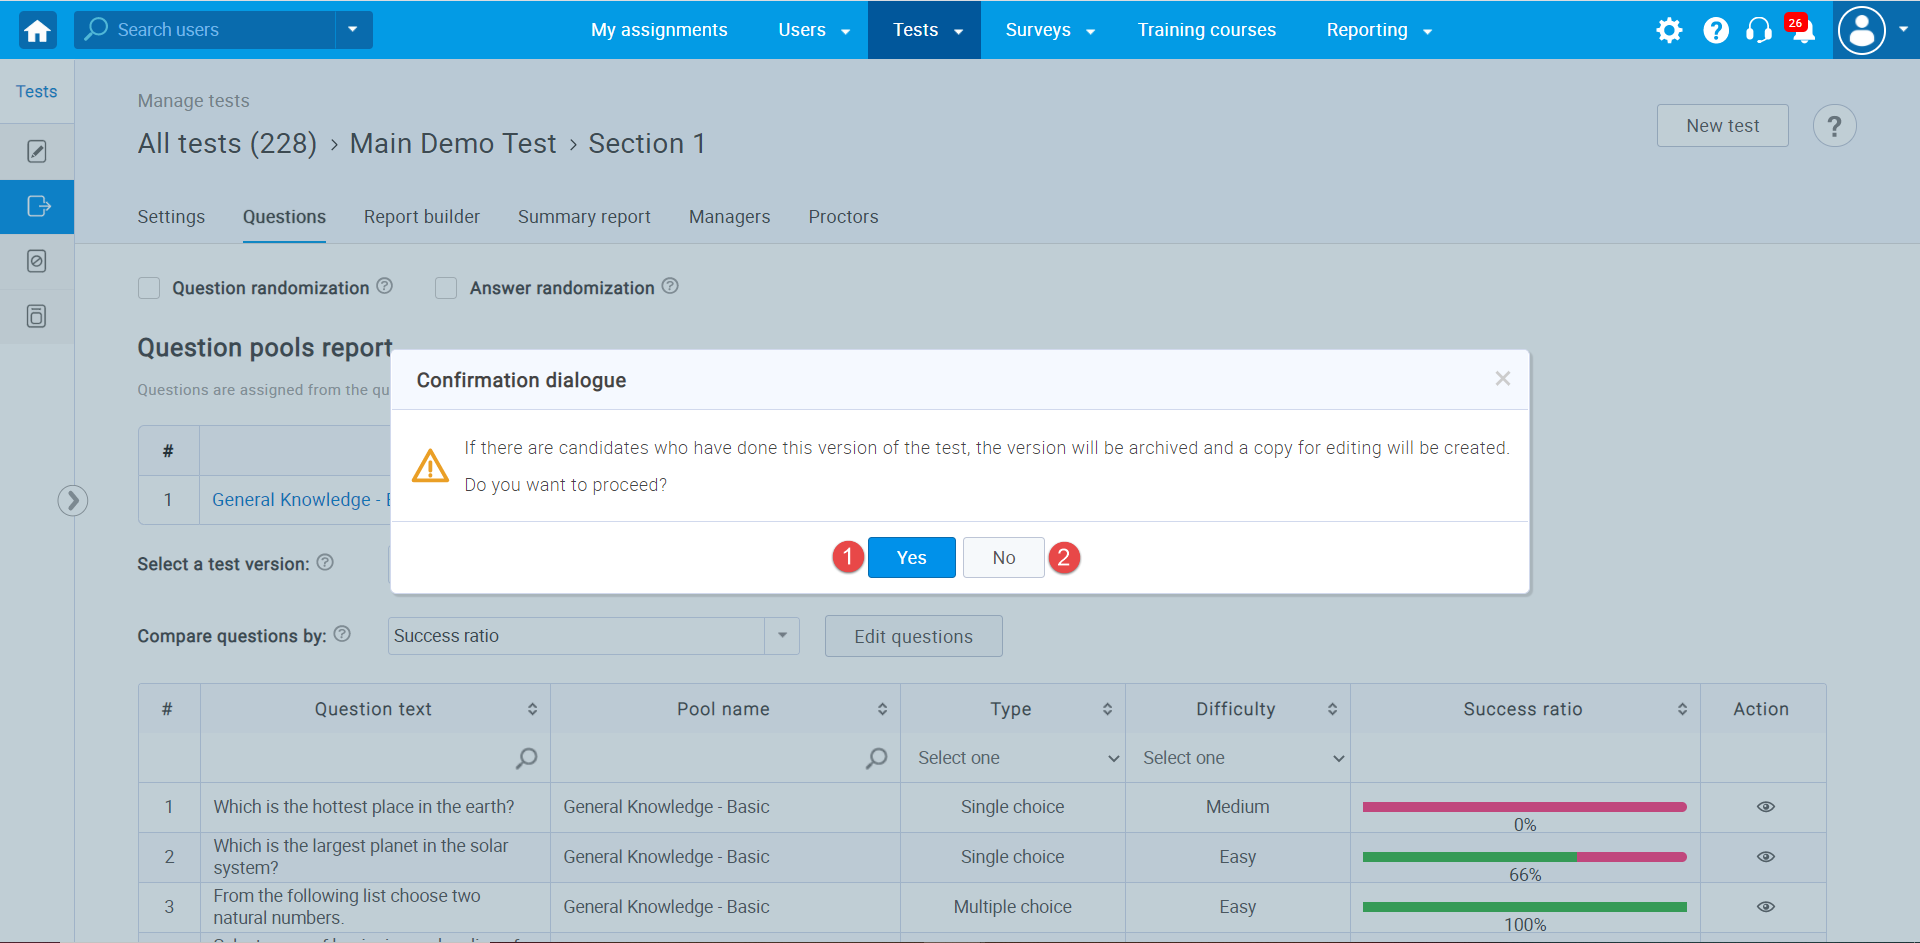
If there are candidates who have already completed the test, that completed version will be archived, and the copy will be created. The confirmation dialogue with this message will appear.
This option will not create a copy for the whole test. Instead, a copy of the question set will be created, allowing you to save the score and results of the candidates who already completed the test and update questions for the new ones.
- Click the “Yes” button to proceed to edit mode.
- Click the “No” button to cancel.
Once you access the editing mode, you can:
- Enable question and answer randomization.
- See the list of test question versions.
- Click the “Rename” button to change the version name.
- Click the “Import questions” button to add new questions from a question pool.
- Click the “New question” button and choose the desired question type to create a new question.
- Click “View question stats” to go back to preview mode.
- Click the “preview” (eye) icon to preview details about created question.
- Click the “edit” (pen) icon to edit the existing question.
- Click the “delete” (trash can) icon to delete the existing question.

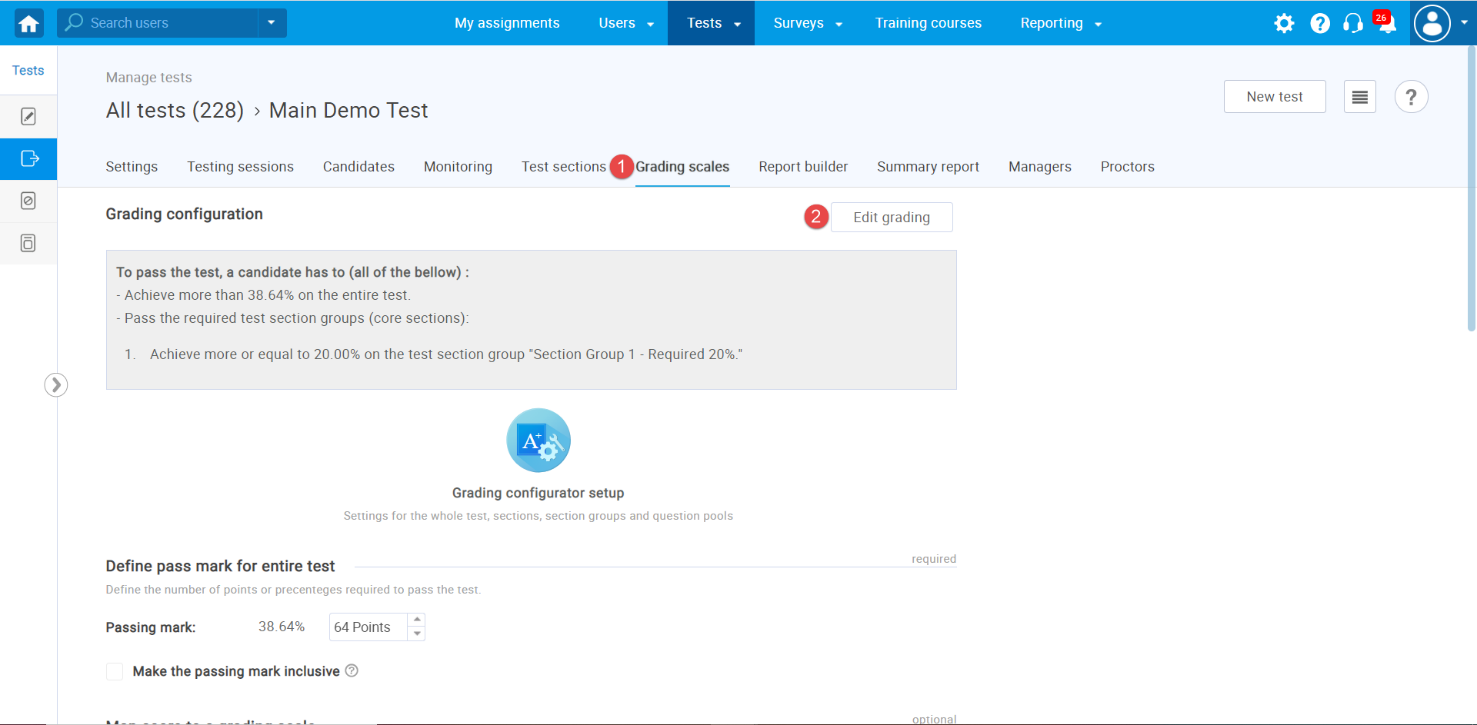
Grading editing
You can fully edit the grading configuration, change the passing mark for the entire test, section, and group of sections. Changing the grading configuration will affect only the users whose results are not verified.
To see how to verify results for a candidate, please take a look at Verifying candidates’ results capter.
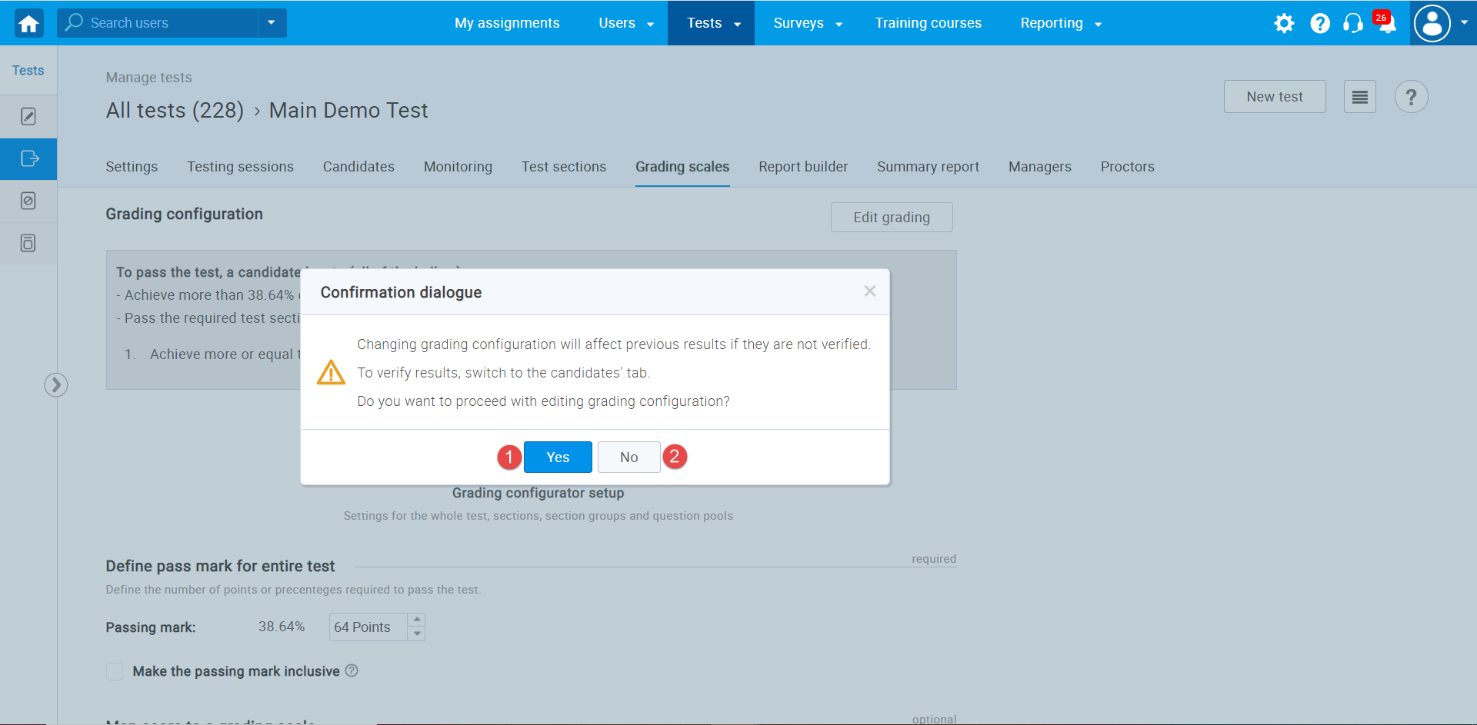
The confirmation dialogue will appear, saying that the grading configuration will affect previous results if they are not verified.
- Click the “Yes” button to proceed with the editing grading configuration.
- Click the “No” button to cancel.
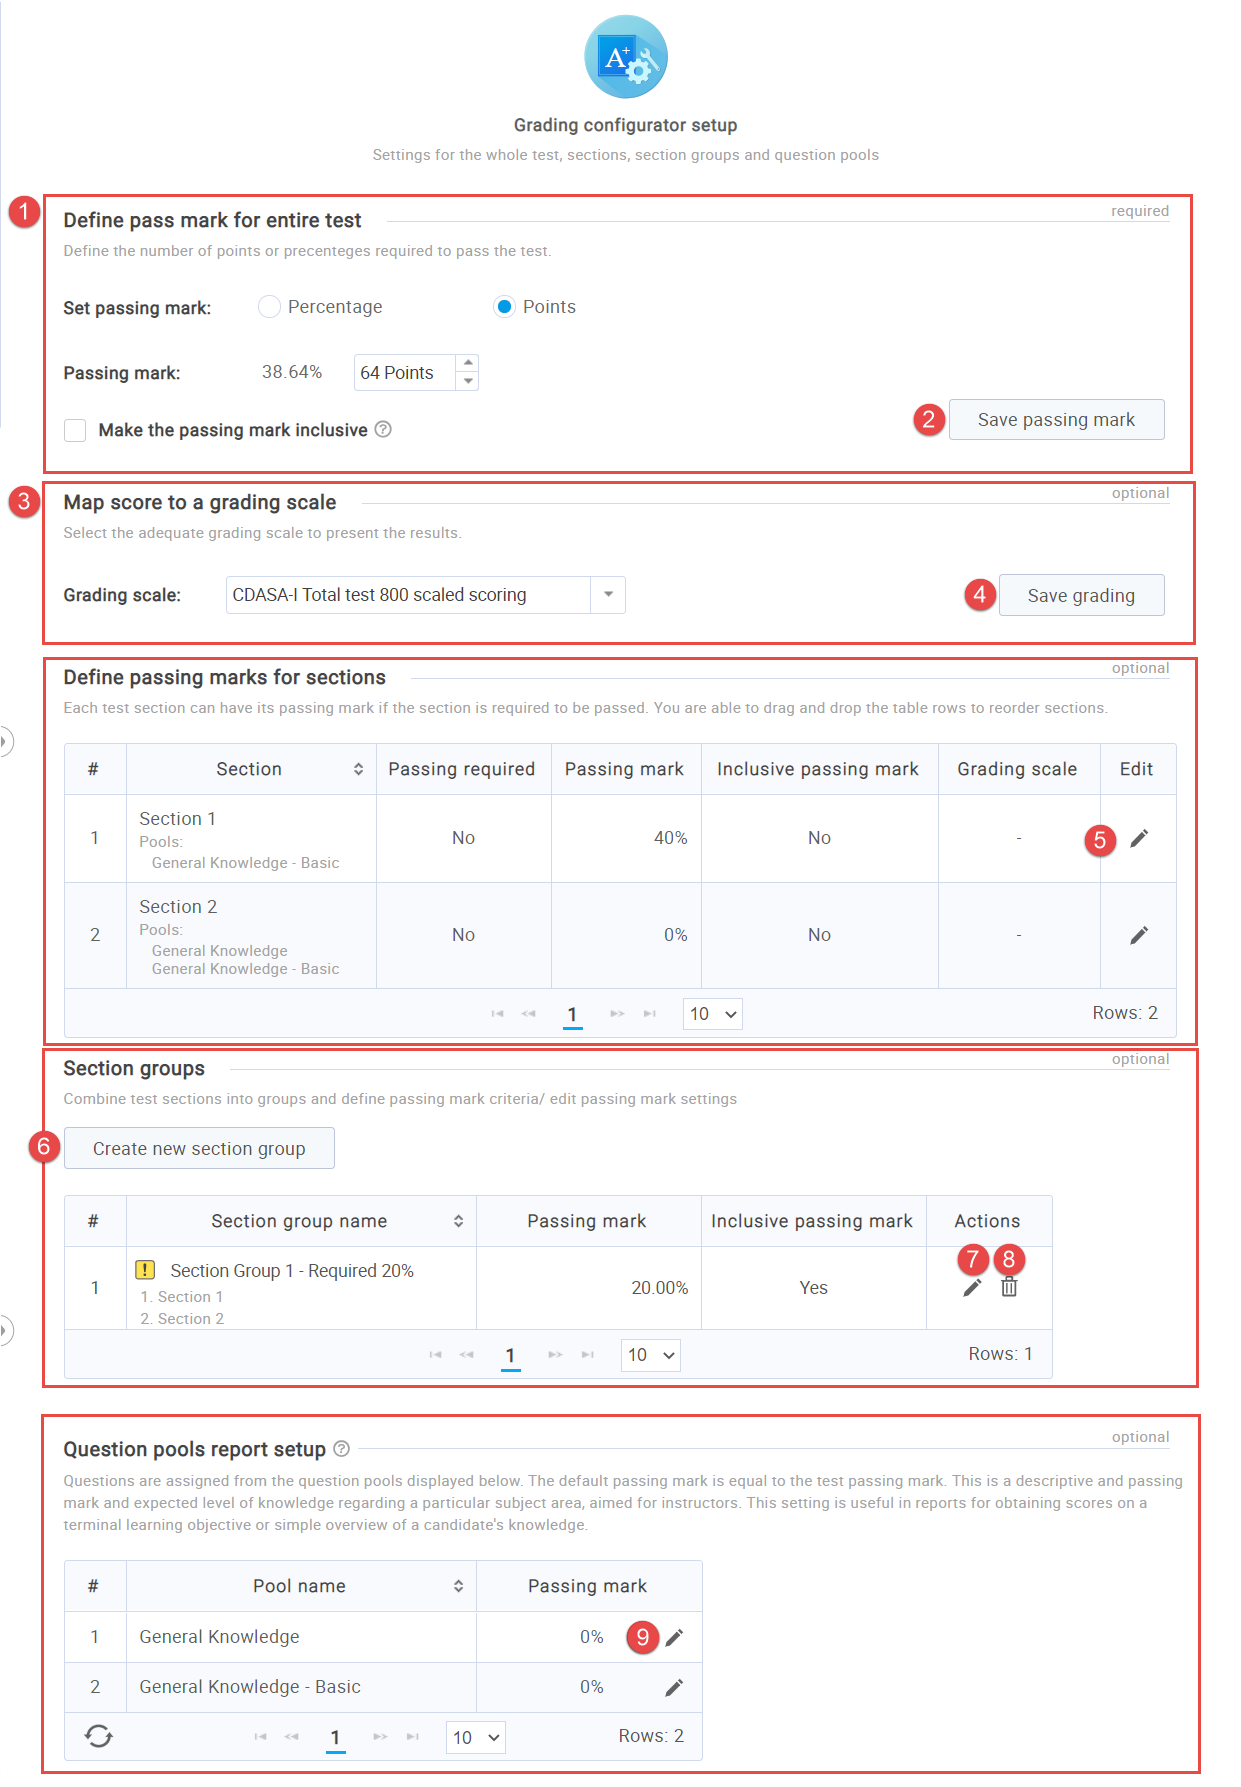
Once you access the editing mode, you can:
- Change the passing mark for the entire test.
- To confirm the test passing mark changes, click the “Save passing mark” button.
- Add or change the grading scale for the test.
- To confirm the grading scale changes, click the “Save grading” button.
- Click on the “edit” (pen) icon to change the passing mark for the section.
- Click on the “Create new section group” button to create and set the new section group’s passing mark.
- Click on the “edit” (pen) icon to change the section group’s passing mark.
- Click on the “delete” (trash can) icon to delete the section group.
- Click on the “edit” pen icon to change the passing mark for the question pool.
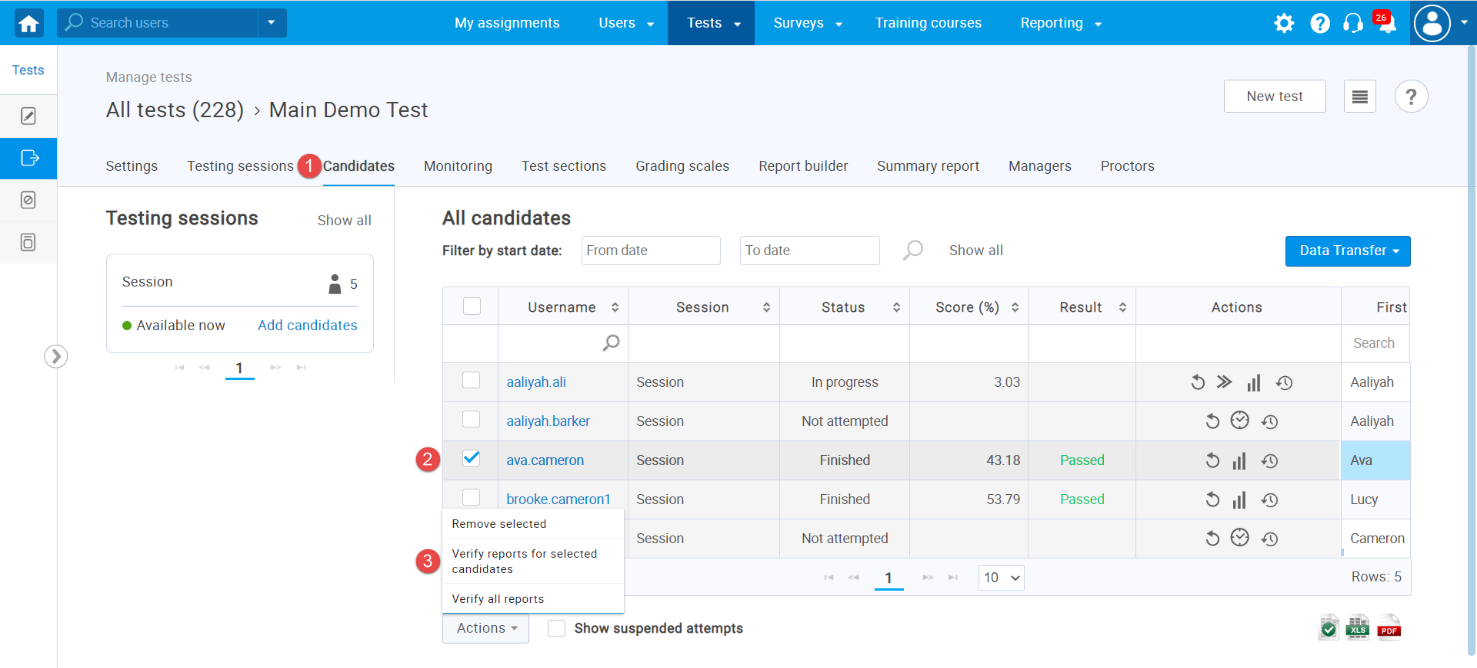
Verifying candidates’ results
You can verify candidates’ results as follows:
- Click on the “Candidates” tab.
- Select the candidates whose results you want to verify.
- Click on the “Actions” and select “Verify reports for selected candidates.”
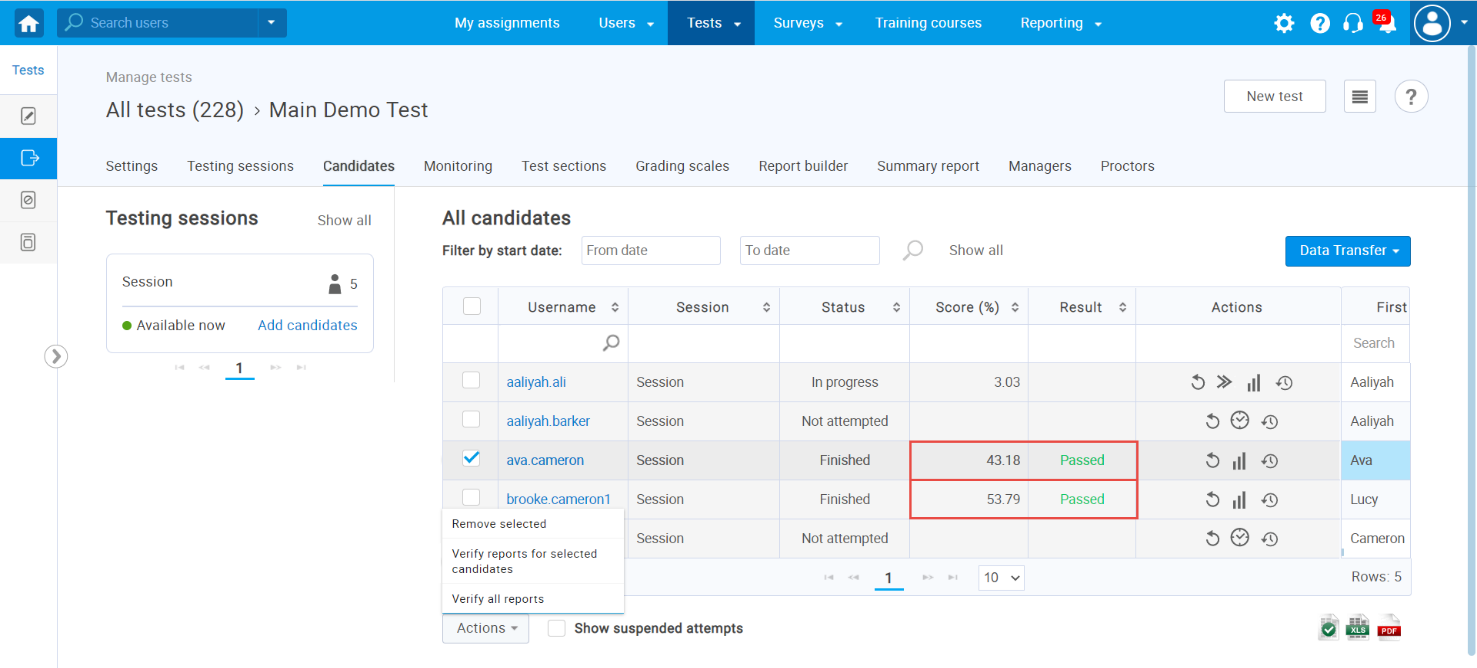
 Example of how the editing of grading affects verified and unverified candidates
In this example, two candidates completed the test – one with 43.18% and the other with a 53.79% score. We will verify the candidate “ava.cameron” results, and no changes on the grading part will affect it.
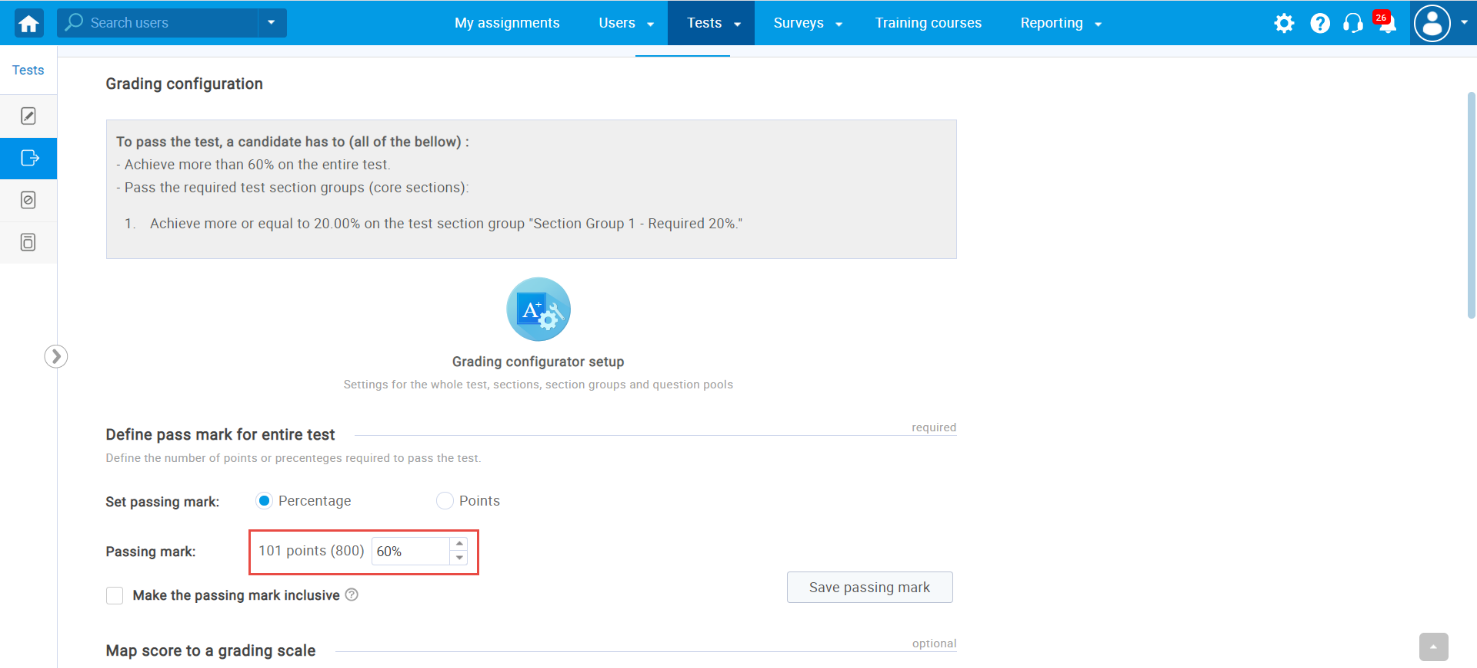
Change the passing mark for the whole test to be 60%.
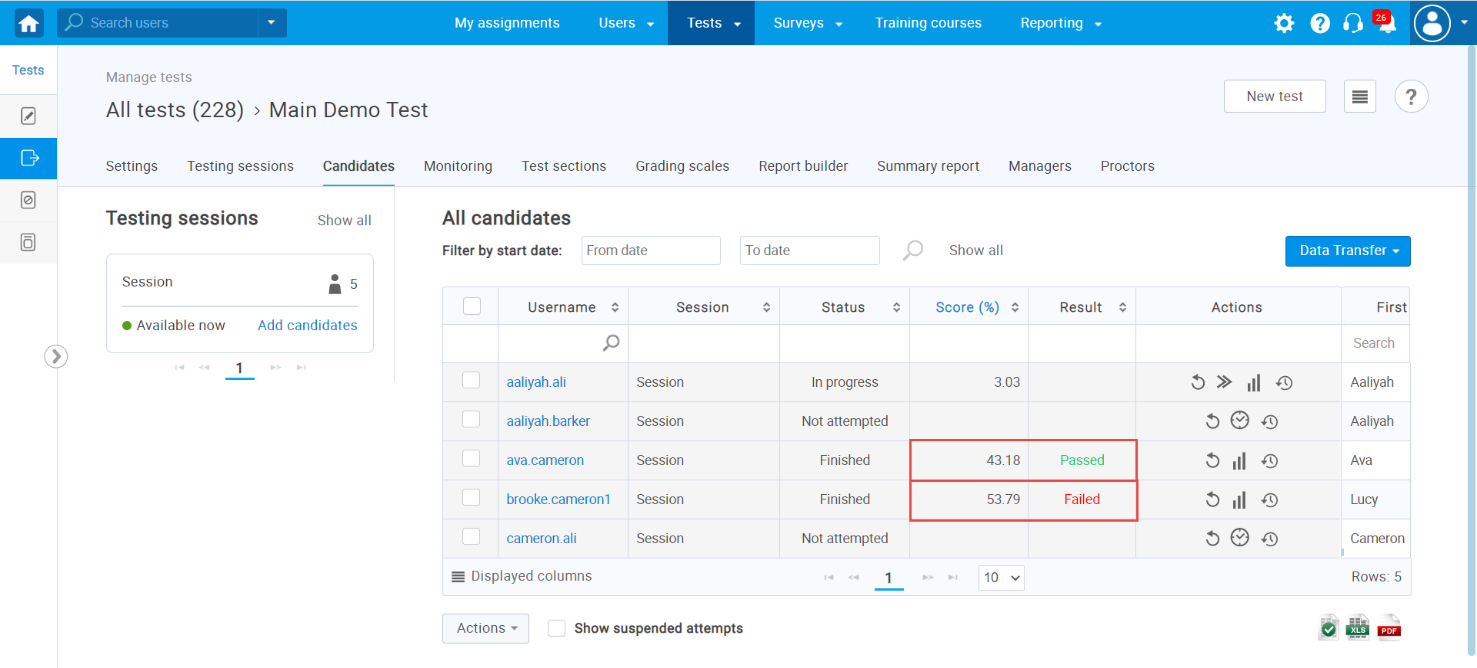
As you can see, the passing mark change affected only the candidate whose result is not verified.
For more useful instructional materials, please visit:


