This article explains how to create a user group and enroll it in a test. This allows assigning candidates from the same group to a session at once, without the need to add one by one.
Access the “User groups” from the homepage
To access ‘’User groups’’ follow the next steps.
Select the “Create user group” option on the home page.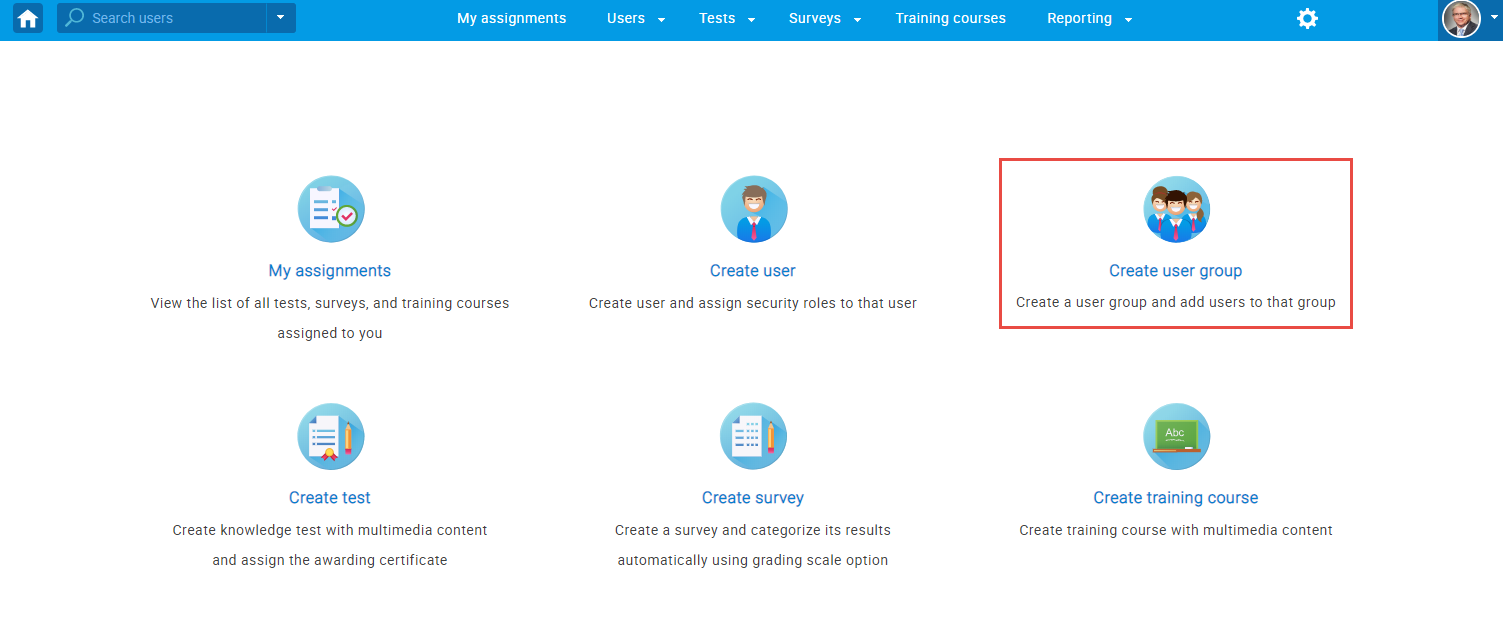
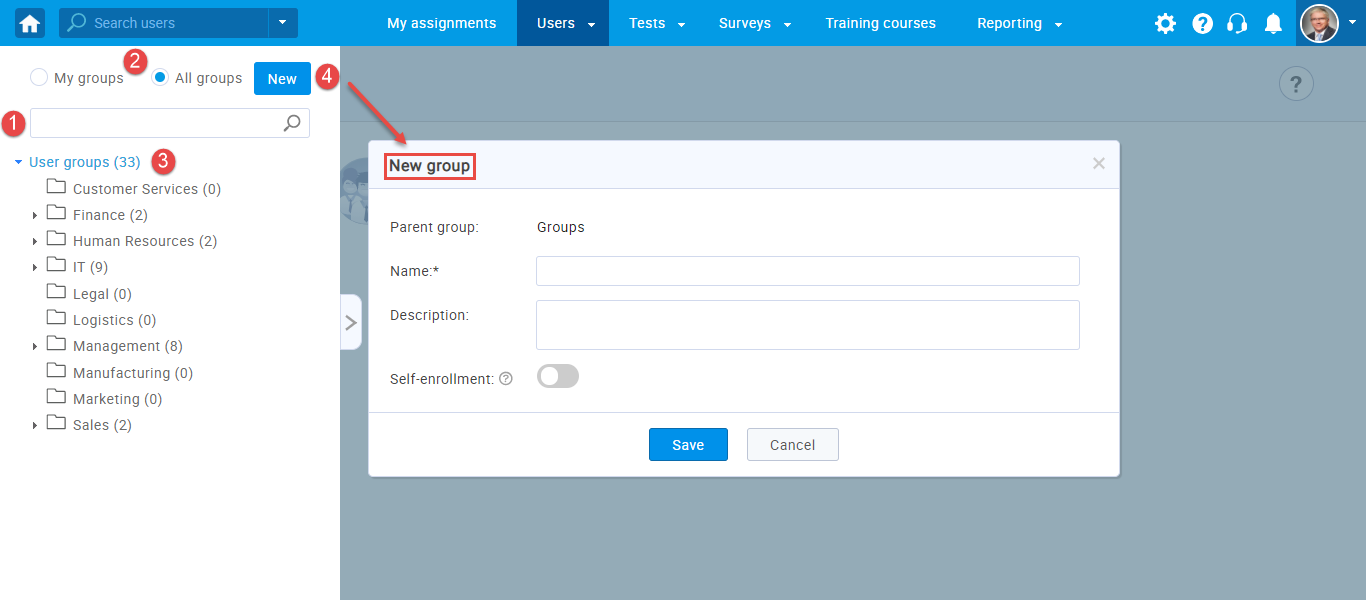
Navigate to the “Users” option on the main menu and select “Manage groups”. On the left side of the “Manage groups” page, you will find the sidebar where you can:
-
- Search for groups.
- Filter groups.
- Select a group to see the group’s information and modify it.
- Create a new group. To create a new group, click on the “New” button. In the pop-up window, set the name and description of the group, as well as the group status.
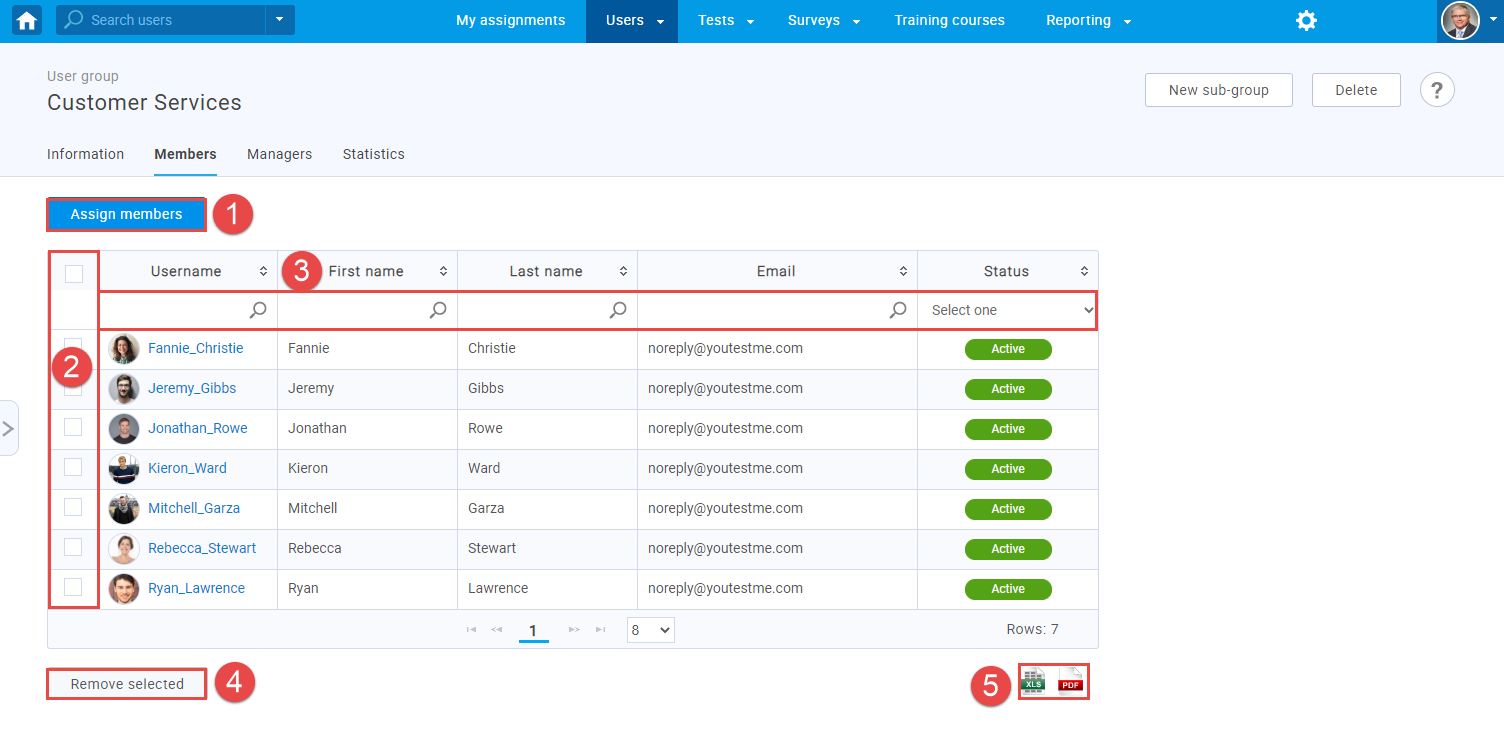
Manage members
The “Members” tab gives an overview of all group members, allows you to add new members to the group and remove existing users. You can also export the member list as an Excel file.
- The “Assign members” button will add the selected users to the group.
- By selecting the check-boxes, you can add or remove users from the current selection, and the actions such as assigning and removing will only have an impact on these users.
- You can search users by their username, first and last name, status, or e-mail.
- The “Remove Selected” button will remove the selected users from the group. No action will take place for users that are not group members. Removing a user from the group will set his/her “Role in the group” to blank
- The “Export as Excel” option will export all group members as an Excel file.
 Enroll group in a test
First, you need to create a new testing session:
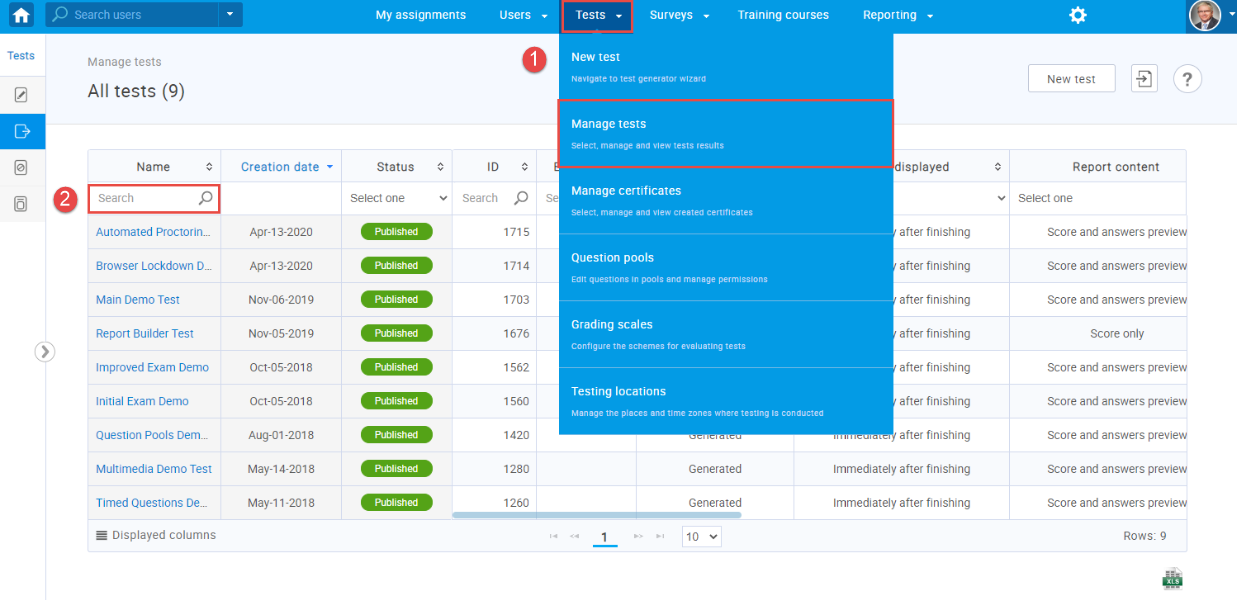
- Navigate to the “Tests” option in the main menu and select the “Manage tests” option.
- Type the name of your test in the search field, and select the name of the desired test.
- Select the ‘’Testing sessions’’ tab.
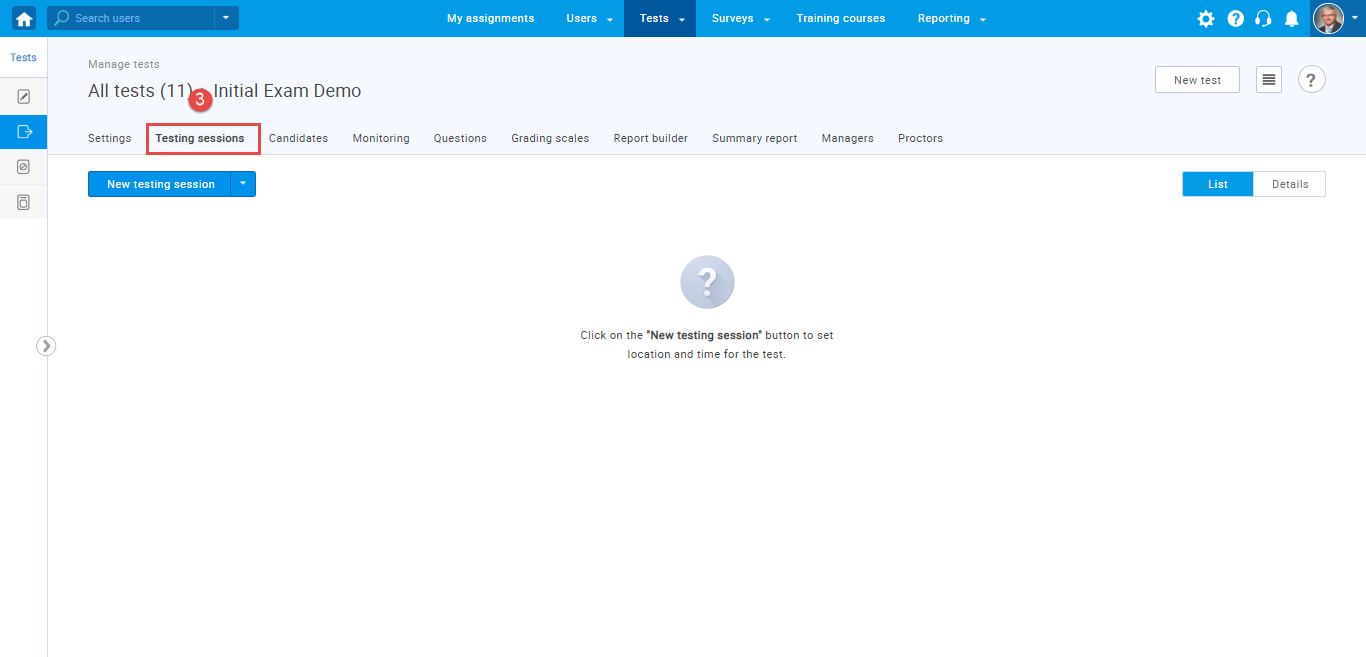
- In the testing session tab, click on the “New testing session” button and configure new testing session settings:
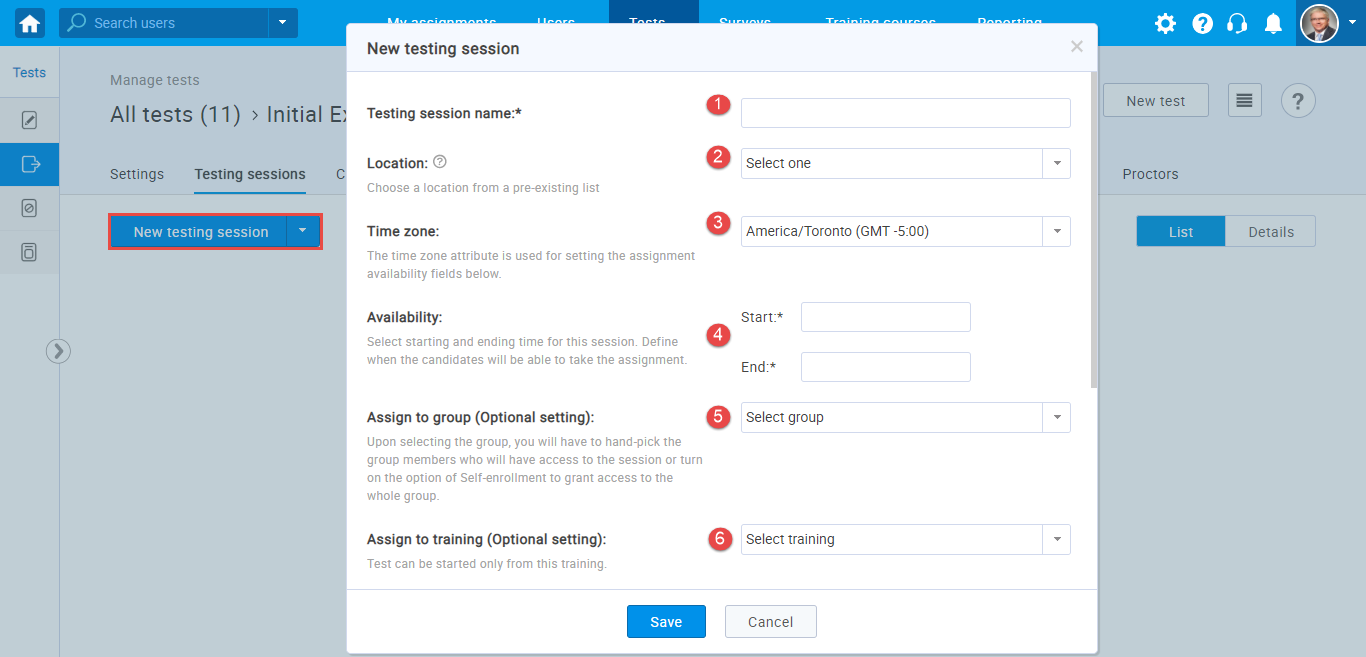
- Enter the session’s name.
- Choose one of the previously defined testing locations in the ‘’Locations’’.
- ‘’Time zone’’ refers to the time zone of the user that is creating the session. It suggests that the calendars with availability times below are displayed according to that time zone.
- Select starting and ending time for this session. Define when the candidates will be able to take the assignment.
- Select group. Upon selecting the group, you will have to hand-pick the group members who will have access to the session or turn on the option of Self-enrollment to grant access to the whole group.
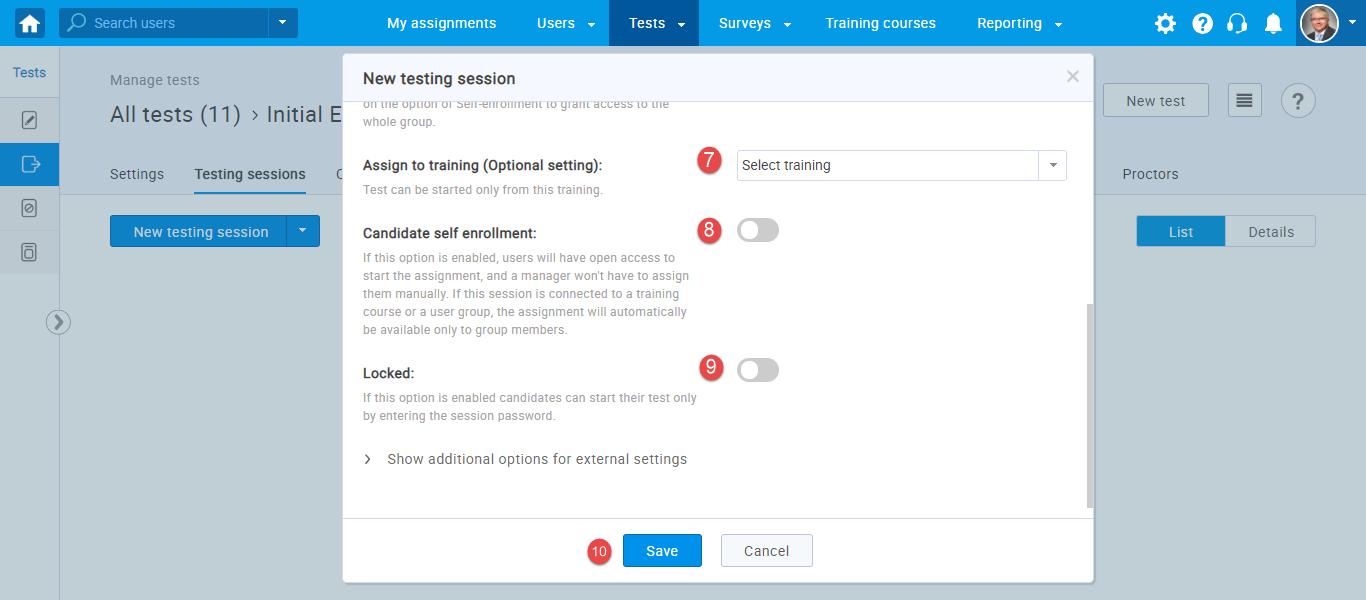
- Select training (Optional setting). If you choose this option, test can be started only from this training.
- If you enabled the “Candidate self enrollment” option, candidates can self enroll in the session from the “My assignments” panel.
- If you enabled the “Locked’’ option, the candidates will be able to start the test only by entering the “Session password”.
- You can show or hide additional options for external settings.
- Click the “Save” button.
For a video tutorial on how to create a user group and enroll it in a test, please watch the video.
For more useful instructional materials, please visit:


