This article explains how to organize exam booking – prepare a test, set prices, define capacities, and deadlines for booking and cancelation.
To arrange a test, you need to:
- Create a test
- Set prices needed for booking a test
- Organize testing sessions
Creating a test
For information on how to create a simple test without sections and assign candidates to it, please see this link.
Setting up prices
In order to set the prices for exam booking:
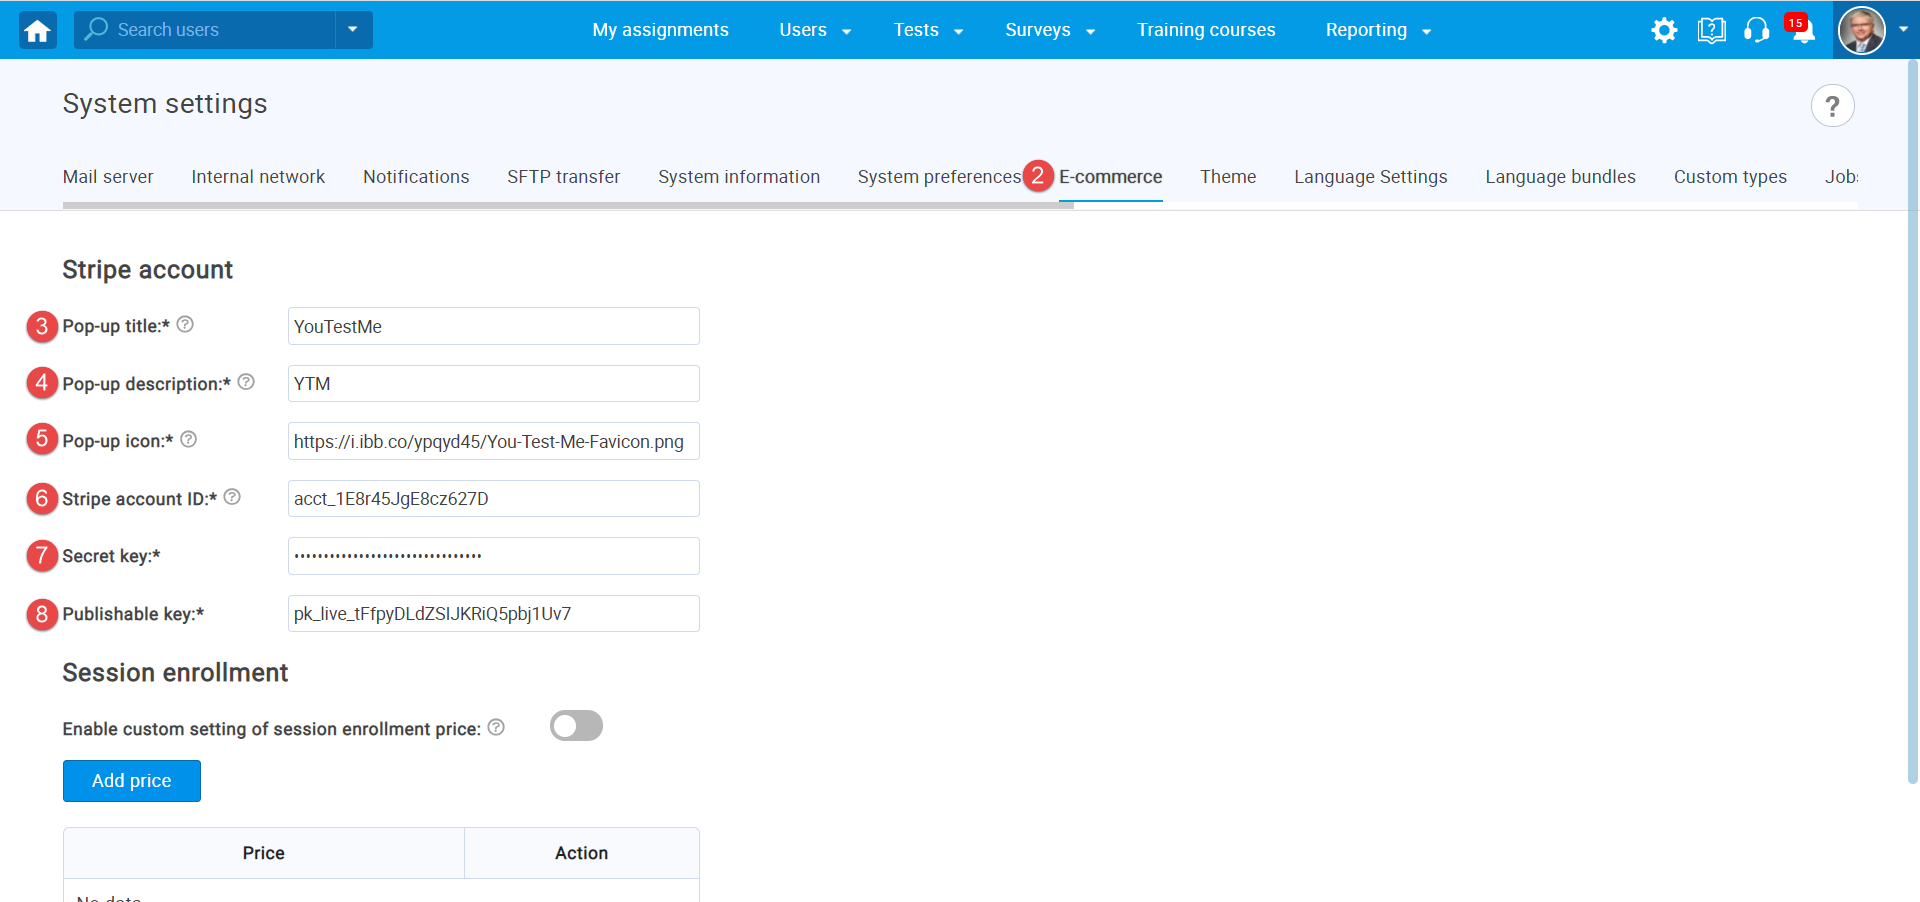
- Navigate to “System settings”.
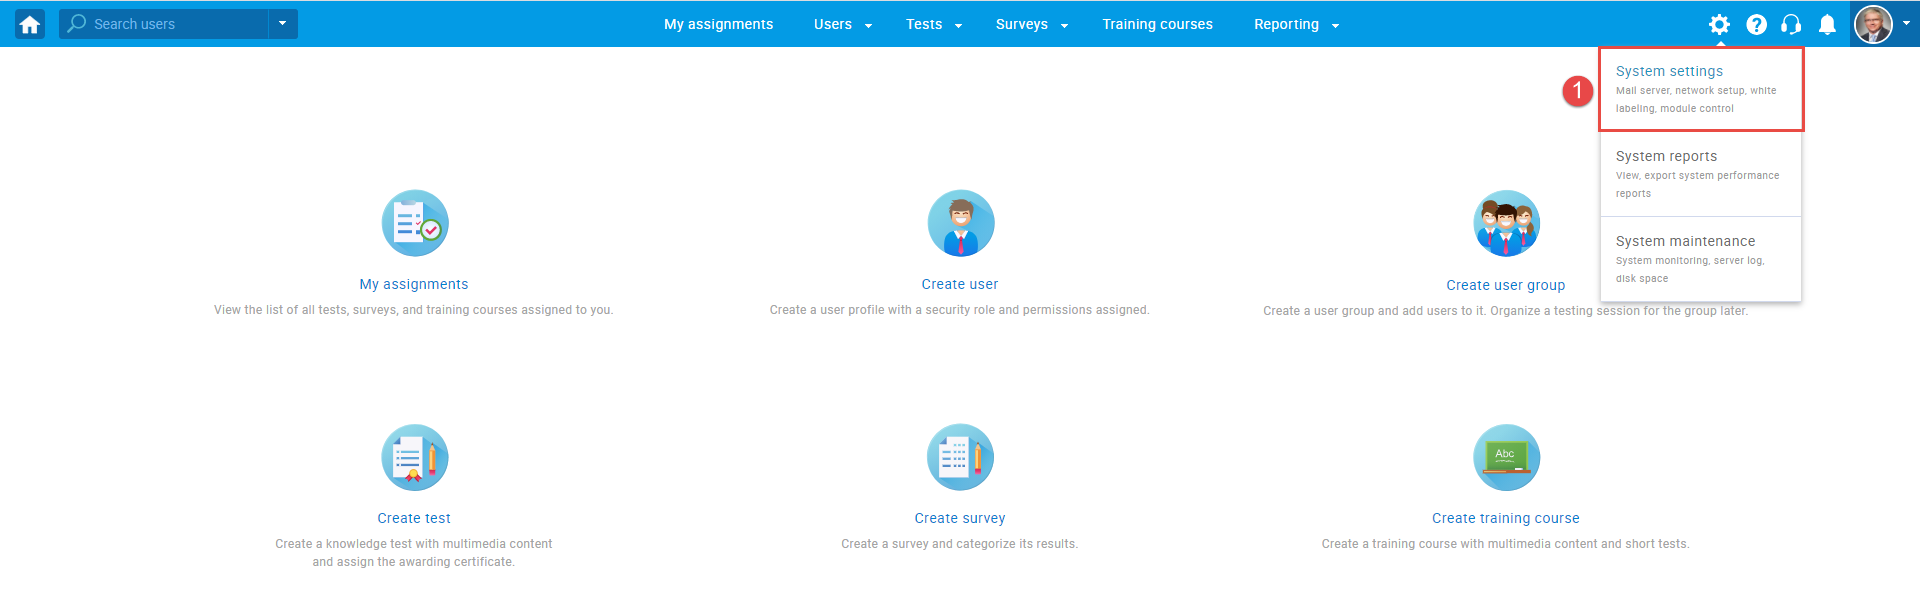
- Choose the “E-Commerce” tab.
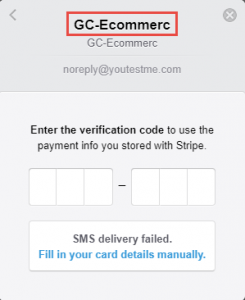
- Enter the pop-up title. This title will be displayed when entering a payment card by the candidate.
Example of how the pop-up title will be displayed from the candidate’s perspective who needs to pay the fee.
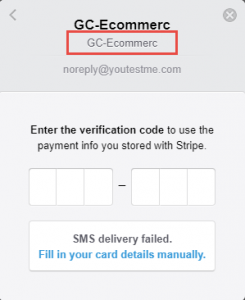
- Insert the pop-up description. This text will be displayed when entering a payment card by the candidate.
Example of how the pop-up description will be displayed from the candidate’s perspective who needs to pay the fee.
- Set the pop-up icon – Full URL of the logo picture for the Stripe checkout.
- Enter the Stripe account ID – ID of your Stripe account connected to the YouTestMe Stripe platform.
- Enter the Secret key.
- Enter the Publishable key.
To see how to access the Stripe account ID, publishable and secret key, please check this article.
Setting up predefined prices
If you want to use predefined prices already set in advance:
- The “Enable custom setting of session enrollment price” option must be disabled.
- Click the “Add price” button.
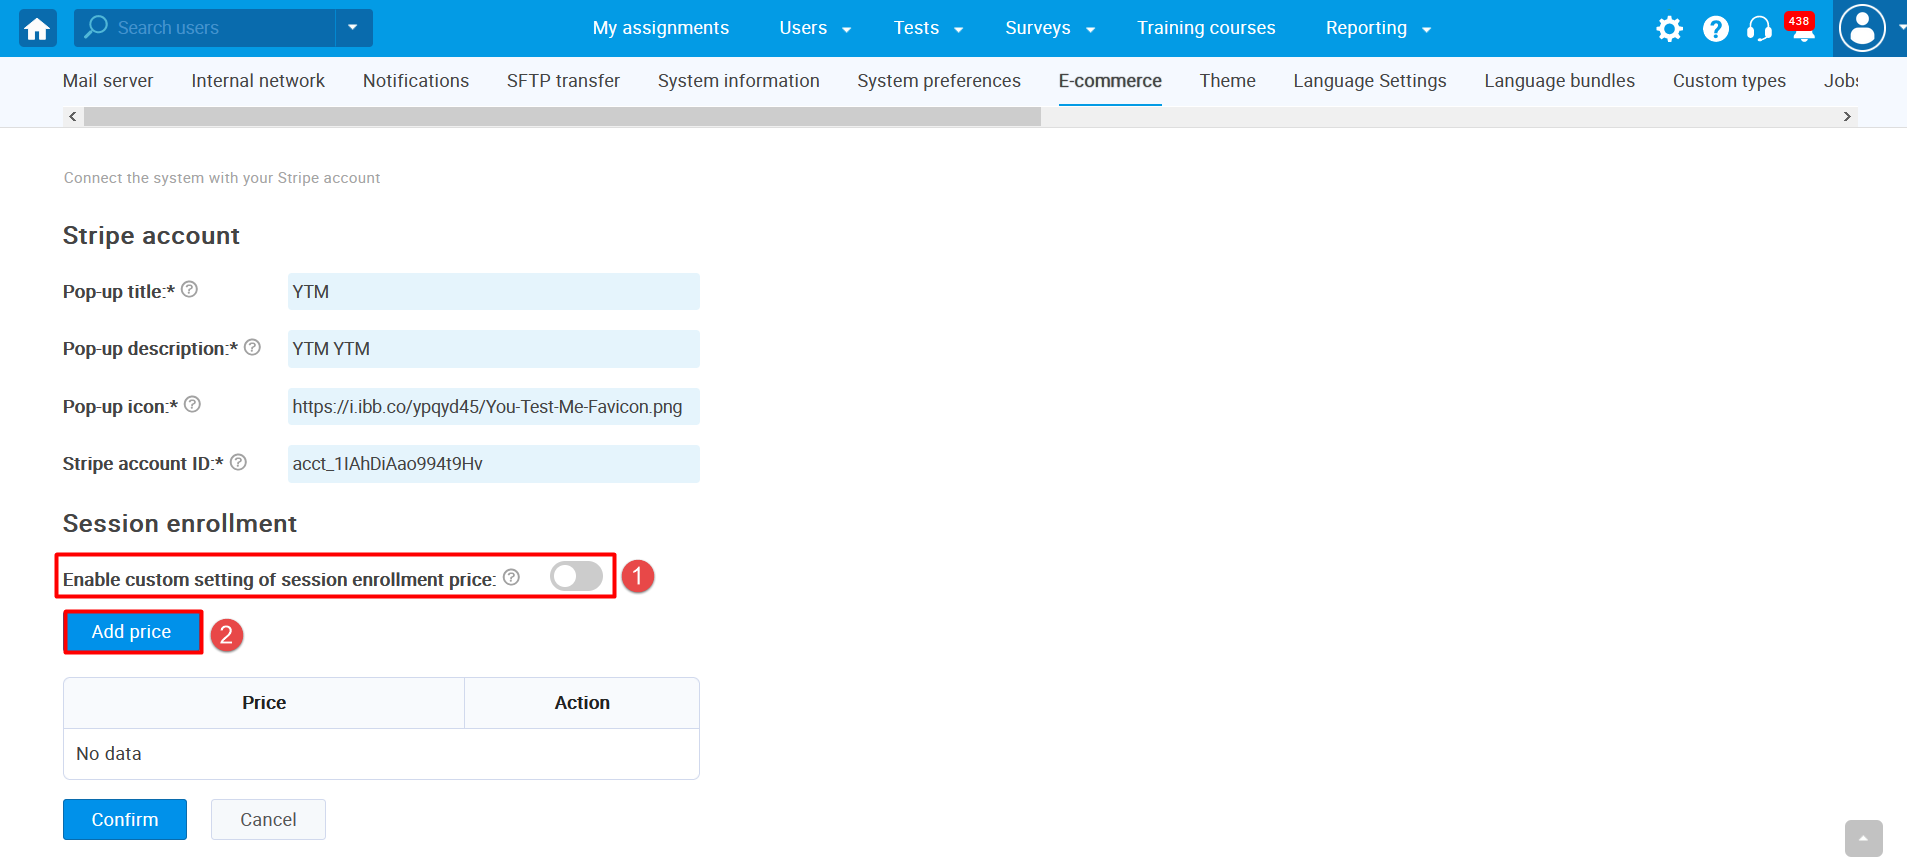
3. When the pop-up window shows up, add the price and confirm it by clicking on the “Confirm” button.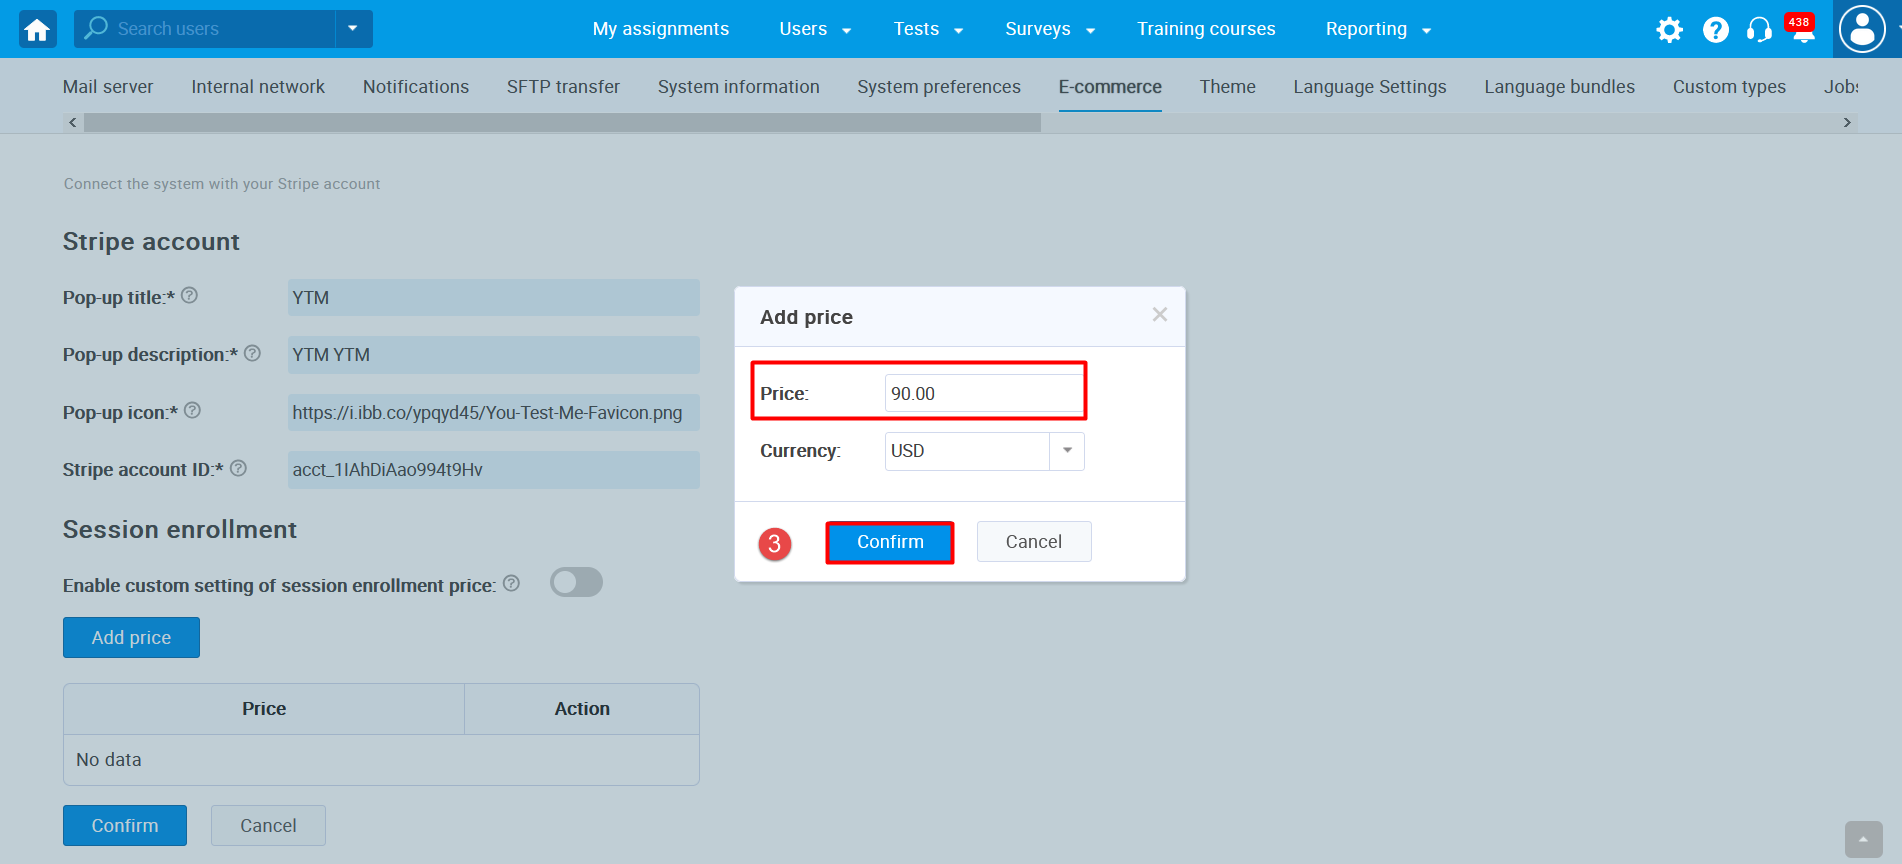 4. After setting up as many prices as you want, confirm it on the “Confirm” button at the bottom of the page.

Once you setting up your testing session, predefined prices will be displayed in the next form:

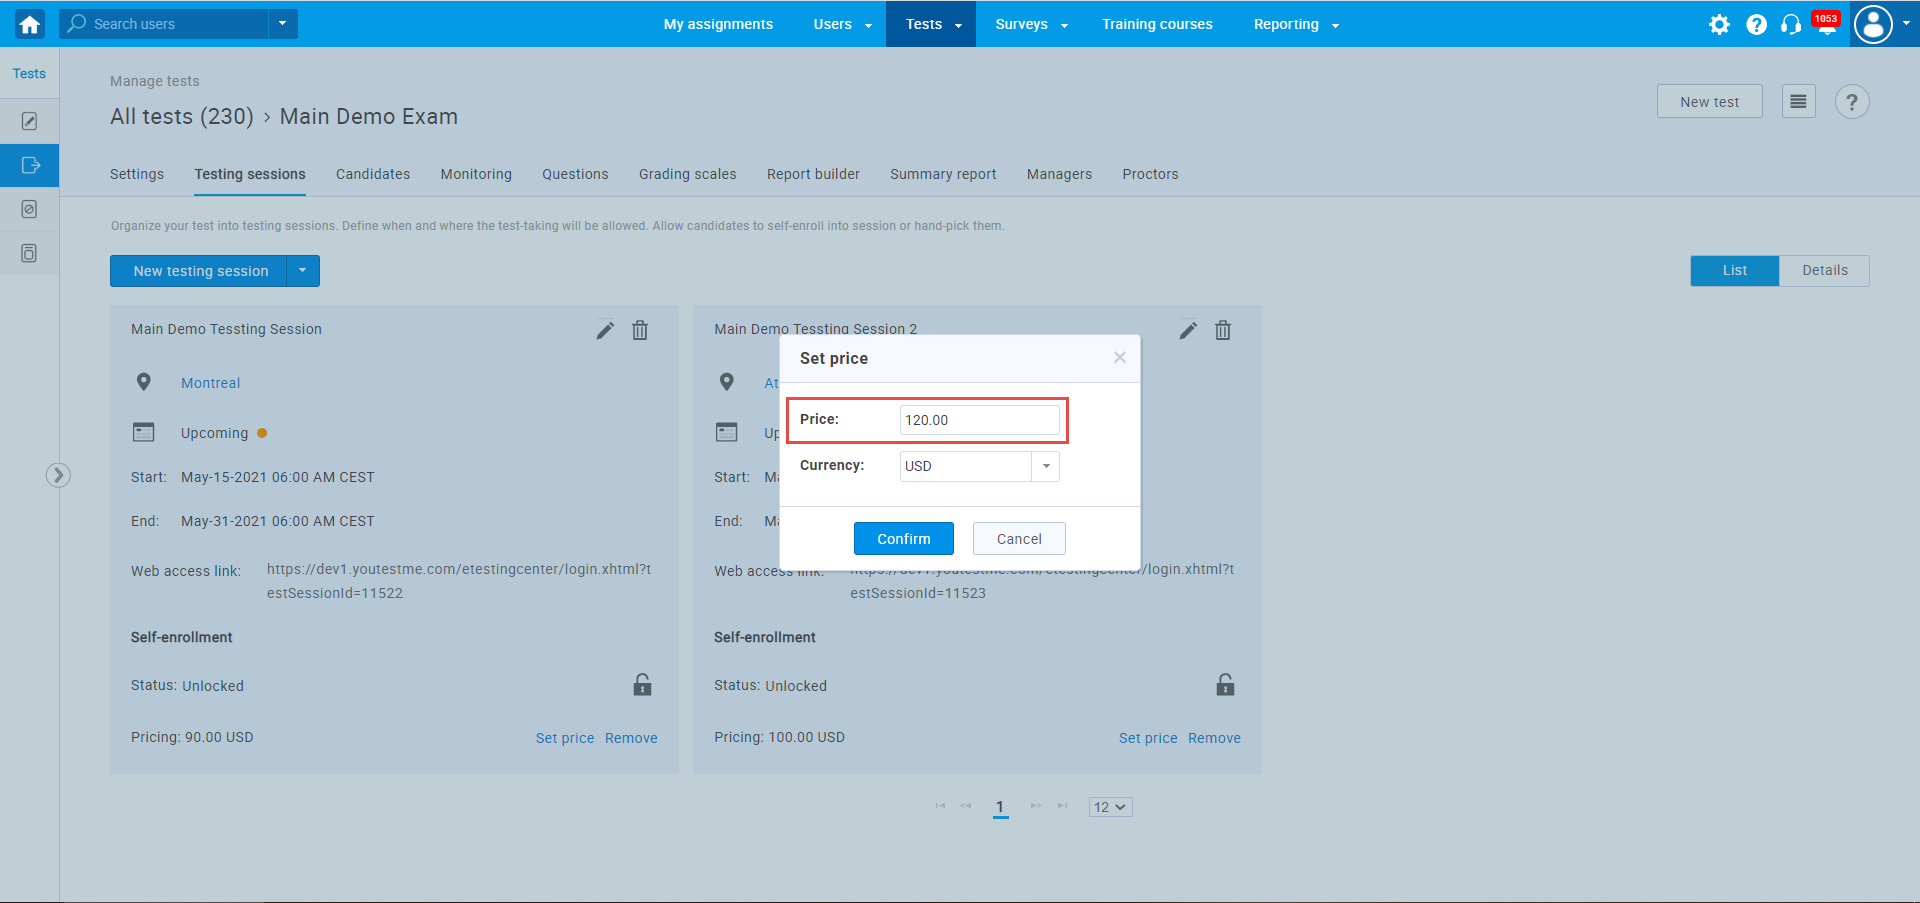
Creating custom prices
If you want to set prices for each testing session independently:
- Enable custom setting of session enrollment price.
- Click the “Confirm” button.

Once you setting up your testing session, you can define a custom price. An example is displayed in the picture below.
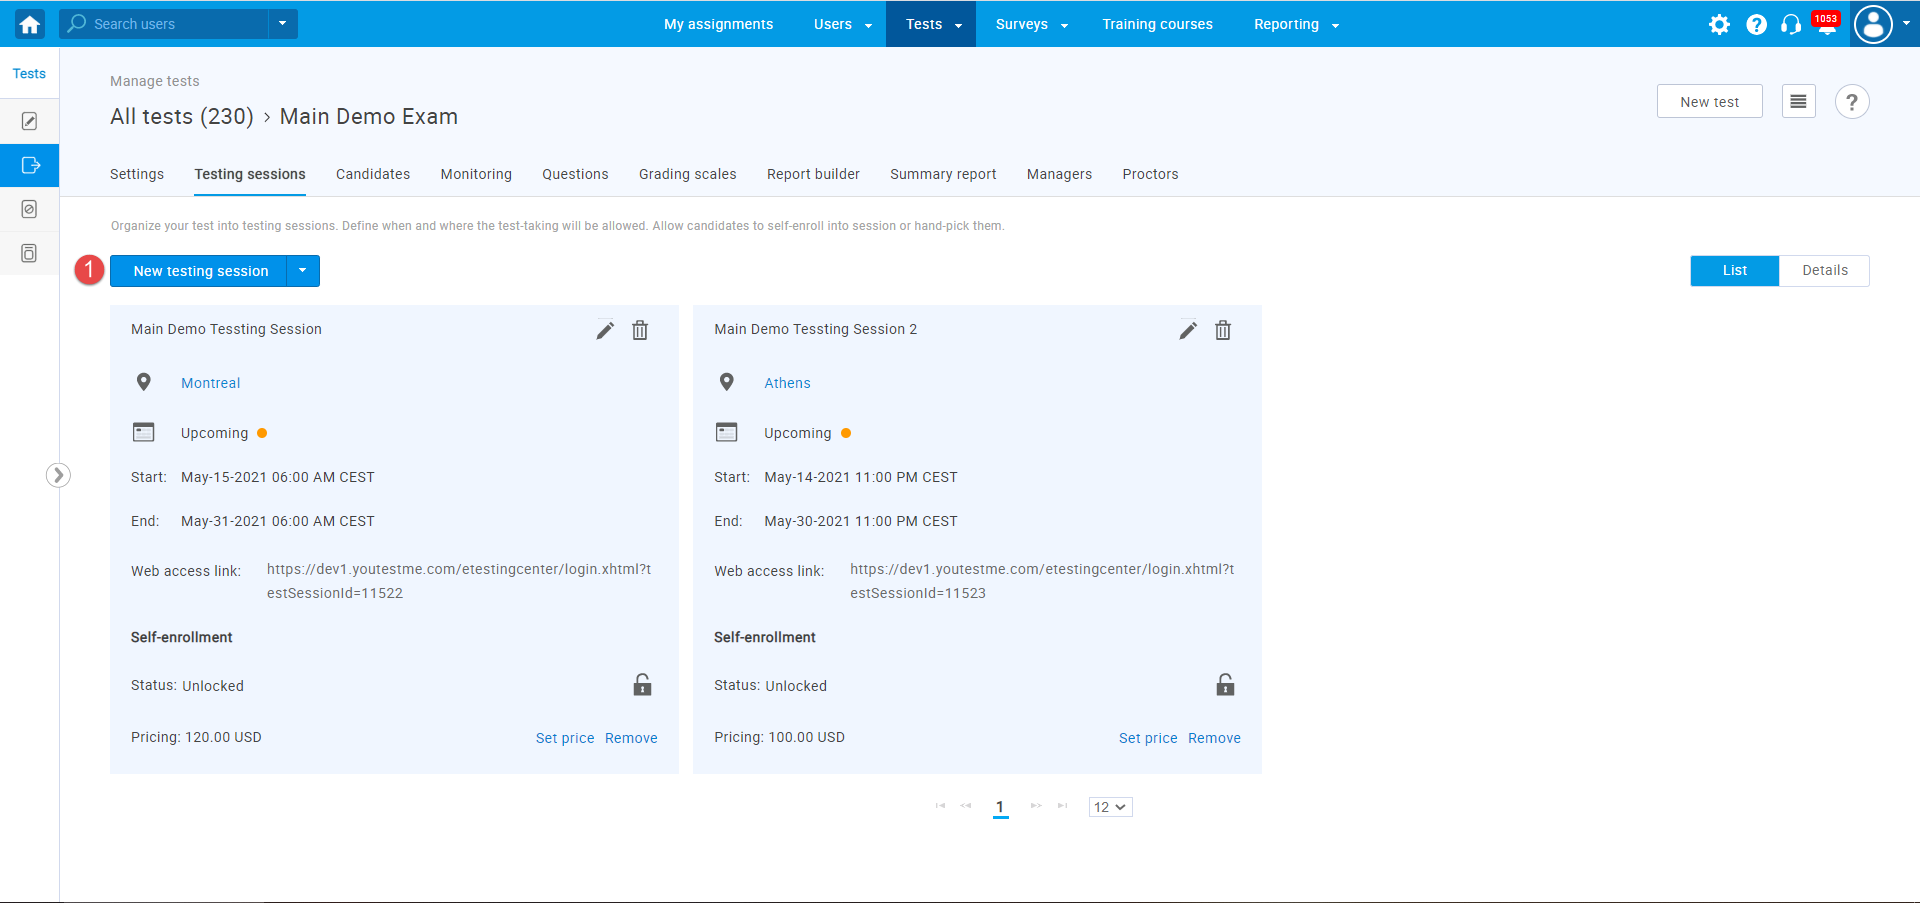
Organizing testing session
Once you create a test, you need to schedule a testing session. To do so:
- Click the “New testing session” button.
- Choose a location (optional).
- Enter a session name.
- Define start and end time for the session – when candidates will be able to take the test.
- Enable self-enrollment option – Users will be able to, book, purchase, or start the exam on their own, without the need for the manager to schedule them manually.
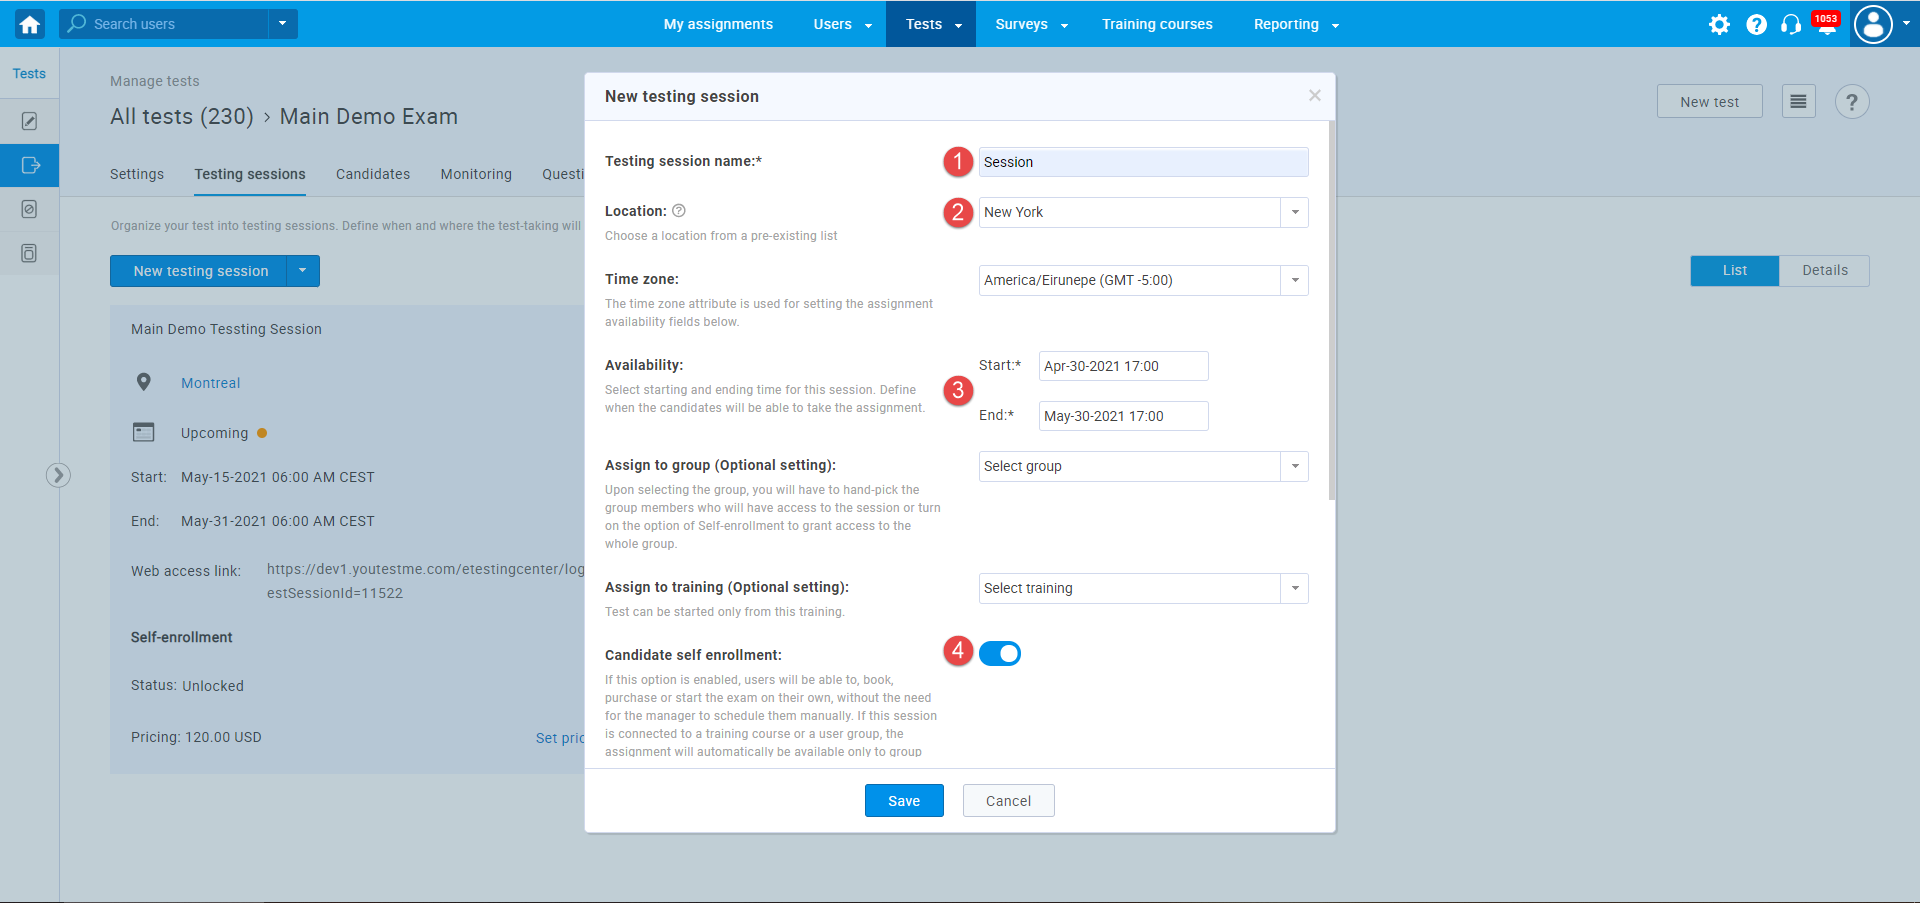
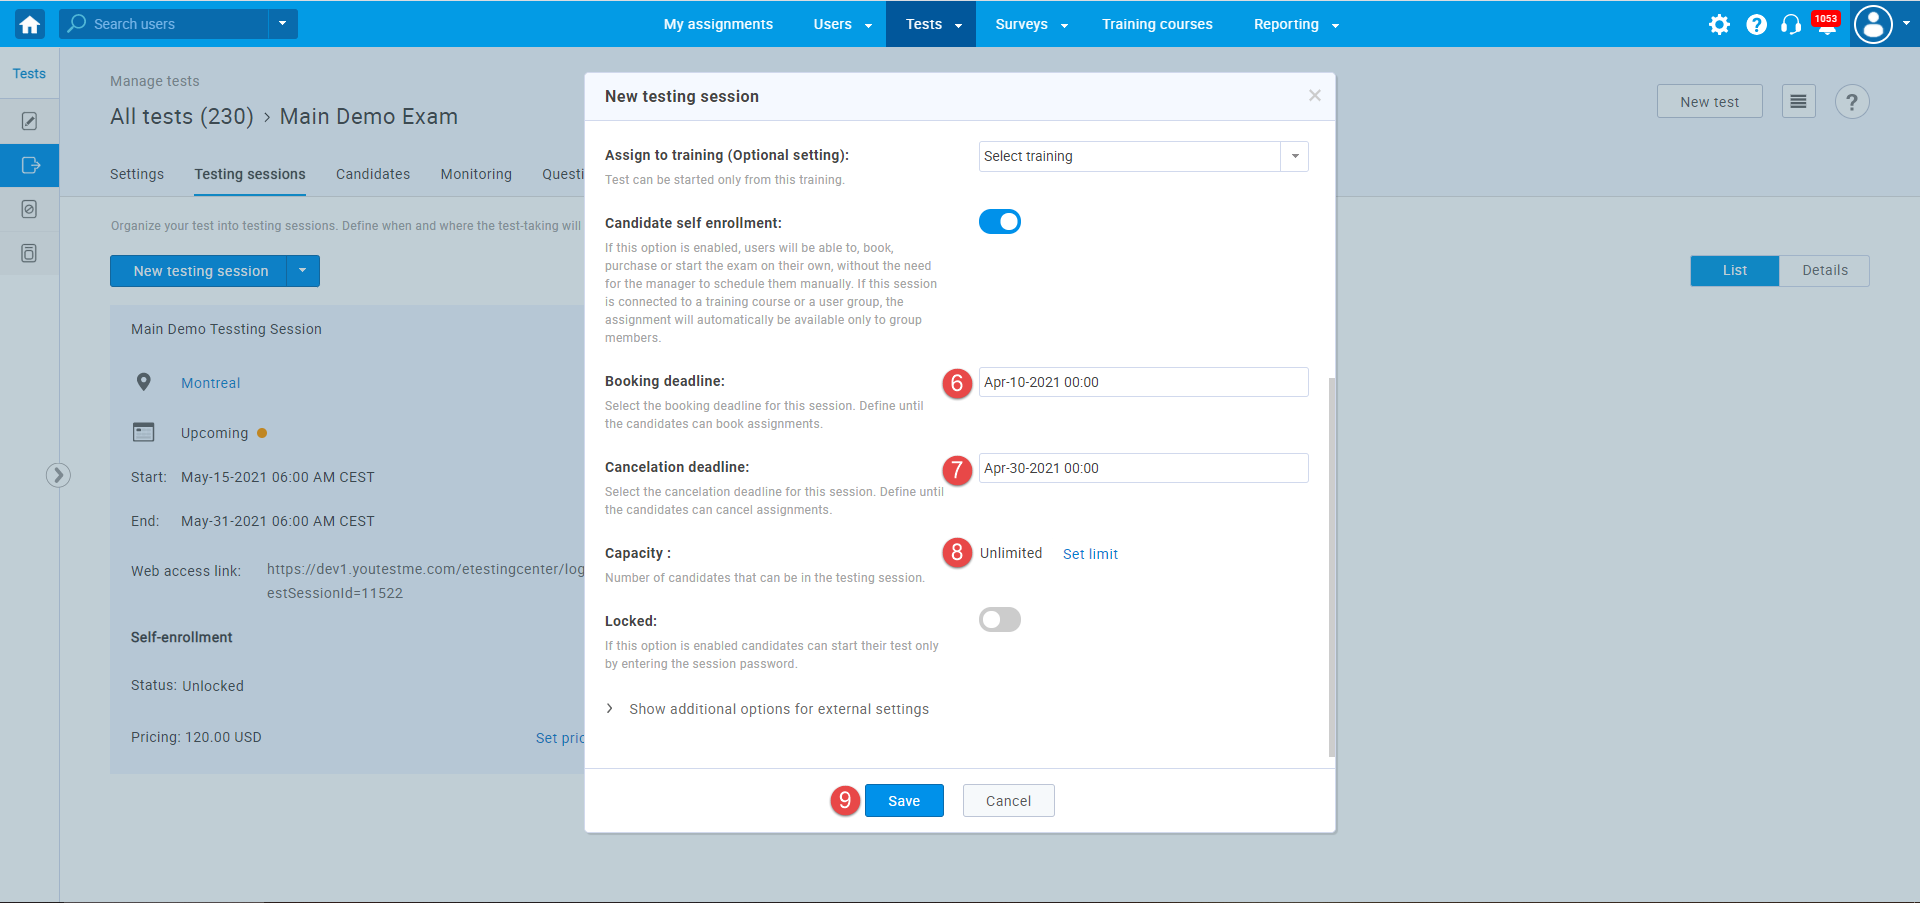
- Set booking deadline – Define until the candidates can book the test.
- Select cancelation deadline – Define until the candidates can cancel the test.
- Define a number of candidates that can be in the testing session. By default, this number is unlimited.
- Click the “Save” button to create a session.
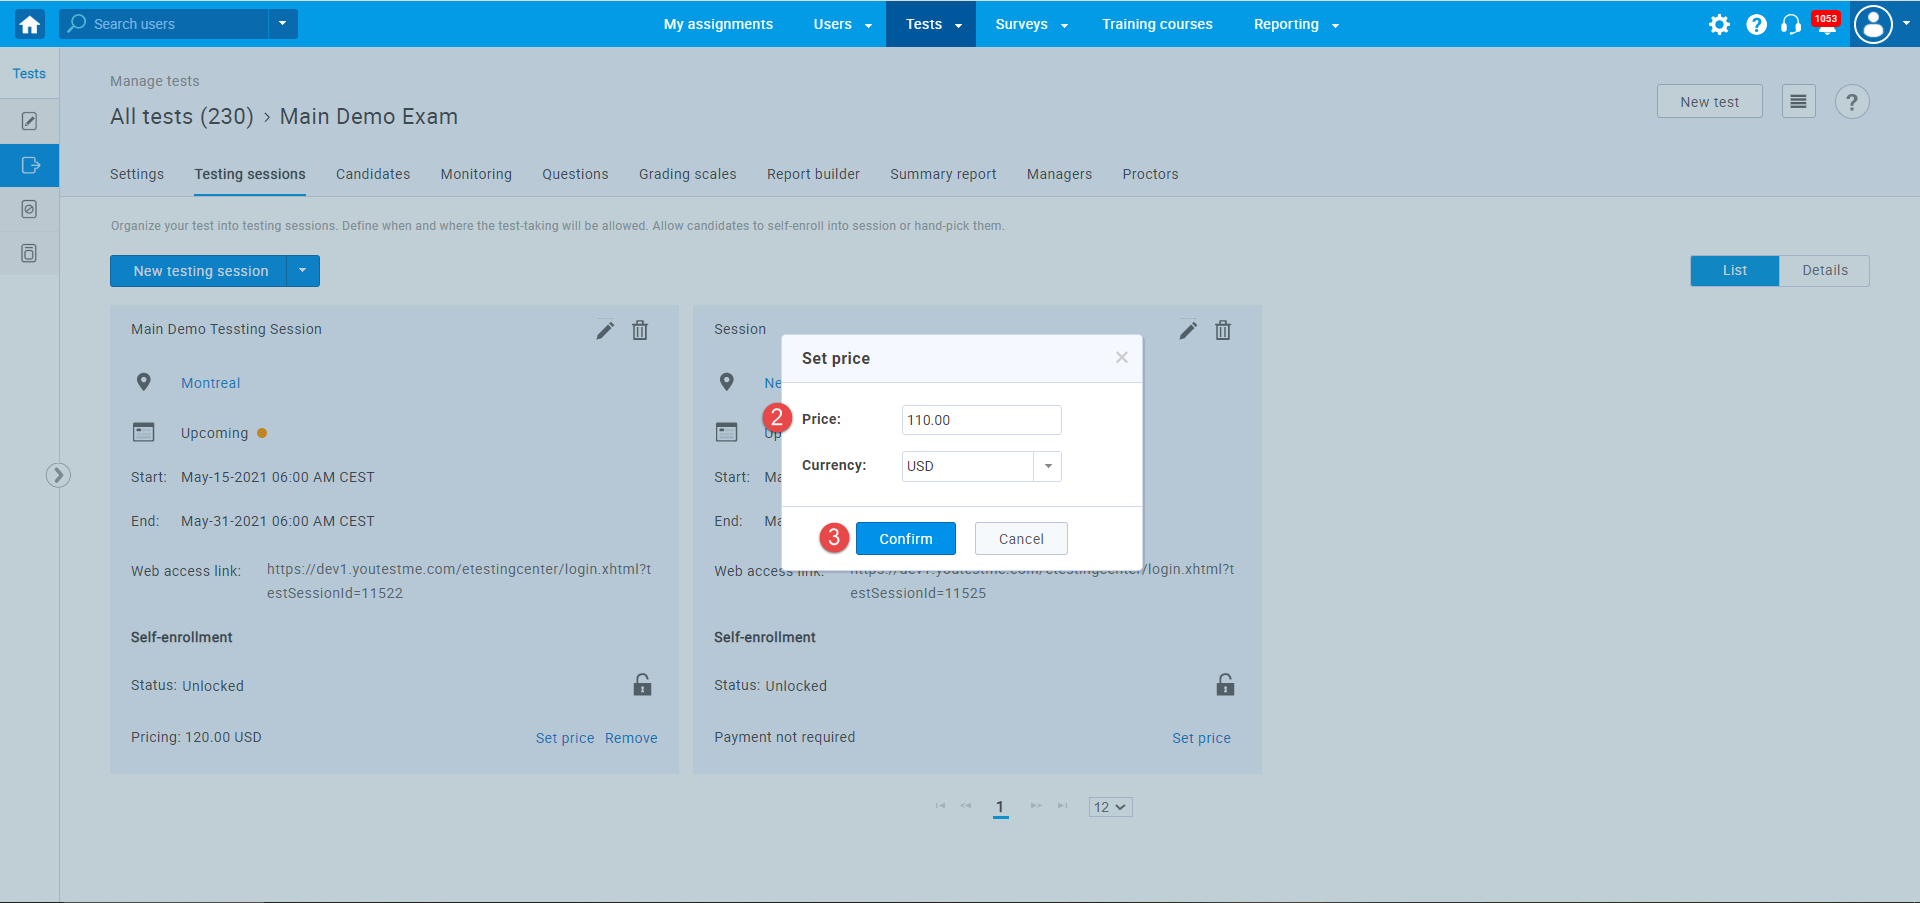
Once you create a testing session, you can define prices for each session by choosing the previously set prices or defining custom prices. To do so:
- Click the “Set price” option.
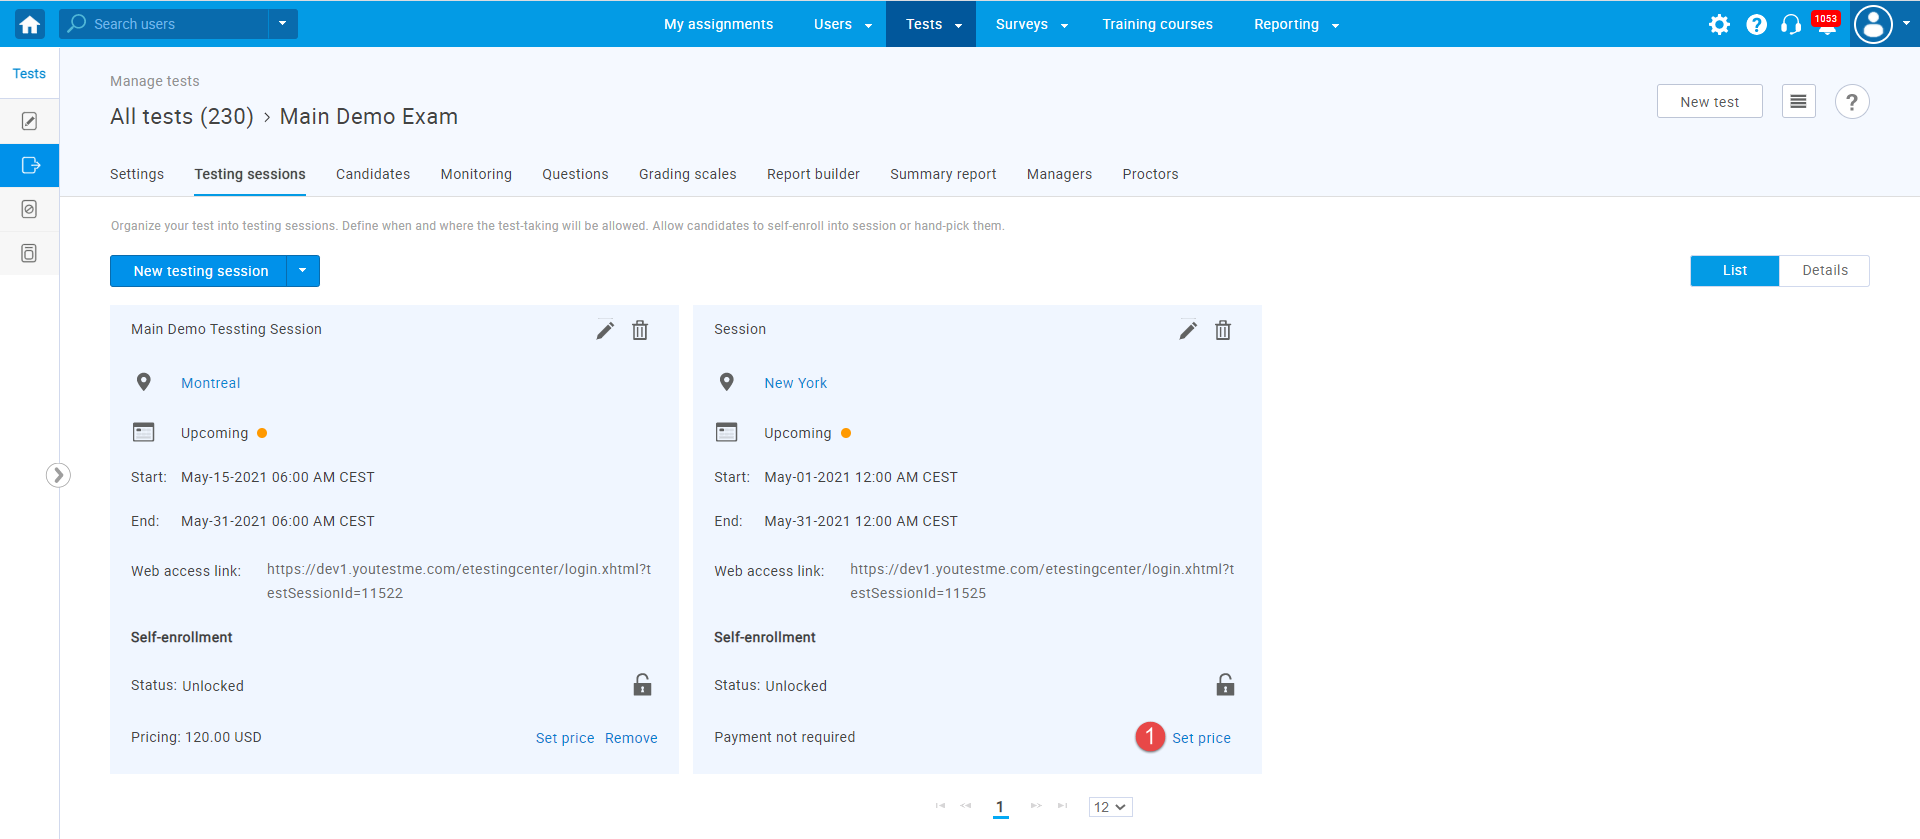
- Choose the previously defined price or enter the custom price (If the “Enable custom setting of session enrollment price” is enabled.)
For more useful instructional materials, please visit:


