This article explains how to configure a notification template for test results, i.e., customize the text of both email and in-app notification templates.
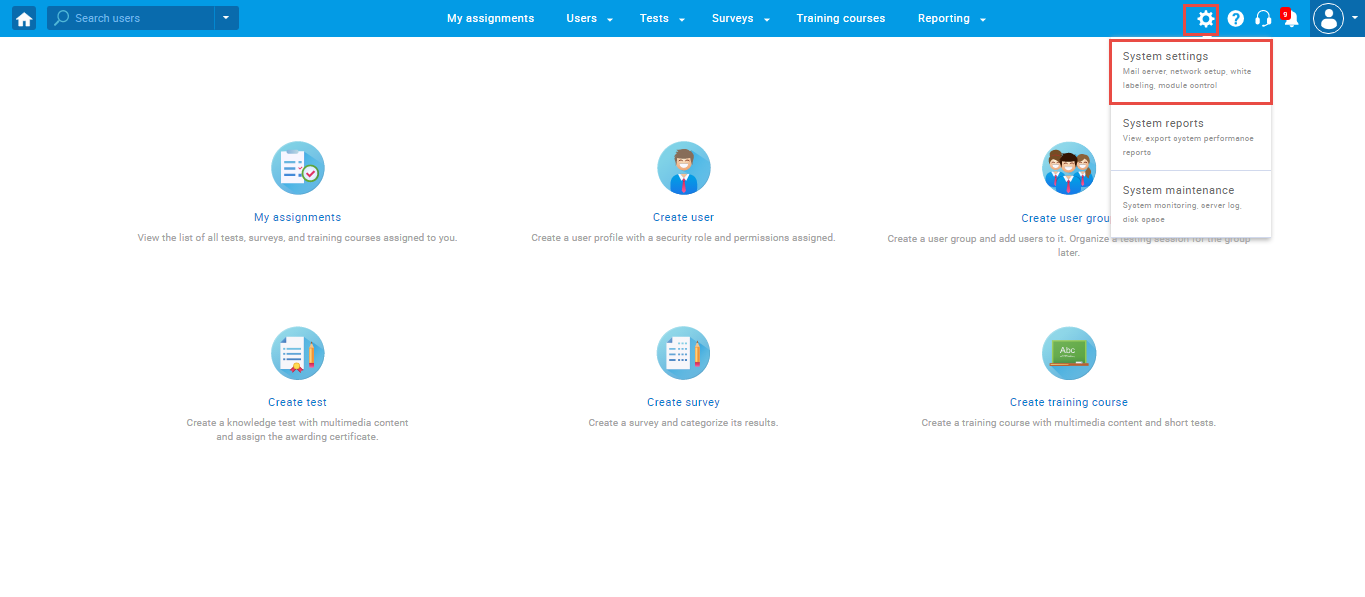
To configure the test results notification template, navigate to the “System” and then to “System settings”.
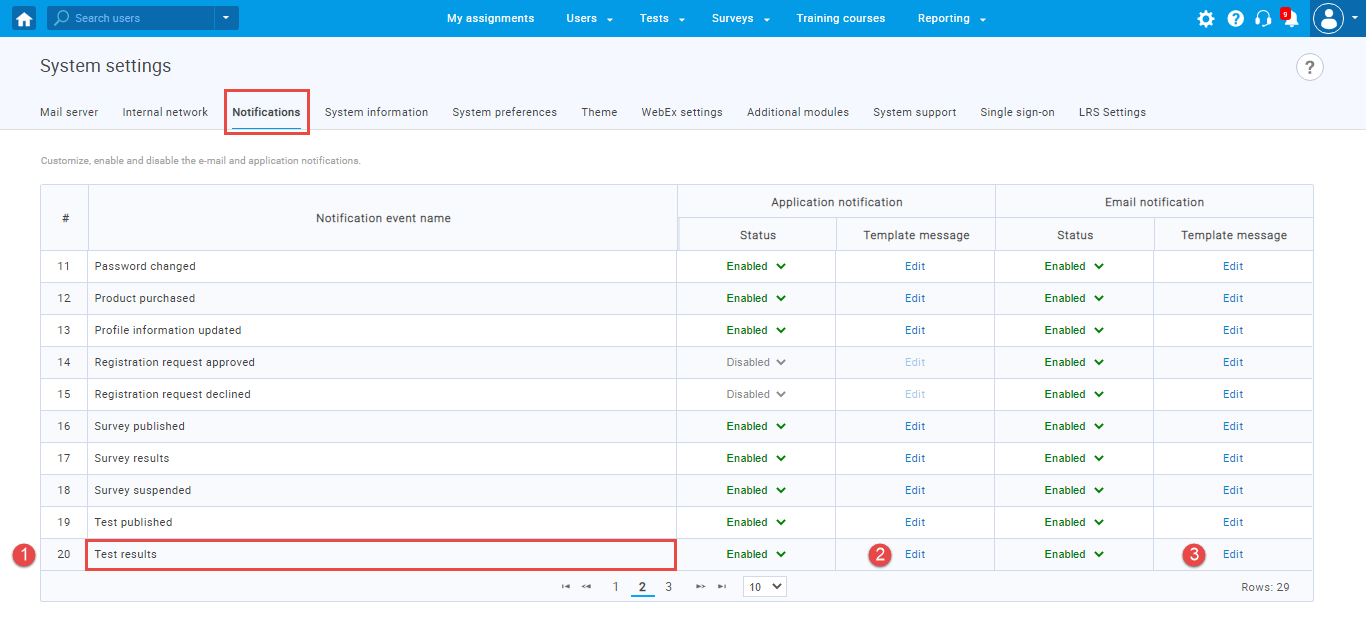
Then navigate to the “Notifications” tab, and:
- Find test results notification.
- Click the “Edit” application notification template.
- Click the “Edit” email notification template.
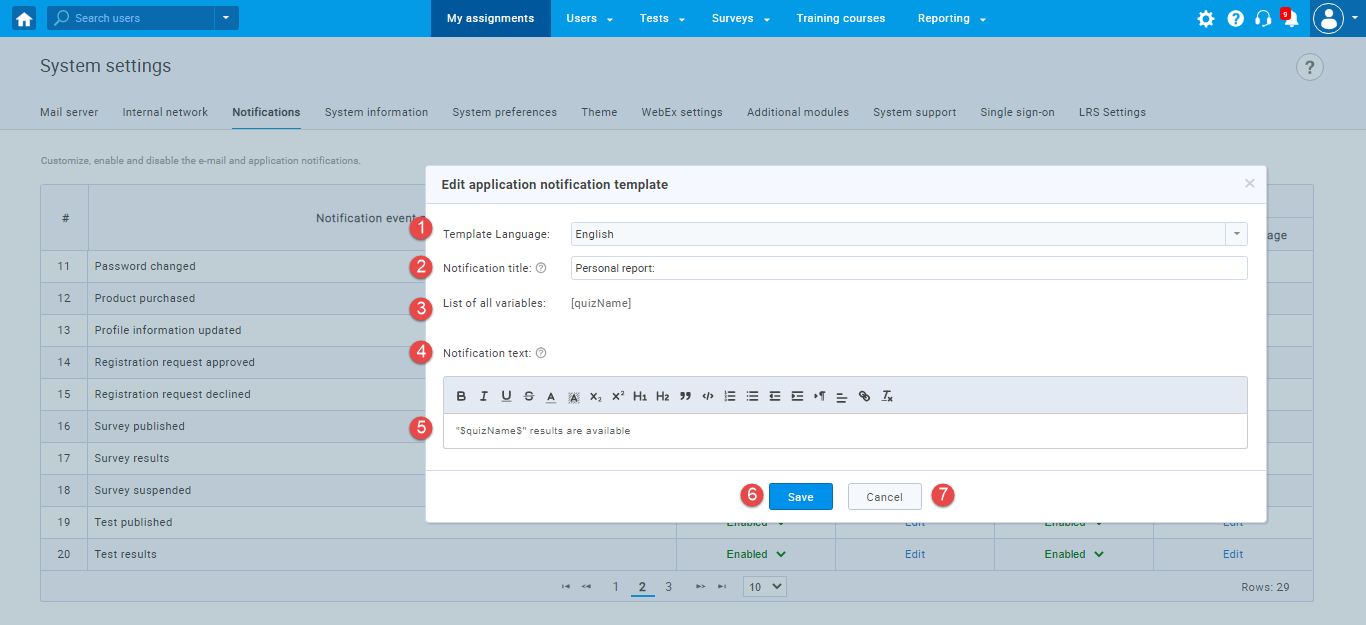
Editing application notification template
In the “Edit application notification template” pop-up window, you can configure test results application notification. To do so:
- Select the template language from the drop-down list.
- Enter the Notification title – The text entered in this field will be displayed as the notification title in the notification panel.
- View the list of all variables – The list of all variables is used for configuring the notification text below.
- Enter the notification text – You can modify the notification text and apply styles. The variable ($quizName$) relates to the test name.
- Click the “Save” button to save the changes.
- Click the “Cancel” button if you want to discard changes.
Editing email template
In the “Edit email template” pop-up window, you can edit the email notification template. To do so:
- Select the template language from the drop-down list.
- Enter mail subject name – Modify the email template name. This name will be used as a subject in the system emails.
- View the list of all variables – the variables used in the “Template preview”.
- Edit the “Template preview” – modify the existing email template, apply styles, and formating. The variables will be replaced with the specific value ($from$ – the sender of the email (YouTestMe), $to$ – the user that receives the email, and $quizName$ – the test name).
- Click the “Save” button to save the changes.
- Click the “Cancel” button if you want to discard changes.

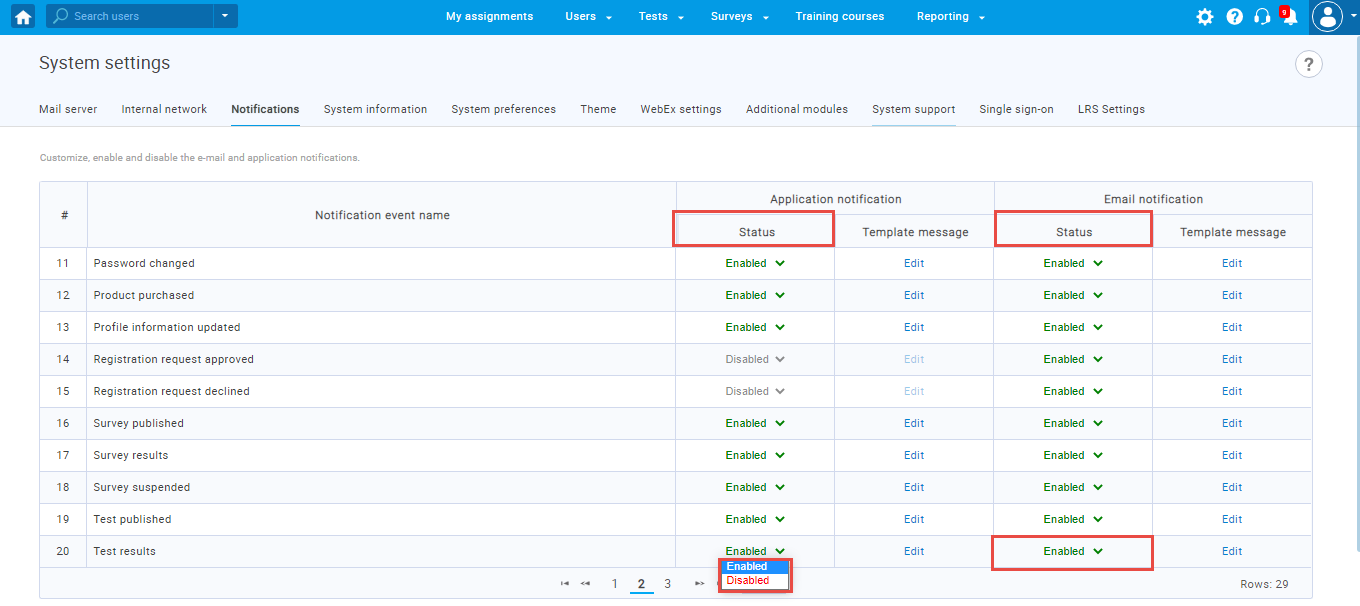
Enabling notifications sending
To enable automated sending of notification:
- Navigate to the “Status” column.
- Select the status from the drop-down list (“Enabled” or “Disabled”).
For video instructions on how to configure notifications, you may watch this video.
For more related instructional materials, please visit:


