This article explains how to create hundreds of user accounts at once by importing user data with an Excel template.
Uploading users from an Excel file
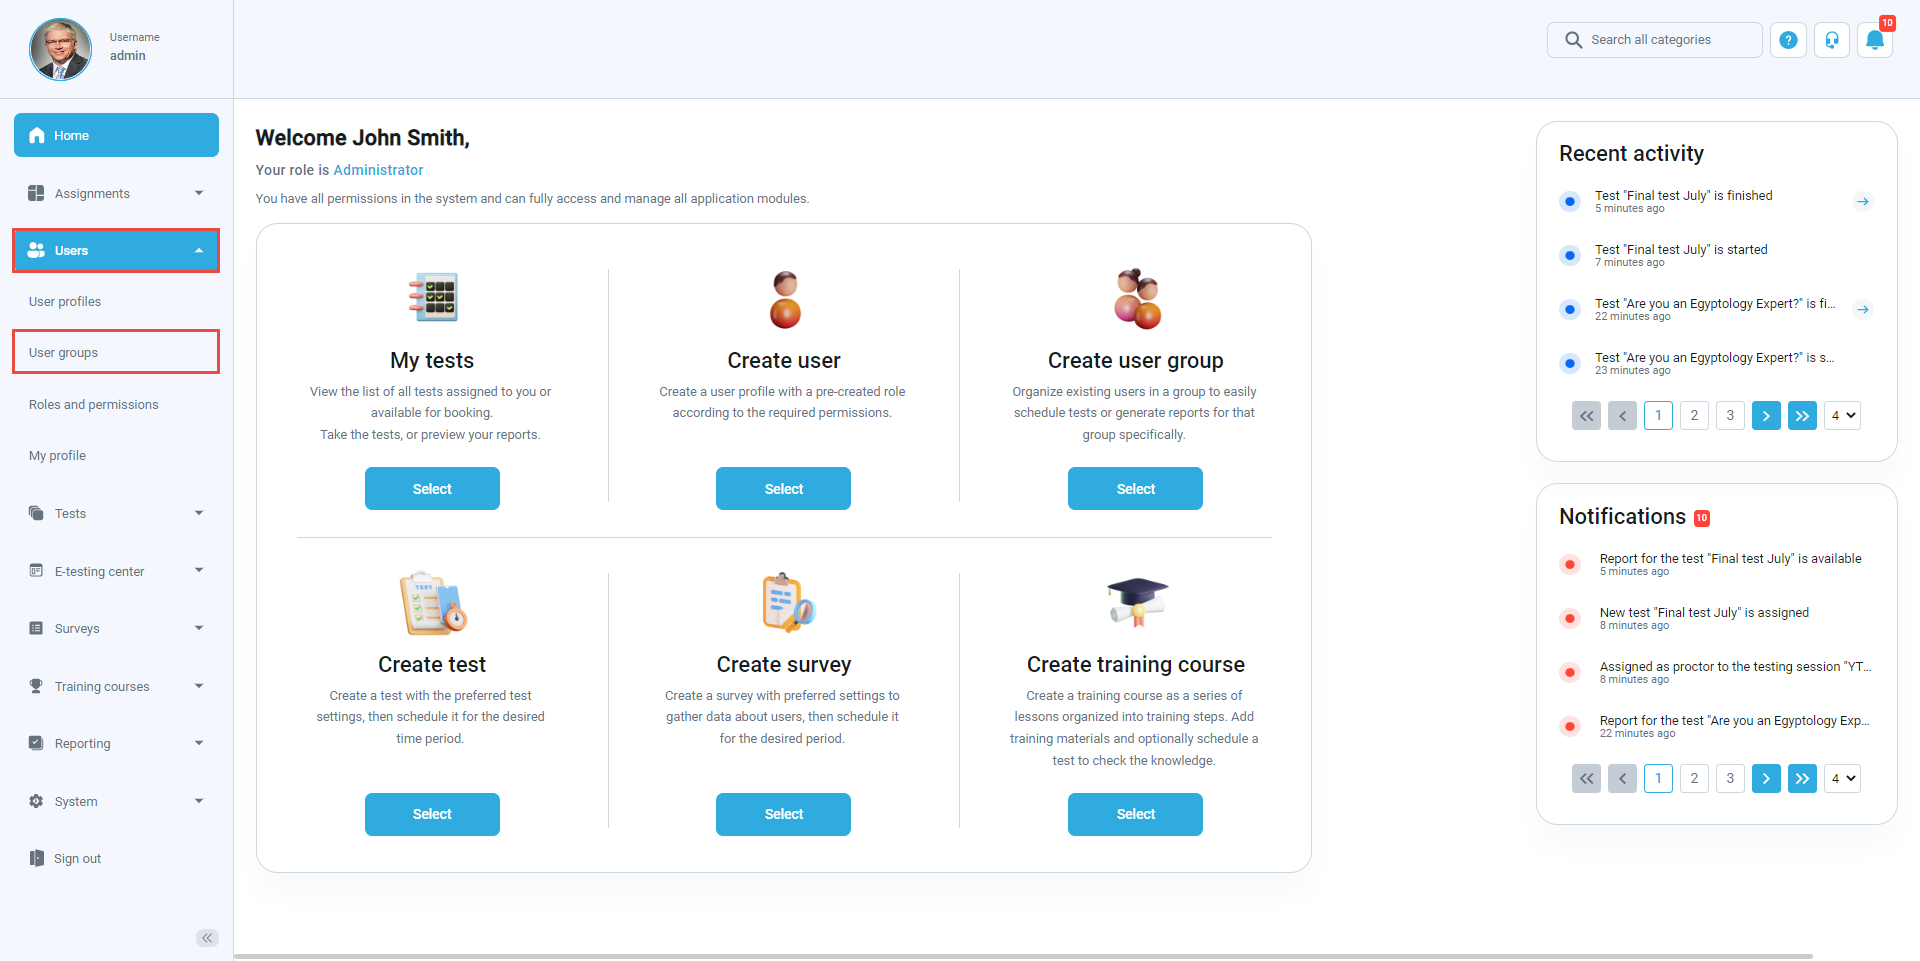
To upload users, hover over the “Users” tab in the main menu and click on “User profiles”.
Then:
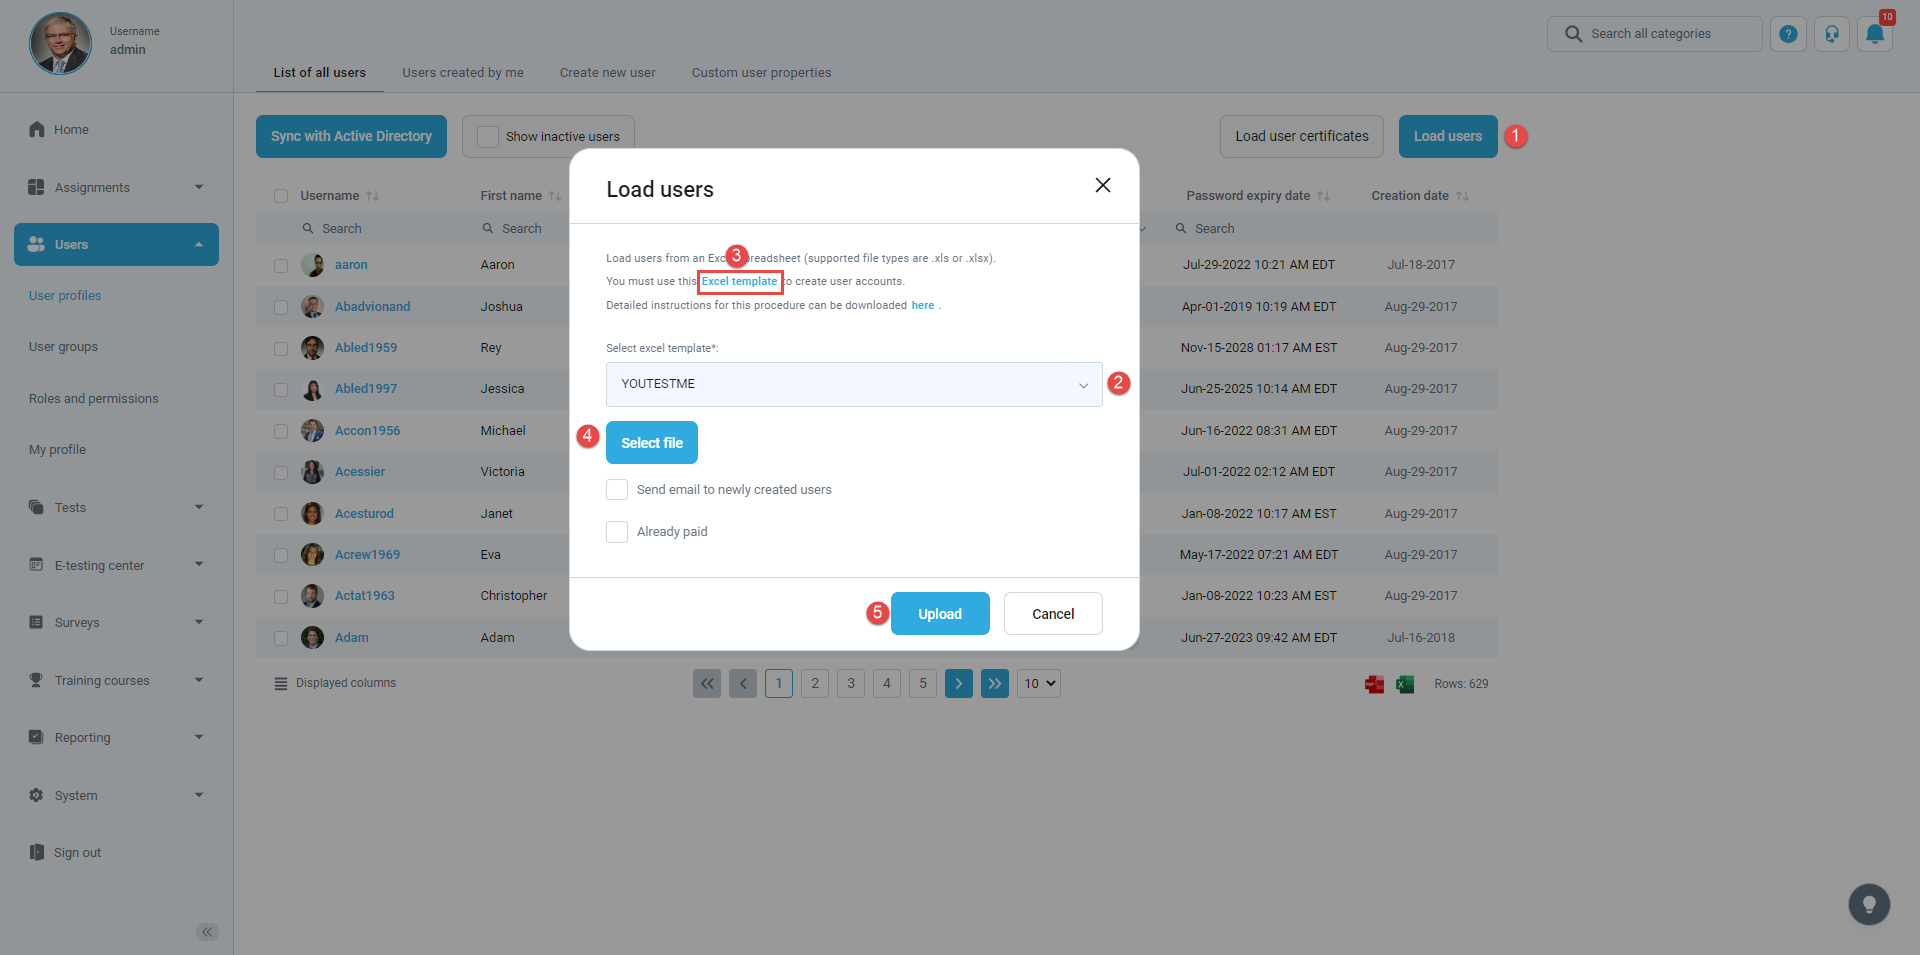
- Click on the “Load users” button.
- In the pop-up window, select an Excel template. You can choose between:
- “YOUTESTME” template – is a default and recommended option for uploading users into YouTestMe GetCertified. This template contains all the fields for entering users’ accounts and personal information, and it is fully compatible with GetCertified.
- “AGILE” template – if your institution uses the Agile system, you need to export your users from the system and import them into GetCertified.
- Click on the text “Excel template” to download a predefined Excel template. To import the data successfully, it is necessary to fill in the Excel template according to set rules. Please refer to the heading below to learn more about the proper way of filling the template.
- When you fill in the template, add a file with user data by clicking the “Select File “button.
- Click the “Upload “button to load users into the YouTestMe GetCertified.
Filling in the Excel template
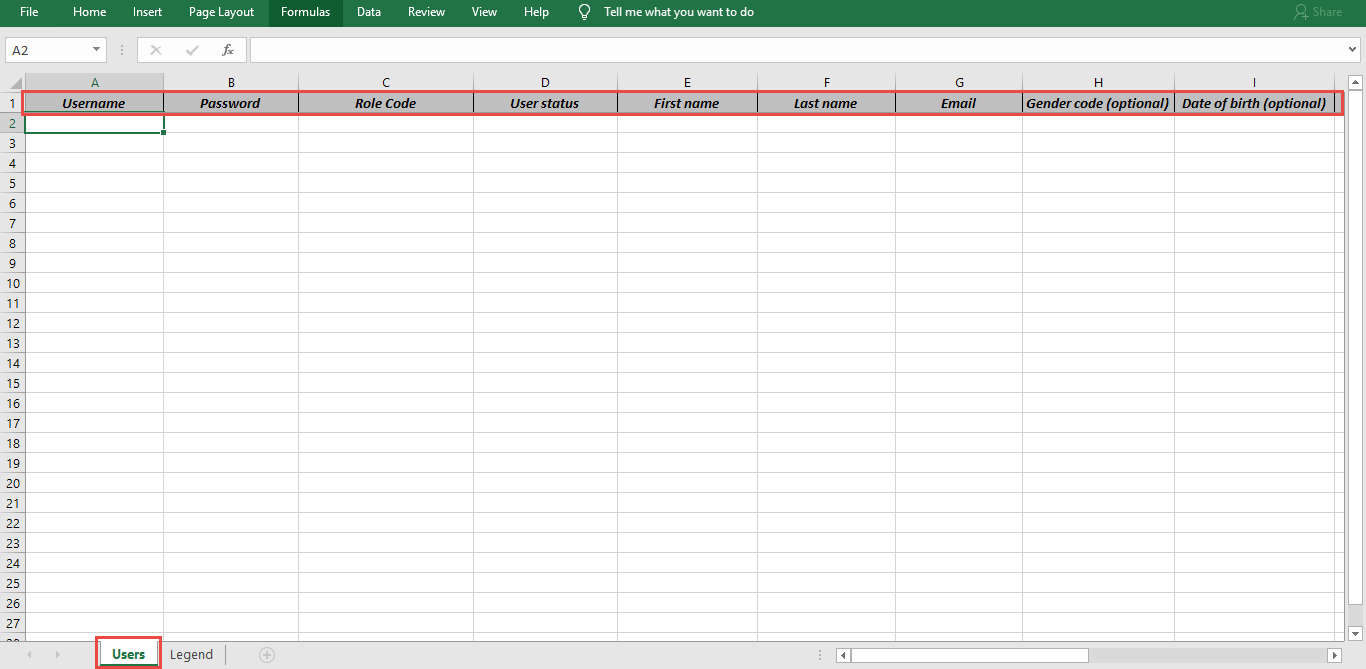
The Excel template consists of a sheet containing fields where should be entered users’ personal and account information.
The first seven columns are mandatory to fill: username, password, codes denoting user’s role and status, first and last name, and an email address.
Gender, date of birth, affiliation within the organization, groups, country, and city are optional fields for bulk import.
Those fields can be requested to be filled by users themselves.
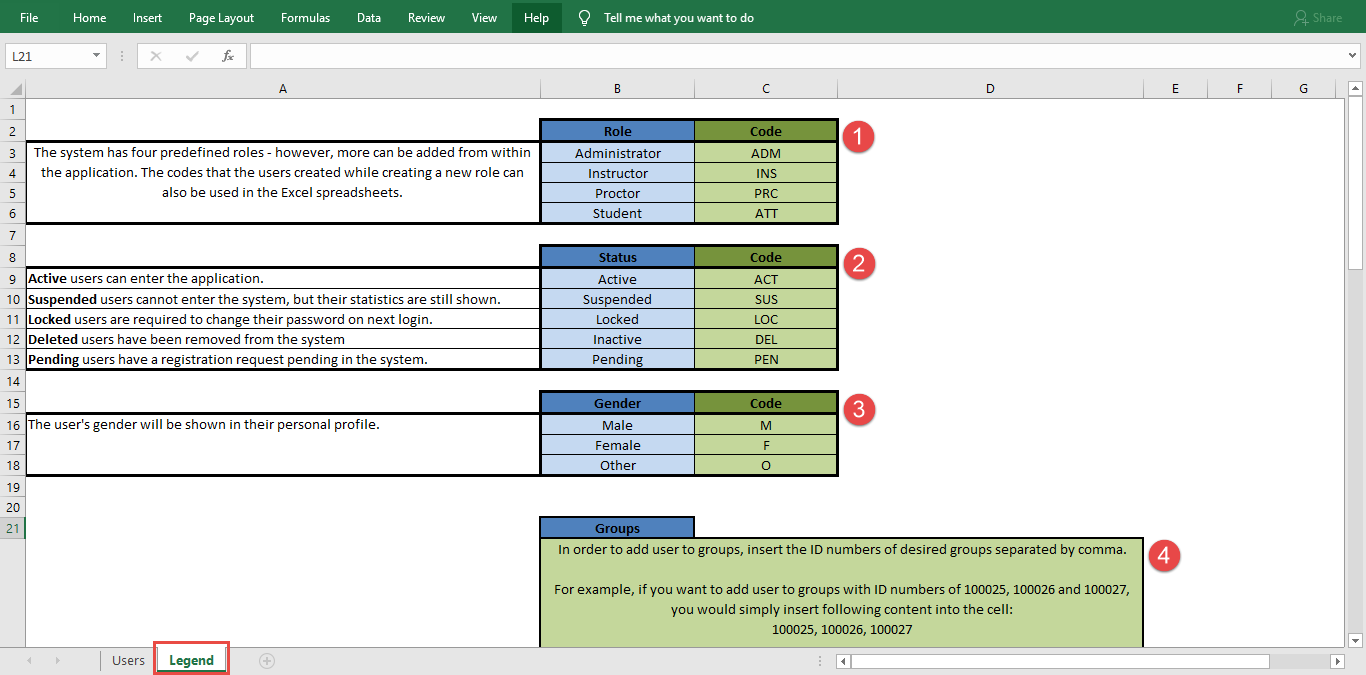
The second sheet contains Legend. It provides explanations and instructions for filling the fields that require predefined codes, specifically:
- User roles in the system – There are four default roles in the systems: administrator, student, instructor, and proctor. However, new, custom roles can be created, and the system would generate codes upon.
- Status – The status of a user account can be active, suspended, locked, inactive, or pending. As shown, explanations and codes can be found in the Legend.
- Gender – Insert a code denoting the user’s gender.
- User groups – Each user group in the system has its ID. To add a user to the user group when uploading them as an Excel file, enter a user group ID found in the Information tab of the corresponding group.
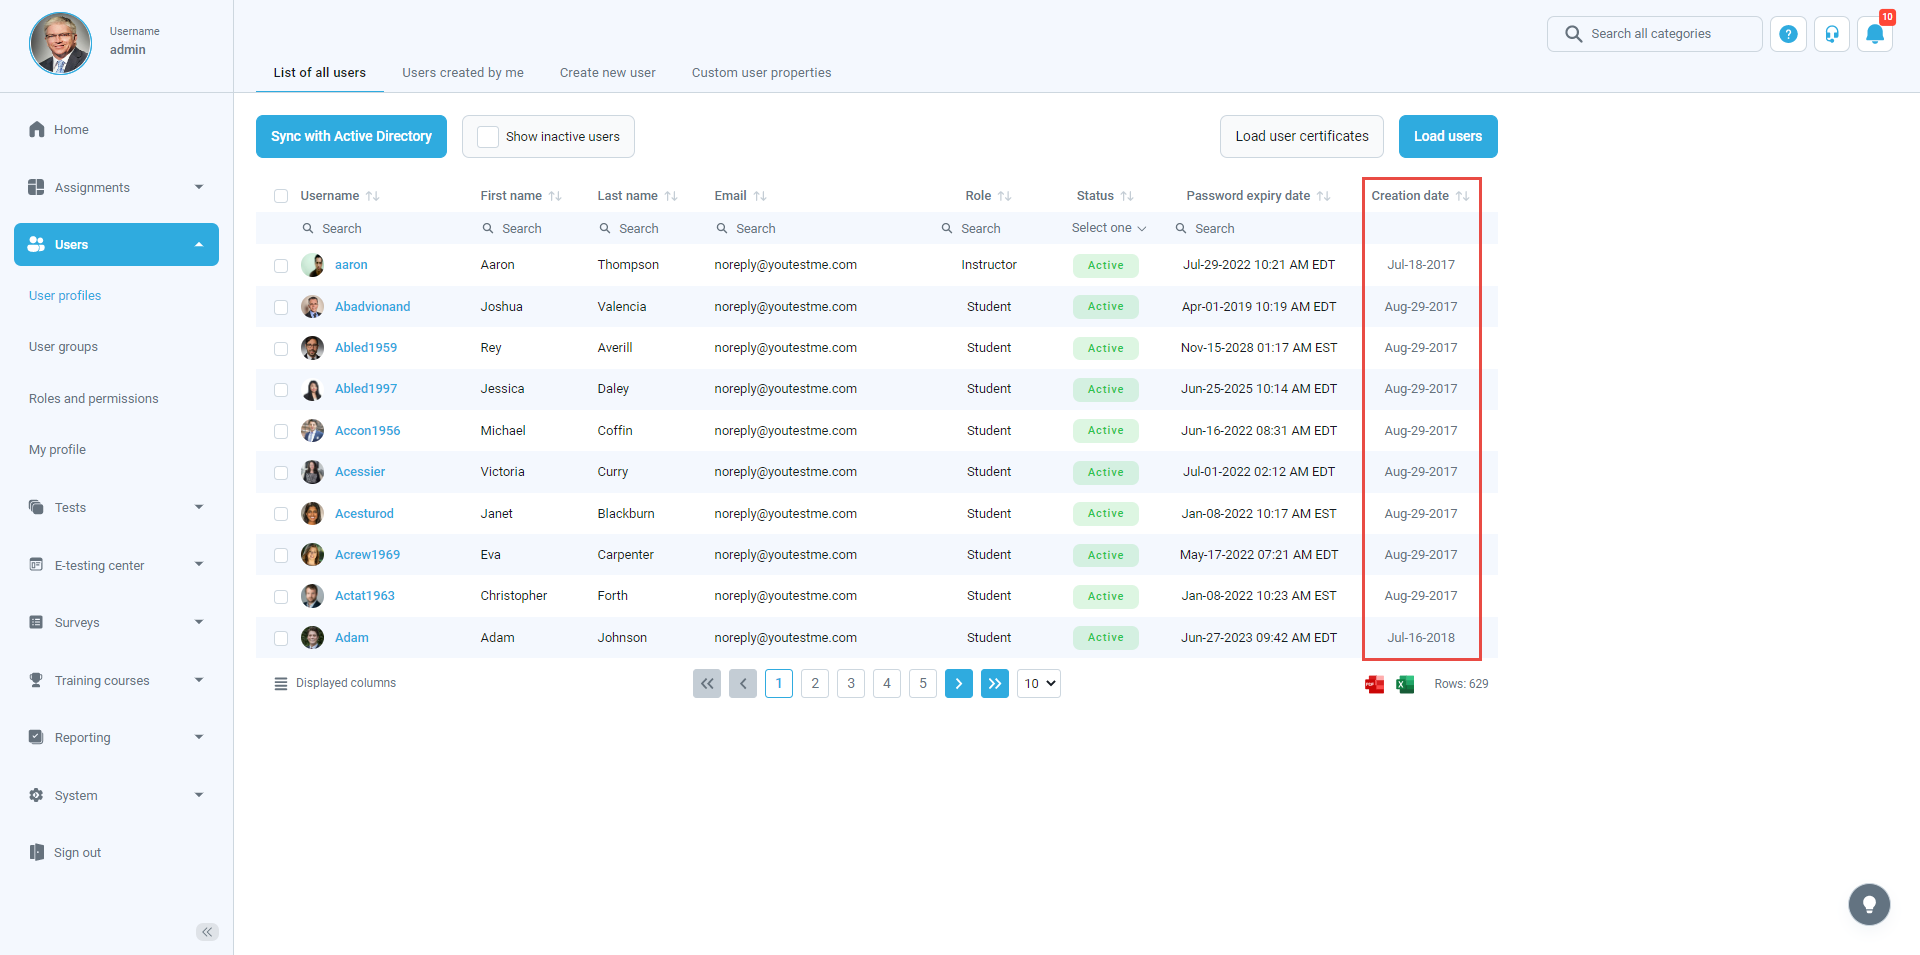
When the Excel file is uploaded, you can see imported users by filtering the users by Creation date in descending order.