This article shows steps on how to set up the OpenID integration that allows users to log in with Microsoft Azure AD.
Before creating this configuration, please:
- Make sure that you have an account created for Microsoft Azure AD (you can request a global admin role) and login https://login.microsoftonline.com/
- Go to the https://aad.portal.azure.com/
Create the new OpenID configuration
When you log in to the YTM application, navigate to the:
- “System” page.
- Choose the “Integrations” option.

When the page opens, go to the:
- “OpenID settings” tab.
- Click on the “Add new OpenID configuration” button to create a new configuration.

The pop-up window will appear.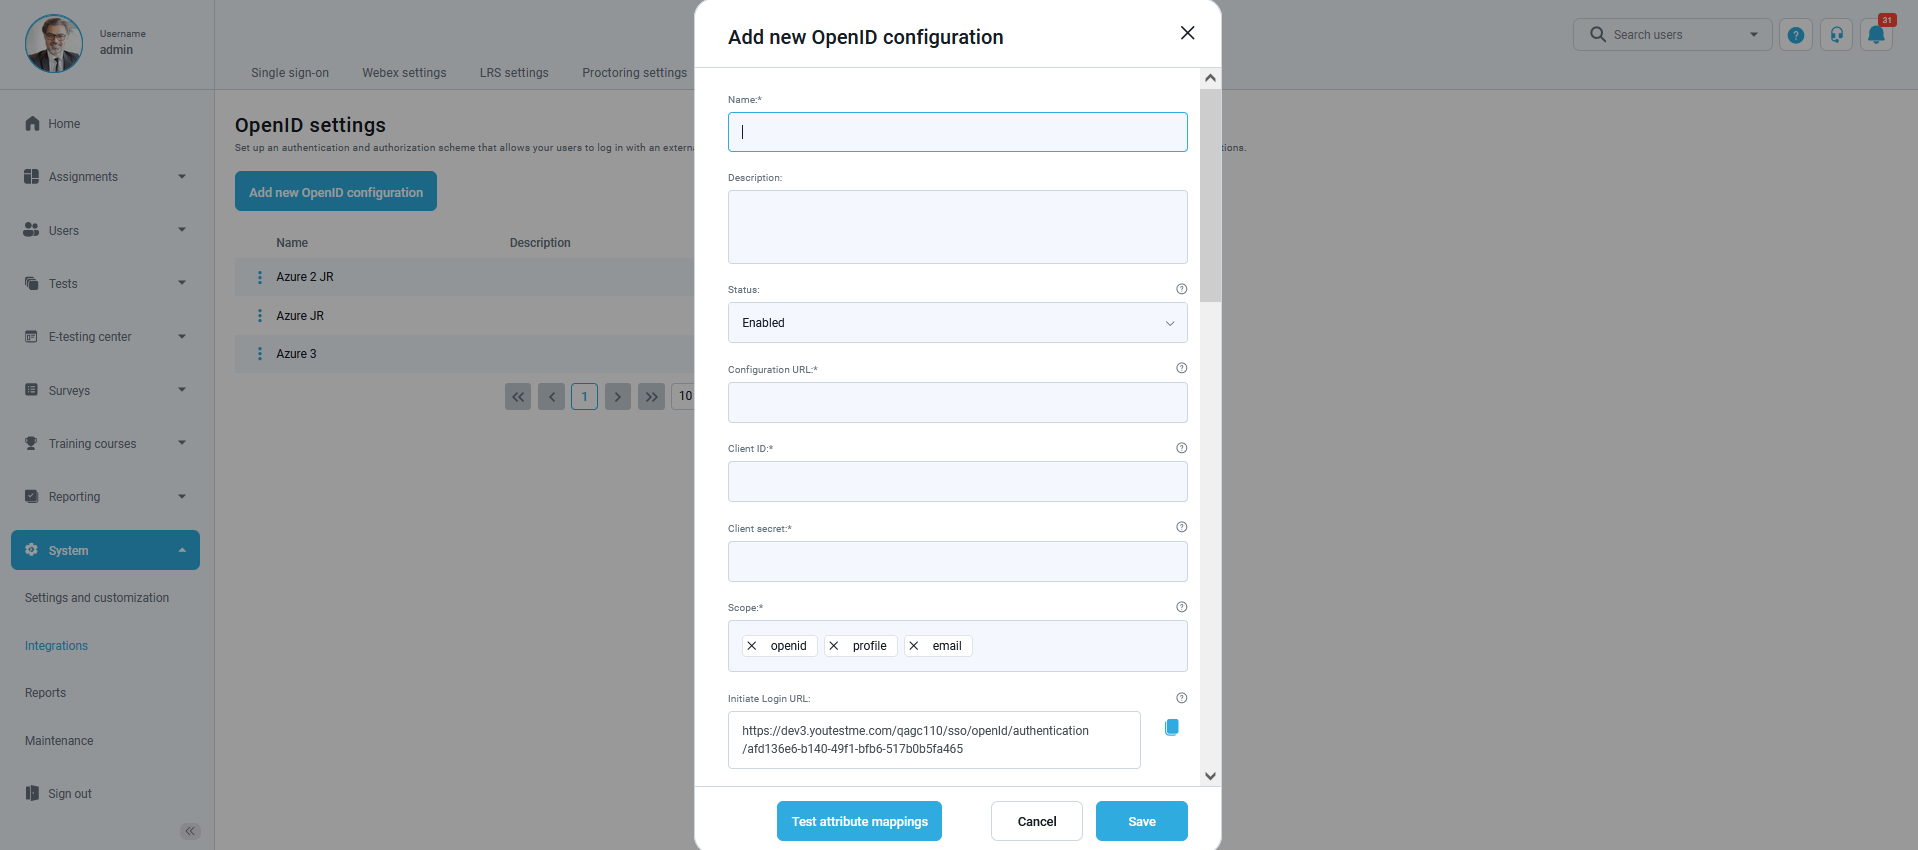
How to fill in the mandatory fields
-
- “Name” – Enter the name you choose for the configuration.
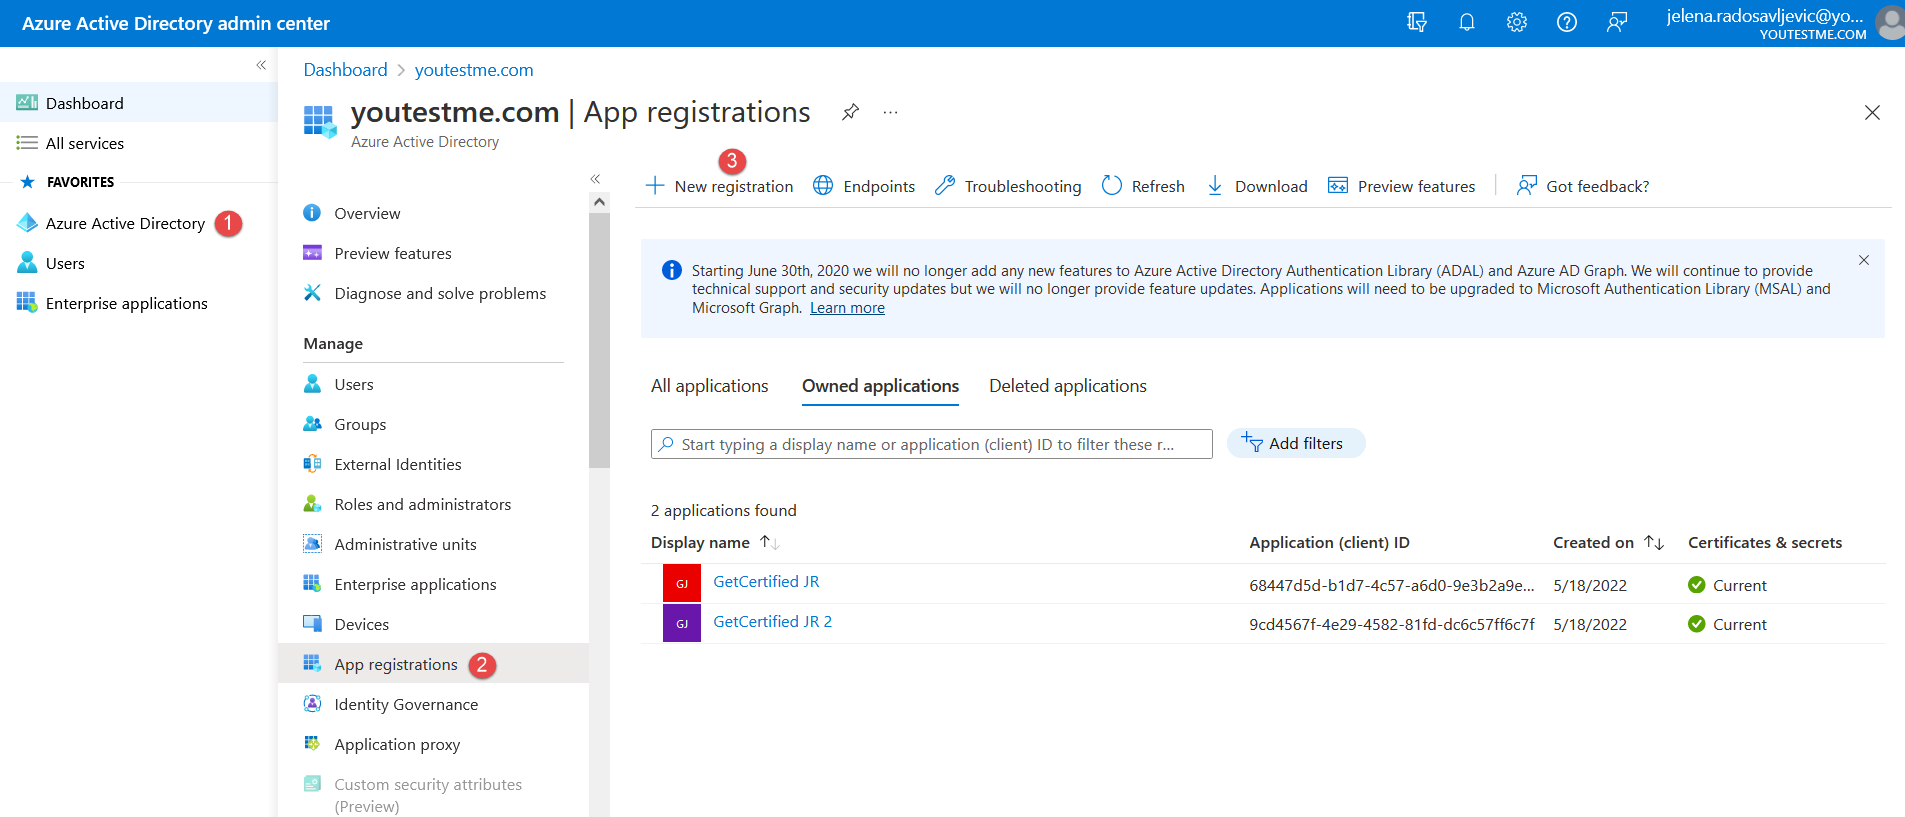
- “Configuration URL” – Go to the https://aad.portal.azure.com/ and create the new registration following the steps from the picture below:
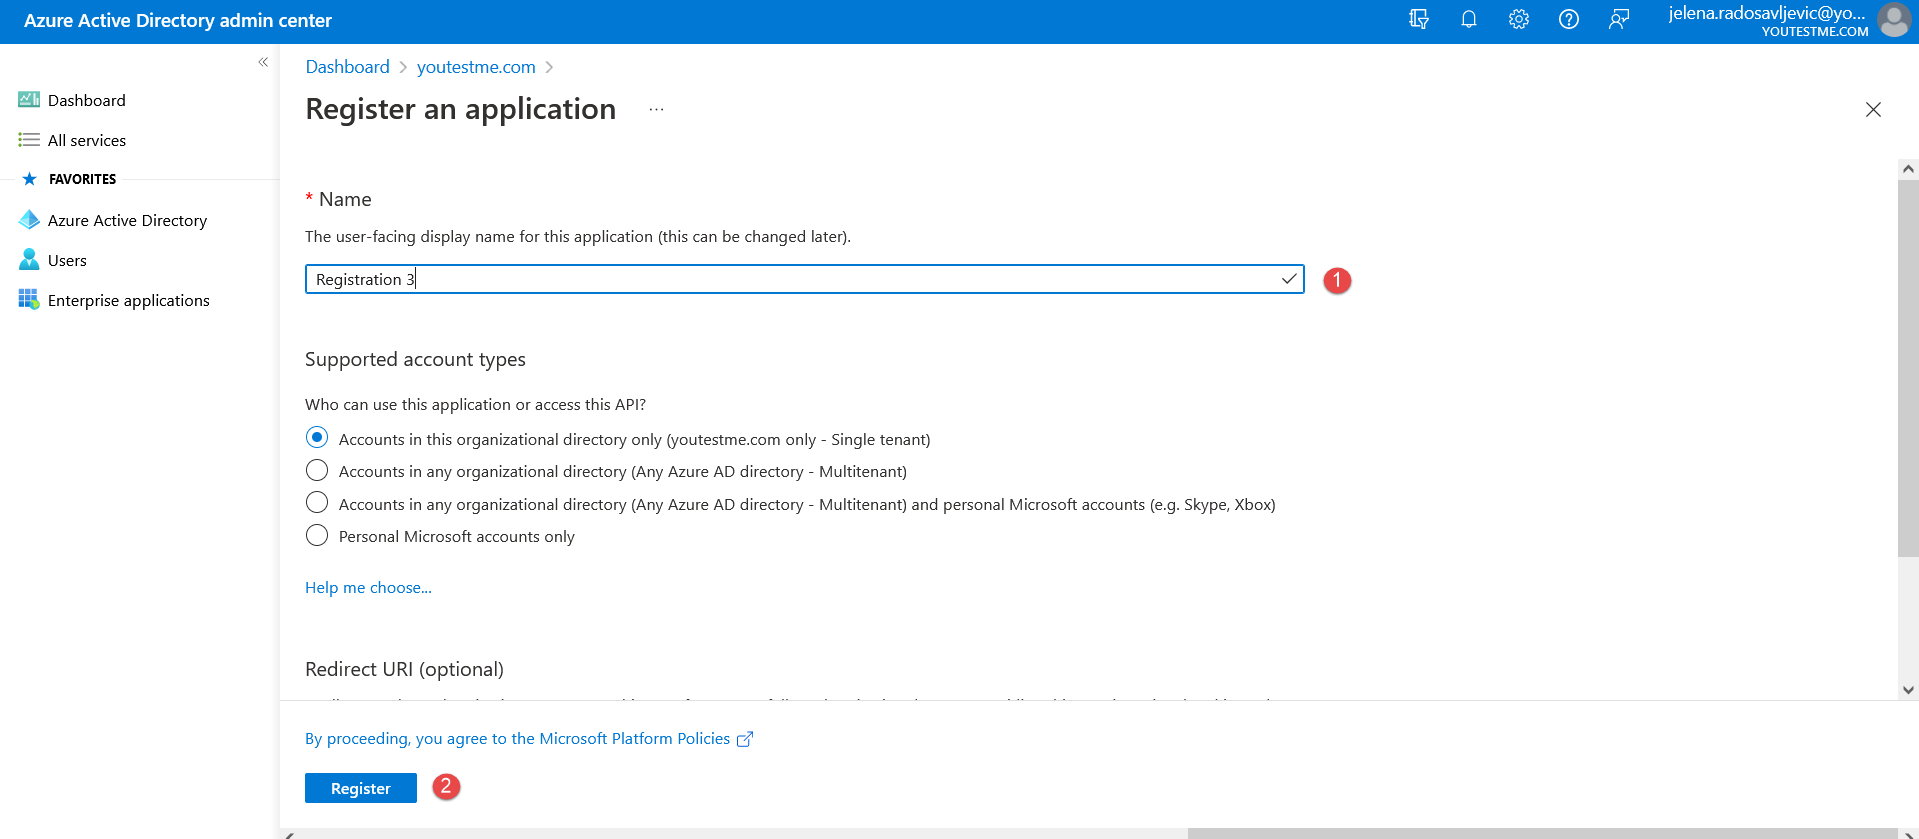
 Give the name to the new registration and confirm it with the “Register” button below (as in the picture below):
  Now when the registration is created, navigate to the “Endpoints” to copy the “OpenID Connect metadata document” (as in the picture below):
 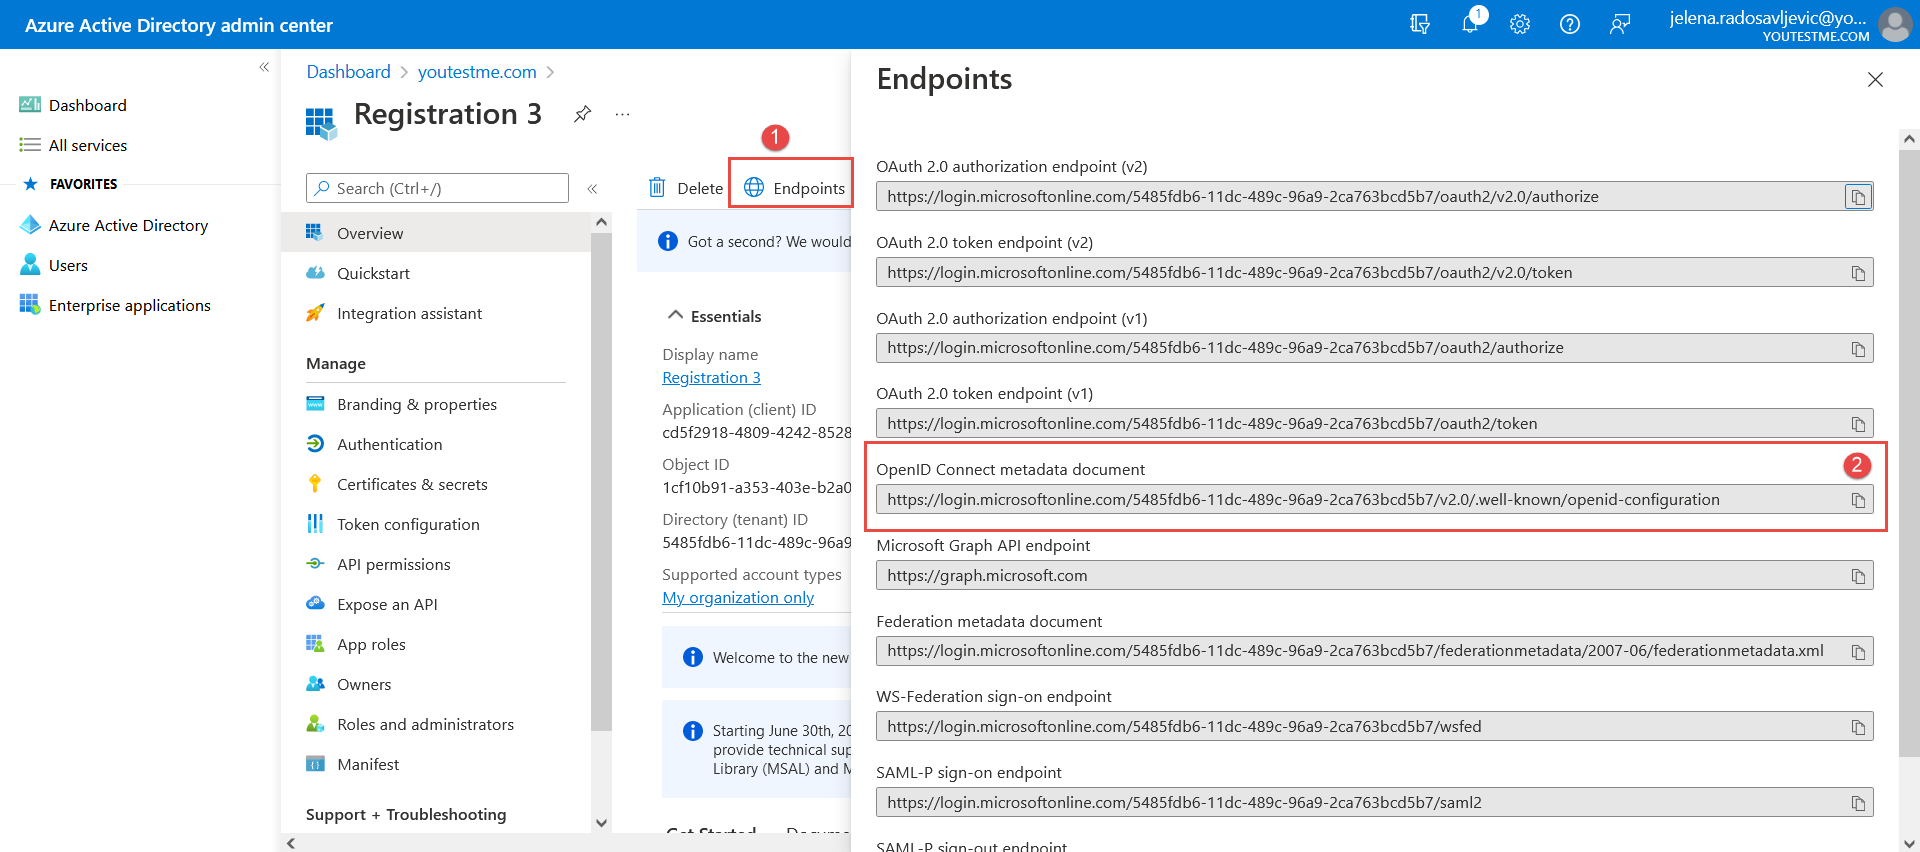 Paste the URL into the “Configuration URL” field in the YTM application.
 - “Client ID” – Copy the data from the “Application (client) ID” field (as in the picture below):
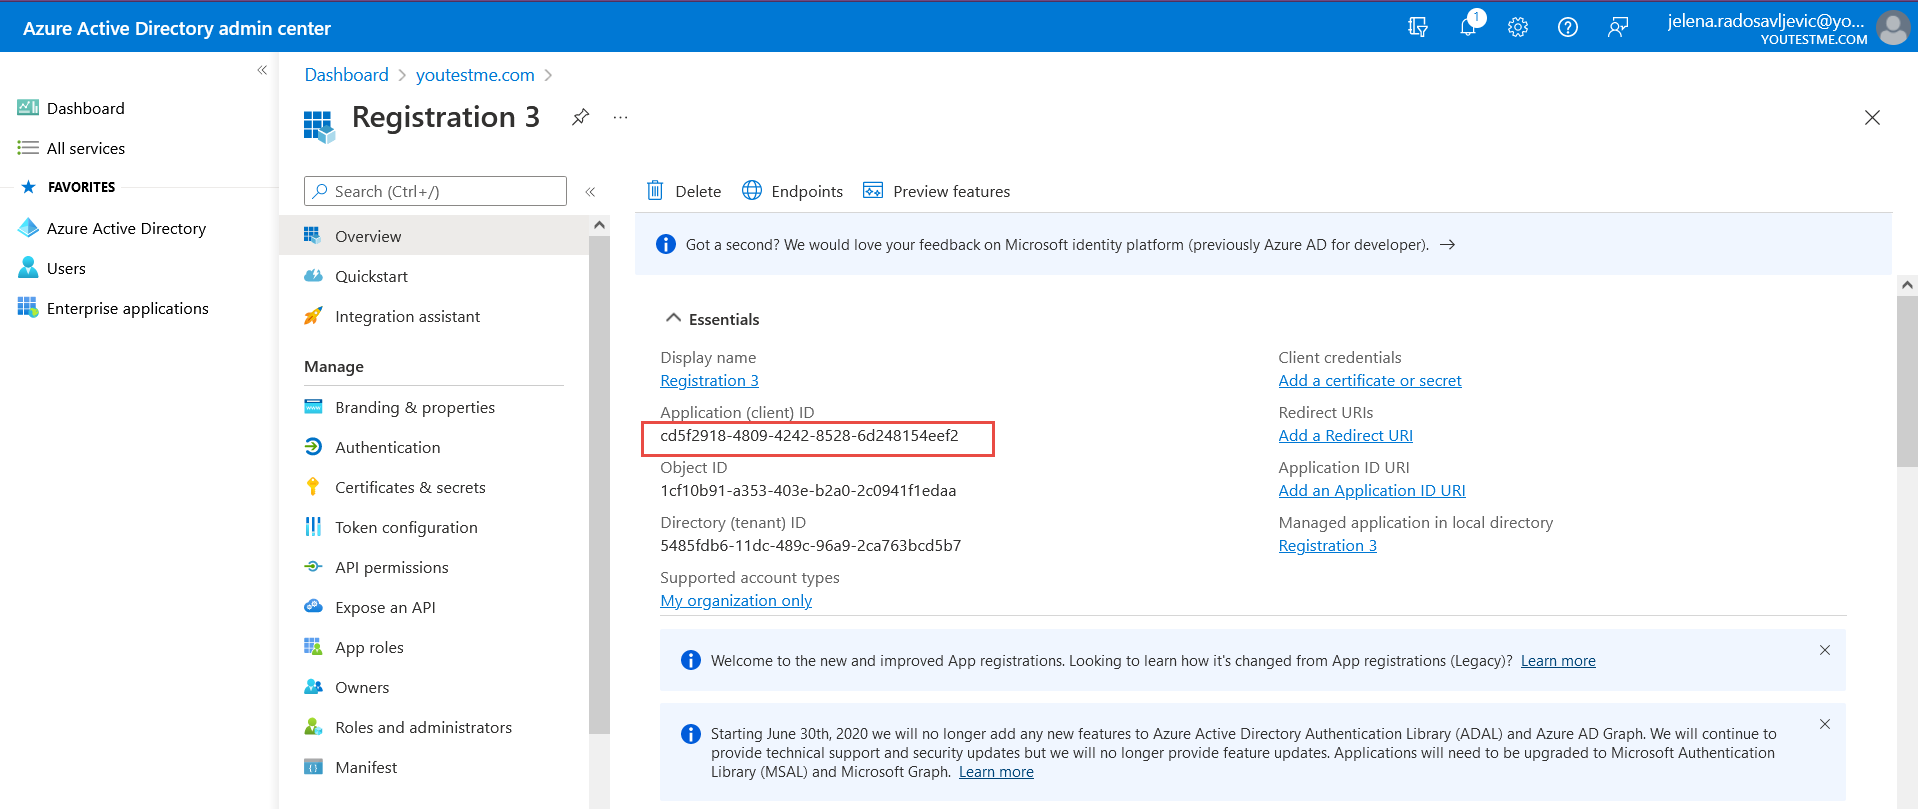 And paste it to the “Client ID” field in the YTM application.
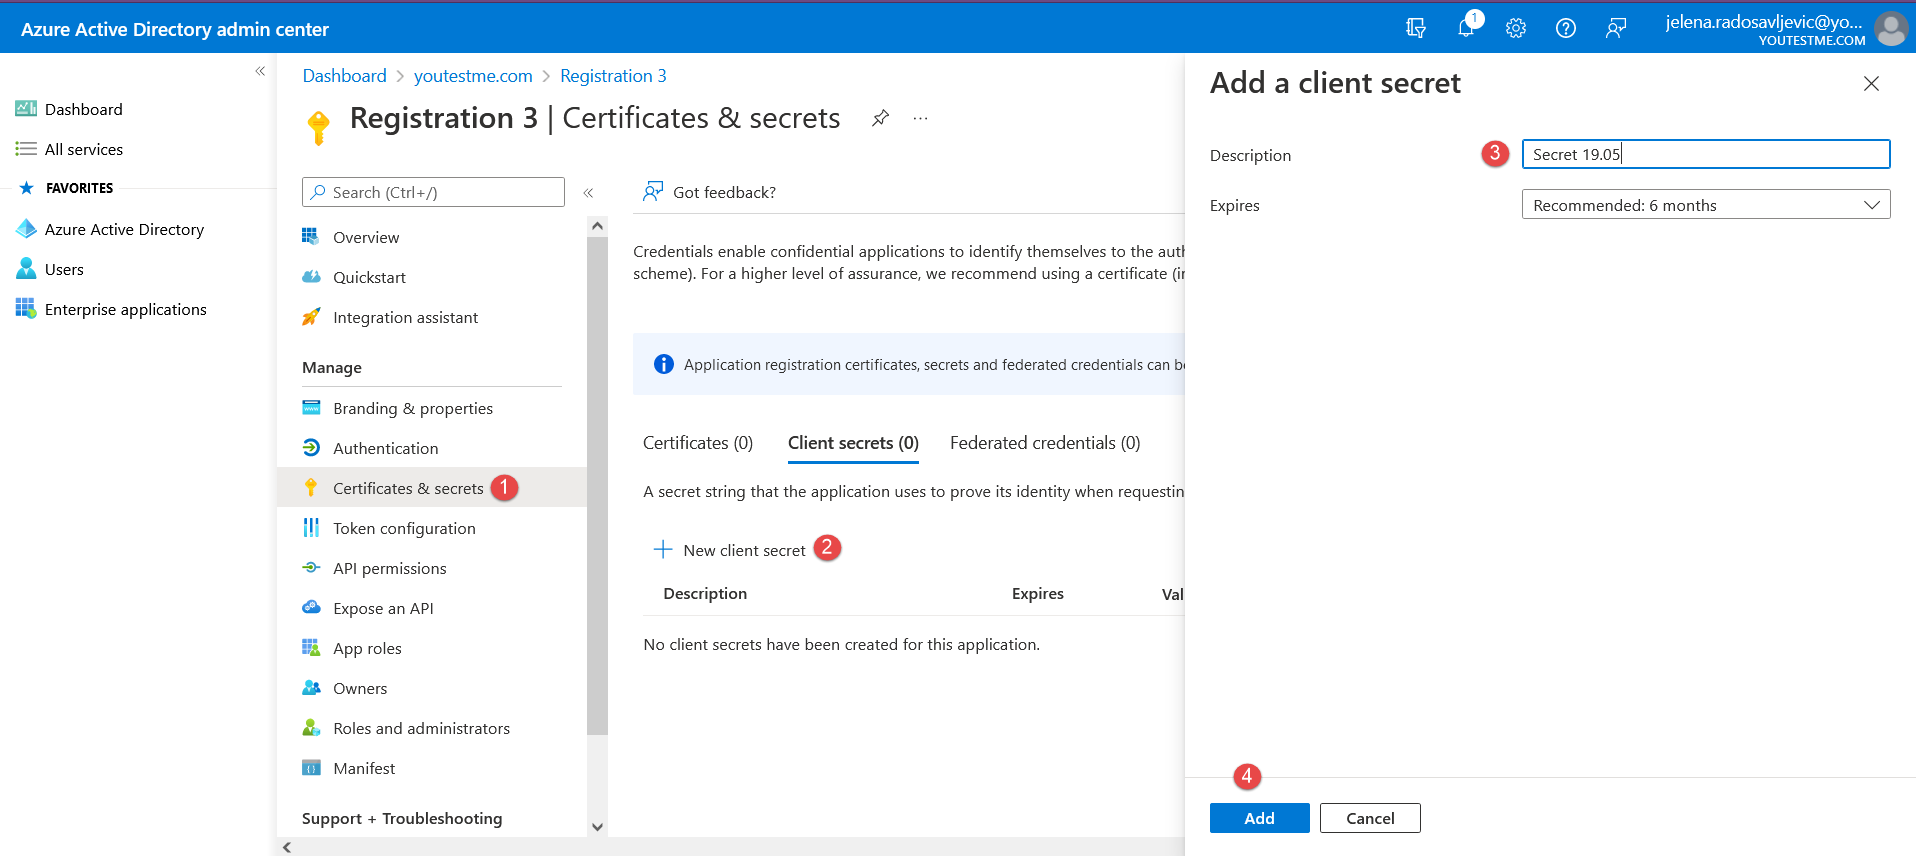
 - “Client secret” – To create it, follow the steps from these pictures below:
 Once the “Client secret” is created, copy the “Value”:
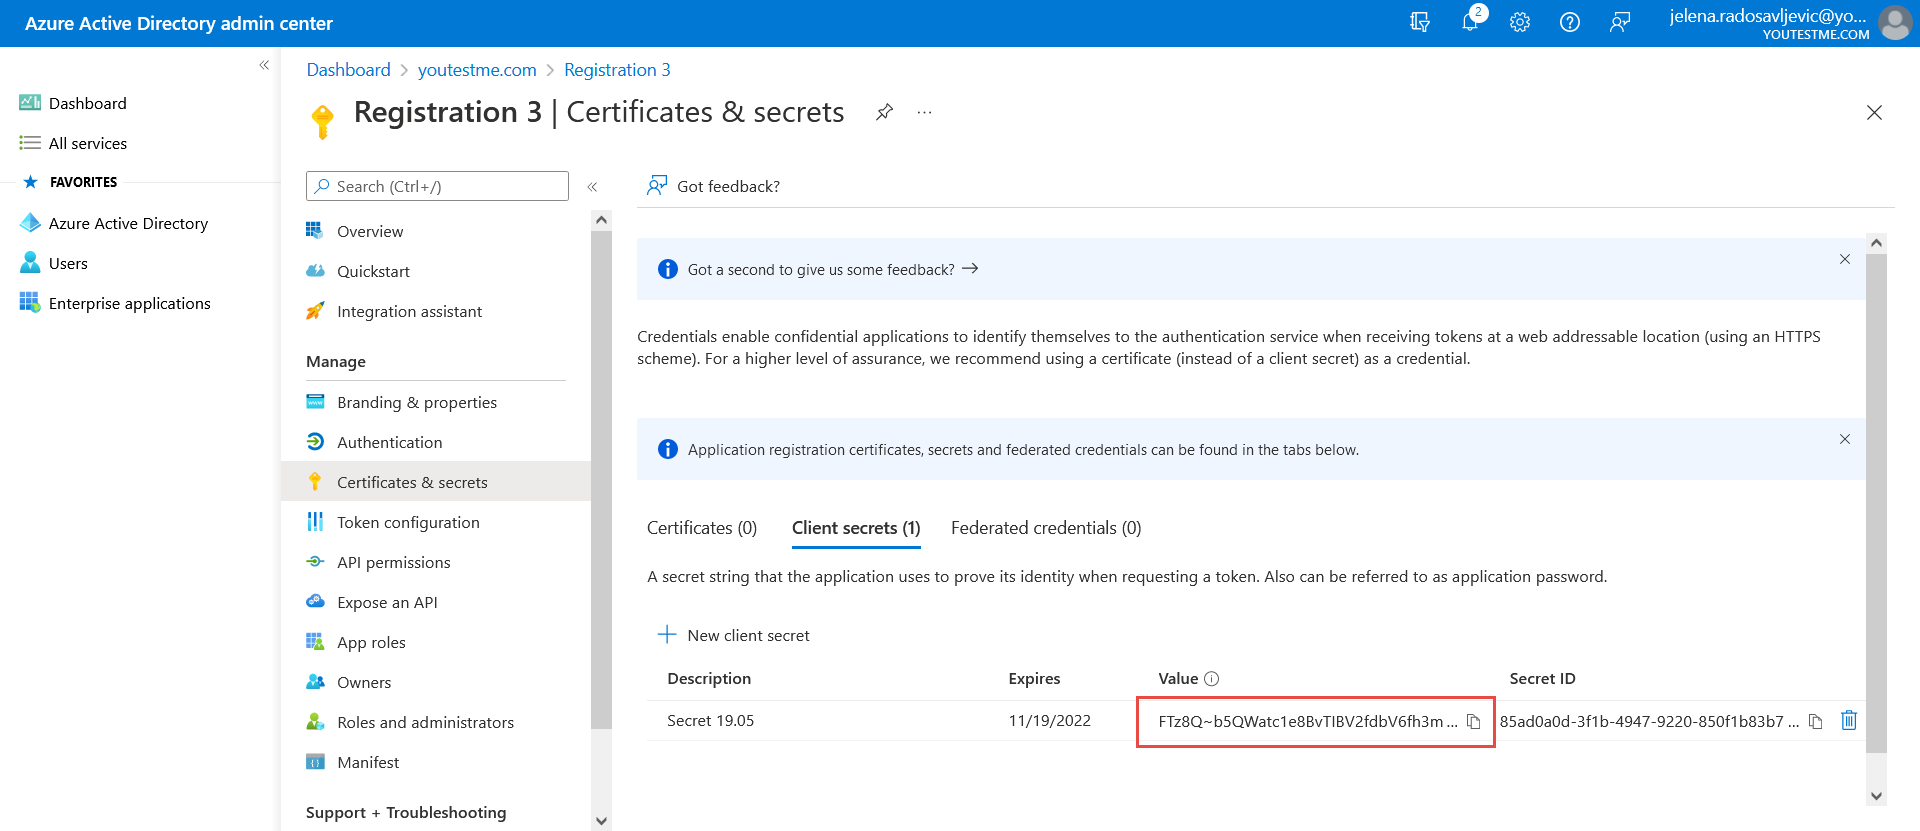 And paste it to the “Client secret” field in the YTM application.
 - “Scope” – We already have predefined scope values in the YTM application:
 Which we need to confirm in Microsoft Azure (as in the picture below):
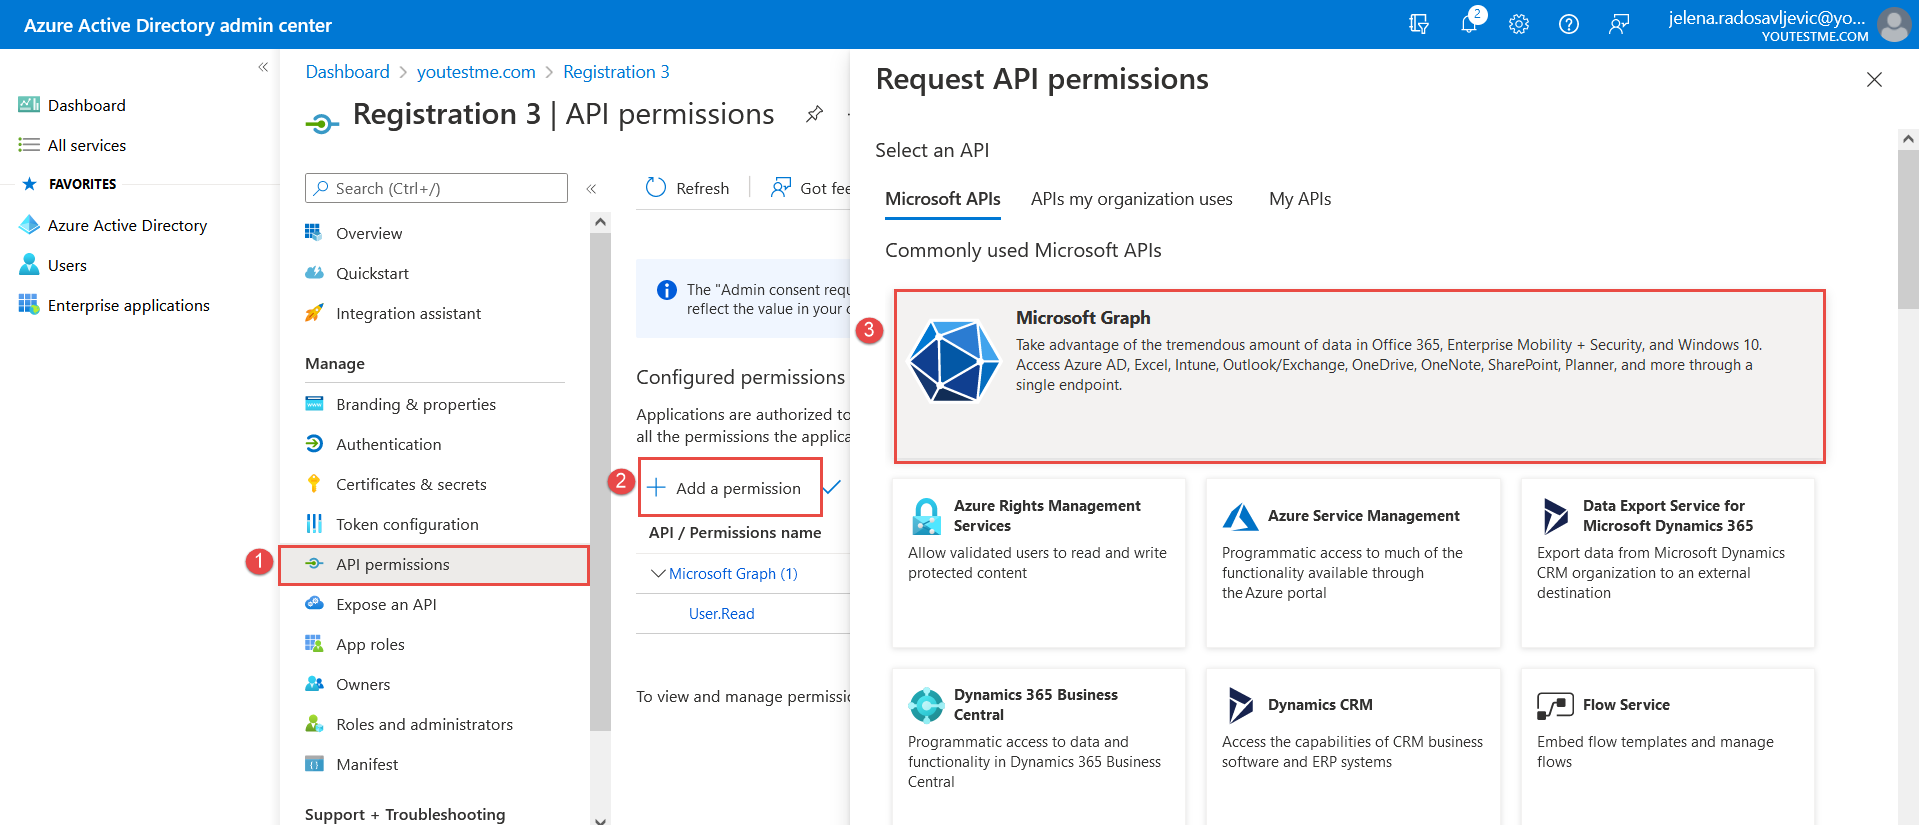
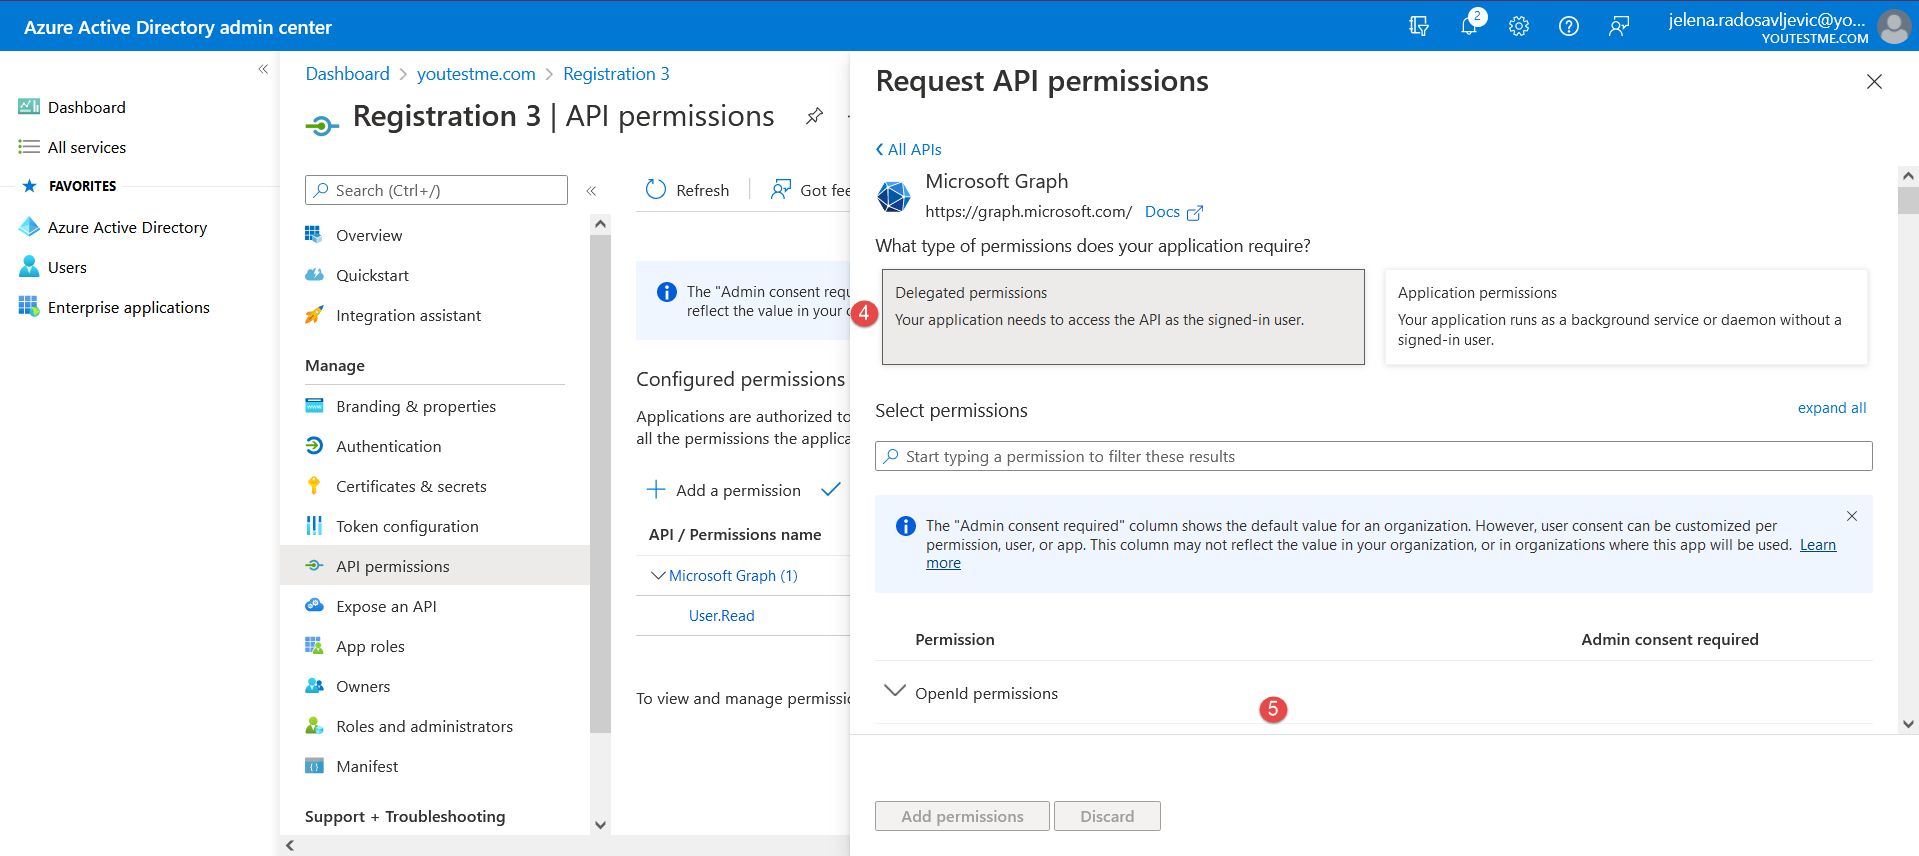
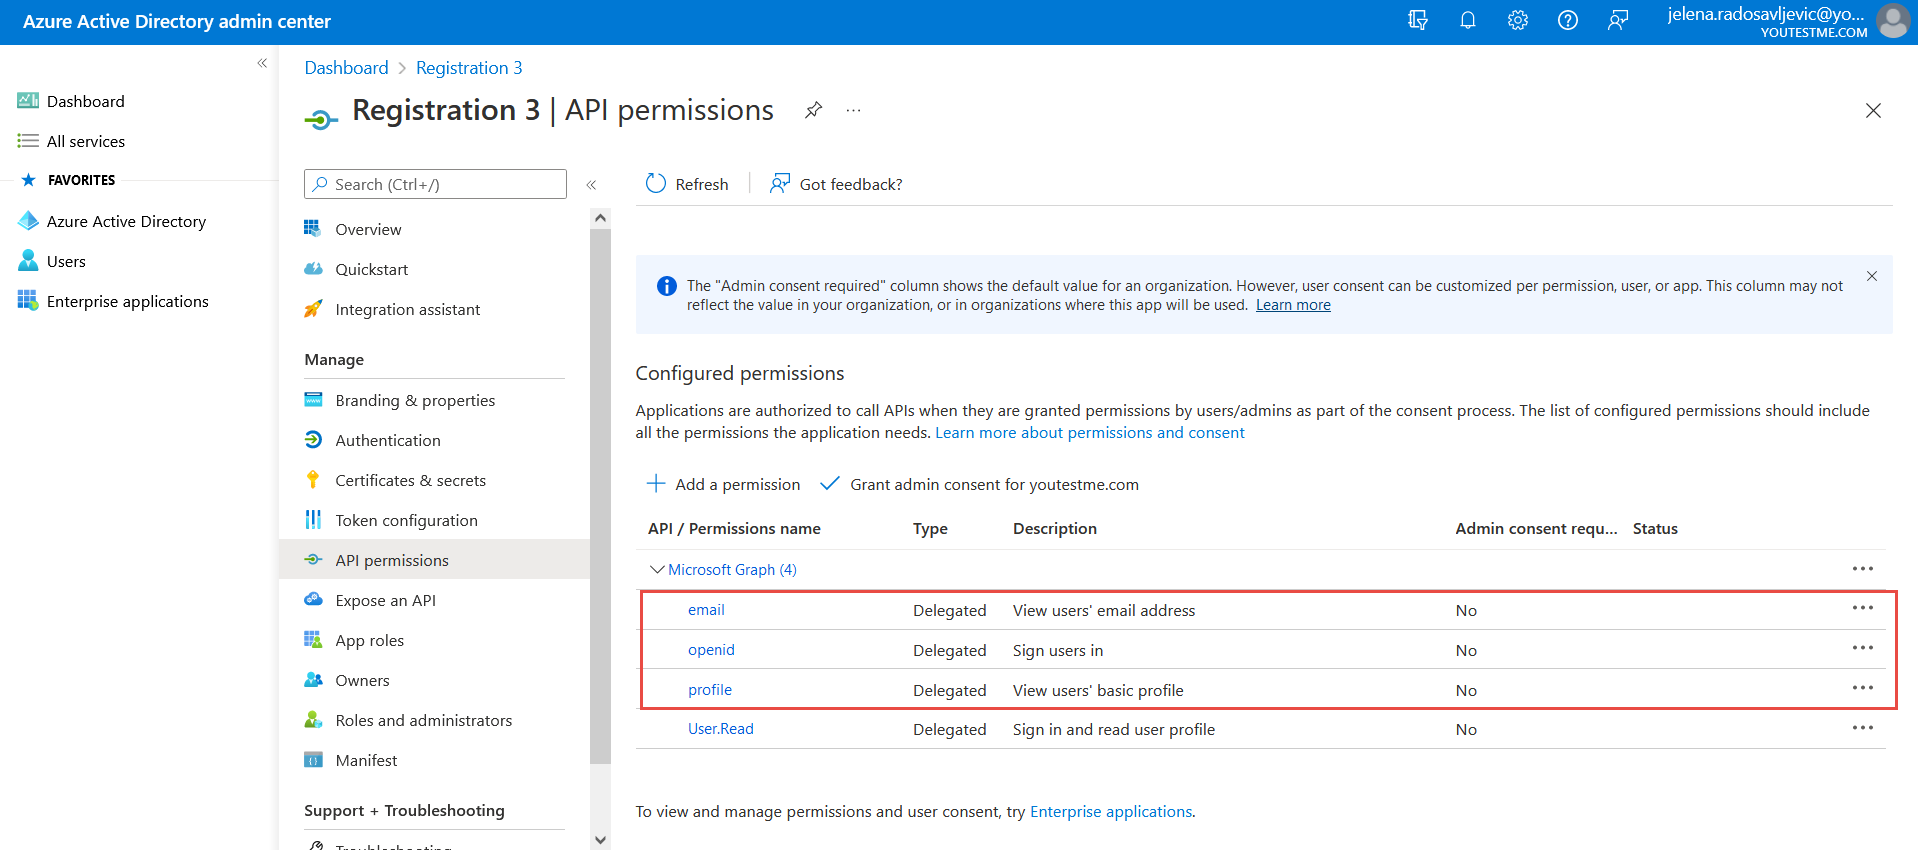
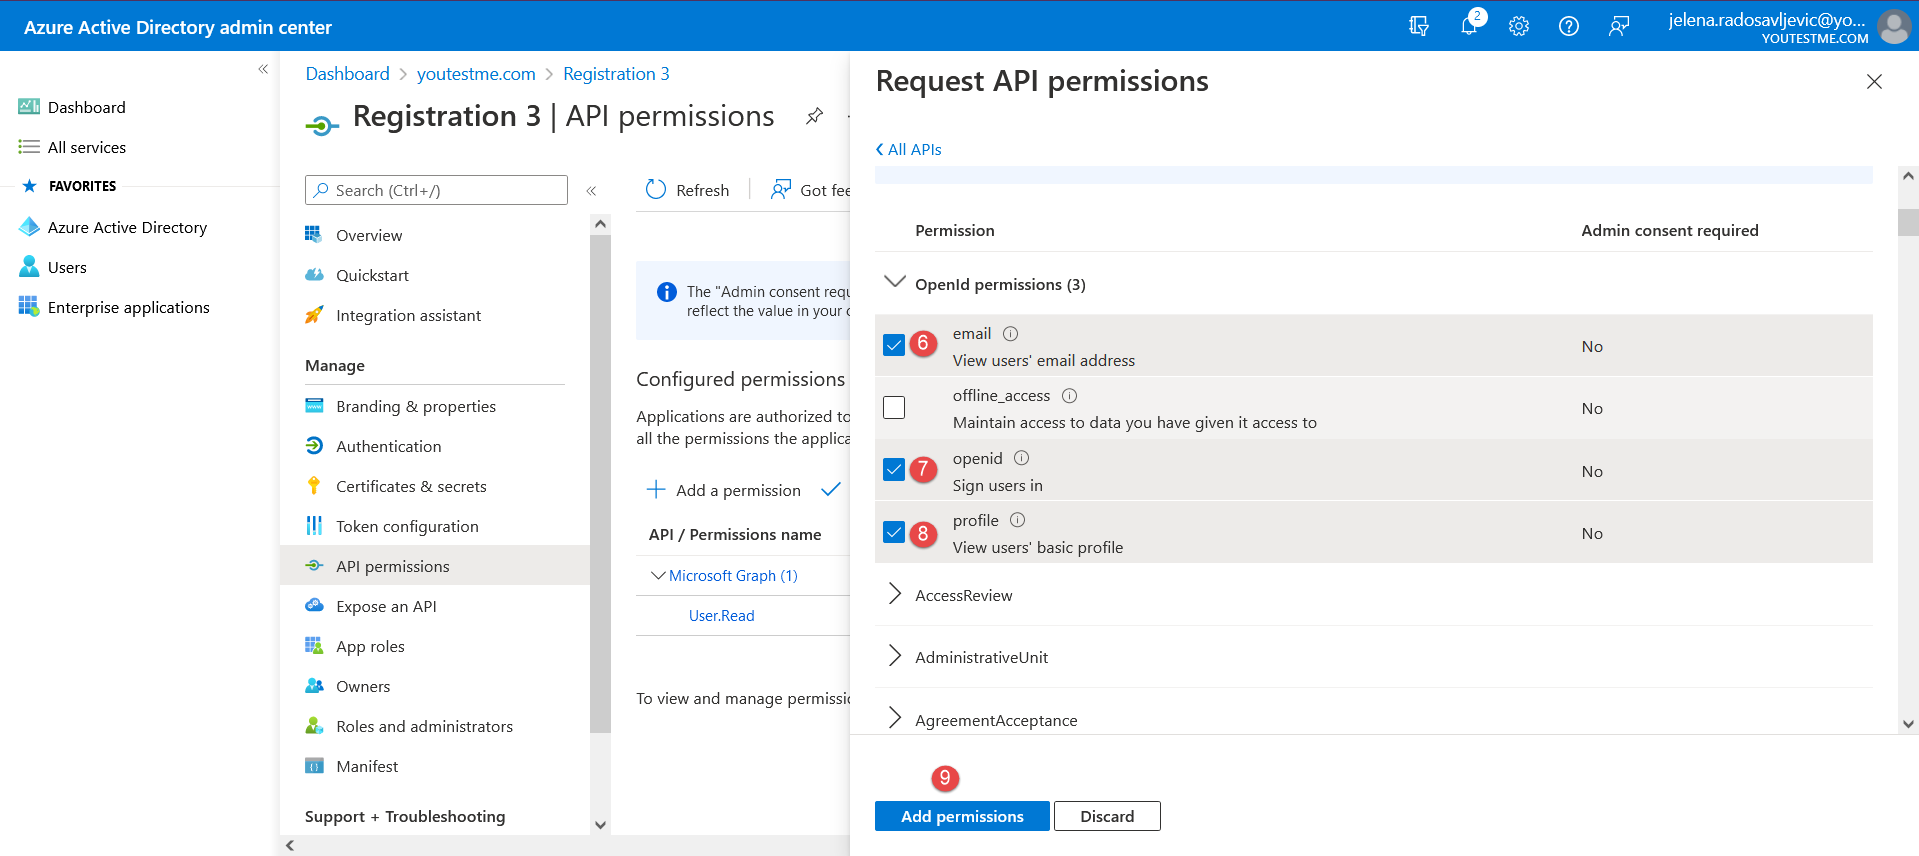 After you add permissions, it should be displayed as below:
  Now, you need to set “Token configuration” in Microsoft Azure and choose the “Optional claims” and “Groups claim”.
Optional claims: To add “Optional claims”, follow the instructions from the picture below: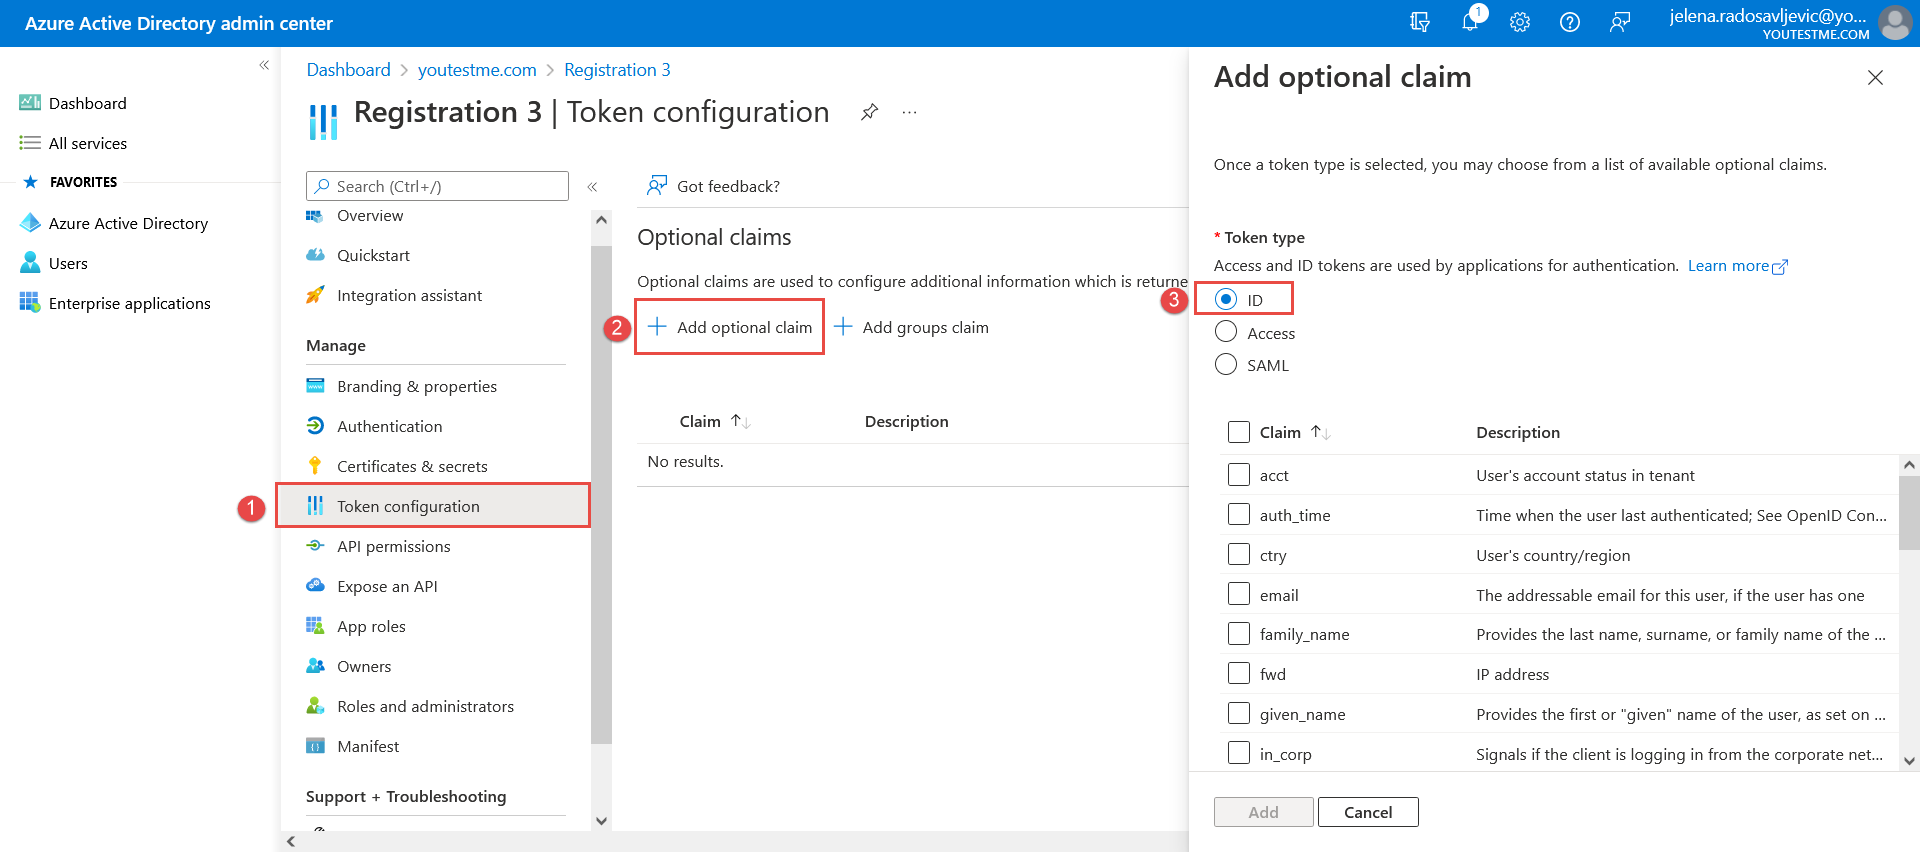 And choose the next claims:
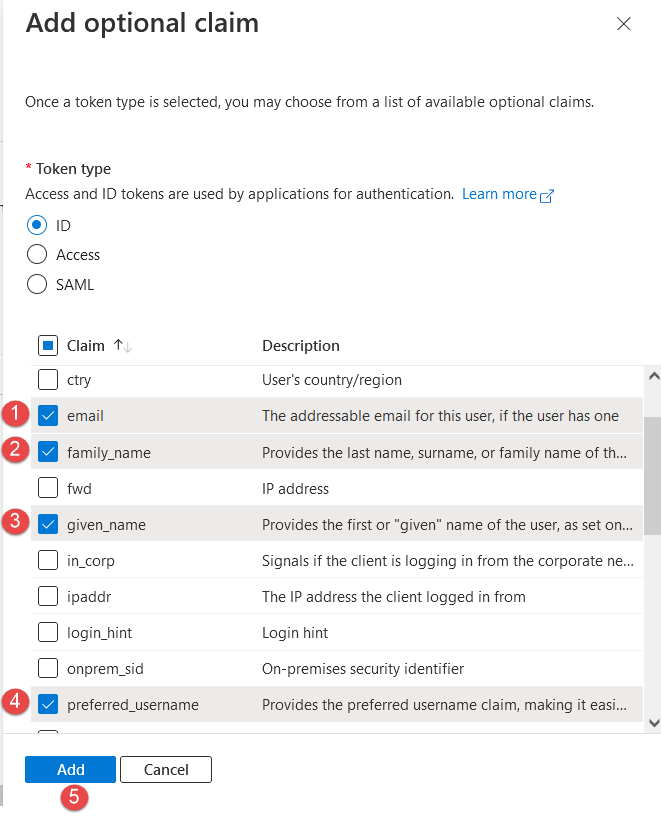 Groups claim: Set the “Groups claim” by following the steps from the image below:
 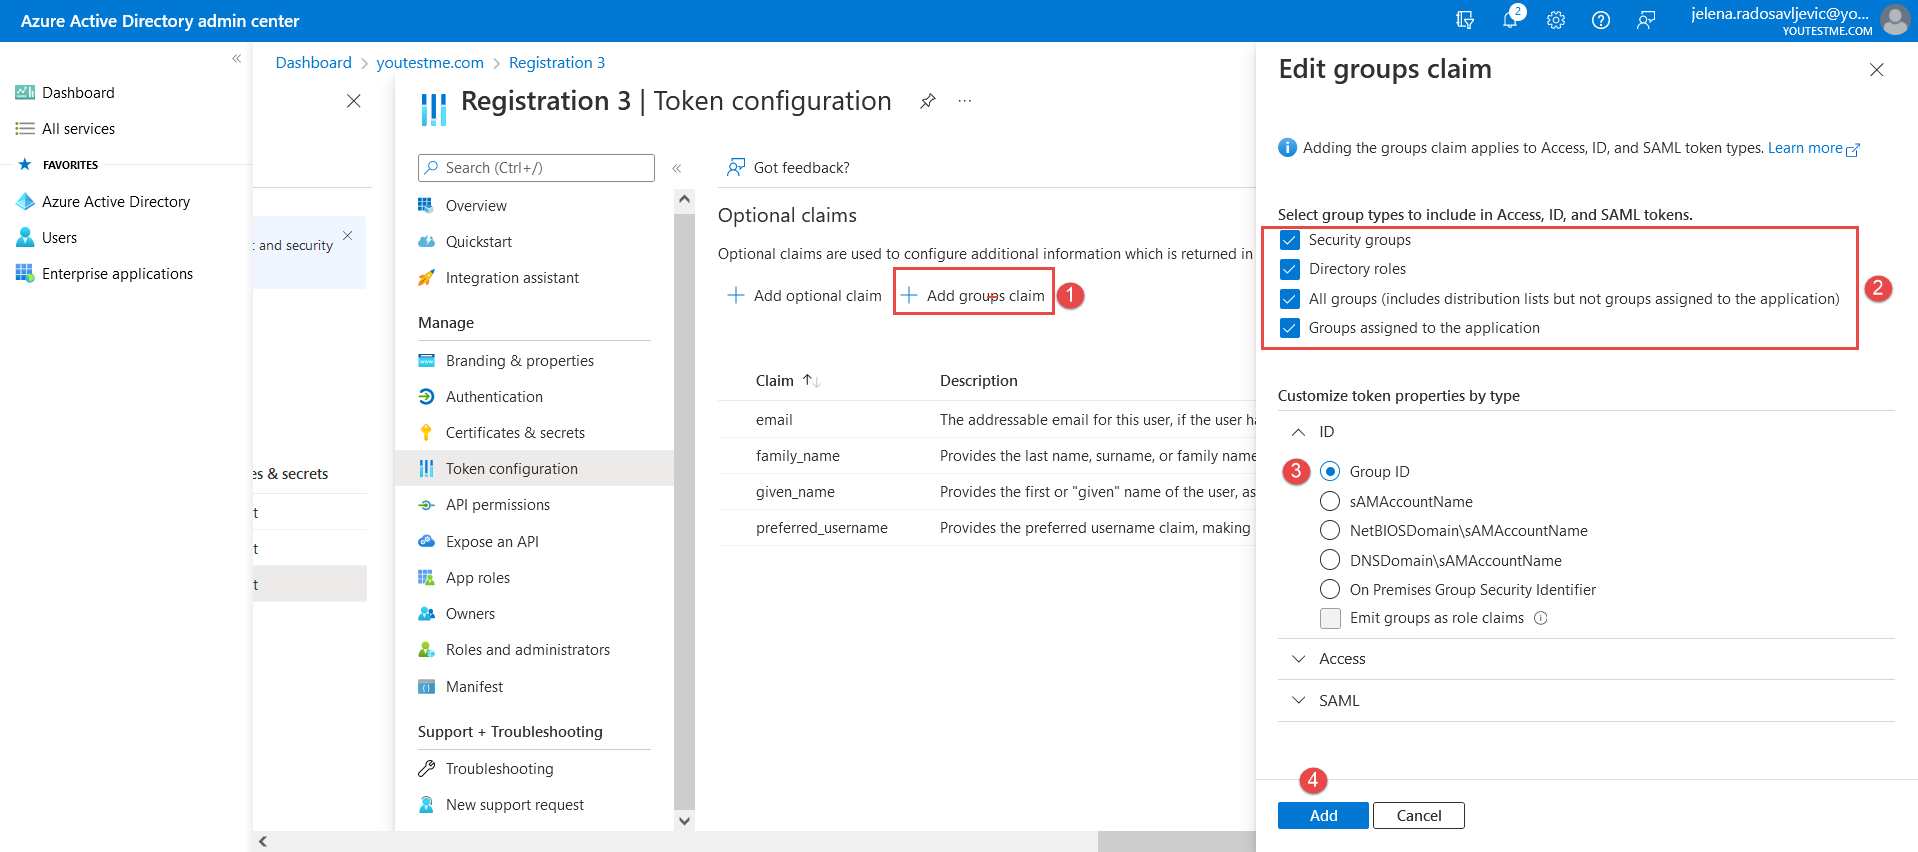 Once you have set all claims, you can continue filling in the mandatory fields in the YTM application.
- “Username attribute” – Copy and paste this value: id_token.preferred_username
- “Email attribute” – Copy and paste this value: user_info.email
- “Callback URL” – The data that we integrate into Microsoft Azure, by following these steps:
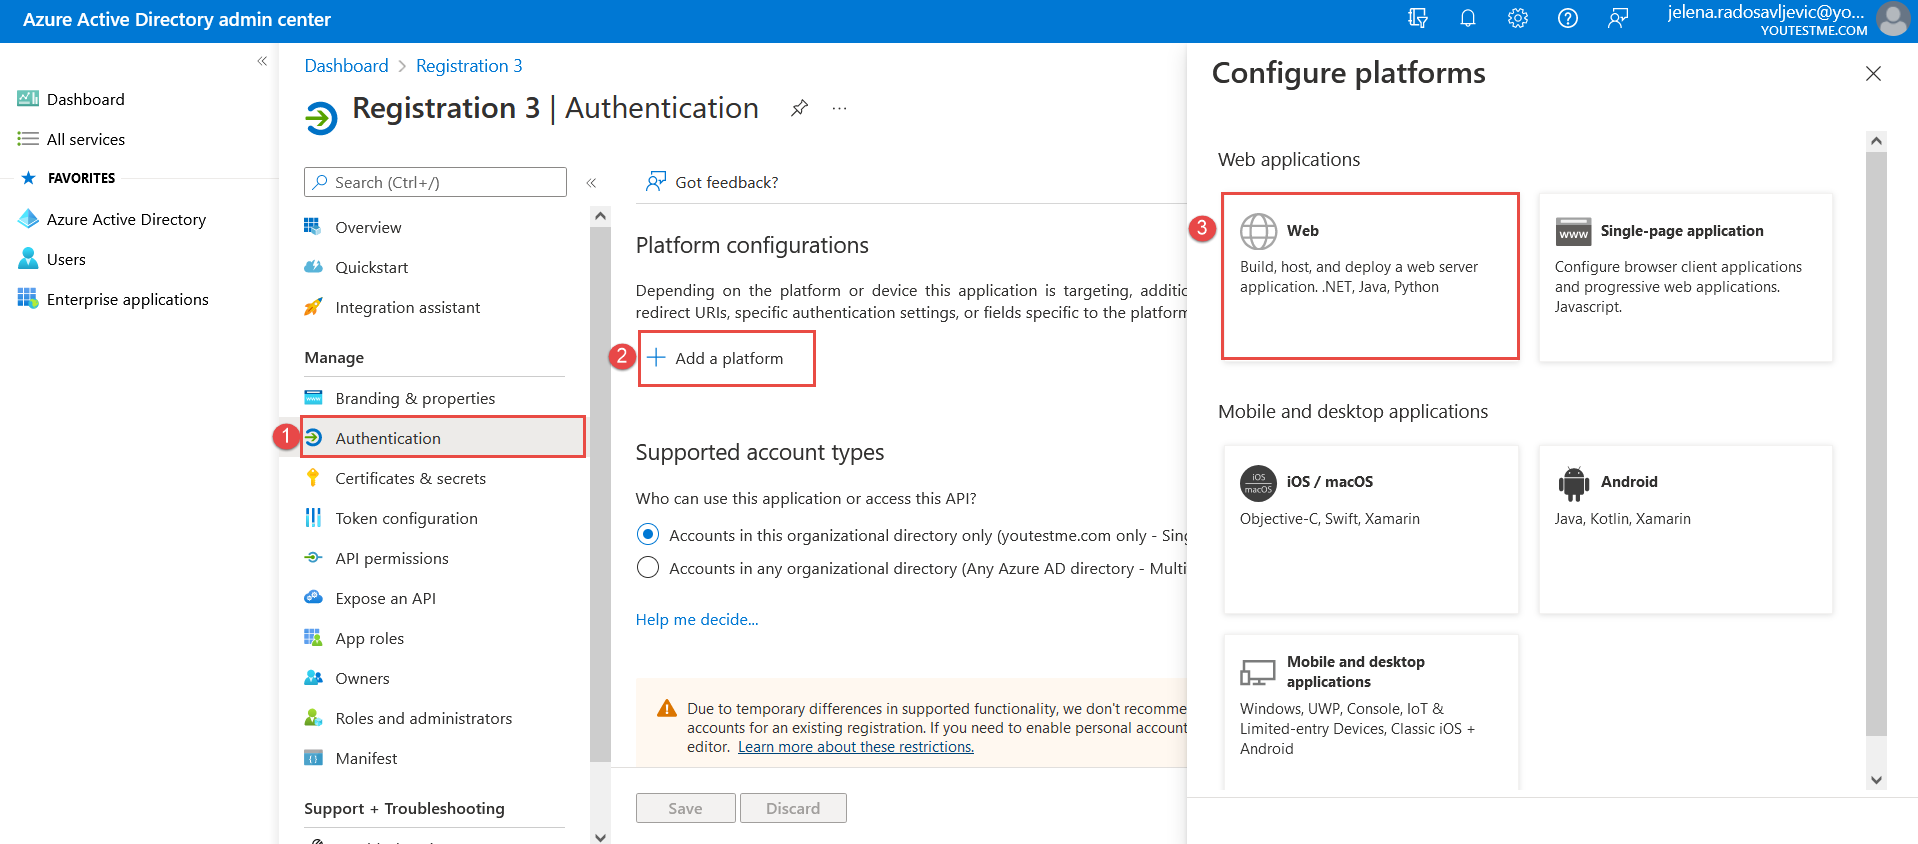 And paste the “Callback URL” from the YTM application into the Microsoft Azure application:
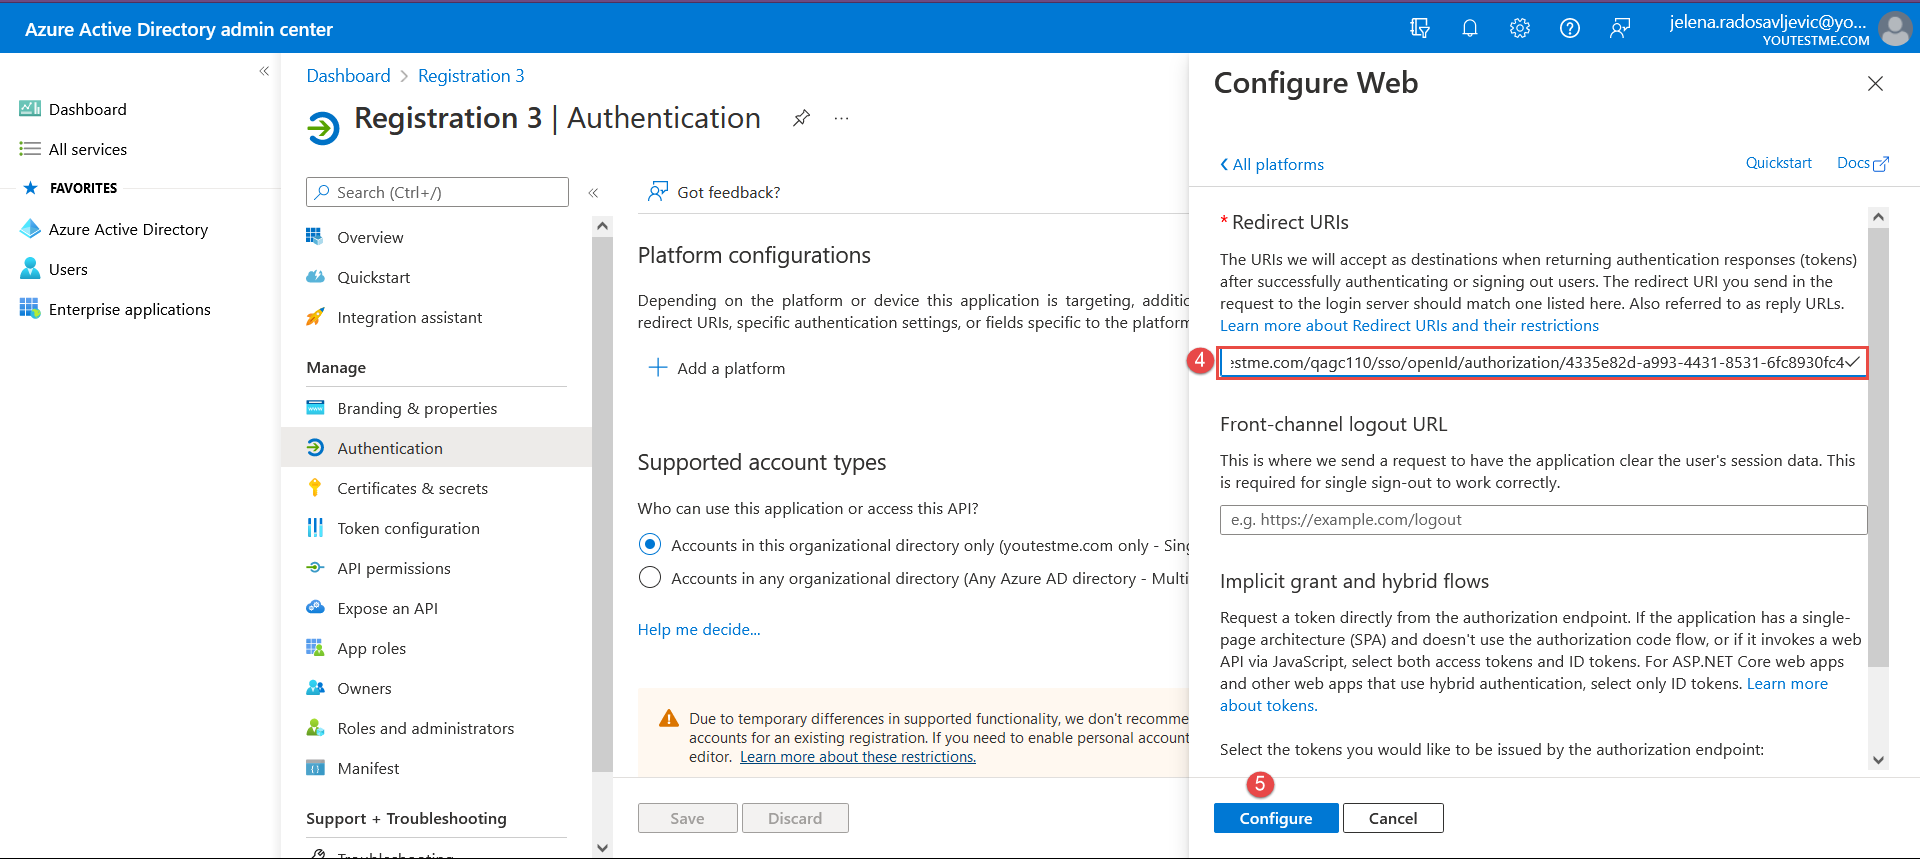
- “Role code attribute” – Copy and paste: (id_token.groups.indexOf(‘f4affda8-ff1e-4fbe-a2a1-4e89bf68d71b’) !== -1) ? ‘ADM’ : ((id_token.groups.indexOf(‘0a28e788-da40-4992-8a94-f082cd51167f’) !== -1) ? ‘GST’ : ((id_token.groups.indexOf(‘f71d0c2b-4068-49d5-a4ad-74954a9a94f3’) !== -1) ? ‘INS’ : ( (id_token.groups.indexOf(‘2d46d52e-2c4f-431c-9f26-ecc8caf66bfe’) !== -1) ? ‘PRC’ : ( (id_token.groups.indexOf(‘7c5debd8-20f6-401d-8878-77440f034d96’) !== -1) ? ‘TST’ : ‘ATT’ ))));
- “Status code attribute” – Copy and paste: ‘ACT’
After you add all of the mandatory fields, click on the “Save” button to save the configuration.
Student’s perspective
Students can choose to sign in with the newly created OpenID: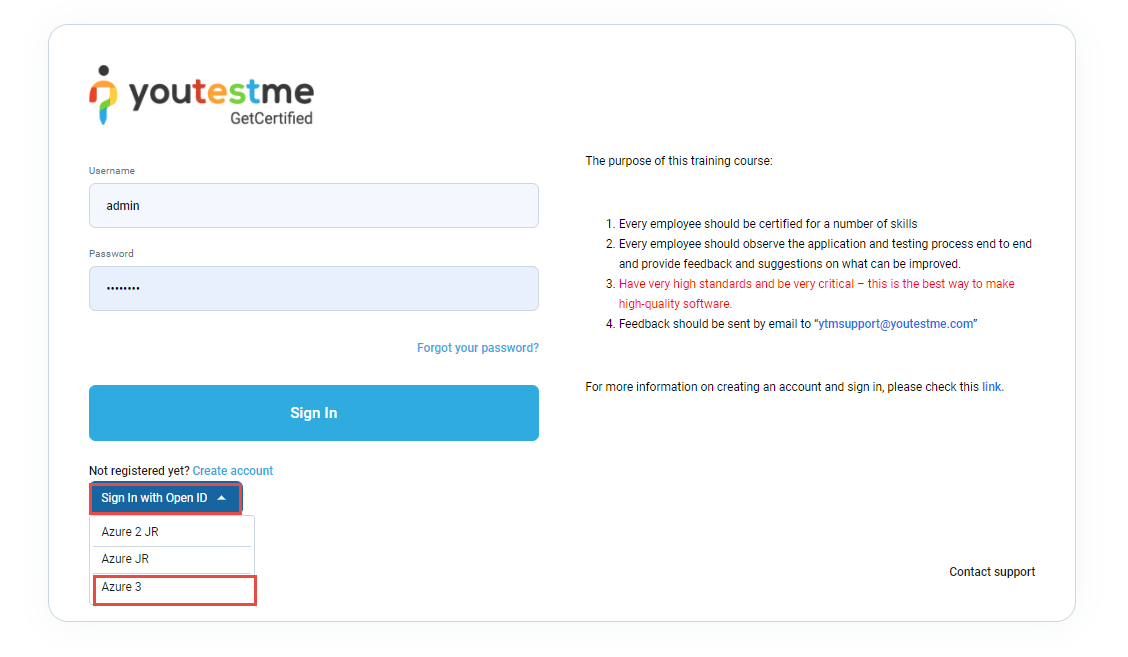
These are the first-time login steps: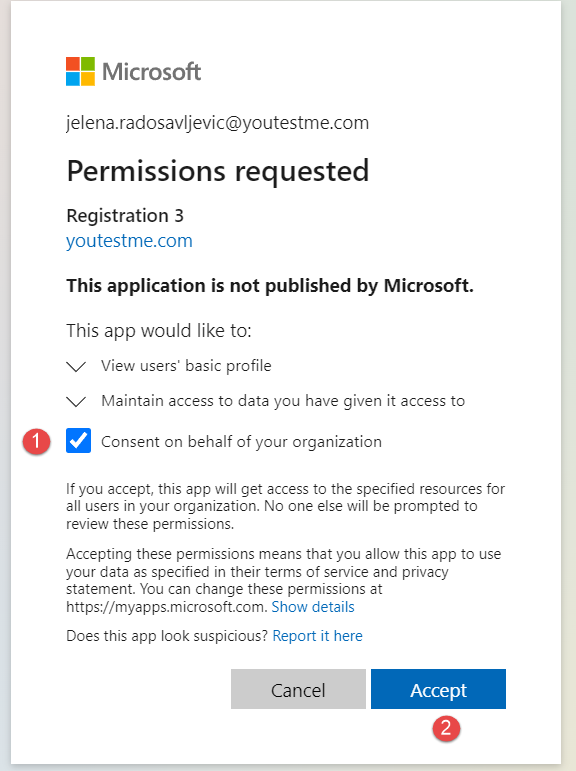
Once the student has passed the validation steps, he will be directed to the YTM application.
NOTE: Please contact our support team at support@youtestme.com if you have trouble configuring your OpenID configuration.
For more related instructional materials, please visit:


