This article explains the LRS integration with GetCertified, and it assures that the test results sending process goes successfully.
Sending the test results to LRS ensures:
- Uploading all the results candidates made on the test.
- Making the test results available as the statements recorded by LRS.
Currently supported is to send only the results of tests that contain:
- True/False questions.
- Single choice questions.
- Multiple choice questions.
Currently is not supported to send test results:
- Generated tests.
- Tests with sections.
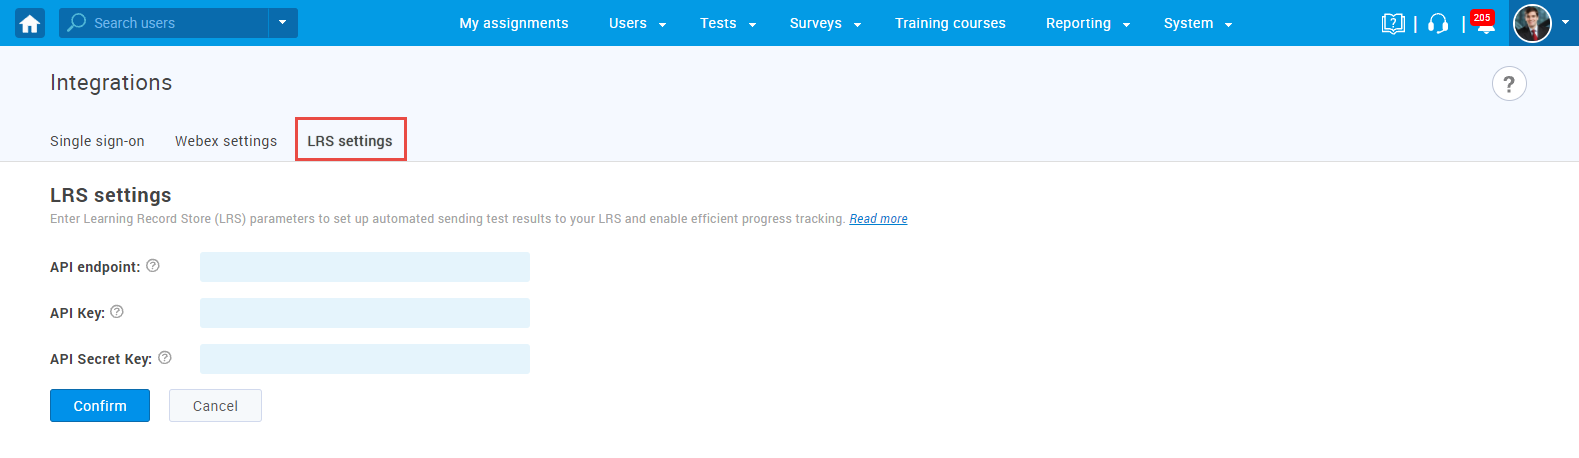
LRS Settings
The LRS settings assure the manager of a test to send each candidate’s test results into the LRS system and track each candidate’s success.
The given explanation is just an example of the Yet Analytics Learning Record Store integration with GetCertified. You can use any other Learning Record Store that supports Tin Can API (xAPI). Before configuring LRS parameters in the system settings, you need to log in to the LRS system. To set up your LRS parameters:
-
- Visit the Yet Analytics link.
- Sign up to receive the verification email.
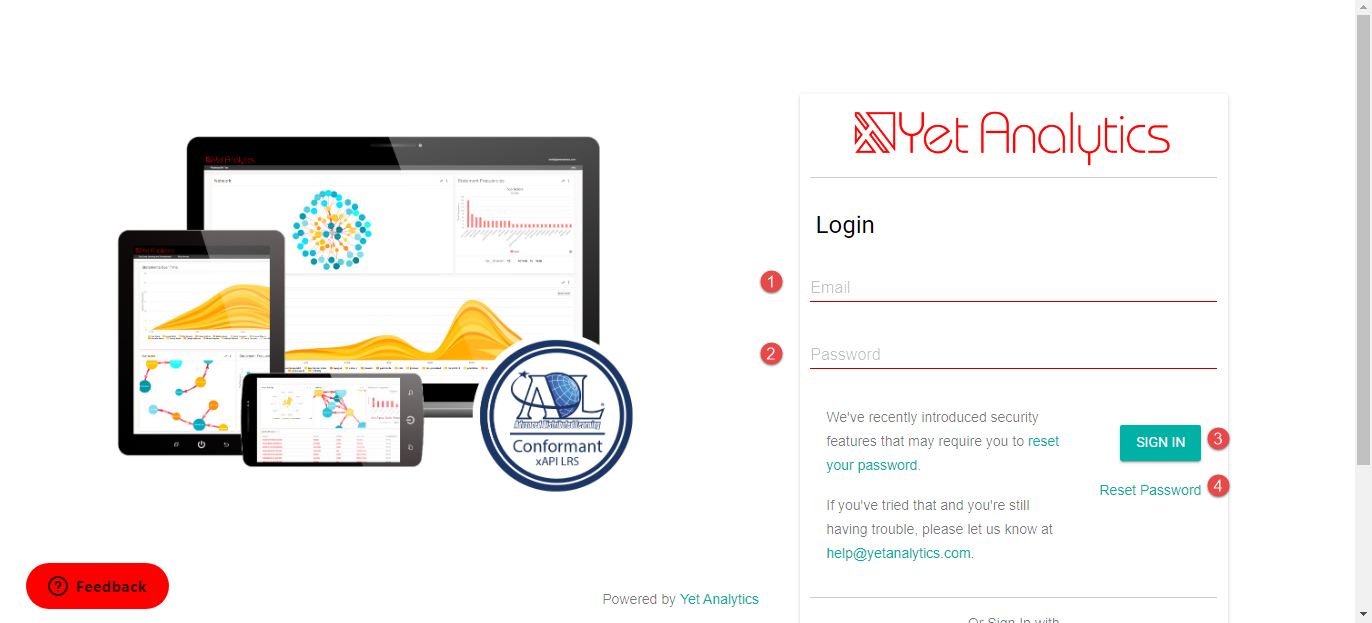
After successful signing up into the LRS system, you can log in to the LRS. To do so :
- Enter your email.
- Enter password.
- Click the “Sign in” button.
- Click on the “Reset password” link if you forgot the password.
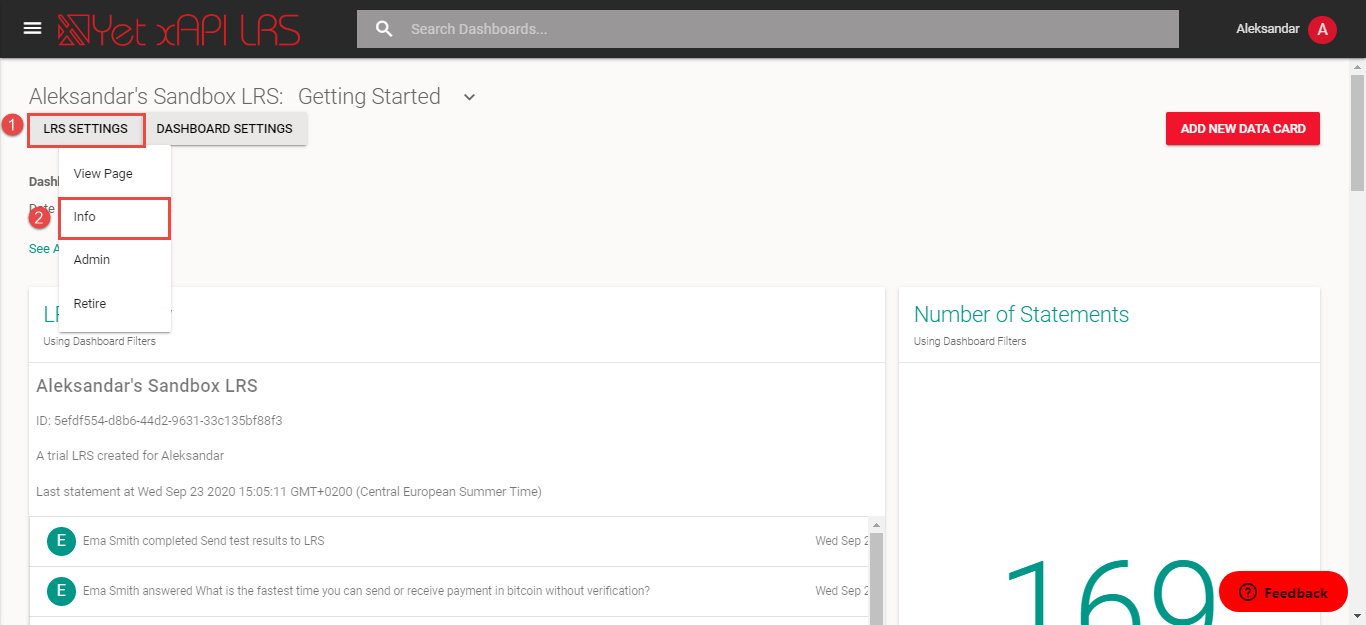
Once you logged in:
- Click “LRS Settings”.
- Click “Info” from the drop-down menu.
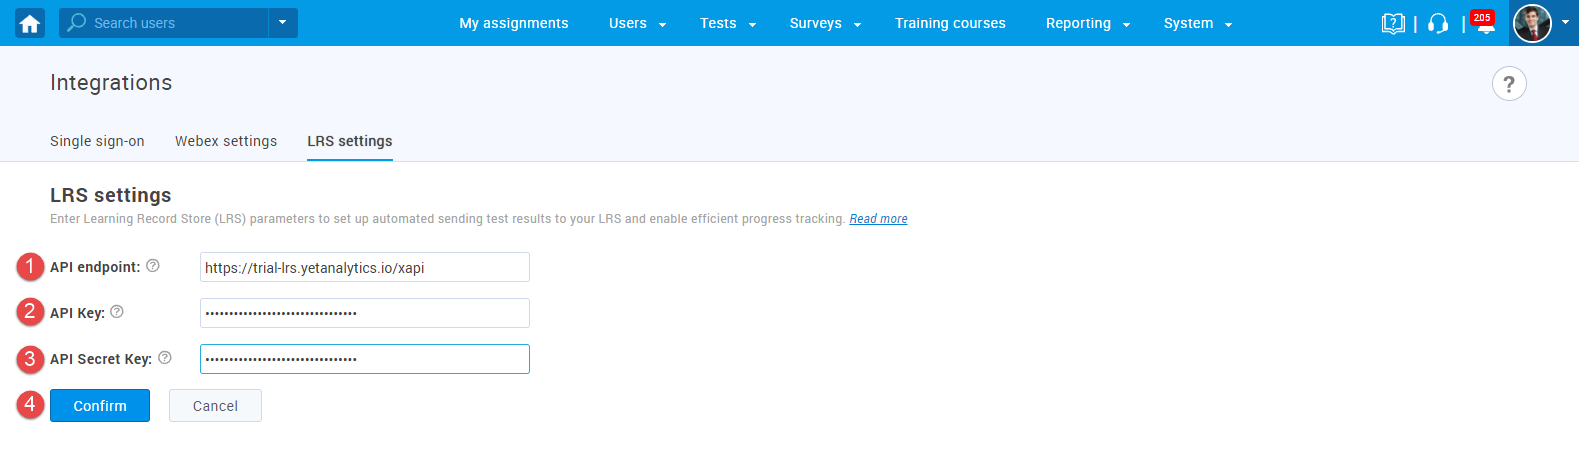
The pop-up window will open, and there you can see all the needed parameters you will insert in the GetCertified.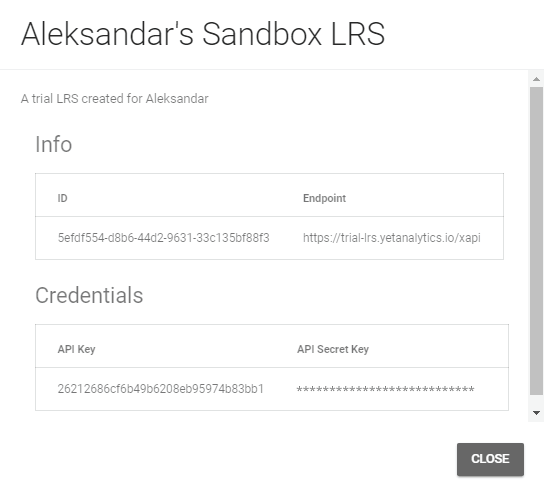 To configure learning record store parameters:
- Hover over the “System” section in the main menu, then select “Integrations“.
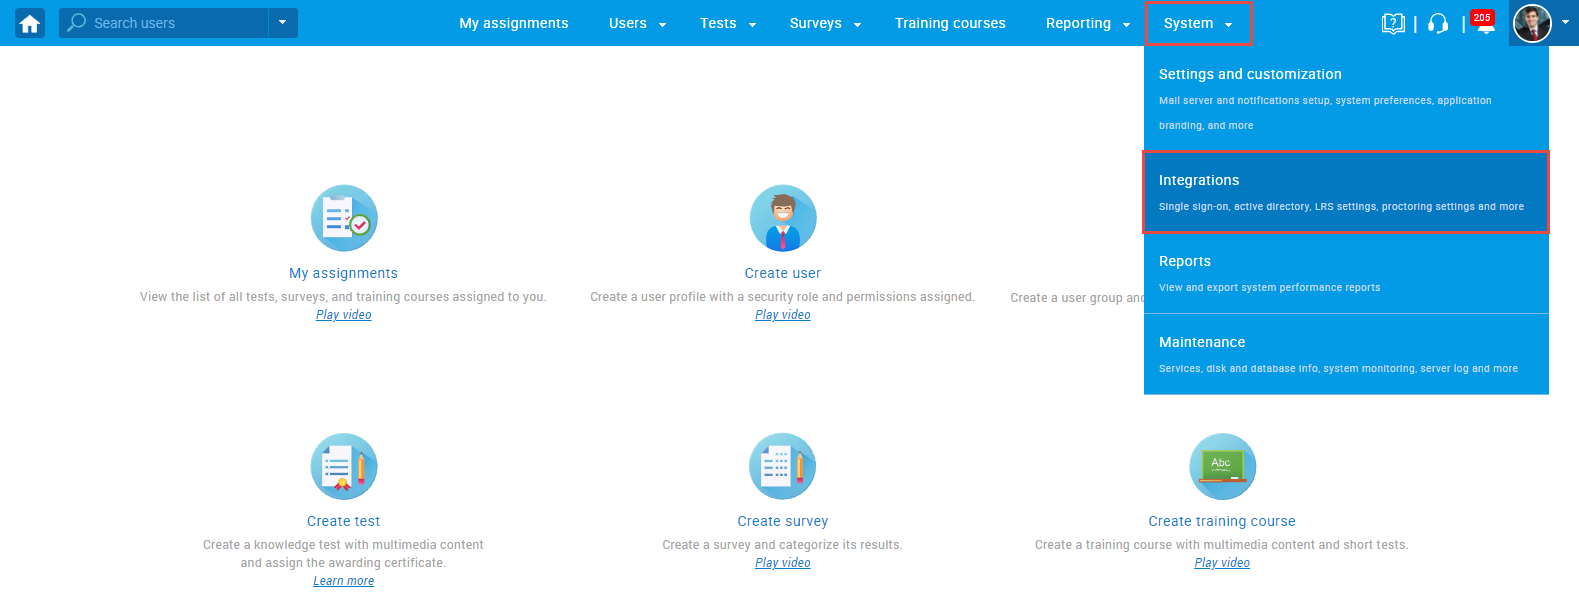
- Navigate to the “LRS settings” tab.
Then, fill the following fields:
- API endpoint – insert the endpoint URL LRS has provided you.
- API Key – insert the key, which provides you authentification.
- API Secret Key – insert the secret key used for the authentication process as well.
- Click the “Confirm“ button to save the configuration.
Sending test results to LRS
After the LRS parameters are configured, you can start sending results to the Learning Record Store.
- To do so, once you open the “Candidates” tab for the test:
- Click the “Data transfer“ button.
- Select the “Send test results to LRS” option.
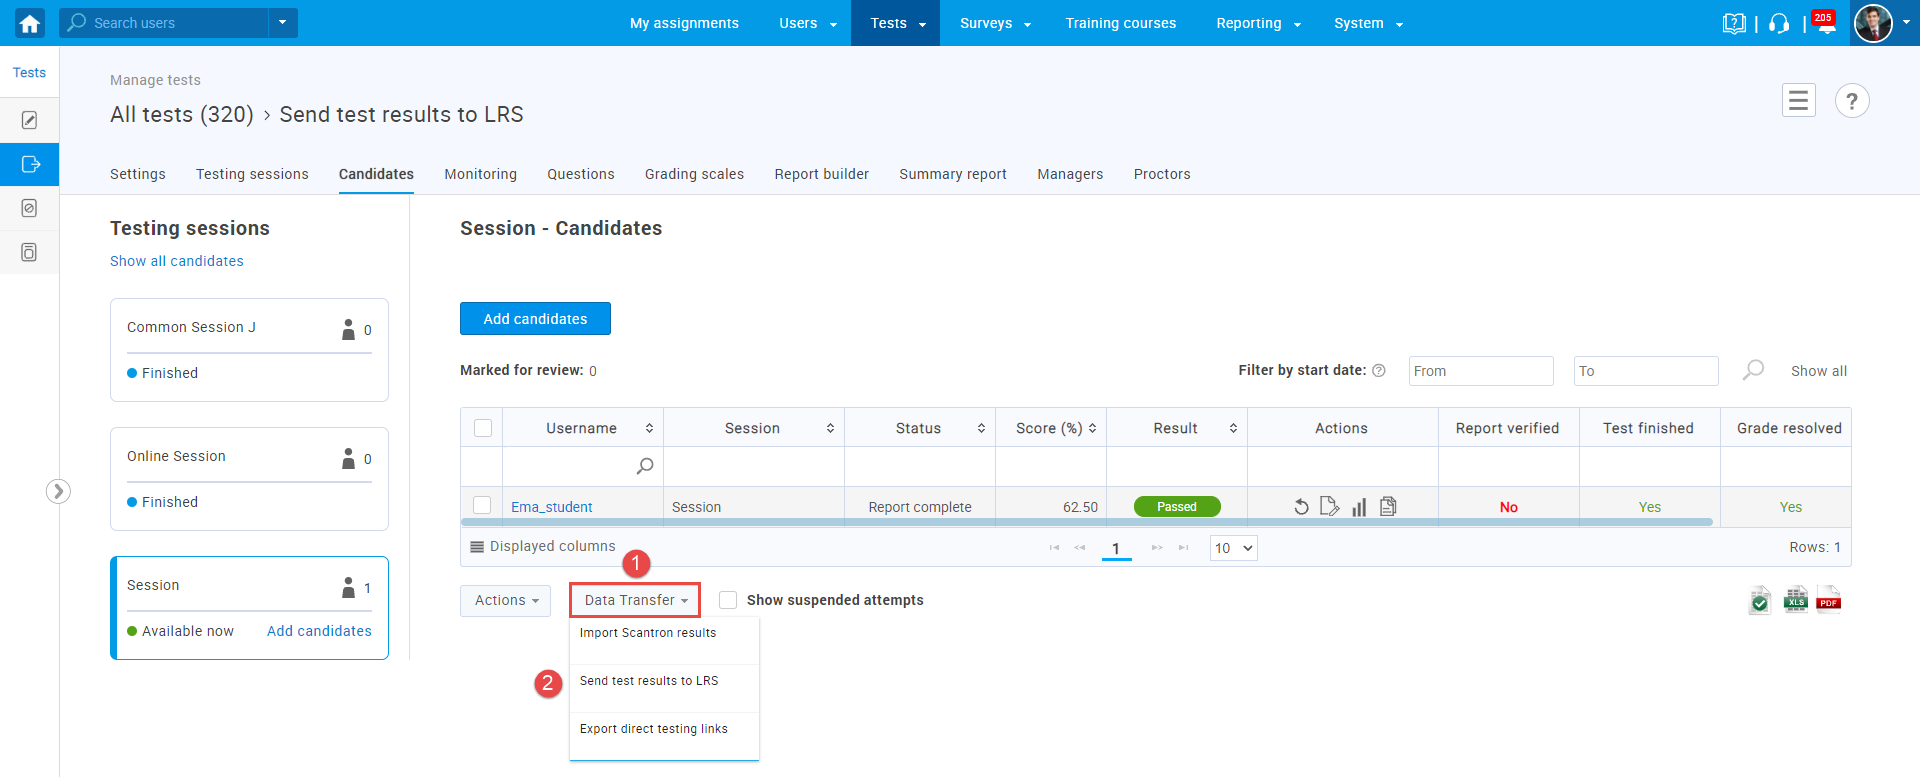
When the process of sending results to the LRS system starts, you should wait a few seconds to transfer the test to the LRS. This situation happens mostly when many candidates have completed the test and multiple results are available to send.
Note: The picture above shows that only one test result is sent to LRS because only one candidate has attempted the test. Now, log in to the LRS with your credentials, and you can see that the results are sent and stored successfully.
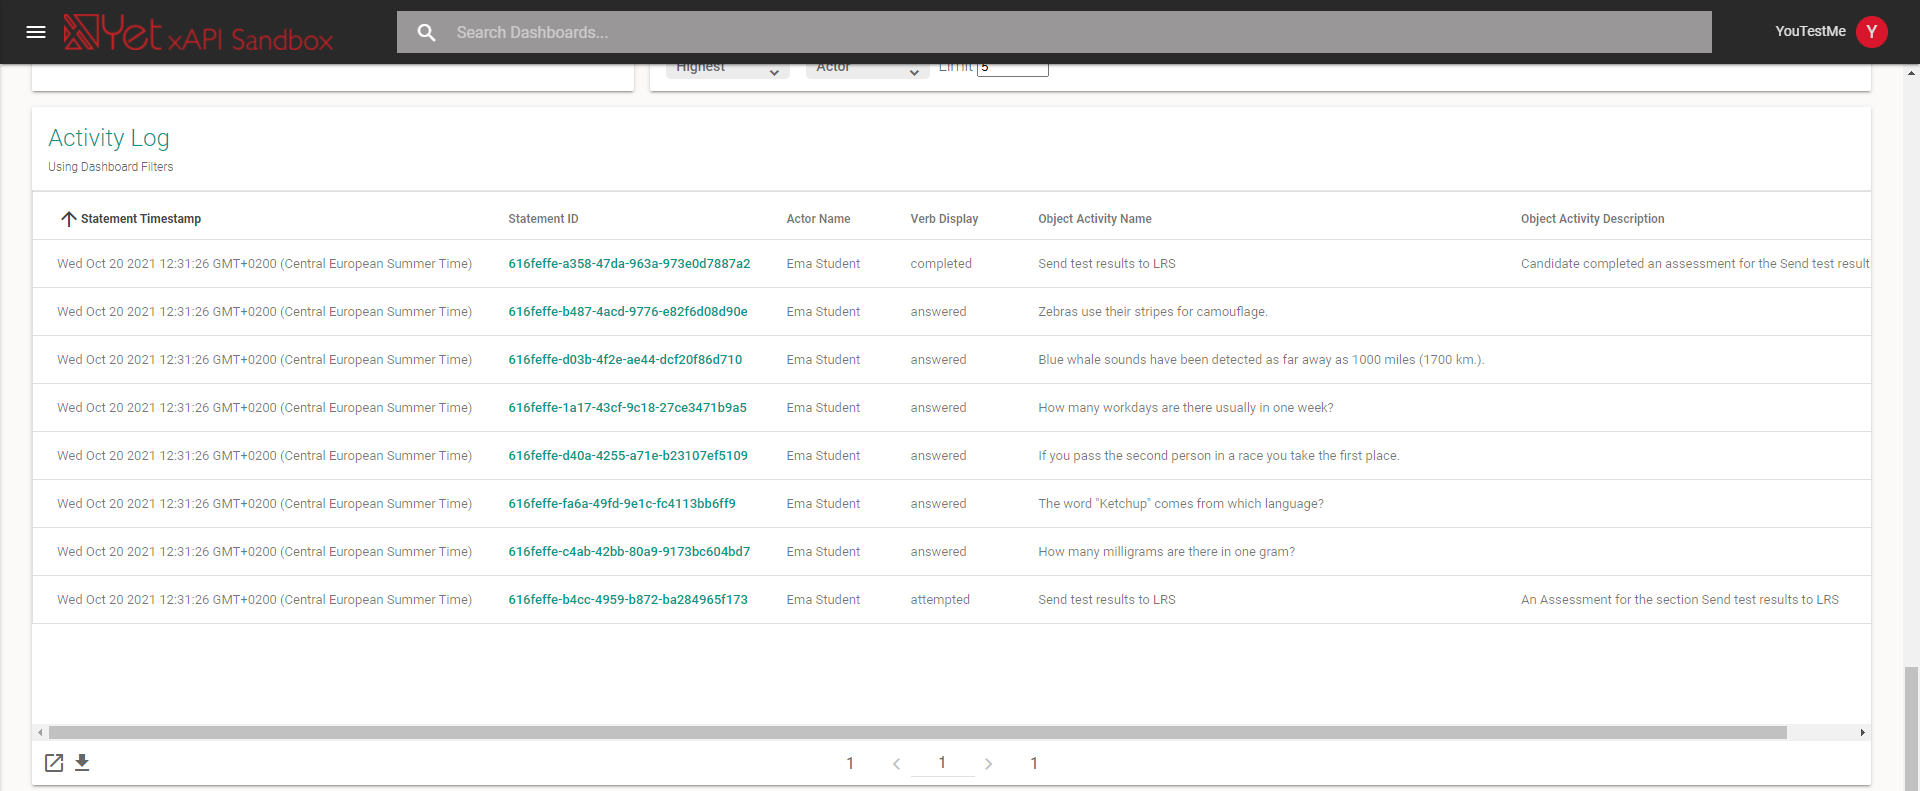
You can see on the photo information which questions the candidate has answered and that the candidate has completed the test.
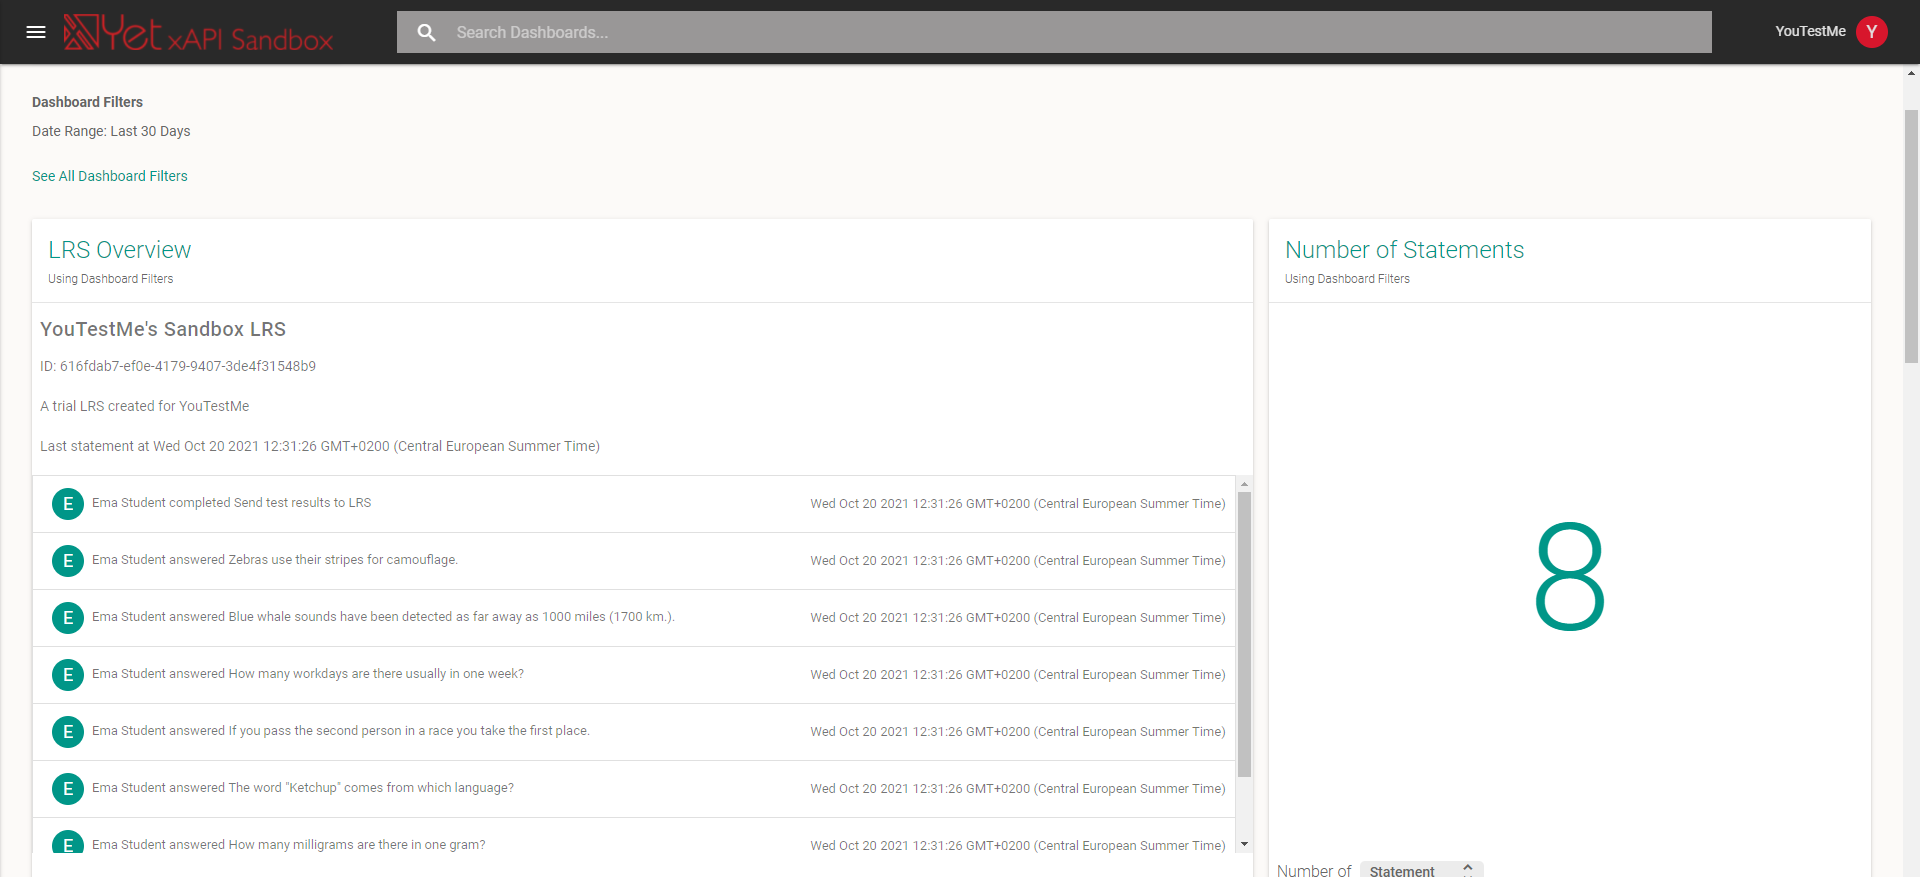
In the Activity Log section, you can see that all the statements show the information which questions in the text the candidate has answered and completed the test. All the statements LRS noted, you can sort by the Timestamp to see the latest information about the test results sent to the LRS. The integration with LRS helps you easily track the candidates’ performance after completing the test and compare their test results.
For more useful instructional documents, please check these links:


