This article explains how to create custom user properties. You can add 5 custom properties of different types.
Creating custom user properties
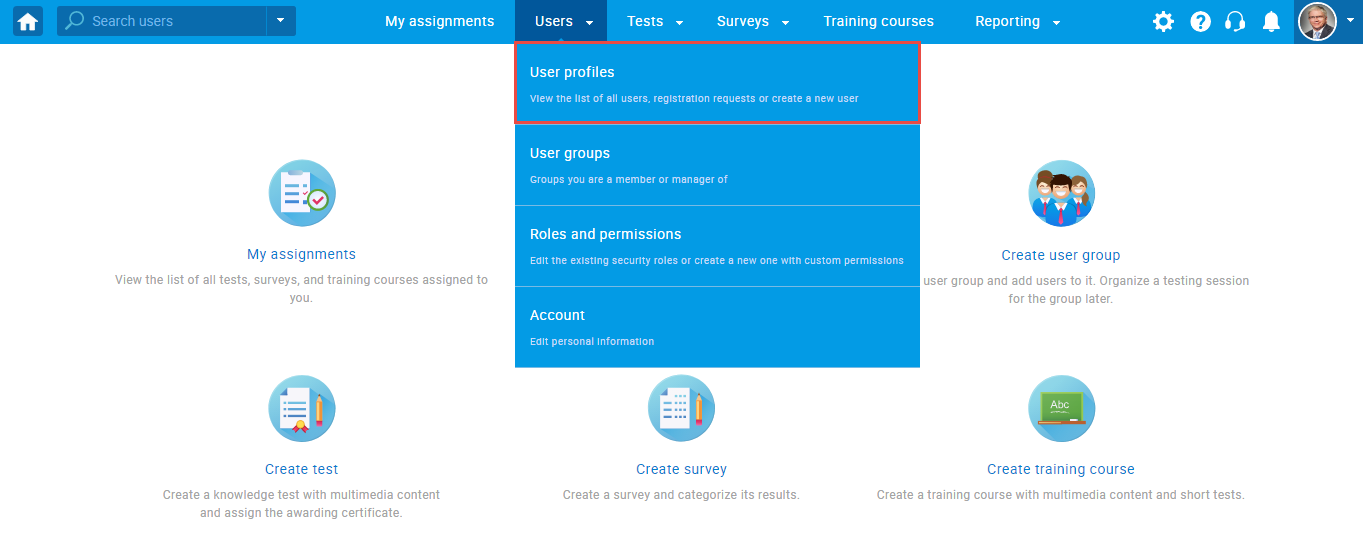
To create custom user properties, hover over the “Users” tab in the main menu and select “User profiles”.
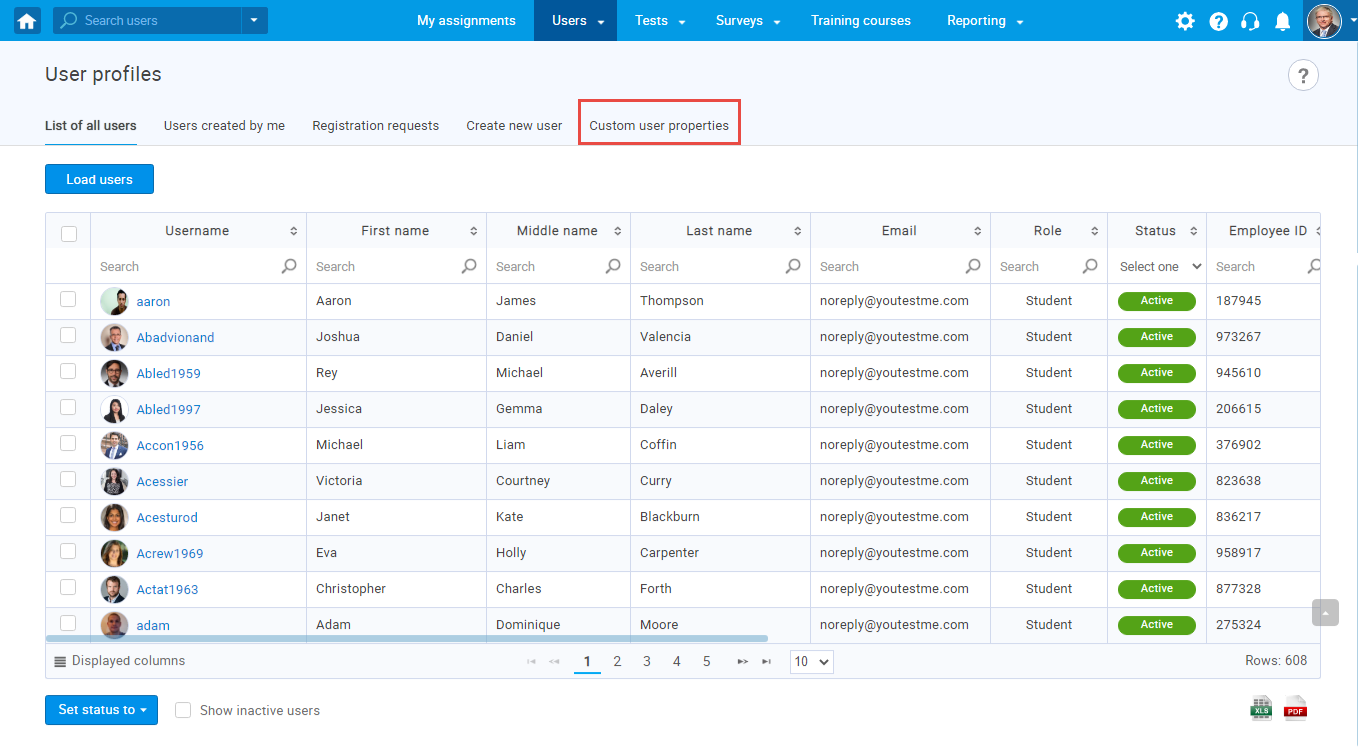
Navigate through the “Custom user properties” tab.
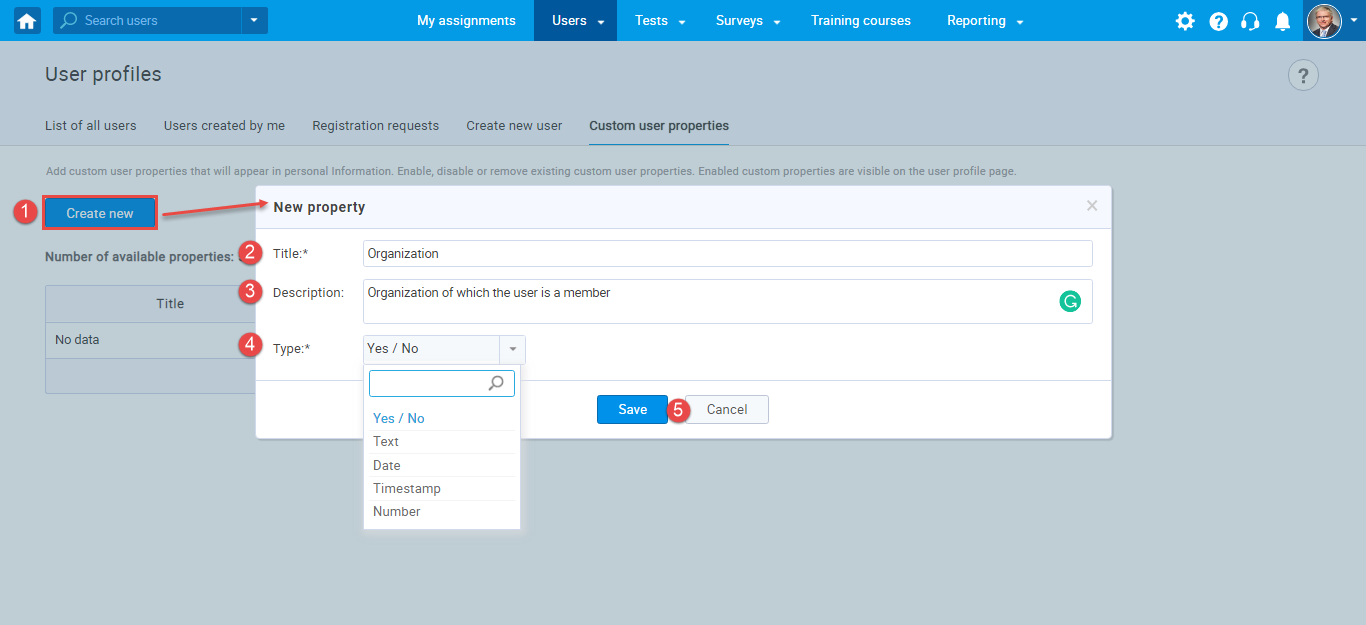
Once you access the “Custom user properties,” follow the steps below to create a custom data field:
- Click the “Create new” button.
- Enter title.
- Enter description.
- Choose the type of custom field from the dropdown menu.
- Click the “Save” button if you want to save changes or the “Cancel” button if you want to cancel them.
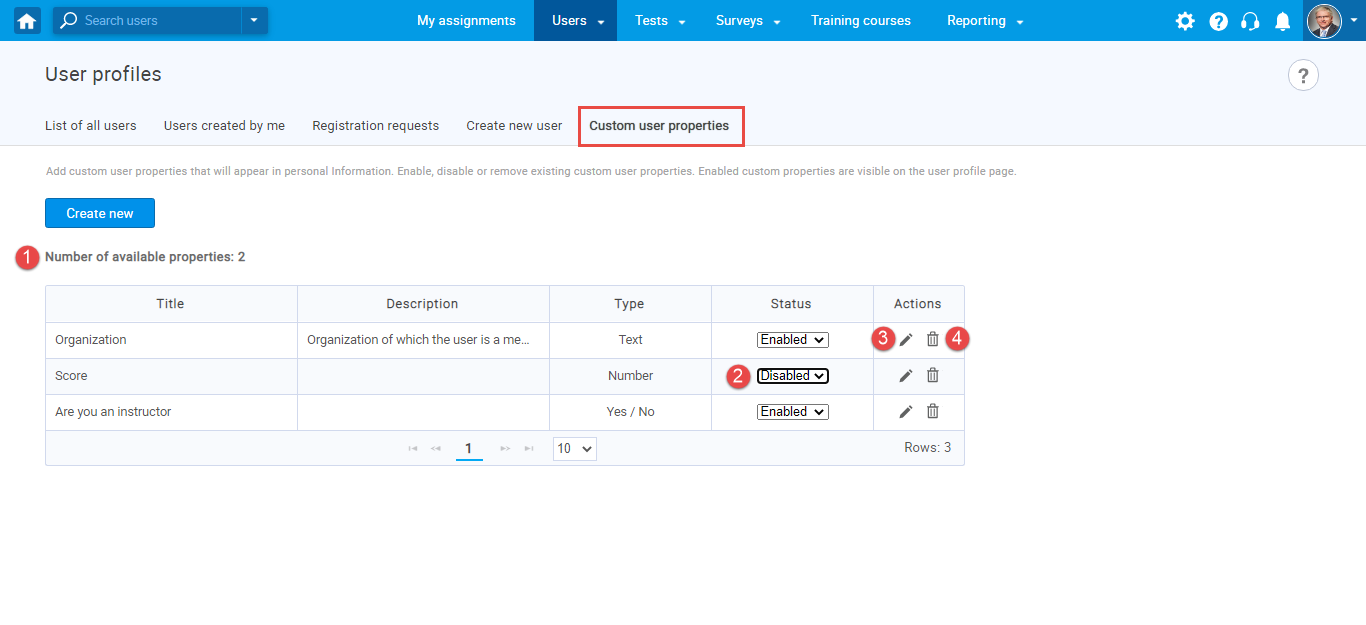
The list of available options:
- The number of available properties represents the number of remaining custom fields that you can create.
- By enabling/disabling the custom property, you can control the column’s visibility on the user profile page. If the custom column is disabled, all stored values in the property are persisted but not displayed.
- You can edit the title and description of properties by clicking on the “pencil” icon.
- You can delete the property by clicking on the “bin” icon.
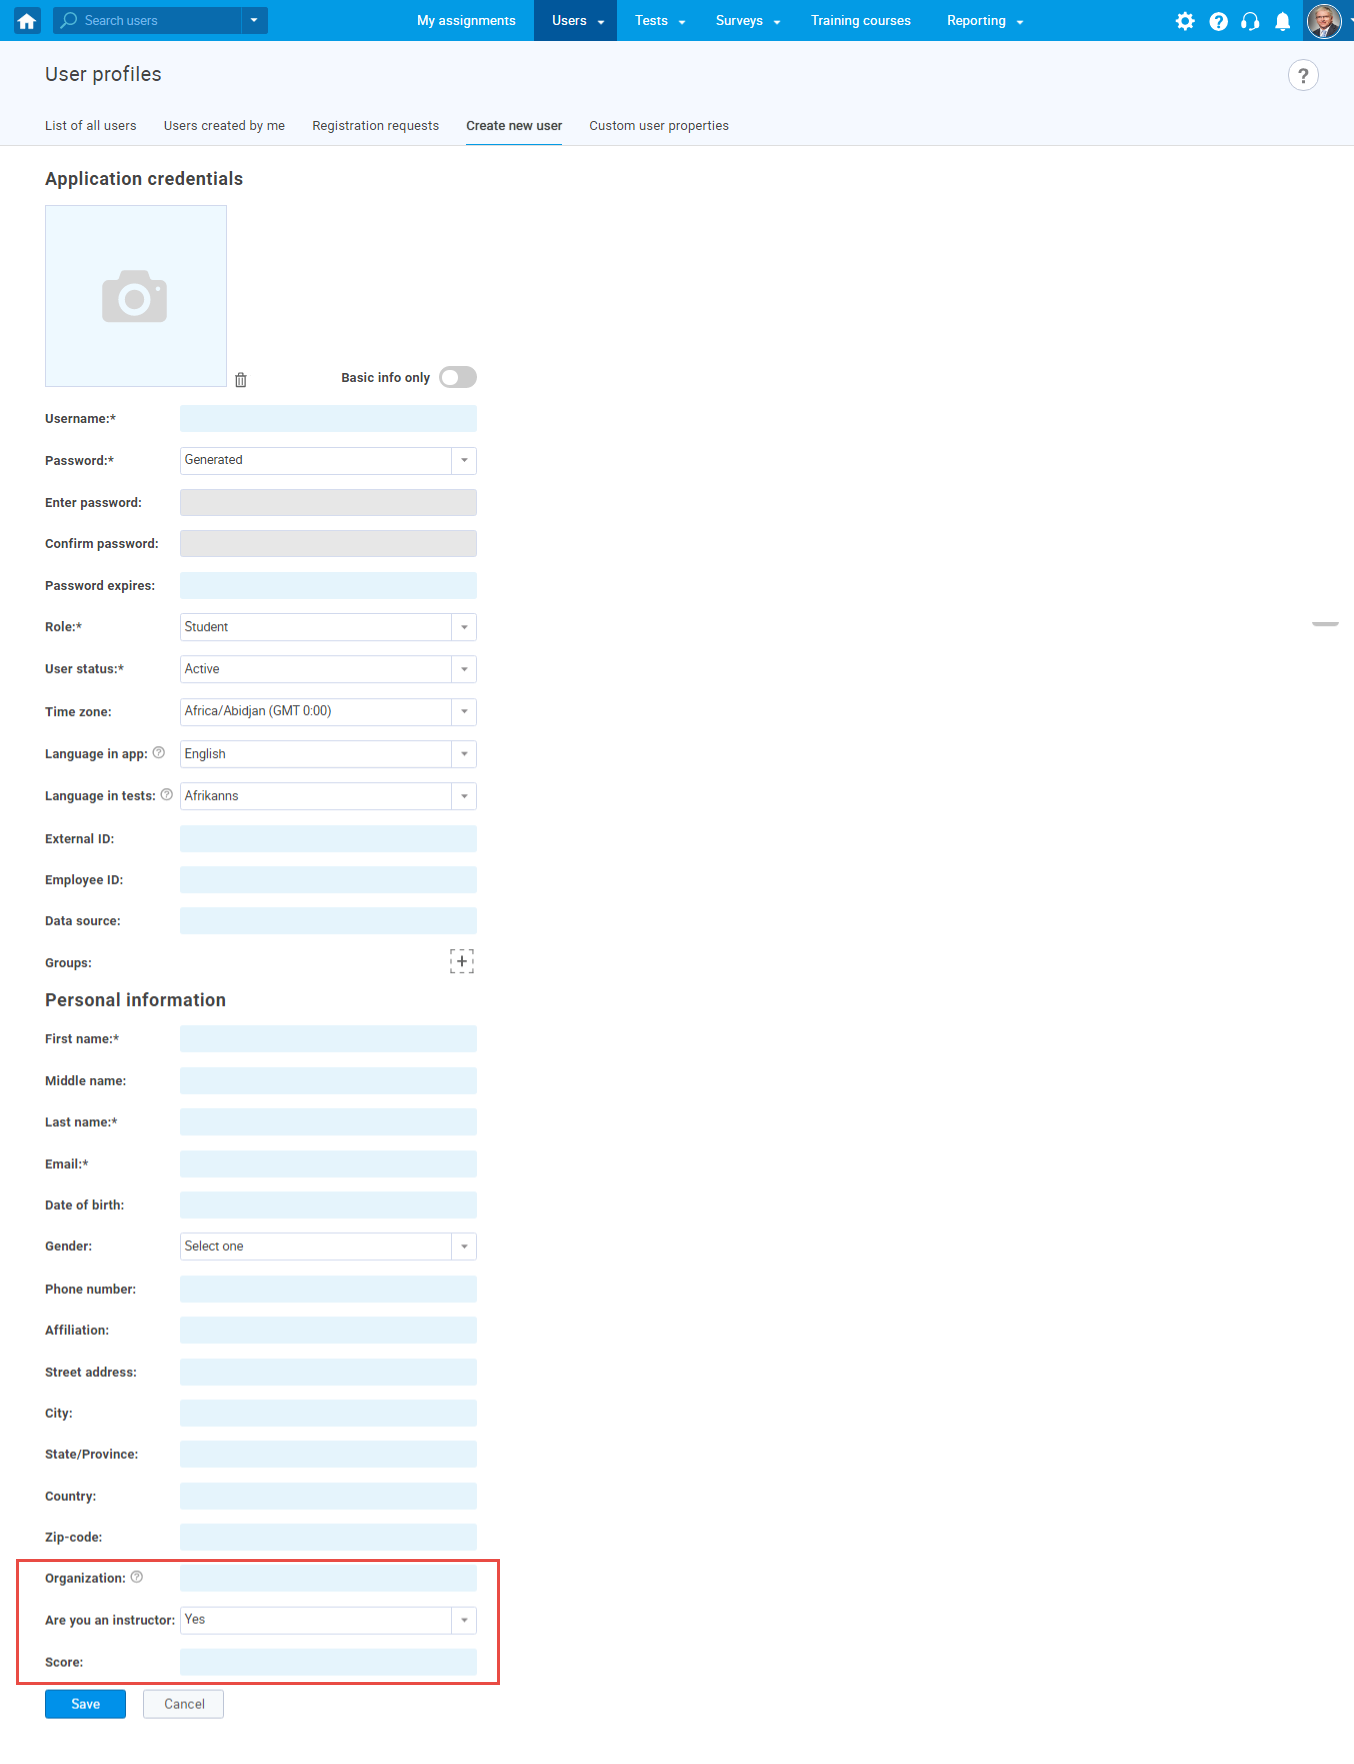
You can see your newly created fields when you access the “Create new user” tab.
For more useful articles, please visit:
- How to pin a test to the top of the My assignments page
- How to pin a survey to the top of the My assignments page
- How to pin training course to the top of the My assignments page
For a video tutorial on how to:

